
![]() [ I first wrote about using Keynote for video in 2008, and have written about it a couple times since; with the most recent article in 2010. I figured it was time to write an update. ]
[ I first wrote about using Keynote for video in 2008, and have written about it a couple times since; with the most recent article in 2010. I figured it was time to write an update. ]
Keynote provides an easy way to create animated transitions for video projects; provided you create your Keynote presentation properly.
NOTE: This technique works whether you are editing the exported video file using Premiere or Final Cut Pro X. I’ll illustrate this using Final Cut, but the process of exporting video from Keynote is the same, regardless of what editing software you are using.
EXECUTIVE SUMMARY
Here is a summary of the steps:
Let’s see how this works in practice.
CREATE THE PROJECT
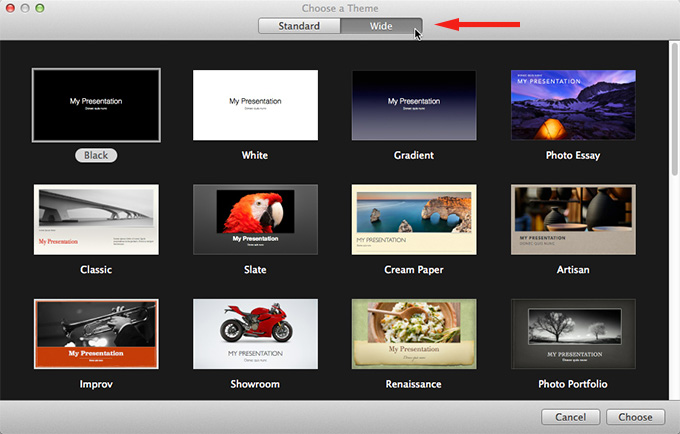
This technique works whether you create a project from scratch or using the Theme Browser. For this article, though, I’ll use the Theme Browser. Since all HD video is 16:9, when looking at Themes, be sure to click the Wide button at the top. This sets the aspect ratio of the Keynote presentation to match HD at 16:9.
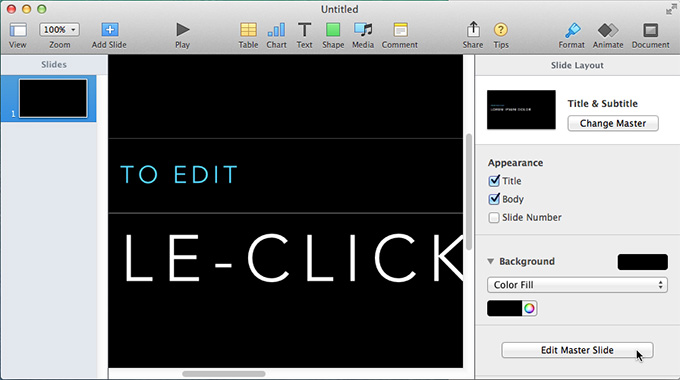
Here, I selected the Photo Essay template, which immediately displayed Format options on the right. Click Edit Master Slide.
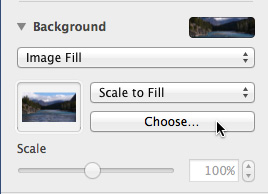
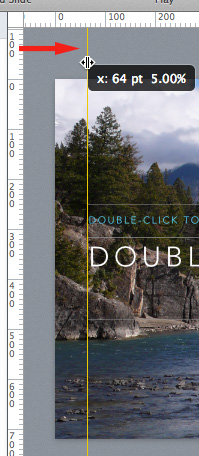
In the Background category, I changed “Color Fill” to “Image Fill,” changed “Tile” to “Scale to Fill,” and clicked the Choose button to choose my background image.
NOTE: These three settings are not required for video, but they explain how I got my photo of the Canadian Rockies to appear as the background image.
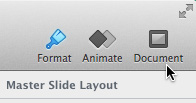
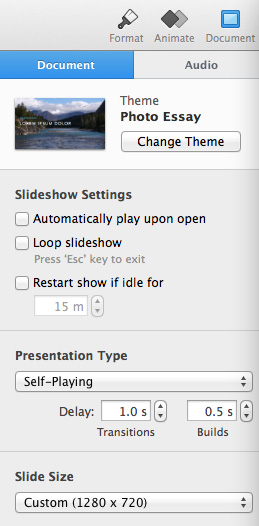
This next step, though, is crucial. Click the Document button in the top right…
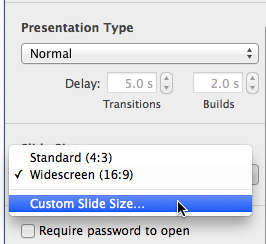
… then, under Slide Size, select Custom.
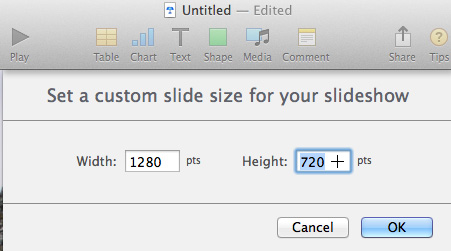
In the size dialog, enter the pixel dimensions of your video. For HD projects, this will either be:
It is important for the Keynote presentation to match the size of your video presentation in order for all images and text to be the size you expect.
NOTE: You can override these settings during export. However, you get the highest image and text quality by creating your Keynote presentation at the same size as you plan to export. Text, especially, degrades as you vary the image size during export.

When you are finished sizing your project click Done.
ADD TRANSITIONS AND EFFECTS
Creating a Keynote presentation for video is essentially the same as creating a normal Keynote presentation: add graphics and text until you are happy.
Things to keep in mind:
NOTE: Some folks argue that Action Safe and Title Safe are no longer necessary for videos destined for the web. I disagree. We are all used to seeing layouts where text is offset from the edges. Pushing text too close to the edge feels very uncomfortable and has an amateur feel.
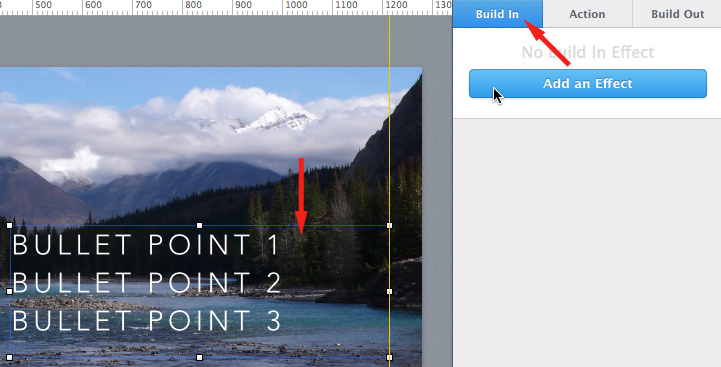
To add an effect, select the text block you want to animate, click the Animate button in the top-right corner of the interface, and click Add Effect under Build In.
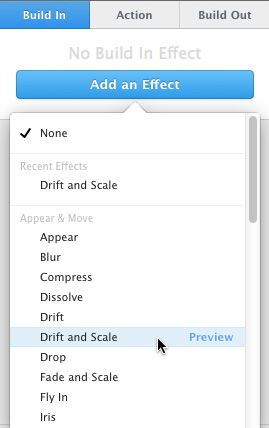
Select the effect you want to apply to the text. (Click the Preview button to view the effect before applying it.)

The most important setting, from a video point of view, is to set the Duration. This will be the duration that Keynote exports when you create the video file. The rest of the animation settings can be anything you want.
SET SLIDE DURATION
Before exporting the file, there are two more settings we need to set:
NOTE: Both of these settings can be modified during the export process. I change them here so I can preview exactly what the video will look like, without needing to first export the file.
If a slide duration is not set, Keynote exports a single frame between transitions, which can make finding specific transitions somewhat challenging. However, setting the slide duration too long means Keynote will create REALLY big export files, most of which are simply extended still frames.
My recommendation is to set this to one second, then adjust the exact timing between each transition using still frames in your editing software.
EXPORT A VIDEO FILE
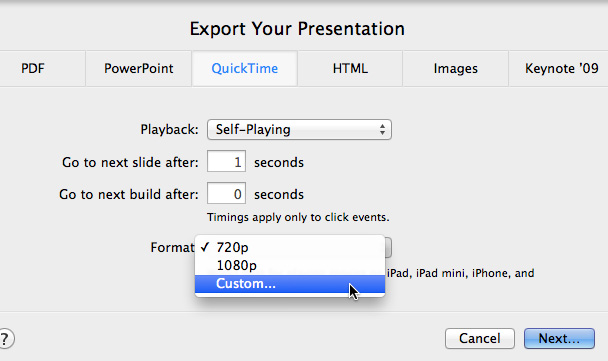
Once everything is built, timed and tested, choose File > Export > QuickTime to export the file.
NOTE: You can export a file as many times as necessary. I ALWAYS discover something I overlooked the first, ah, few times I export a file.
Make sure this screen is set to:
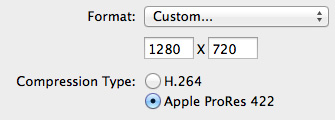
Changing the Format setting is really important. By default, Keynote exports the movie as H.264. While H.264 is ideal for playing on iOS devices, it is NOT ideal for video editing.
NOTE: While you could change the video image size here, it is MUCH better to design your presentation at the correct size. This assures that all text and animation match between what you previewed in the presentation and what you export in the video.
When these settings are correct, click Next.
Give the file a name and location and click Save.
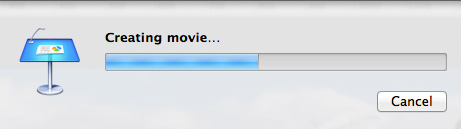
Keynote then generates a QuickTime movie.
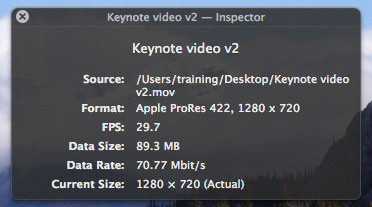
While I would much prefer that Keynote give us the option to export in ProRes 4444, because its color fidelity for computer-generated images is MUCH better, ProRes 422 is significantly better than H.264.
IMPORT AND EDIT
Once the movie is created, you are done using Keynote. Now, import the QuickTime movie into the video editor of your choice. In this example, I’ll use Final Cut Pro X.
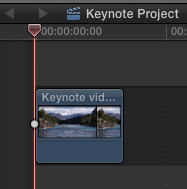
Import the Keynote movie and edit to the Timeline. All slides and animation are contained in a single clip.
Most of the time, we sync the animation against a narrator or voice track. There are two ways to do this:
This article describes how to create and modify both types of still frames.
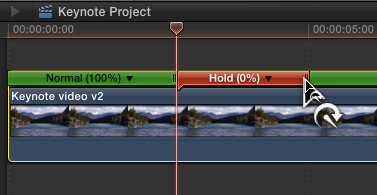
I prefer to use freeze frames, rather than Hold frames. For me, even though freeze frames break the clip into component pieces, I find them easier to work with than Hold frames. On the other hand, I learned how to use freeze frames in Final Cut Pro 5, where Hold frames did not exist.
Whichever option you use, you create a still frame of the slide between the animated transitions and adjust the timing of the still frame to match your narration.
THE ONE BIG LIMITATION
The one big limitation to this technique is that if you need to make changes to your movie – for example, to correct a spelling error – you need to go back into Keynote, make the change, then reexport the movie.
This means that any existing edits that you’ve made to the older movie need to be redone; including re-creating all still frames. Because of this, be really, REALLY sure that the movie looks the way you want before you start editing. Or, plan to export multiple versions of the same video file.
SUMMARY
Creating animated text and info-graphics in Keynote is far faster than the creating the same tasks inside Final Cut Pro X; or Premiere using After Effects, for that matter. While there is no easy round-trip between Keynote and FCP X or Premiere, the text animation effects Keynote provides makes this technique a worthwhile addition to your editing arsenal.

2,000 Video Training Titles
Edit smarter with Larry Jordan. Available in our store.
Access over 2,000 on-demand video editing courses. Become a member of our Video Training Library today!
Subscribe to Larry's FREE weekly newsletter and
save 10%
on your first purchase.
13 Responses to Use Keynote for Video
Larry, have you tried to key the text & transitions using a solid background in Keynote? I tried it a few ways a couple of years ago with some fairly decent results. I had a client who needed some quick text and didn’t own a dedicated character generator. We did a luma key through a small Edirol switcher that worked surprisingly well. We weren’t exporting a file then, but using Keynote to present the text directly into the switcher with an analog VGA output. The chromakey on that switcher was terrible, so it didn’t work nearly as well, but I’d expect that the new chroma and linear keyers in FCPX and PPCC would be much more effective if you chose the right color for the background. Seems like you could build a decent title sequence with transitions and timing that way.
Scott:
Well…..
Yeah, it might work. Especially for feeding video directly to a switcher for a live presentation. But, it seems to me that when titles start to get this complex, it would easier to use Motion, which provides a lot more flexibility in making changes.
Larry
Larry, of course Motion would do light years better. I thought that you were suggesting this for folks who didn’t have the skills or need to learn Motion, but might want to spice up basic videos. I was just extending the concept to another possible use for those who might be a lot more comfortable inside Keynote than Motion. I like Motion, but the learning curve is somewhat steep. I also wish that Apple would let you move back and forth between FCPX and Motion in a similar way to Creative Cloud with Premiere and After Effects. Ditto for Logic X a la Audition. If you’re using standard FCPX import and file management (which was only recently released from the Apple control death-grip), it’s a pain to use any of that media in Motion. But I digress.
Also, you never followed up on my question(s) about ingest in Prelude with AVCHD.
Scott:
I try to answer every comment on every article – looks like I missed one. Send me a private email and I’ll try to help.
Larry
Larry: Will this technique work with graphics created over black, then composited in FCP X? Does Keynote create an alpha channel? If not, what would happen if the titles were created over a green B/G, then CKed in FCP X? The keyer is so good, this actually might work.
Thanks, Michael
Michael:
GREAT question – thanks for asking!
No, Keynote does not create an alpha channel, so if you created text over black, you’d need to key it in FCP X using a Luma key. This will work, but doesn’t handle fuzzy edges very well.
We’ve had a discussion already on this thread about putting the text over green and chroma keying it. My guess is that would work pretty well, even though I poo-poohed it in talking with Scott earlier. I haven’t tested this though and would be interested in what other readers suggest.
Larry
Previous versions of Keynote produced animation with transparent background, provided background image has opacity set to zero. Next, animation should be exported as PNG or 4444. I used this technique plenty of times, adding animated background during editing in FCP. Pity new Keynote has so limited export feature.
Any idea on how to export at 60 fps? In the videos I’ve watched the older versions had an option to change the frame rate, yet they appear to have taken that out. This is an issue since my video project in FCP X is 60 fps. Any help would be greatly appreciated.
Derek:
Export from what? Keynote? You can only export at the frame rates they support.
However, when you bring the Keynote video file into any editor, it will automatically conform the file to match your 60 fps project frame rate.
Larry
I used to believe that Keynote was probably the most under-appreciated video post-production tool. I can’t count the number of times I’ve used it to get some excel data or powerpoint information into the video world. Apple killed the alpha export option in Keynote 6. Why? I cannot begin to understand their thinking.
Earlier Keynote versions had the ability to export to a quicktime with an alpha channel. You needed to choose the one of the quicktime codecs with Millions of colors + like animation. The last version of Keynote ’09 cobbled this functionality but could be worked around by selecting a background and setting the opacity to 0%.
In Keynote 6 you have the option to export to Keynote ’09.
Opening the file in Keynote ’09, make sure the file has a background with the opacity set to 0%. Then export the animation as a quicktime using animation codec with Millions+ colors to generate a quicktime with an alpha.
Not sure if this was already brought up or not, but I’ve found when I’ve needed to make small changes that don’t affect the timing of the project (i.e. misspellings, subtle design updates, etc), I can re-export the keynote and then just re-link the file in FCPX. That way I don’t have to mess with the freeze frames and timing again in FCPX.
Hi Larry, been following for years. Using Keynote 7.0.5 (4052) exactly as you suggest here, but all is blurry in edit. Imported video is quite clear until I drag down to edit window. Only thing different from yours is Inspector says Frame rate is 30, instead of your 29.7. Worse, exported edited file is also blurry. Under View – Better Quality and Optimized Original are checked. Any suggestions. Thanks so much. Paul
Paul:
Make sure your project is set to ProRes 4444 and that the slides match the frame size of your project.
Frame rate won’t make a difference, but using the wrong codec will.
Larry