 It is fairly easy to transfer projects between Adobe Premiere Pro CC and Apple Final Cut Pro X. This article explains how. In fact, if you have a project in Final Cut Pro X, you can also use these instructions to transfer it to:
NOTE: You can also use the process described below for transferring Premiere projects to transfer FCP 7 projects to FCP X.
But, before explaining How? I need to answer two other important questions: Why? and When?
WHY?
There is nothing inherently wrong or “bad” about starting an edit on one system, then finishing it on another. However, this transfer needs to be made during the rough cut portion of your editing. (As you’ll see in the “When” section, waiting until later in the edit runs the risk of losing too much when you transfer your project.)
Transferring should be a one-time-only event. If you want two editors working on the same project – one in the morning and one in the afternoon – they should both use the same software.
Transferring works best when one system is used for logging and creating a rough cut, then delivered to a second editor for trimming, clean-up and effects.
Transferring will also work painlessly where one system is used to create string-outs (“selected” clips from a larger body of source files) while a second system is used to collect the string-outs and assemble them into a completed program.
NOTE: This string-out process works equally well if you have one editor selecting clips or a team of multiple editors. The key is that the files move from one system to another early in the editorial process.
This transfer process can also work well if you have an editor in the field quickly creating a rough cut, then delivering both the cut and the media back to the office either via the web or shipping a hard disk.
WHEN?
When it comes to editing, Premiere and Final Cut both achieve similar results, but they don’t do it the same way. For this reason, transferring projects can either be blissfully simple, or frustratingly difficult depending upon when you make the transfer because not everything can be transferred.
In general, the following elements should transfer with few to no problems:
For best results, transfers – in either direction – should be done anytime during an edit before effects are added. This is because most effects won’t transfer between systems, including:
Also, if you are using a proxy workflow in either application, the links from proxy to source files will not transfer.
Because of this, it makes the most sense to transfer from one system to another at some point during the initial rough cut.
WHAT YOU’LL NEED
You first need to export an XML file of the project you want to transfer. This means that you need to be able to open the project file in the application that created it and that all media is linked.
NOTE: It is strongly recommended that the media files are online and have identical file paths (drive names, folder structures and file names) to avoid problems with relinking media. If working between two Macs, you may need to consolidate media to an external drive and reconnect any unconnected media before exporting XML.
You will need one of two utilities, depending upon the direction you are going.
From Premiere Pro CC to Final Cut Pro X
7toX
MSRP: $9.99
AppStore link: itunes.apple.com/us/app/7tox-for-final-cut-pro/id496926258?mt=12
For more information: www.intelligentassistance.com/7tox.html
From Final Cut Pro X to Premiere Pro CC
XtoCC (formerly Xto7)
MSRP: $49.99
AppStore: itunes.apple.com/us/app/xtocc/id487899517?mt=12
For more information: www.intelligentassistance.com/xtocc.html
NOTE: XML conversion is actually a very complex process. Read the online documentation from Intelligent Assistance for the appropriate utility before transferring complex projects to better understand the limitations of this procedure.
HOW IT WORKS: PREMIERE TO FCP X
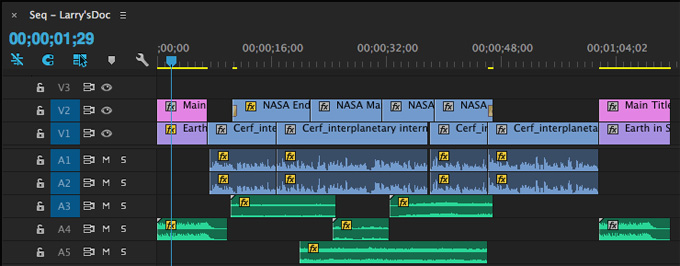
Here’s my sample project in Premiere.
To create an XML file, select the sequence you want to transfer in the Project panel. (You can also select multiple clips in the Project panel in addition to the sequence itself to include in the transfer.)
Choose File > Export > Final Cut Pro XML
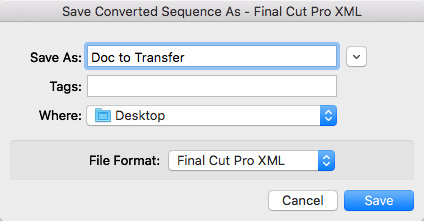
Give the XML file a name and location.
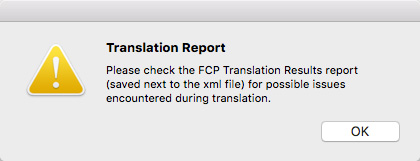
This error dialog always appears. This text file will tell you what did, and didn’t, make the transfer. This file will be stored in the same location as the XML file and named: “FCP Translation Results [today’s date].” It is a good practice to read this before importing your project into Final Cut Pro X.
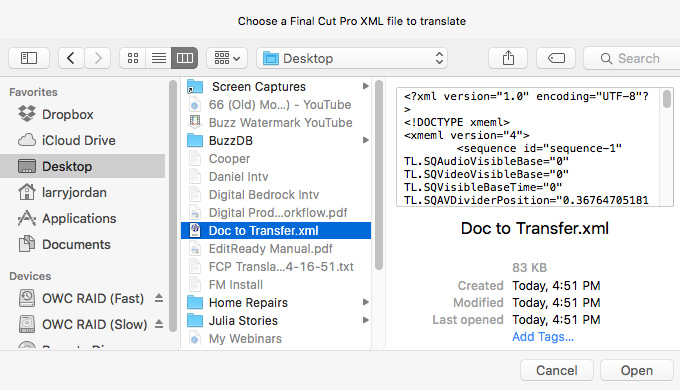
Open 7toX and either open it from this dialog, or simply drag-and-drop the XML file on the icon for the application itself.
7toX opens and processes your XML file. This process is quick, but the actual speed of the conversion depends upon the number of clips and the complexity of the source project.
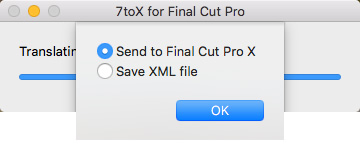
7toX now offers to automatically start FCP X and import the Premiere project into FCP X.
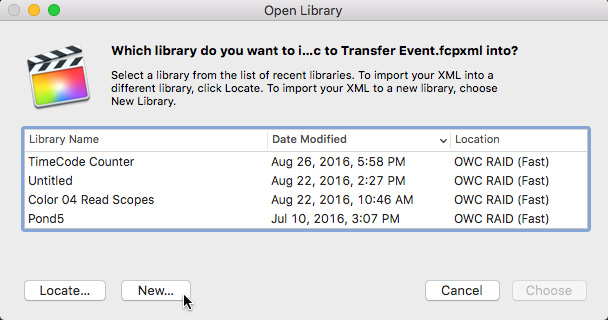
In general, I create a new library for these transfers. However, if editors in the field are creating select lists, you can easily add these transfer to an existing library by selecting it from this Library list.
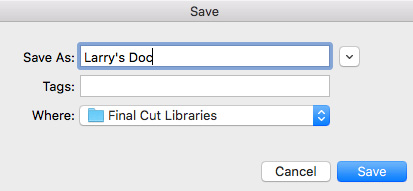
If you are creating a new Library, give it a name and location.

Here’s the same project opened in Final Cut.
At which point, clean up what didn’t transfer successfully, then start editing.
NOTE: Importing media using XML obeys the FCP X > Import preference setting. If you don’t want media files added to a Library, set the Import panel’s Files preference to Leave in place (instead of Copy to library storage location).
For clips, keywords are added to the in point/out point range representing the bins the clip or subclip was inside. Reel, Scene and Shot/Take are added to the clip’s Reel, Scene and Take fields, while other log notes and comments are added to the clip’s Notes field. If the clip or subclip was marked Good then the clip or range is rated as Favorite (depending on your preferences choice).
HOW IT WORKS: FCP X TO PREMIERE
The process is similar when moving from Final Cut Pro X to Premiere.
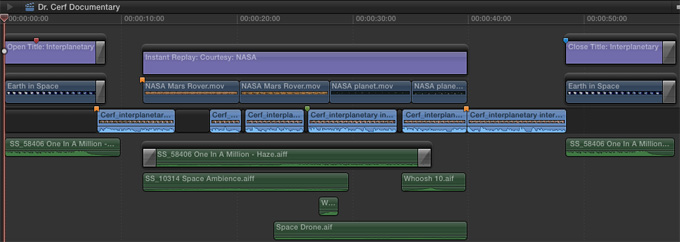
First, open the Library and select the Project or Event you want to transfer.
NOTE: Compound clips are translated as nested sequences. However, the destination app importing Final Cut Pro 7 XML may not necessarily support nested sequences, such as Adobe Audition and After Effects. You can avoid this by breaking apart compound clips in a project into their original items.
Choose File > Export XML
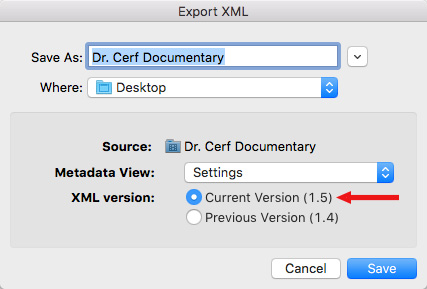
Give the XML file a name and location. If you are using FCP X 10.1 or later, always export using XML version 1.5 or later. Click Save.
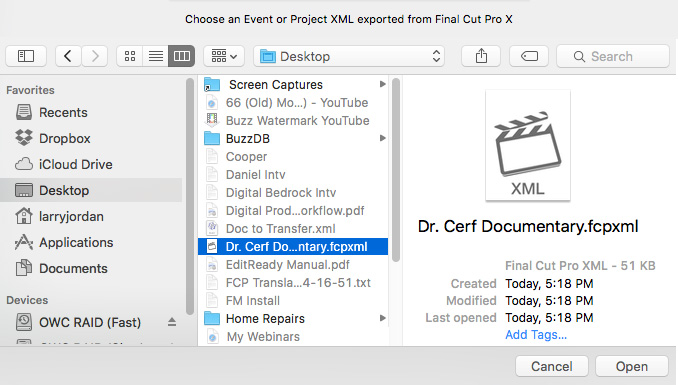
Open Xto7 and open the XML file (or drag the XML file on top of the Xto7 application).
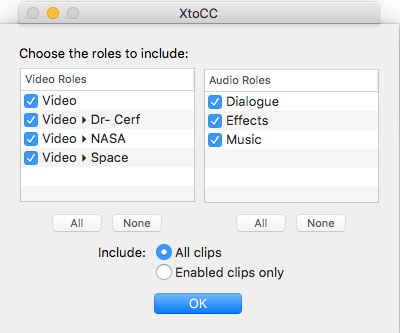
This dialog allows you to determine which roles get exported. In general, I recommend exporting everything, then making adjustments once you import the project into Premiere.
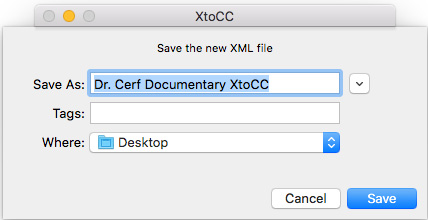
Specify where you want the converted XML file stored.
NOTE: The speed of conversion will depend upon the size and complexity of the original project.
Open Premiere.
NOTE: When transferring projects, I tend to create a new project in Premiere. However, you can easily import a FCP X project into an existing Premiere project. It will be treated as a stand-alone sequence.
Choose File > Import and select the converted XML file. Premiere will recognize it as an XML file and handle it accordingly.

After a few seconds, the transferred project is loaded into the Project panel.
NOTE: Always review the Translation Error report, then make any adjustments to clips that need it before beginning your edit.
IF YOU ARE MOVING BETWEEN TWO COMPUTERS
If you are moving projects between two computers, you will need to send both the converted XML file AND all the related media. The XML file only contains pointers to your media.
This means that you need to think carefully about where to store media for any project you expect to move between systems before starting your edit.
SUMMARY
There are substantial differences under the hood between Premiere and Final Cut. The programmers of these utilities have told me this is some of the most complex code they’ve ever written. Because of these differences, this transfer process works well, but doesn’t convert everything. It is best used early in the editorial process, before titles and effects get added.
The other key point to keep in mind is that you must create an XML file of the project you want to transfer. Only Adobe can read a Premiere project file and only Apple can read a Final Cut project file. This means that you need to have access to Premiere or Final Cut to create the XML file in the first place.
Finally, for best results, be sure to read the documentation from Intelligent Assistance before beginning this process to minimize problems.
2,000 Video Training Titles
Edit smarter with Larry Jordan. Available in our store.
Access over 2,000 on-demand video editing courses. Become a member of our Video Training Library today!
Subscribe to Larry's FREE weekly newsletter and
save 10%
on your first purchase.
31 Responses to Transfer Projects Between Premiere Pro CC and Final Cut Pro X
← Older Comments-
 Laurent Imbault says:
October 11, 2018 at 7:55 am
-
 Larry says:
October 11, 2018 at 8:13 am
-
 David says:
November 19, 2019 at 1:01 pm
-
 Larry says:
November 19, 2019 at 1:06 pm
-
 An Tran says:
April 1, 2021 at 10:11 am
-
 Larry says:
April 1, 2021 at 10:22 am
-
Exportación XML de Final Cut Pro Premier Pro FAQ - AprendoMania says:
January 2, 2022 at 6:11 am
← Older CommentsNothing works ! I can open the xml from Premiere and I get the message that there are 14 media files that need te be relinked
and then nothing ?
What do I do next ?
Laurent:
You need to relink the files. Remember, XML files do not contain media. So if you are moving this project from one system to another, you also need to move the media files. Because the two hard disks (old system and new system) most likely have different names, this means that the path names stored with each clip are no longer valid. Therefore, you need to relink the files.
Larry
Thanks Larry,
The “FCP Translation Results [today’s date]” log file defaults to the Documents folder rather than the location of the XML you are importing. Is there a way to change the destination of the FCP Translation Results [today’s date] log? I have not found a place to change this.
Thanks!
David:
None that I know of, but perhaps another reader knows a workaround.
Larry
is there anyways to also move the fcpx keywords over to CC? i have tried using an app call Findrcat to add finder tag into the metadata but it wouldn’t carry the keywords over to CC. Please help.
An Tran:
Not directly. Maybe by moving clips into Kyno or another media asset management software, then moving them into Premiere.
But, essential, keywords are exclusive to Final Cut.
Larry
[…] Transferir proyectos entre Premiere Pro CC y Final Cut Pro X | Larry Jordan […]