
![]()
![]()
This is a simple technique to create a pointing arrow in Final Cut Pro X. (Actually, this technique can be used to import and animate any symbol, so feel free to use your imagination.)
NOTE: While I’m using Photoshop CC 2015 and FCP X 10.2.1 for this article, these techniques work with every version of Photoshop and FCP X 10.0.3 or later.
Here’s the workflow:
START IN PHOTOSHOP
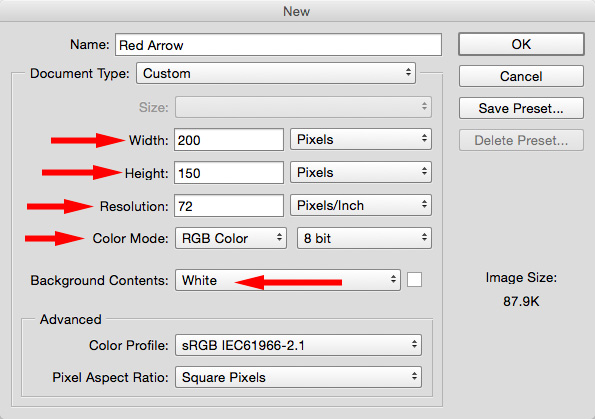
In Photoshop, create a new document that is about the size you need. For example, I’ve created a square that is 200 x 150 x 72 pixels. If you need to create a full-screen graphic, create it at the same frame size as your Final Cut project.
It is important that you create graphics using the following Color Mode settings:
Other options either won’t import or won’t retain their layers after importing.
NOTE: That 72 pixels/inch resolution is important. You’ll get the most consistent results by setting this to 72. Higher resolutions are only used for images you expect to print. Video uses 72.

Once the file is created, click the New Layer button, or choose Layer > New > Layer to create a new layer. This is the layer that will contain the object you want to import into Final Cut.
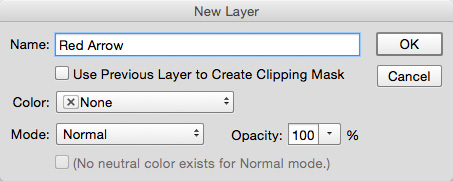
Name it something that makes sense to you. Since we are creating a red arrow, that’s what I called it here.
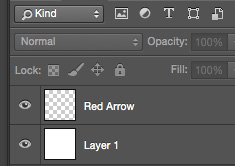
In the Layers panel, we now have two layers:
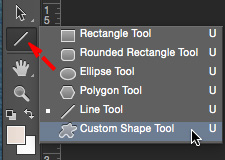
Click the Line tool (near the bottom of the tool bar) and select Custom Shape Tool.

Click the tiny, tiny, downward pointing arrow next to Shape in the toolbar at the top, to reveal the custom shapes built into Photoshop. This screen shot just shows variations on arrows.
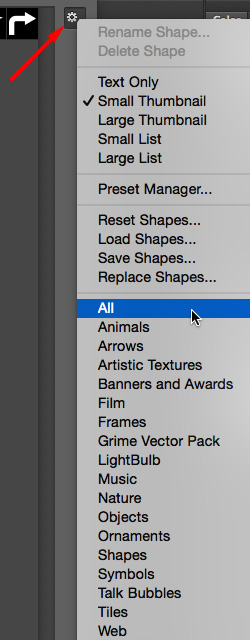
To see ALL the shapes (there are more than 100) click the gear icon in the top right corner of the Shape menu.
NOTE: All these shapes are vectors, which means they can be perfectly scaled to any size you want with no loss in resolution.
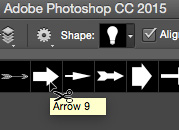
Click the shape you want to use. In our case, I clicked the fat Arrow 9.
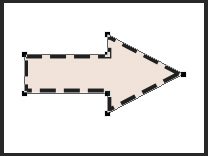
Make sure the Red Arrow layer is selected and that the Custom Shape tool is also selected. Then, draw your arrow. When you let go of the mouse, the arrow shape is added to the layer.
NOTE: It is essential that the symbol you are drawing is on a different layer from the background. It is also essential that the background layer have a color in it. Leaving the background layer transparent messes up the import into Final Cut.
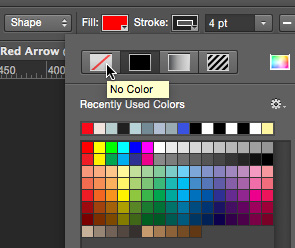
At the top of the tool bar, click the color chip next to Fill to change the fill color, then, click the color chip next to stroke to change the color of the edge of the shape. Here, I selected a red fill, then, clicked the “red slash” icon to remove the stroke color.
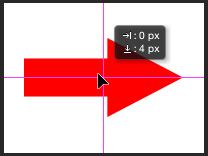
The arrow is nice, big, and red. Select the Arrow (Move) tool (shortcut: V) and position the arrow so it is centered in the frame. This isn’t necessary, but looks nice.
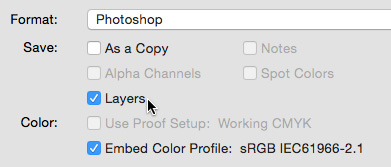
Save the file as a PSD and make sure the Layers option is checked. (Saving as a PSD is essential to put a transparent background behind the arrow.) In the Save dialog, set:
A dialog appears saying that saving with layers increases size. This is fine, click OK. At this point, we are done with Photoshop.
NOTE: It is not necessary to make the background layer invisible before export.
IMPORT INTO FINAL CUT PRO X
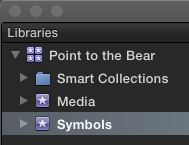
Start Final Cut and open the Library into which you want to import the symbol. Here, I created an Event specifically to hold my imported shape.
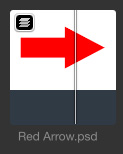
Import the Red Arrow.psd file we just created. See the small stacked icon in the top left corner of the clip? This indicates that the clip is a Photoshop layered graphic.
NOTE: Apple recommends that if the different graphic layers don’t import properly, change the Project Properties to Apple ProRes 4444 before importing. While I have not always found this necessary, it is good to know this workaround if you have problems with the import.
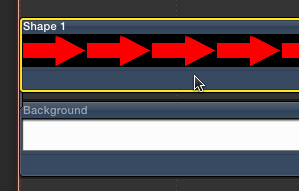
Double-click the clip in the Browser to “Open in Timeline.” Note that the two layers imported and separate.
Select the top layer containing the red arrow and choose Edit > Copy.
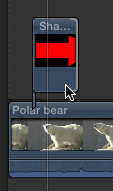
Position the playhead in the Timeline where you want the arrow to appear and choose Paste > As Connected Clip. Then, adjust the duration of the clip as you would any other.
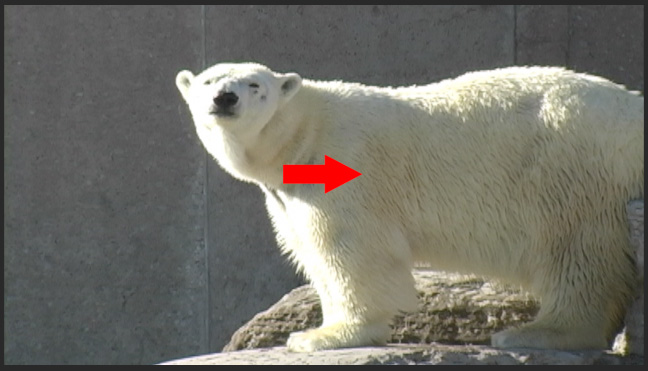
The red arrow appears at 100% size in the center of the frame.
POSITION AND ANIMATE A GRAPHIC
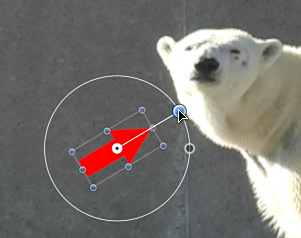
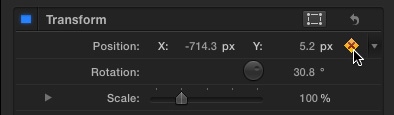
This arrow can be animated using Transform settings the same as any other clip. For example, turn on the Transform controls in the Timeline, then reposition and rotate the graphic.
Click the blue Done button in the top right corner of the Viewer when you are done positioning the arrow.
To animate the arrow, put the Playhead in the arrow clip at the position you want the animation to start, then click the diamond keyframe button to create a keyframe, then position the graphic where you want it to start.
Move the playhead to where you want the animation to end, then change the position of the keyframe to where you want the animation to end.
ADD A DROP SHADOW
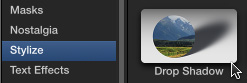
To add a drop shadow to the arrow, open the Effects Browser (Shortcut: Cmd+5), click the Stylize category and drag the Drop Shadow effect on top of the arrow clip.

Adjust the Drop Shadow settings in the Inspector until you like the look.
Done. (I was going to close with: “And those are the bare facts…” But, I’ll just leave that unsaid.)

2,000 Video Training Titles
Edit smarter with Larry Jordan. Available in our store.
Access over 2,000 on-demand video editing courses. Become a member of our Video Training Library today!
Subscribe to Larry's FREE weekly newsletter and
save 10%
on your first purchase.
7 Responses to Photoshop and FCP X: Create a Pointing Arrow
Larry, thanks for the tutorial. However I must say sometimes I just can’t bear your sense of humor… 😉
Robert:
(smile…) I forgive your barely disguised sense of envy, though it does give me “paws.” We’re just polar opposites…
Larry
Larry, Maybe it’s because I am still using Photoshop 13 but I can and have always been able to import a Photoshop file with a transparent background and have that background be transparent in FCP. No colored background has every been necessary. You need to export with Layers checked but, beyond that I have not had a problem. Has the procedure changed in newer versions of Photoshop?
MRM
Hi, Larry.
As always, thanks for your work on this – you have a valuable ability to be very clear and I look forward to your newsletters.
I did have a question on this one, however. Specifically, why would someone want to do any of this? The messing around with psd files, I mean.
I do things like this often, and save all my images as simple png files on a transparent background. This eliminates the need to remember proper layer settings, has a reduced file size, doesn’t require extracting the proper layer within FCPX, imports perfectly, and allows for the full range of Photoshop control over things like drop shadows.
I realize your arrow example is probably a simplified case, but even under the best case scenario, I’ve been puzzling why anyone would bother importing psd files at all. Is there some improvement to fidelity or render times I’ve been missing out on all these years?
Once again, thanks – and, um… …. I can’t think of a bear pun. Sorry.
Chris:
(smile, barely adequate…) Whether you create PSD files or PNGs with a transparent background, you still need to create at least a two-layer image for the alpha channel to be saved with the graphic. Also, very few graphic codecs support alpha channels. This article was written for editors who are new to graphics and need a basic instruction.
Your method is fine, but, as I discovered while writing this, it can be very complex to describe a simple technique.
Larry
Chris, I think the best answer to your question is simplicity and efficiency.
In other words, why bother to save out a PNG if you can simply use the original Photoshop file?
Why add the extra step of saving out (and keeping track of) a separate PNG file if you can simply import the Photoshop file? If you decide you want to tweak the graphic, you are going to want to get back into the original Photoshop file anyway, particularly if you are using vector based Photoshop shapes to create the symbol in the first place.
Having said that, if your getting the graphics from a separate art team, as opposed to creating it yourself, then I’d rather have them send me a PNG and let them keep track of their Photoshop assets.
Wow – three minute response time. That’s amazing.
Thanks for clarifying!
-Chris