
 [UPDATE: Nov. 2, 2020. Adobe removed XML import from After Effects in the 17.0.5 update. The new recommendation is to import an XML file into Premiere Pro, then save the project. Next, either open the PPRo Project in After Effects or Dynamic Link it to After Effects.]
Most of the time, when you start a project in Premiere Pro CC, you’ll want to finish the edit in Premiere. However, there may be reasons that you need to move a project from Premiere to Final Cut in the middle of an edit; for example, you need to change editors and the new editor is more comfortable in Final Cut.
You CAN move projects between apps and this article explains how.
But…!
Premiere and FCP X use two different versions of XML (similar to English and French). So, in order for one app to read the XML of the other, it needs to be translated. This requires a utility called: “SendToX.”
This translation process isn’t really difficult. A more fundamental problem is that the underlying software architecture between Premiere and Final Cut are very, very different and not everything in your edit will successfully transfer. You need to understand these differences in order to determine if and when is the best time to move projects between software.
This process applies to any Adobe Premiere Pro CC sequence or Apple Final Cut Pro 7 project that you want to send to Apple Final Cut Pro X.
NOTE: Here’s an article that explains how to move projects from Apple Final Cut Pro X to Adobe Premiere Pro CC.
EXECUTIVE SUMMARY
The best time to transfer projects is during the rough-cut process, before you start adding transitions, titles, color grading or effects.
Moving rough-cuts between software will almost always be successful.
In order to transfer between Premiere and Final Cut Pro X, you’ll need a utility called: “SendToX.” Developed by Intelligent Assistance, it is available here in the Mac App Store. The reason this utility is necessary is that Premiere and FCP X speak two different versions of XML; this utility converts between them.
Also, for best results, install and run SendToX on the same system that has Final Cut Pro X installed. The original XML file can be moved between computers with no problems.
WHAT TRANSFERS SUCCESSFULLY
NOTE: MP4 with timecode has caused problems for several people, the reason being that sometimes FCP X supports MP4 timecode but mostly it does not (unless the files have been ingested by FCP X itself). So in SendToX’s Preferences is a checkbox “Ignore MP4 timecode” which is on by default, but there might be cases where turning this off works for the media.
WHAT TRANSFERS MOSTLY
NOTE: Because not everything transfers between applications, SendToX adds red to-do markers to items indicating what has changed or been substituted. The easiest way to view these markers is to open the Timeline Index and click the Tags button. As you review these substitutions you can change each marker to Completed by clicking the red checkbox in the Timeline Index.
WHAT DOESN’T TRANSFER
Because the effects engines between FCP X and other applications are so different, anything that involves an effect won’t transfer. This is why I recommend translating projects in the rough-cut stage, before effects are applied.
Here’s a more detailed list:
NOTE: For a complete list of what transfers and what doesn’t, view the SendToX Help Files.
HOW IT WORKS

Here’s a typical project in Premiere. Note that it has audio and video clips on multiple tracks, transitions, and titles. While this is sequence with a short duration, it will serve to show how the transfer process works.
NOTE: Because transferring between apps is best done before effects are applied, I have not yet added any color grading or effects to this sequence.
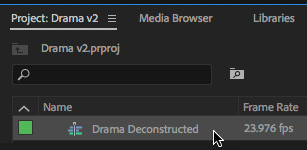
Select the sequence you want to move.
NOTE: While you could move an entire project, this works best when you transfer in smaller sections, such as individual sequences.
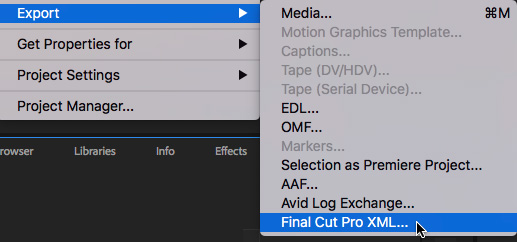
Choose File > Export > Final Cut XML.
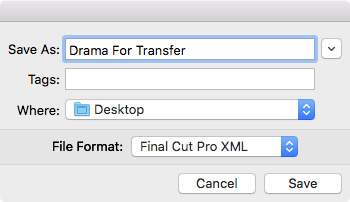
First, Premiere simplifies the XML associated with this sequence, then opens a dialog where you can give the XML file a name and storage location.
NOTE: I tend to store XML files on the desktop while I am working with them, to make them easier to find, then move them into a dedicated location after the transfer is complete. This isn’t required, it’s just how I work.
Premiere generates, then exports an XML file to the location you specify.
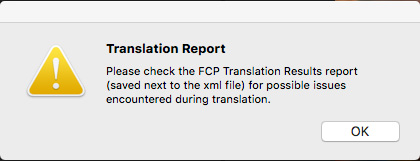
Next, it creates a Translation Report of anything that won’t successfully translate.

Here’s what the Translation Report looks like for this sequence. Your Report will look different, depending on the contents of your sequence.
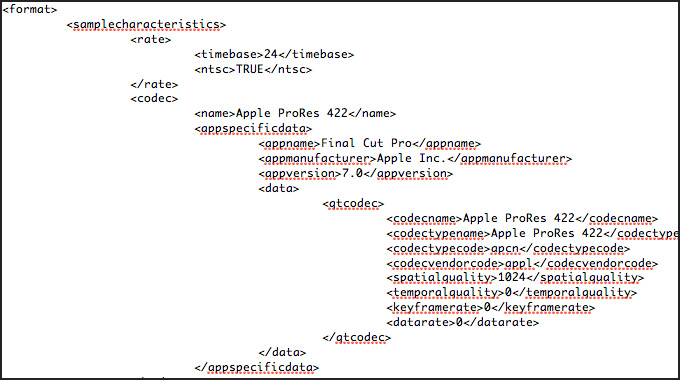
NOTE: XML files are simply text files. You can open them in TextEdit just to see what they look like. This is a small sample of the XML from the project I’m working with here. (Smile… you don’t need to know how to read XML files in order to use them.)
At this point, you can quit Premiere Pro CC. We are done with it.
CONVERSION
Here’s where the magic happens. Drag the XML file on top of the SendToX application – either in the Applications folder or the Dock. This opens the application and starts the XML conversion process. (You can also open the app and choose File > Open, but dragging is more fun.)
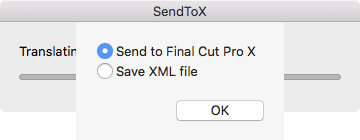
SendToX then analyzes the XML file and asks what you’d like it to create. If you are on the system that also includes FCP X, choose the default: Send to Final Cut Pro X.
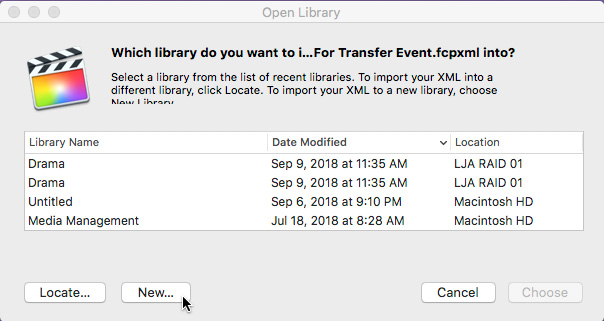
SendToX then translates the file and opens Final Cut Pro X, which asks whether you want to add this sequence to an existing Library or create a new one.
Since you don’t know how well the translation process will work, my advice is to always create a new Library. It will be easy to move the project and related clips to an existing library once you verify the transfer.

In this case, I clicked “New” and FCP X asked me to create and name a new Library. Normally, I would store this Library with the rest of my FCP X libraries, but, to keep things simple for this tutorial, I stored it on the Desktop. I’ll move it later, if I need to.
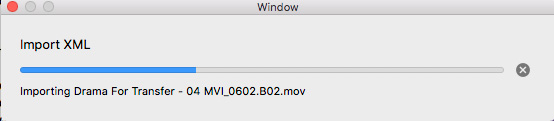
FCP X then imports the XML file.
NOTE: When importing media via an XML file, Preferences > Import settings determine where media is stored and whether optimized or proxy files are created. Verify Preference settings before importing the XML file. Once you start importing clips, it’s too late to change these preference settings.
At this point, you can close SendToX. You are done with it.
IMPORTING INTO FCP X
The final import step happens automatically: SendToX opens FCP X and tells it to import the sequence into a new Library.
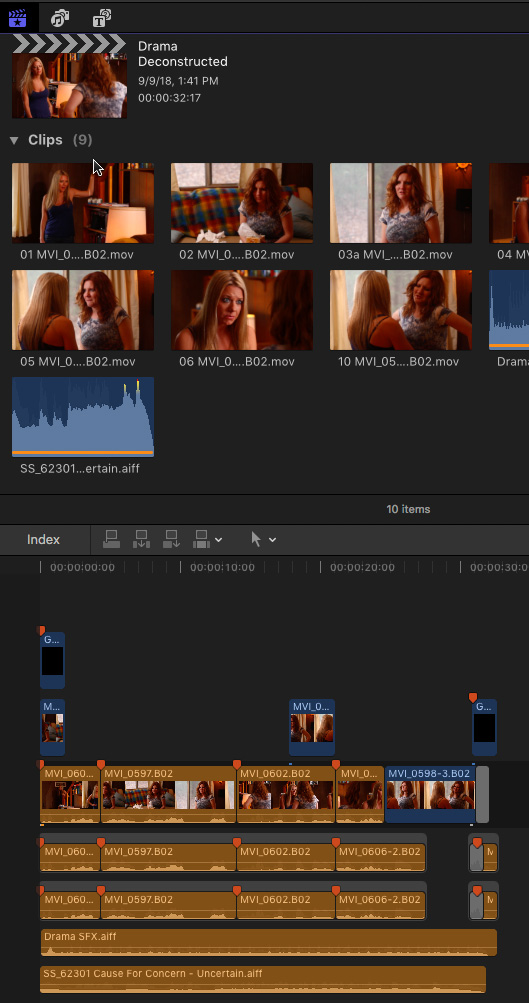
Ta-DAH! There’s your transferred project. Titles were imported as black slugs, named after the title.
NOTE: Again, I want to stress this point. Moving sequences between applications works best in the rough-cut stage. Most titles, effects and all color grading will not transfer because the underlying structure of the two applications is so different. This technique is best used to preserve an edit, not the look, of a squence.
EXTRA CREDIT

2,000 Video Training Titles
Edit smarter with Larry Jordan. Available in our store.
Access over 2,000 on-demand video editing courses. Become a member of our Video Training Library today!
Subscribe to Larry's FREE weekly newsletter and
save 10%
on your first purchase.
9 Responses to Transfer Sequences From Premiere Pro CC to Final Cut Pro X
Thanks for the very detailed description. I have been looking for this exact process to take over a documentary edit. One question, I didn’t see any mention of media, does this process assume that you have imported all the media before you began the migration?? In my case, i have a RAID 5 and a new iMac Pro running FCPX, so i would probably transfer their original footage to the RAID rather than just connecting an external drive with the footage?
Thank you,
Patrick
Patrick:
Your media is not affected. What the XML file contains are LINKS, which point to the current storage location of your existing media, which is why media stored inside a Library won’t transfer. This means that the system running FCP X will need the same access to the media as Premiere. This is easy if you are running both editing apps on the same system. But, if you are moving systems, then you will need to move – and probably relink – the media as well.
Larry
mac pro late 2013
vers: 10.13.6
apps mentioned below are all updated as of today.
i received a drive that included XML files created in adobe premiere and to be used in FCPX. after the sendtox pass, I opted for the new project, titled it, etc.
upon completing the transfer, all the footage appears in the browser, however, the minor edits on the timeline are just empty “black slugs”?
there are no major edits on the timeline (i.e. transitions/graphics or titles) only blocks of clips the producer liked and wanted me to use.
could you please help me learn why the clips on the timeline don’t show?
thank you in advance,
Spud
Spug:
The XML file contains data on WHERE all your edits occur and which clips are involved, but the XML file does not include media.
You’ll need to link the files in the Timeline with the source media files on your hard disk. Often, editors think the XML file contains everything. It doesn’t, it only contains pointers to where the media is stored on the original hard disk. You’ll need to relink it to get them to appear in your timeline.
The menu choice inside FCP X is to select all the clips in the timeline, then choose File > Relink media.
Larry
quick update:
I was able to re-export the XML from the original premiere file and connect them to the timeline. so those now work. the new challenge I’m facing is audio. like before with the footage, they make the transfer, just not onto the timeline. the audio is now doing that. i can hear them when playing in the browser, their just not auto transferring to the timeline.
Spud:
Again, this may be a linking issue. Try relinking the audio.
Also, reach out to the tech support team at Intelligent Assistance, the folks who made Send to X and get their advice as well.
Larry
Thank you, Mr. Jordan.
Your advice helped.
Just took a bit of patience on my end.
Best,
Spud
Larry,
Thank you so much for such a detailed work-flow on transitioning timelines between the two NLE’s. I myself work primarily inside the Adobe suite for all it’s application opportunities like, AE, Audition, PP, etc..
I am faced with a tricky edit here. I shot over 10 videos in the new ProRes RAW (apple codec) which we all know is in limbo right now between Apple and Adobe. My hope was that Adobe would have it ready to edit by the time I needed to edit the project. Although Adobe announced big news that they will finally be integrating the codec natively into Premiere Pro in September 2019, the engineers have yet to finish the support into the NLE and are very late to give any updates on it’s final release for us to begin editing the exciting new codec. Forum threads point to a release date being announced potentially in 4-5 weeks via Adobe’s rep, Patrick Palmer, in a community feed, but sadly I don’t have the luxury of waiting that long.
So I am still stuck in having to use it in FCPX which I don’t prefer working in because of being so comfortable and skilled in Premiere, especially with graphics, effects and transitions.
But I am seeing a issue that will arise for me and wondering if you could help me sort out the best work-flow solution?
It’s very important to me that I retain the 12-bit RAW color. My assumption was that the 12 bit RAW file could only be color corrected in FCPX to get the most out of it. But perhaps I am wrong?
So my plan was to bring in all the ProResRAW 12bit clips to FPCX where they are viewable and string them out on the timeline, then export out that XML to bring over to Premiere. I would then Edit, Sync Audio, and create a rough cut in Premiere (where I am comfortable and edit very well). I would hold off on graphics/effects/transitions.
This is where I am confused with XML’s. Initially I thought I would then have to export out an XML of that rough cut in Premiere (If that is possible?) and bring it back over to FCPX to do color on of those 12bit RAW clips (where they are viewable). But then I can’t send it back to Premiere via XML to finish graphics, effects, and transitions and final finished export because the color correction from FCPX wouldn’t transfer back.
Which leads me to ponder, is it possible to not send it back to FCPX to do color, but in fact do color correction/grading in Premiere?
As in once sending the original XML string-out from FCPX to Adobe, I could just stay in Premiere all the way to the end and do everything there (Edit,Sync Audio, Graphics, Effects, and most importantly COLOR)? If so, am I color correcting a 12 bit RAW file? or will it not color the same unless I am in FCPX to work with that 12 bit RAW file?
If it only works to color grade the 12 bit Raw file in FCPX, I’d be better off from the very beginning color/grading every 12 bit RAW video clip (an enormous amount of clips) in FCPX and exporting out a ProRes HQ file of each clip and then bring them over to Premiere to do the rest of the project in. This would be a lot of work grading clips i may never use in the final edit.
Sorry for the novel, just very passionate about the topic and want to make sure I get the most out of these 12 bit Raw clips and not compromise.
Evander:
The problem is that, until Adobe releases support for ProRes RAW, you can’t view the clips in Premiere. Period. This means no editing, no rough cuts and no color grading. Your choices are: edit and color grade in FCP X; edit in FCP X and color grade in DaVinci Resolve; or edit and color grade in DaVinci.
Or, transcode your clips into, say, ProRes 422 for rough cuts and editing, then relink to the 12-bit masters for the color grade. That would allow you to edit in Premiere, but PLEASE TEST how relinking works before committing to this workflow.
Larry