
 I’ve written a lot about multicam editing in both Final Cut Pro X and Premiere Pro CC. So, today, I decided to see what happens when I combine an SD, HD and 4K clip into one multicam clip inside Final Cut Pro X.
NOTE: Here’s a collection of articles on multicam editing in both Final Cut and Premier.
In the past, multicam editing required that all clips have the same image size, frame rate and codec. Those rules changed with the release of Final Cut Pro X.
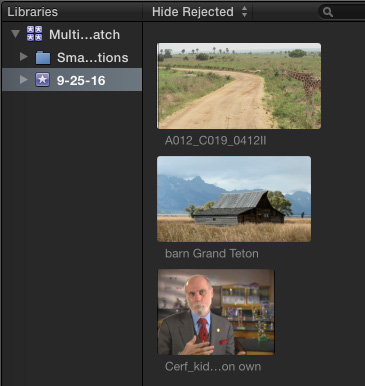
Here are the clips I’m using for this article:
That’s a pretty good mix – let’s see what happens.
NOTE: I’m using a 4K clip. However, this technique will also work for resolutions of 5K, 6K or greater.
EXECUTIVE SUMMARY
If you change one clip setting before creating a multicam clip, you can easily reframe shots after they are placed into a multicam clip and edited into a project.
HOW THIS WORKS
Import your clips into a library, either new or existing, the same as you would any other clip. Create a project with the video settings you need.
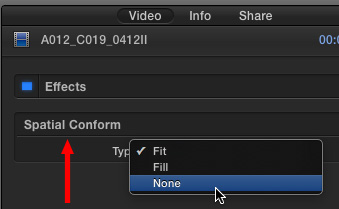
Here’s the critical setting. Before you build a clip into a multicam clip, select it in the Browser, open the Inspector, go to the Video tab and change Spatial Conform from Fit to None.
Do this for all clips you expect to reframe during your edit.
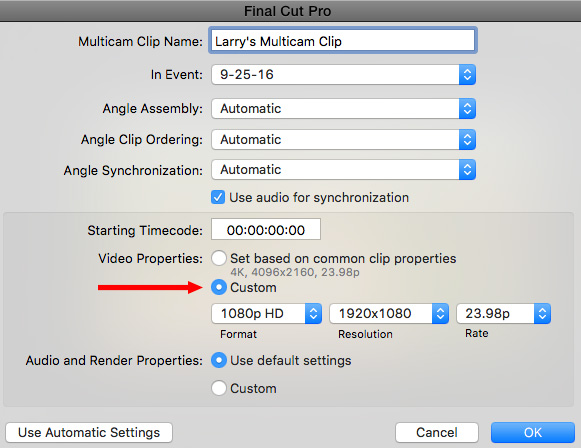
Next, create a multicam clip,but click Use Custom Settings to access the custom video properties. Final Cut defaults the video settings to match the first selected clip; in our example, this is the 4K RED clip. However, you should change this so that the multicam clip matches the settings of your Project.
Here’s the key point, FCP will transcode your media into ProRes 422 so that both the codec and frame rates match. But, when you change Spatial Conform to “None,” FCP transcodes the clip to match the frame size of the original. This allows you to reframe any shot, even after the multicam edit is complete.
BIG NOTE: Where possible, don’t change the frame rate. Changing image size is far easier than changing frame rate, which can cause jerkiness in smooth movements.
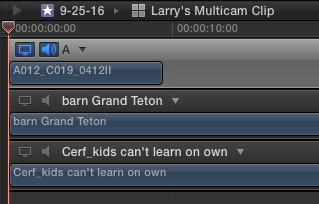
Like any multicam clip, we can adjust timing and clip organization by double-clicking the multicam clip in the Viewer to open it in the Angle Editor.

In the Angle Viewer, we see our three clips. Final Cut added padding to the SD clip, and slightly cropped the 4K clip to match the aspect ratio of the 16:9 HD multicam clip.
Edit the multicam clip into the Timeline, then slice-and-dice as you wish; the same as always.
Now, when it comes time to reframe, select the segment in the edited multicam clip that you want to adjust in the Timeline and go to the Transform section of the Inspector.
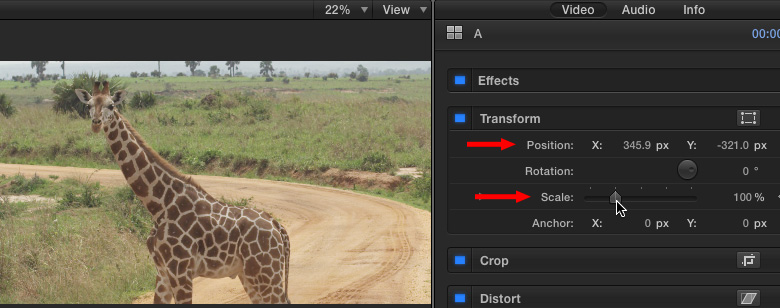
Note that Scale is set to 100%. This means you are are looking at an HD-sized window into the original 4K frame. As long as the Scale value is 100% or smaller, you’ll have access to all the extra quality that a 4K image provides.
We can now adjust the X and Y values to get exactly the frame we want, without losing the quality of our source image.
NOTE: Scaling larger than 100% will make the image focus tend to go soft.
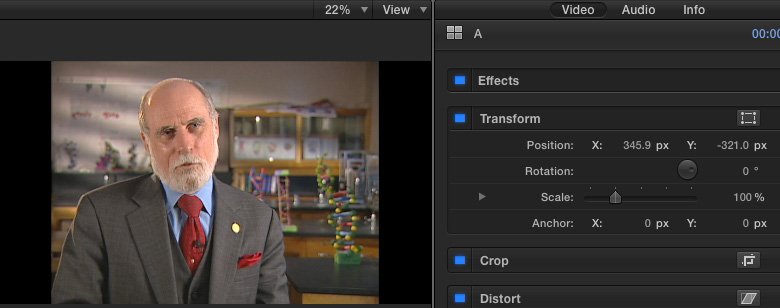
When we look at the SD clip, it was automatically up-resed to 1080 HD by Final Cut, with all aspect ratios intact.
NOTE: An SD clip, up-resed to 1080 HD, will look soft because we are enlarging it 6 times bigger than the resolution at which it was shot. Here’s an article that covers up-resing in more detail.
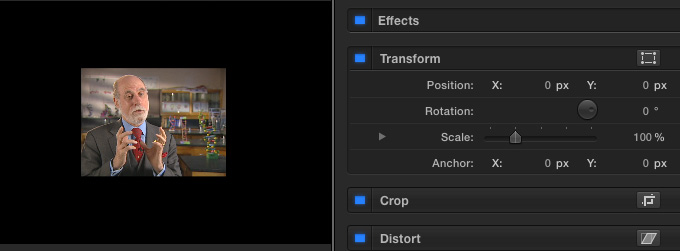
SECOND NOTE: If you don’t want an SD clip up-resed automatically, set Spatial Conform to None, as described above. The clip will be placed at 100% size in the exact center of the multicam clip.
SUMMARY

These are what the three different angles look like when Spatial Conform is set to None – every image is scaled according to its original size.
This is very cool – all the flexibility of reframing our shots, with all the speed and power of multicam editing. Cool.

2,000 Video Training Titles
Edit smarter with Larry Jordan. Available in our store.
Access over 2,000 on-demand video editing courses. Become a member of our Video Training Library today!
Subscribe to Larry's FREE weekly newsletter and
save 10%
on your first purchase.

12 Responses to FCP X: Reframe High-Res Clips For Multicam Editing
← Older Comments-
 Peter says:
August 2, 2018 at 11:10 am
-
 Larry says:
August 3, 2018 at 8:01 am
← Older CommentsHey Larry,
I am working with Red Epic Raw files, and I noticed in both the project settings, and when making a Multicam clip is changes things to a Pro Res file. Why does it do this, and how does it affect my raw files?
Peter:
For Multicam work, you don’t need to overhead of editing RAW – you’ll need to access the RAW files when you do color grading, after the edit is complete. Since RAW are VERY!! processor intensive, you are pushing your CPU for no reason during the edit. To solve this problem, FCP X converts the camera native to ProRes.
Instead, I’d convert your RAW files to Proxy for the multicam edit. Then, when the edit is complete, switch back to the camera native RAW files for color grading and finishing.
Larry