
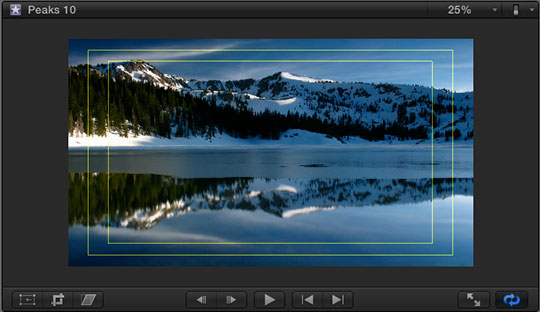
Action Safe and Title Safe boundaries were invented decades ago to solve two problems with televisions that had picture tubes:
Even today, we still need to pay attention to these issues because not everyone has yet upgraded to an LCD TV set. And, when you are digitally projecting an image, overshooting the edge of an image is common.
So, to help us prevent having portions of our image – like the phone number of a sponsor – disappear because the edge is no longer visible, all versions of Final Cut and Adobe Premiere allow us to display two boundaries to help us align our images. This makes sure that essential portions of our image can be seen on virtually all TV sets.
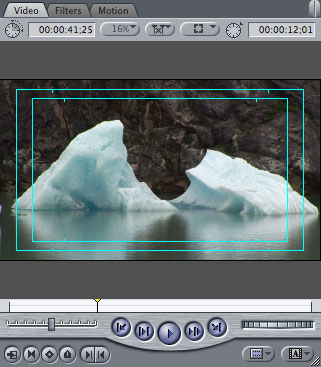
Action Safe: This boundary is 5% in from each edge of the frame. All essential action, and actors, should be inside this outer boundary.
Title Safe: This boundary is 10% in from each edge of the frame. All essential text, logos, graphics, and titles should be inside this inner boundary.
So, now that you know what these are, how do you display them?
FCP X
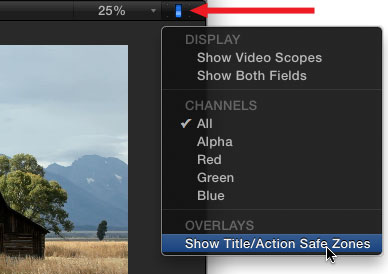
Click the Switch in the top right corner of the Viewer and toggle Show Title/Action Safe Zones on or off.
In Final Cut Pro X, the boundaries are shown as yellow rectangles. Action Safe is the outer rectangle, Title Safe is the inner rectangle.
FCP 7 AND EARLIER VERSIONS
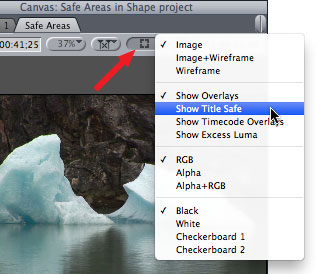
If you are using FCP 7, select either the Viewer or the Canvas and do one of two things:
In Final Cut Pro 7, and all earlier versions, Action and Title Safe are displayed as cyan rectangles.
ADOBE PREMIERE PRO
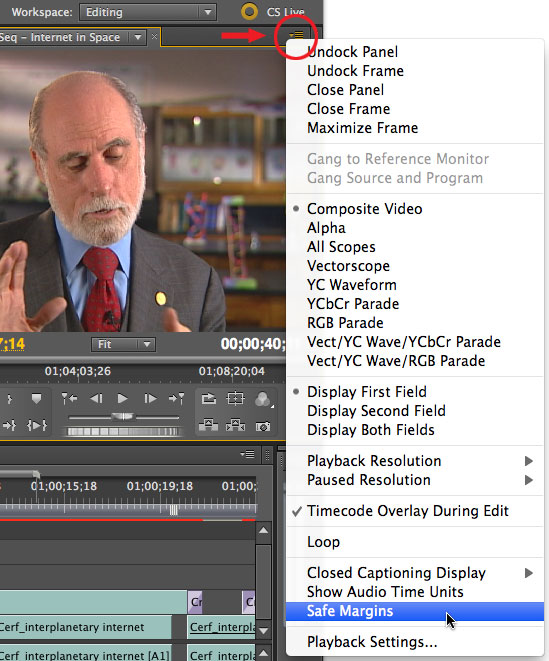
In Premiere Pro, click the small fly-out icon in the top right corner of the Program monitor and select Safe Margins.
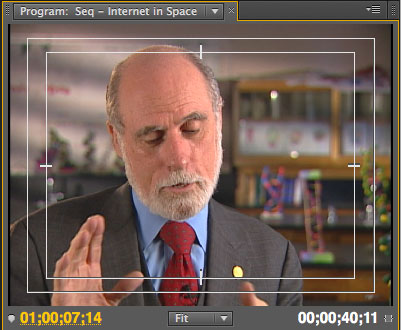
In Premiere, the zones are displayed as white rectangles with a small hash mark indicating the vertical and horizontal centers of the frame.
WEB VIDEO
These boundaries are essential for any video going to DVD, cable, or broadcast — in other words, anywhere except the web.
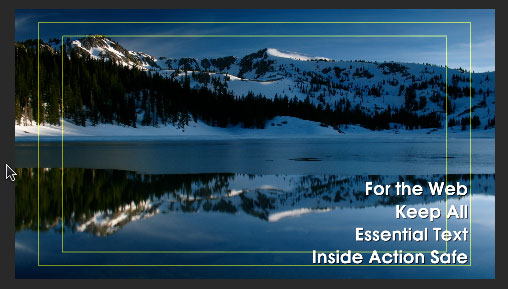
However, I’ve also found that these boundaries are useful for web video as well. We’ve grown up watching video that honors these boundaries, it is ingrained in how we perceive television.
Text that touches the edge of an image creates a very uncomfortable feeling in the viewer; generally, this is something we want to avoid.
So, when I’m creating video for the web, I don’t need the excess protection that Title Safe affords. Instead, I frame all essential text, logos, or composites so that everything is contained inside Action Safe.

2,000 Video Training Titles
Edit smarter with Larry Jordan. Available in our store.
Access over 2,000 on-demand video editing courses. Become a member of our Video Training Library today!
Subscribe to Larry's FREE weekly newsletter and
save 10%
on your first purchase.

44 Responses to Display Action / Title Safe Zones
← Older Comments Newer Comments →-
 Larry Jordan says:
November 4, 2012 at 8:10 am
-
 Helen Perret says:
November 4, 2012 at 9:18 am
-
 jay says:
December 6, 2012 at 11:05 pm
-
 Larry Jordan says:
December 7, 2012 at 12:17 am
-
 jay says:
December 7, 2012 at 1:03 am
-
 mimoFilms says:
March 8, 2013 at 1:04 am
-
 Jonathan Hickman says:
May 13, 2013 at 4:48 am
-
 Larry Jordan says:
May 13, 2013 at 8:37 pm
-
 Jonathan Hickman says:
May 14, 2013 at 7:08 am
-
 Larry says:
May 14, 2013 at 7:19 am
← Older Comments Newer Comments →Helen:
Adding the black rectangle is the best option. However, there should not be any stuttering. If there is, then, somehow, your son has changed the frame rate of the video. Have him check his sequence settings to match the frame rate of the composited video with the frame rate of the original video.
All he needs to do is take is OLD sequence. Turn it into a nest and scale the nest about 10%. It is an easy fix, and won’t affect frame rate or audio sync.
Larry
Thanks, we will check that, although he says he hasn’t changed the frame rate.
Thanks for a very quick reply,
Helen.
Hi,
what’s a tiny mark on action safe and title safe frame in Final Cut Pro? each title safe and action safe in FCP have 4 marks (2 on the top, and 2 on the bottom). Can anyone explain?
Thanks,
Jay
Jay:
On 16:9 images, these small marks show the boundaries of a 4:3 image.
Larry
Thank you! 🙂
Very useful, thanks. I was wondering if the action save area would be enough for a video produced for the web. And you gave me the answer.
Larry, I know you answered this somewhere, but how do you control the action/title safe when using the Ken Burns plug-in. I’m having a problem where my Ken Burns animated stills are getting cut off on my LED TV. All of my interviews contain action within the action safe, but the Ken Burns stuff seems to create the issue. Thanks!
Starting and ending positions are completely determined by the position of the Green and Red rectangles. As the Ken Burns Effect always lasts for the entire duration of the clip, to keep essential elements inside Action Safe, simply make sure your rectangles are sufficiently large.
Larry
Thanks Larry. I having trouble with newspaper clippings and the headlines being cut off on some TVs. I’m checking it after applying the Burns effect using action safe zones. It would be helpful if there was a safe zone option that could be displayed within the Burn guidelines.
And to make matters worse, TVs seem to vary–an LG LCD seems to have a different mask than a Sony LED. Also, TVs have always added contrast to my work, which frustrates color correction.
Jonathan:
If it cheers you up, ALL TVs have varied since the beginning of time. That is why Action Safe was invented in the first place.
Larry