
 NOTE: This article was first published in 2013. While accurate for earlier operating systems, here’s a more recent version that also includes a note on APFS.
Dual-boot systems are a way of configuring the boot drive so that you have the option to start-up your computer (“boot”) into different operating systems. The most common reason to do this is to have both Mac OS X and Windows available on the same system.
NOTE: While dual-boot systems allow you to choose which operating system you will run, you can’t switch between operating systems without restarting your computer.
However, for me, a big benefit of creating a dual-boot system is that I can have two different Mac OS X systems, with two different versions of Final Cut Pro X, installed. Because all of my media and projects are stored on an external drive, dual-booting allows me to select which version of Final Cut Pro X I want to use for an edit.
NOTE: Actually, you can create any number of different boot disks, to run whatever software you want. Though we use the term “dual-boot,” in point of fact you are only limited by the amount of free space on your boot disk.
DETERMINE HOW MUCH SPACE YOU NEED
Before we create a new partition, we need to figure out how big it needs to be. There are three components:
Most Mac operating systems take 20 GB or less to store. So, let’s estimate the OS at 25 GB, to be safe.
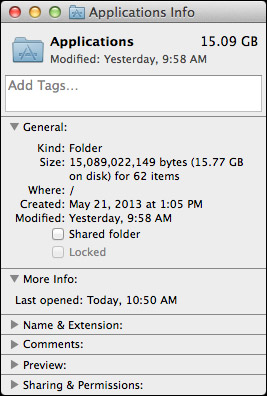
Open your boot disk, select the Applications folder and choose File > Get Info. The total storage space required for all your applications is listed in the top right corner. For this system, applications take 15 GB. Again, let’s round this up to 20 GB.
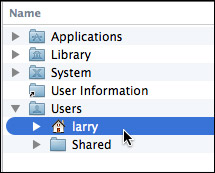
Finally, open the boot disk, twirl down Users and select your Home directory. (It has an icon of a house.)
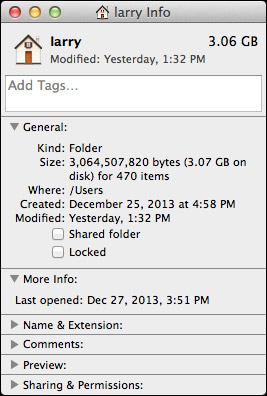
Again, choose File > Get Info and write down the size. In this example, I’m using 3 GB for all my Home directory files. Again, we’ll round up to, say, 10 GB.
The size partition you need to create is the sum of these three folders: 25 + 20 + 10, or 50 GB. Your numbers will vary, but this is how you calculate the partition size you need.
CREATE A NEW PARTITION
As shipped by Apple, your boot disk has a single partition. (You can think of hard disk partitions as similar to rooms in a house. Right now, your “house” stores all your files in a single room filled with file cabinets.)
Partitioning allows us to create multiple rooms. The only problem is that all these different rooms must fit into the space of the original house. So, partitioning allows you to create multiple rooms, but it doesn’t expand the total storage space available to you.
NOTE: In the past, we would partition drives to organize our files. This is no longer a good idea, because there’s a performance hit in moving between different partitions. While partitioning the boot drive still makes sense, partitioning for data storage does not.
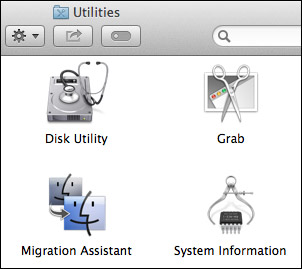
To create a partition, open Utilities > Disk Utility.
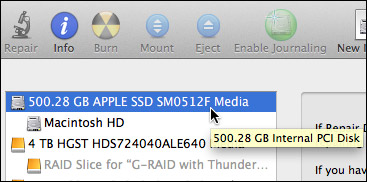
Select the text ABOVE the words “Macintosh HD.” This is because “Macintosh HD” is already a partition. You can’t partition a partition, you can only partition the hard disk that contains the partition.
NOTE: The name of your hard disk – which will probably be a gibberish of letters and numbers – will vary. The key is to select the drive that contains the Macintosh HD partition.

Once the hard disk is selected, click the Partition button at the top center of Disk Utility. If Partition doesn’t appear, you’ve selected the wrong thing in the left-hand panel.
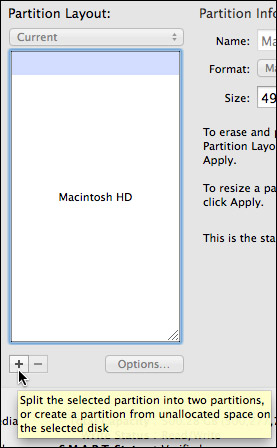
To create a new partition, click the Plus key at the bottom left of the Partition Layout.
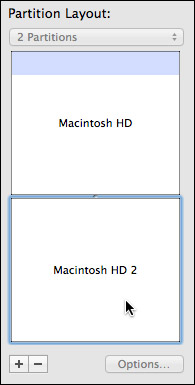
Click inside the new partition to select it.
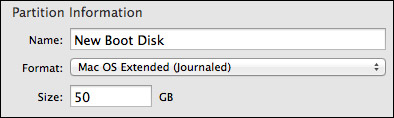
In Partition Information, give your new partition a name. In this example, I called my new partition, “New Boot Disk.” (You can name the partition anything you want, using any combination of letters, numbers and spaces.
Leave Format set to “Mac OS Extended (Journaled).”
And change the size to the size we calculated at the beginning of this article. In this example, I’m using 50 GB; however, your actual number may be different.
Double-check all your entries, then click Apply to create the new partition.
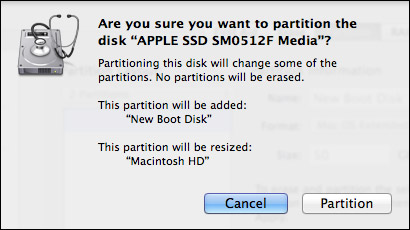
You’ll get a warning message, read it, then click Partition.
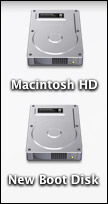
After a few seconds, a new hard disk appears on your desktop. Macintosh HD is your original partition, and New Boot Disk is your new boot disk.
INSTALLING SOFTWARE
At this point, you need to install the new operating system on New Boot Disk, along with any applications you want to use.
When you boot into the New Boot Disk you will NOT have access to anything stored on your current boot disk. It won’t be erased, just unavailable. This includes email and everything in your Home directory.
When installation is complete, you are ready to reboot into the new partition.
REBOOTING
Restart your system while pressing the Option key.
After a few seconds a screen appears allowing you to choose which hard disk you want to boot into. Select your new boot drive and click OK.
After a few more seconds, your computer is ready to go – and launched into the new partition.
EXTRA CREDIT – REMOVING A PARTITION
Removing a partition will erase all the data that is stored on it; so be SURE!!! you have moved all essential data to another drive. (Removing a partition will not affect any other partition on the same, or any other, hard drive.
Go back to Disk Utility.
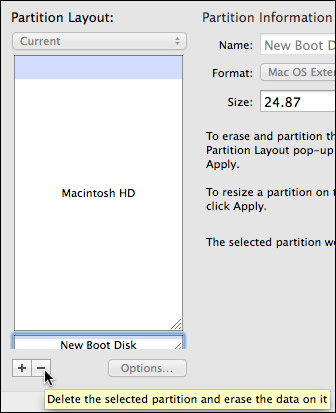
Select the Partition you want to remove and click the minus button in the lower left.
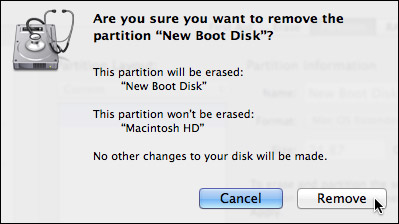
A warning message appears asking you to confirm your choice. Read the message, then click OK.
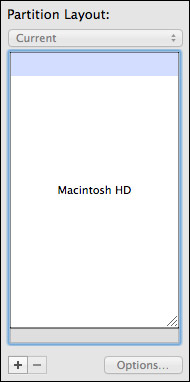
The partition is removed, but the space it occupied is not reclaimed by the original partition.
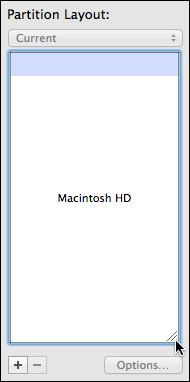
To get the space back, drag the thumb in the lower right corner all the way down to fill the gap.
Then, click the Apply button to apply your changes.
SUMMARY
Dual-boot systems are not for everyone. But, when you need to alternate between different operating systems, or different system configurations, a dual-boot system can make that easy.

2,000 Video Training Titles
Edit smarter with Larry Jordan. Available in our store.
Access over 2,000 on-demand video editing courses. Become a member of our Video Training Library today!
Subscribe to Larry's FREE weekly newsletter and
save 10%
on your first purchase.

97 Responses to Create a Dual-Boot Mac OS X System Disk
← Older Comments Newer Comments →-
 OD Hunte says:
October 19, 2014 at 12:28 am
-
 Ron Vaceluke says:
October 20, 2014 at 12:05 pm
-
 Foggy Road says:
October 22, 2014 at 1:56 pm
-
 LarryJ says:
October 22, 2014 at 2:23 pm
-
 Foggy Road says:
October 22, 2014 at 2:46 pm
-
 Dennis says:
October 22, 2014 at 5:41 pm
-
 Dennis says:
October 22, 2014 at 5:45 pm
-
 Charles says:
October 25, 2014 at 4:24 pm
-
 LarryJ says:
October 25, 2014 at 4:31 pm
-
 Dennis says:
October 25, 2014 at 8:12 pm
← Older Comments Newer Comments →Great insight and info from this Post. I’m laying in bed in Ibiza on holiday trying to figure out how I can access so much of the latest software on OSX (mainly 10.9 &10.10) while keeping my machine at 10.6.8 as I use it primarily for music and do not want to change it. This article may have helped solve that.. I will try this when I get back to London.. thanks guys
I tried to install Leopard on my 2011 13 inch Macbook Pro after buying it and had the same problem of not recognizing the install disc. I was told by apple that I can’t go back to an earlier OS than the one that came with the machine which was Lion. Apple said that it is a firmware situation. Probably just don’t want to support older software.
Hi.
Larry,
Thanks for the tutorial! just one question. I have completed the dual-boot partition. How do i install a new operating system on the new partition?
Foggy Road:
When you download from the Mac App Store, it asks where you want the OS installed.
Larry
Thank you very much for the support! awesome tutorial!!
Download the OS X installer from the App Store and double-click it, then select which partition you want to install it onto and click Install.
BTW, there is one other nifty trick you can use. This works with both standard hard drives and SSDs but works especially well with SSDs.
The trick is to make one additional small partition on your boot SSD of maybe 50GB or so. Then install OS X onto it. Then *copy* all the OS X installer apps onto that partition. Doing this allows you to boot into that partition and then install OS X onto any other partition on the system AND it runs the installer off the SSD so installs are super-fast. I’ve noticed cutting install times by 2/3 by putting the installers on an SSD boot parition. On my machine I have a 45GB “Installers” partition dedicated just to making installs. It boots wicked fast and it installs wicked fast. Another little hack to speed up the work.
Enjoy.
I upgraded to Yosemite, but need to run Mavericks on my 2nd partition until and unless my printer manufacturer updates their drivers.
I downloaded the Mavericks OS X install using the App Store, but I don’t know where the App Store puts it or what it’s called. How do I find this file?
Charles:
It should simply ask for the location to install the OS as soon as the download is complete.
If not, you’ll need to contact Apple Support for help.
Larry
The default location from the App Store is in your applications folder. The installer should be in there. If not, check Dashboard to see if it’s partially downloaded. The file name for Mavericks is “Install OS X Mavericks”.