
 [ Note: This is a surprisingly difficult subject to explain clearly. Feel free to ask questions in the comments. Thanks to Paul Jordan for his feedback on making this clearer.]
I got into a long conversation with Jeff this last week. He was creating still images for video and making a specific point to save them at 300 PPI to provide the highest image quality.
He was quite surprised to learn that, when working with digital images for the web or digital video, the PPI setting doesn’t matter.
PPI (Pixels per Inch) is a measure of the density of pixels. This setting is essential when scanning documents or printing, but not when displaying images to monitors.
UPDATE: Nick Rains, in the Comments below, clarifies the difference between DPI (Dots per Inch) and PPI (Pixels per Inch). DPI refers to the actual dots of ink (1440 DPI or 2880 DPI for example) on the paper. PPI is pixels per inch from the image, and one pixel can be represented by many dots of ink. It’s a fine but very important distinction.
I normally refer to DPI, which Nick points out is incorrect. I’ve revised this tutorial to use PPI. You will often hear DPI and PPI used interchangeably – and, in many cases, you can. But it isn’t precisely accurate.
NOTE: Vector images, created in applications like Illustrator and InDesign, use a different display technology which is ideally suited for printing and design. However, vector images need to be converted to a bitmap for digital video or still images. For this reason, I’m ignoring vectors in this article. (Fonts, too, are vectors, but are rasterized to bitmaps during the render process.)
BITMAP 101
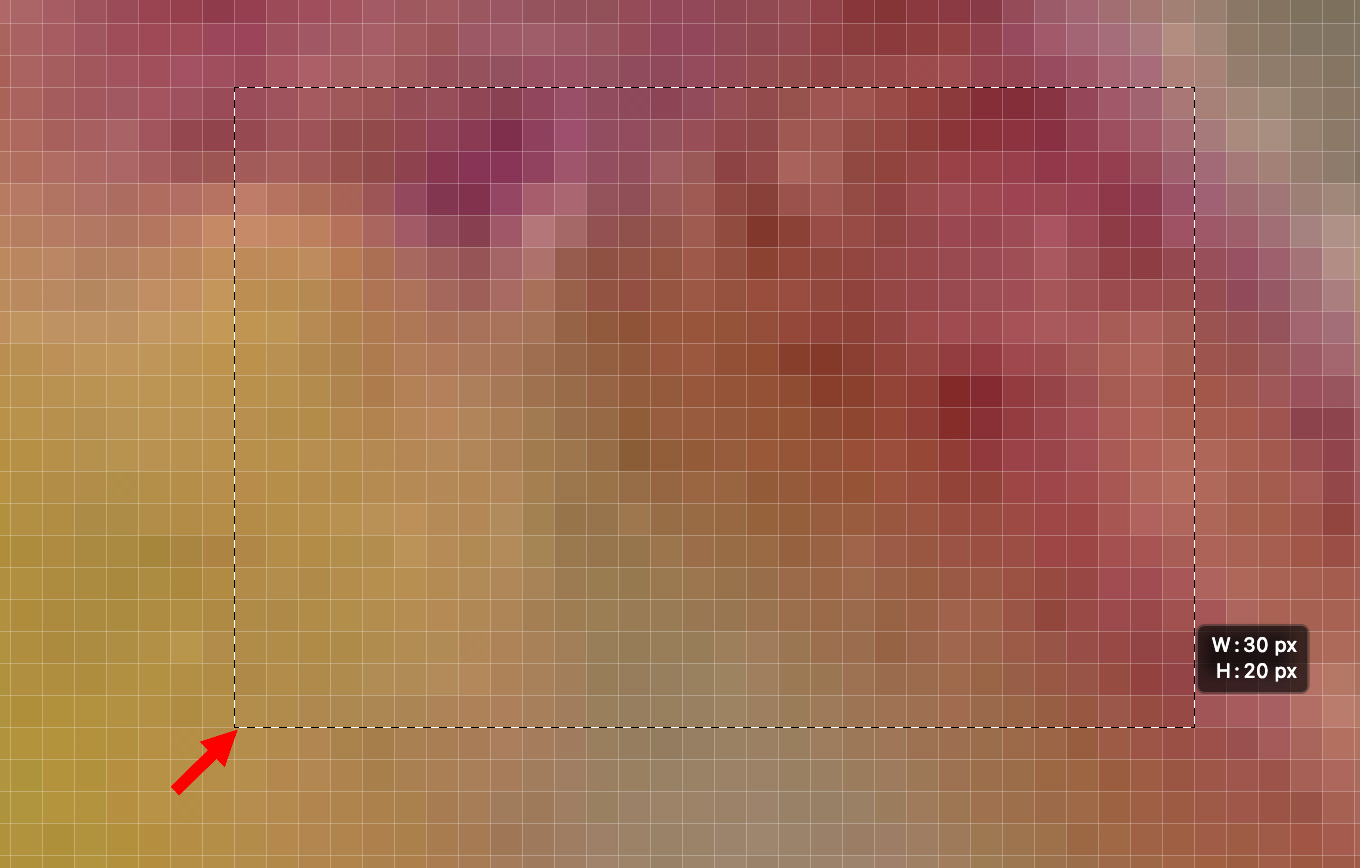
(A 30 x 20 pixel grid, selected in Photoshop along pixel boundaries. The horizontal dimension is always listed first.)
All digital images are composed of pixels (the smallest entity of an image) displayed in a rectangular grid called a bitmap. All pixels are square and contain exactly one color. The grid is always rectangular and displayed as rows and columns of pixels.
Look closely at the screen shot above and you’ll see the individual pixels, each with one and only one color. Notice, also, that the selection travels along the edge of each pixel. When manipulating images, you can only size, select or crop on pixel boundaries. There is no such thing as selecting or editing “half-a-pixel.”
NOTE: Even anti-aliasing, designed to soften or blend edges, uses full pixels, not portions of a pixel, for its magic.
When scaling an image the pixel size remains the same. What changes is that the color contents of a single pixel are either stretched to spread across multiple pixels (scaling up) or deleted to reduce the number of pixels in an image (scaling down). In ALL cases, the size of each pixel remains the same.
NOTE: Zooming into the viewer in Photoshop, Final Cut, Motion, or one of the monitors in Premiere DOES increase the pixel size. But this zooming does not affect the image, it simply alters the display. Scaling changes the size of the image but not the size of the pixels.
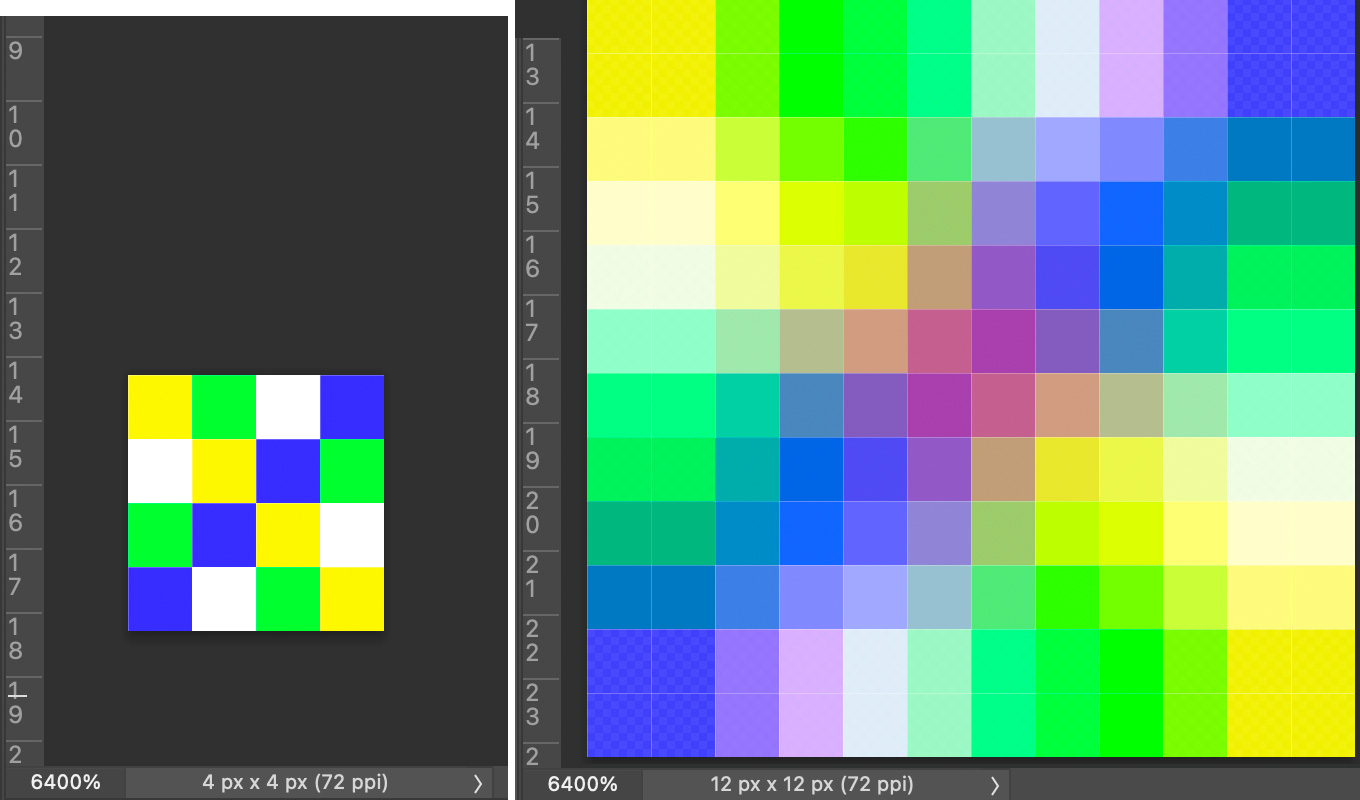 (Scaling a 4 x 4 grid – where each pixel is a different color – up to 12 x 12.)
The screen shot above is an illustration of this unchanging nature of pixels. On the left is the original image, a 4 x 4 grid composed of four different colors distributed across 16 total pixels. As always, each pixel is one and only one color.
NOTE: To see these pixels clearly, I zoomed in 6400% on both images; otherwise each image would just be a tiny dot.
Then, I scaled this source image up to a 12 x 12 pixel grid (144 total pixels). The pixel size in both images remains exactly the same. The bitmap is still rows and columns. But the colors in the original 16 pixels were stretched to cover 144 pixels in the new image.
The problem, as you can instantly see, is that we lost the clean geometry of the original image. In fact, as these colors were stretched, Photoshop invented colors that never existed in the source, such as varying shades of purple, due to how these colors combine. These false colors are what we call “artifacts.”
NOTE: The only way the sharp edges and clean colors of the original image could be maintained would be if the image were exactly doubled (200%) or quadrupled (400%) in size. Resolution would still decrease, but the clarity would be retained.
IMAGE SCALING
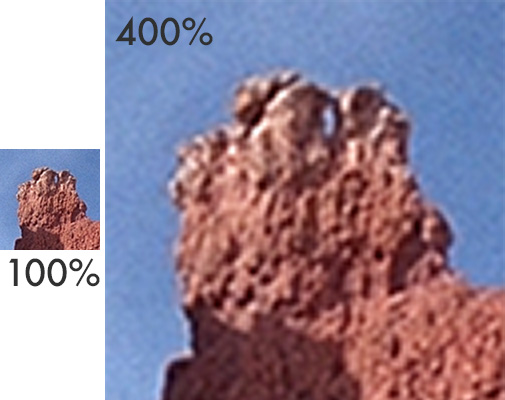
Let me illustrate this scaling problem. In the screen shot above, the placeholder on the left is 100 x 100 pixels. The placeholder on the right is 400 x 400 pixels. Into the left placeholder I put a 100 x 100 image (i.e. displayed at 100%). Then, in the right placeholder, I scaled the left image up four times (400%).
NOTE: A “placeholder” is a box that holds an image. All webpages and video editors allow us to specify the size of the image placeholder (box) separately from the size of the image that is placed IN the placeholder. In video editing terms, the “placeholder” is the frame size of the project. The source image is the frame size of the video clip inside that project. No web page or video editor asks for DPI settings, they only use the available pixels of the image.
The left image looks in focus. But, when I scale that image any percentage larger than 100%, the colors in that source image get stretched creating the loss in resolution you see on the right. The right placeholder has exactly the same image data as the left, but expanded it from covering 10,000 pixels to 160,000!
The way we avoid this loss in image resolution is NOT to increase the DPI, which the computer monitor ignores, but to change the size the original image.
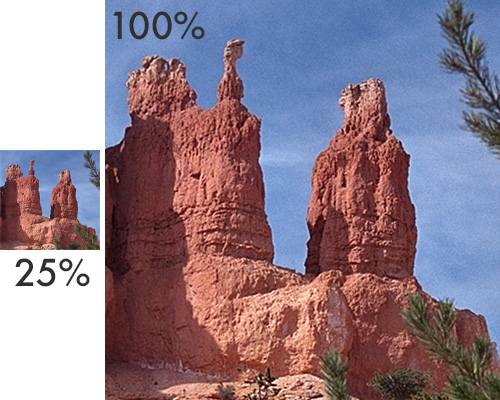
This time, we’ll scale a 400 x 400 image to 25% size in the left placeholder. While the left placeholder is still 100 x 100, the image inside it is only displaying 1 in 4 of its total pixels (25%). When I scale the image up to 100% on the right, all the pixels are now displayed. This provides a high-quality image with more detail. We didn’t change the DPI, we changed the scale of the original (left) image.
NOTE: Scaling an image smaller removes pixels, scaling an image larger stretches the existing colors of an image across more pixels. Scaling smaller tends to preserve image quality, scaling larger tends to soften resolution.
WHERE PPI IS RELEVANT
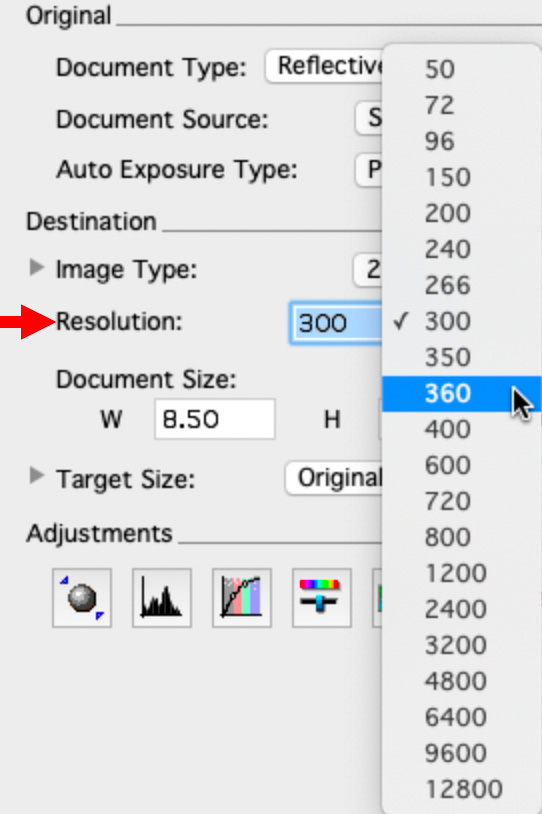
An image scanner, for old photos for example, can capture images at a variety of resolutions. The more pixels per inch, the higher the resolution. For example, my scanner ranges from 50 – 12,800 pixels per inch.
NOTE: Most text documents look good at 150 – 200 PPI, photos between 300 – 600 PPI and slides 2,400 – 4,800, unless they are REALLY well shot. Higher resolutions, which I’ve never used, are best for large format photo negatives.
When scanning, I need to specify how much detail I want in the image – or, more accurately, how much detail is in in the image that can be extracted into the scan. I do that by setting the PPI value to the resolution I need.
PPI is also relevant when printing, because printers can output pages at a variety of resolutions. While 300 PPI is probably the most common print resolution, most printers can output from 72 – 600 PPI.
NOTE: For text printing, a PPI setting of 300 is typical. For images, 600 – 1,200 is more common, especially for ink jet printers.
In both cases, these devices are capable of capturing or outputting a range of different resolutions. DPI determines that resolution.
WHERE PPI IS NOT RELEVANT
But this is not the case with computer or video monitors. These devices simply output the total pixels in the image (unless the image is too big, in which case it is scaled smaller by the device until it fits).
These monitors use bitmaps, just as we saw earlier. Pixels are fixed in size and formatted into rows and columns (the bitmap) where every pixel is square and contains exactly one color.
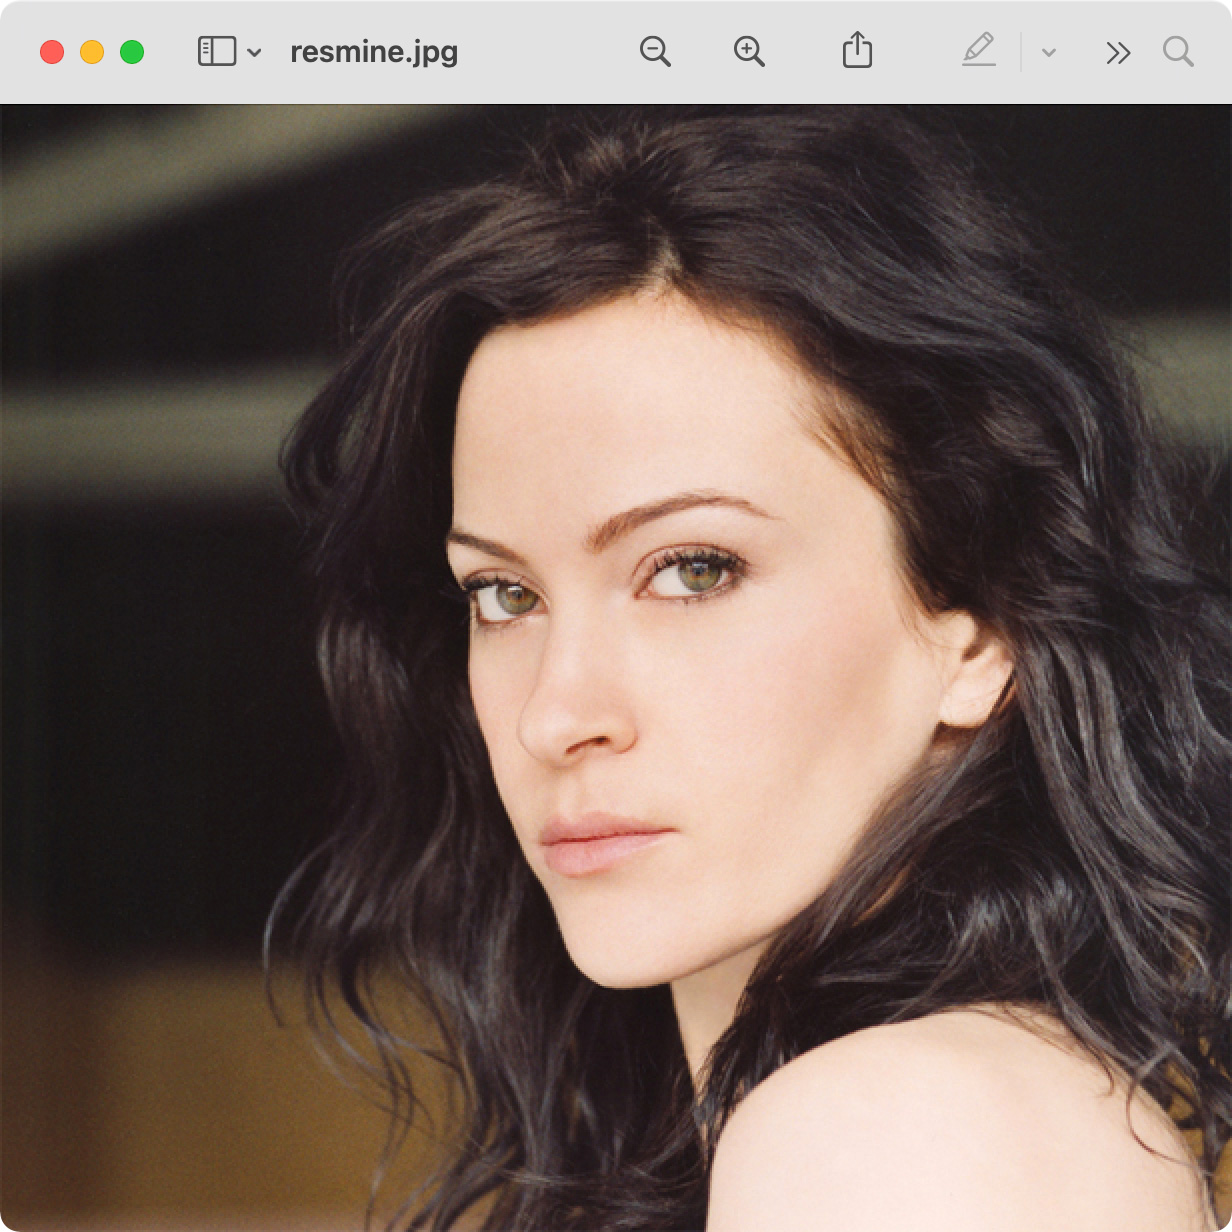
You can see this easily for yourself. Open two images in Preview. Images with fewer pixels, regardless of PPI setting, open smaller than images with more pixels.
NOTE: While you can change the resolution of your monitor using system preferences, that resolution can’t be altered for individual images or webpages. Computer monitor resolution, though changeable, is fixed from the perspective of viewing images at any given time.
Video monitors are even simpler than computer monitors. They are manufactured with a fixed resolution: HD (1920 x 1080), or 4K (3840 x 2160). If a video image is smaller than the display it is automatically scaled up to fit. If it is too big, it is scaled down. As with computers, video monitor pixels are square and contain exactly one color.
In all cases, video monitor resolution is fixed and the image bitmap is scaled until it matches the size of the monitor bitmap. For best quality, the size of the image bitmap should match the size of the monitor bitmap.

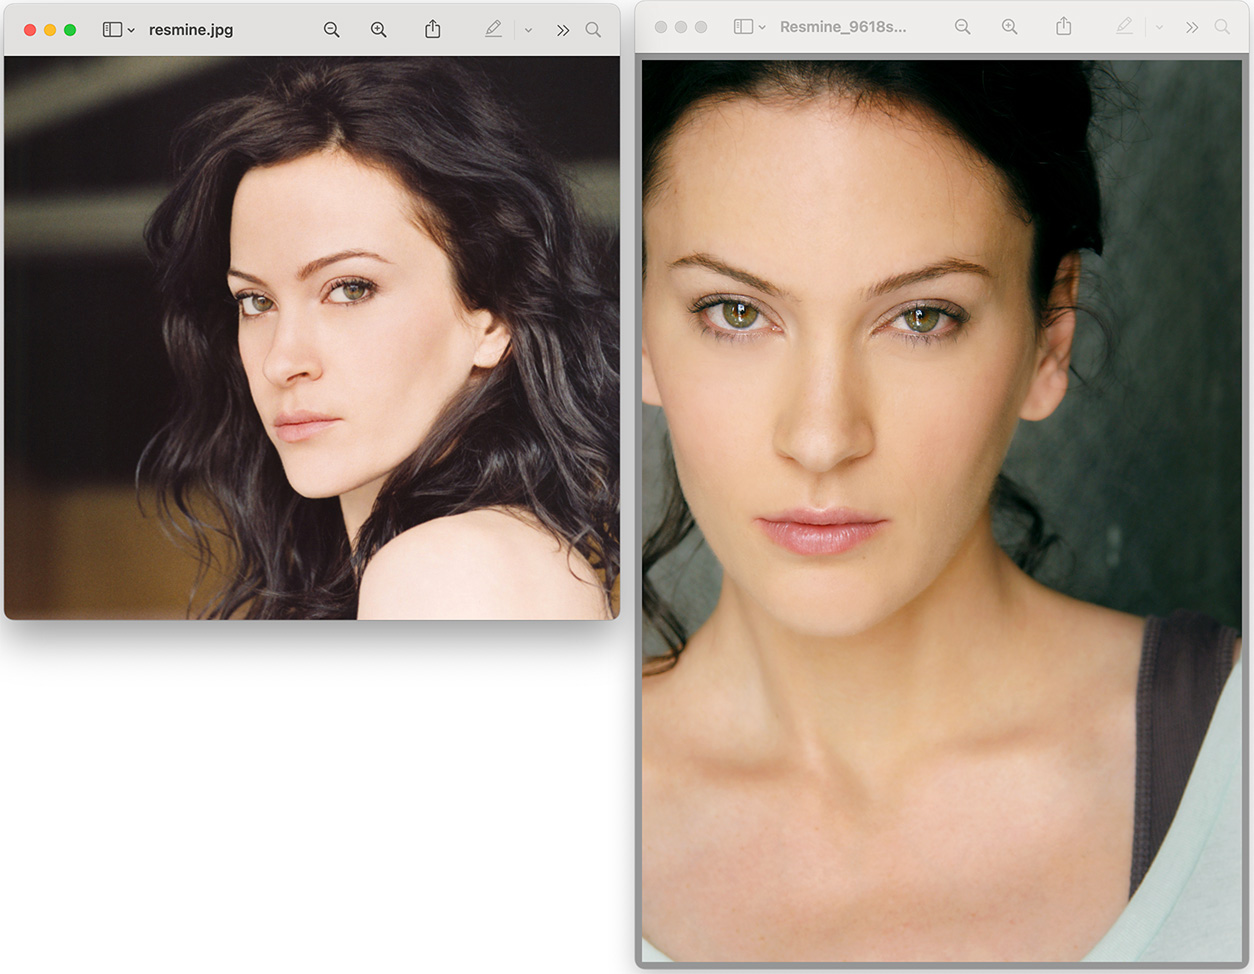
Here’s one more example. The image on the left is 616 x 564 pixels at 72 PPI. The image on the right is 616 x 564 pixels at 300 PPI. Both images are displayed at 100%, yet the size of both images is the SAME. Why? Because computer monitors ignore the DPI setting and display every pixel in the image.
NOTE: Because both these images are displayed at 100%, both will lose resolution if you scale up, as I illustrated earlier. To prevent that, display an image at less than 100% so that resolution is retained when you scale up. This is the idea behind shooting 4K video for an HD project. You have room to scale the image if necessary.
When it comes to digital images for the screen, web, or video, PPI does not matter. When it comes to scanning or printing, it does.

2,000 Video Training Titles
Edit smarter with Larry Jordan. Available in our store.
Access over 2,000 on-demand video editing courses. Become a member of our Video Training Library today!
Subscribe to Larry's FREE weekly newsletter and
save 10%
on your first purchase.
4 Responses to Why Scaling Images Looks So Awful So Often
Just a little ‘point of pedantry’. You should really use the term PPI when you talk about images being printed or displayed on a monitor. DPI refers to the actual dots of ink (1440DPI or 2880DPI for example) on the paper. PPI is pixels per inch from the image, and one pixel can be represented by many dots of ink. You can see this term correctly used in the Info screenshots above. It’s a fine but very important distinction.
Nick:
It never occurred to me that a pixel could require multiple drops of ink from a printer.
Thanks for clarifying.
Larry
Just to clarify, when I’m scanning small b/w and sepia family photos from the 1920s (3.25″x2.25″, 9 people in the image!) I want to set my scanner at 600 dpi and scan at 100% to maintain as much clarity as possible? I was going to scale it to 200% due to the small size of the original, hoping to be able to make out more details, but that will have the opposite effect?
Sorry – new to all of this and my old brain is slow to learn. My goal is to eventually upload all images to a cloud so family members can download and either print or just keep digital, whatever they wish.
RL:
Correct. Old photos don’t have much resolution beyond 600 dpi. So set scale to 100%, dpi to 600.
For a 3.25 x 2.25 image, you’ll get a digital version that’s roughly 2000 x 1400 pixels. This will be enough to fill the screen – though fairly low quality. You can then scale to whatever size you want. (Remember, digital images are ALWAYS based on pixel dimensions, not inches.)
Larry