
![]() Most of the titles, generators, transitions and effects in Apple Final Cut Pro X are created using Motion. In this tutorial, I’ll illustrate the process, though leave creating specific effects to your imagination.
Most of the titles, generators, transitions and effects in Apple Final Cut Pro X are created using Motion. In this tutorial, I’ll illustrate the process, though leave creating specific effects to your imagination.
NOTE: Here’s an article that describes how to move effects that you create from one system to another.
GET STARTED
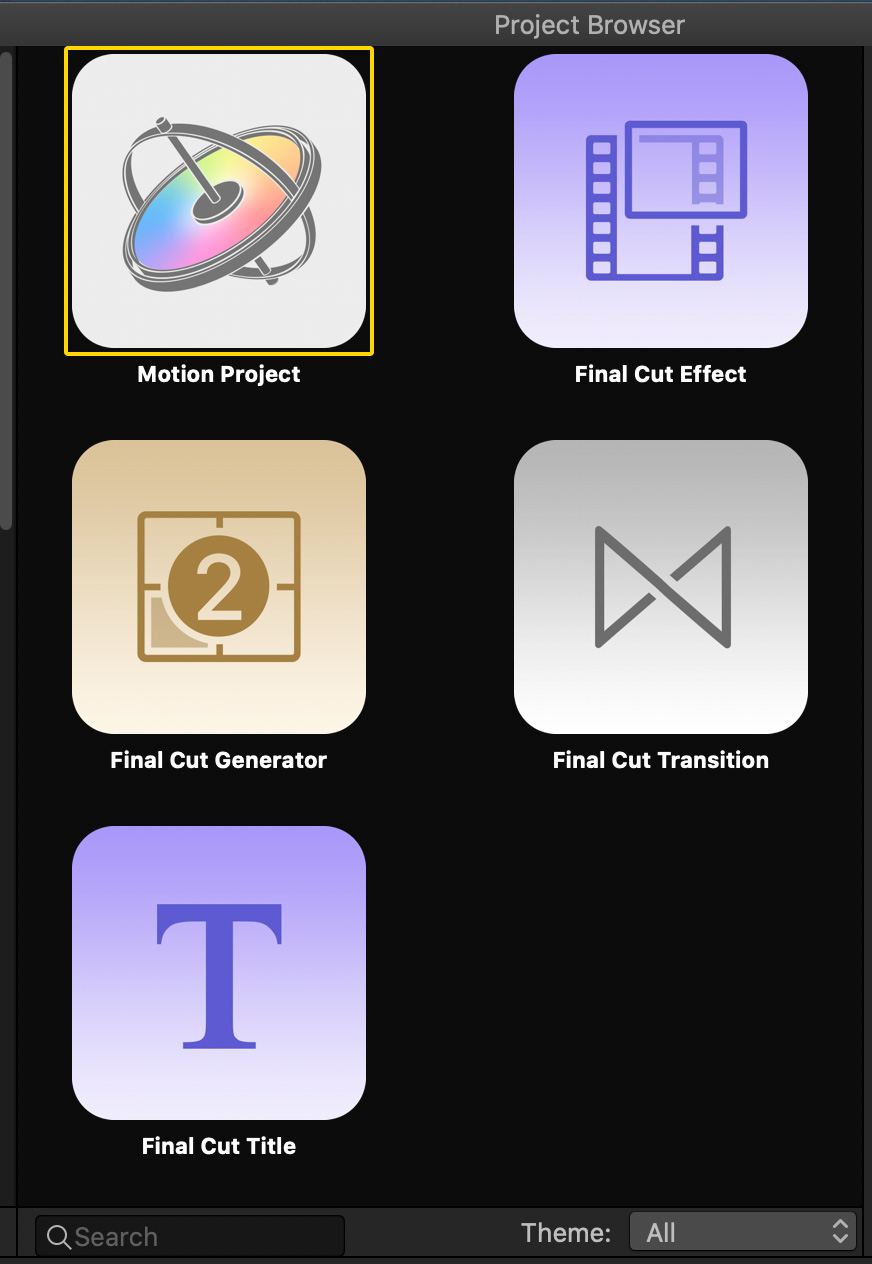
Your first decision starts here, at the Project Browser. If you know, before you start, that you are creating something destined for Final Cut, then choose it here.
NOTE: Motion’s audio capability is extremely limited. I strongly recommend that you not try to create audio effects in Motion.
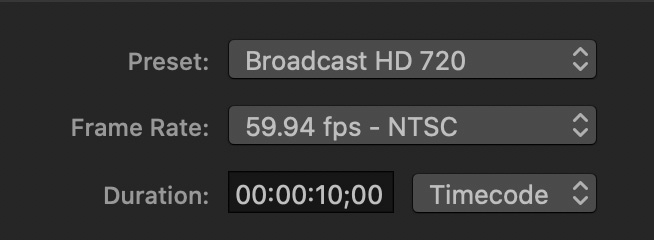
Motion always creates video at the highest possible quality (Apple ProRes 4444, by default). Adjusting presets does not affect image quality, but does determine frame size, frame rate and duration.
CREATE YOUR EFFECT
Once you’ve selected the format of what you want to create, the fun part starts: Creating your effect. For this example, I’ll create something very simple: a Sepia effect.
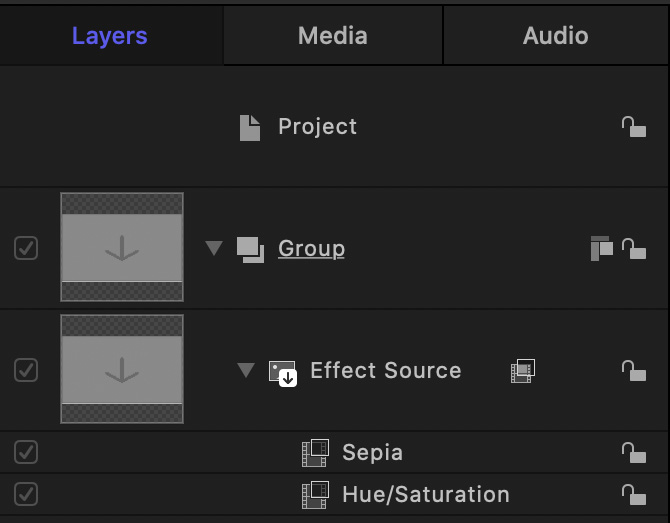
In the Layers panel, I applied two filters to the existing drop zone.
IMPORTANT NOTE: Stacking order is important. Effects process from the bottom to the top of a clip. Make sure Hue/Saturation is below Sepia. If you need to change the order, drag the filter into a new position.
You can spend as much time creating effects as you want. For now, this will be enough.
ADD RIGGING AND WIDGETS
A rig is a container for the controls (called widgets) that are displayed in Final Cut that adjust an effect.
Choose Object > New Rig to add a Rig to your project. Double-click the name (“Rig”) and rename it. While this step is not necessary, it is a good habit to get into because you can have more than one rig in a Motion project. Renaming helps avoid confusion.
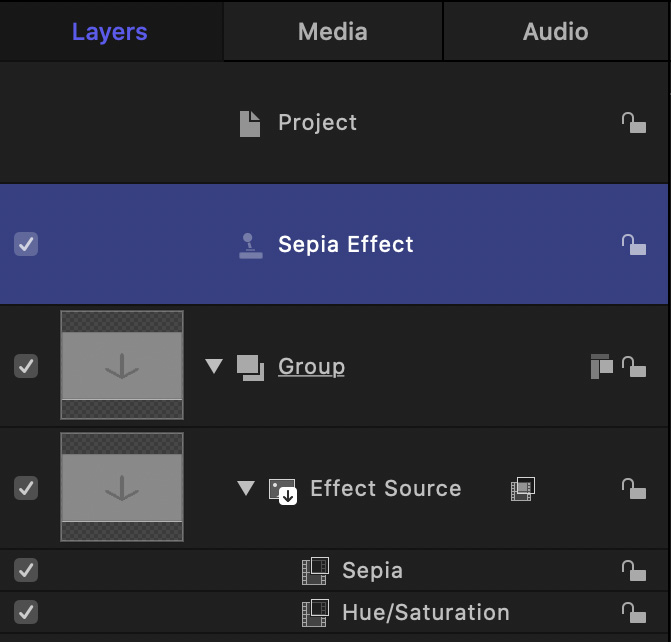
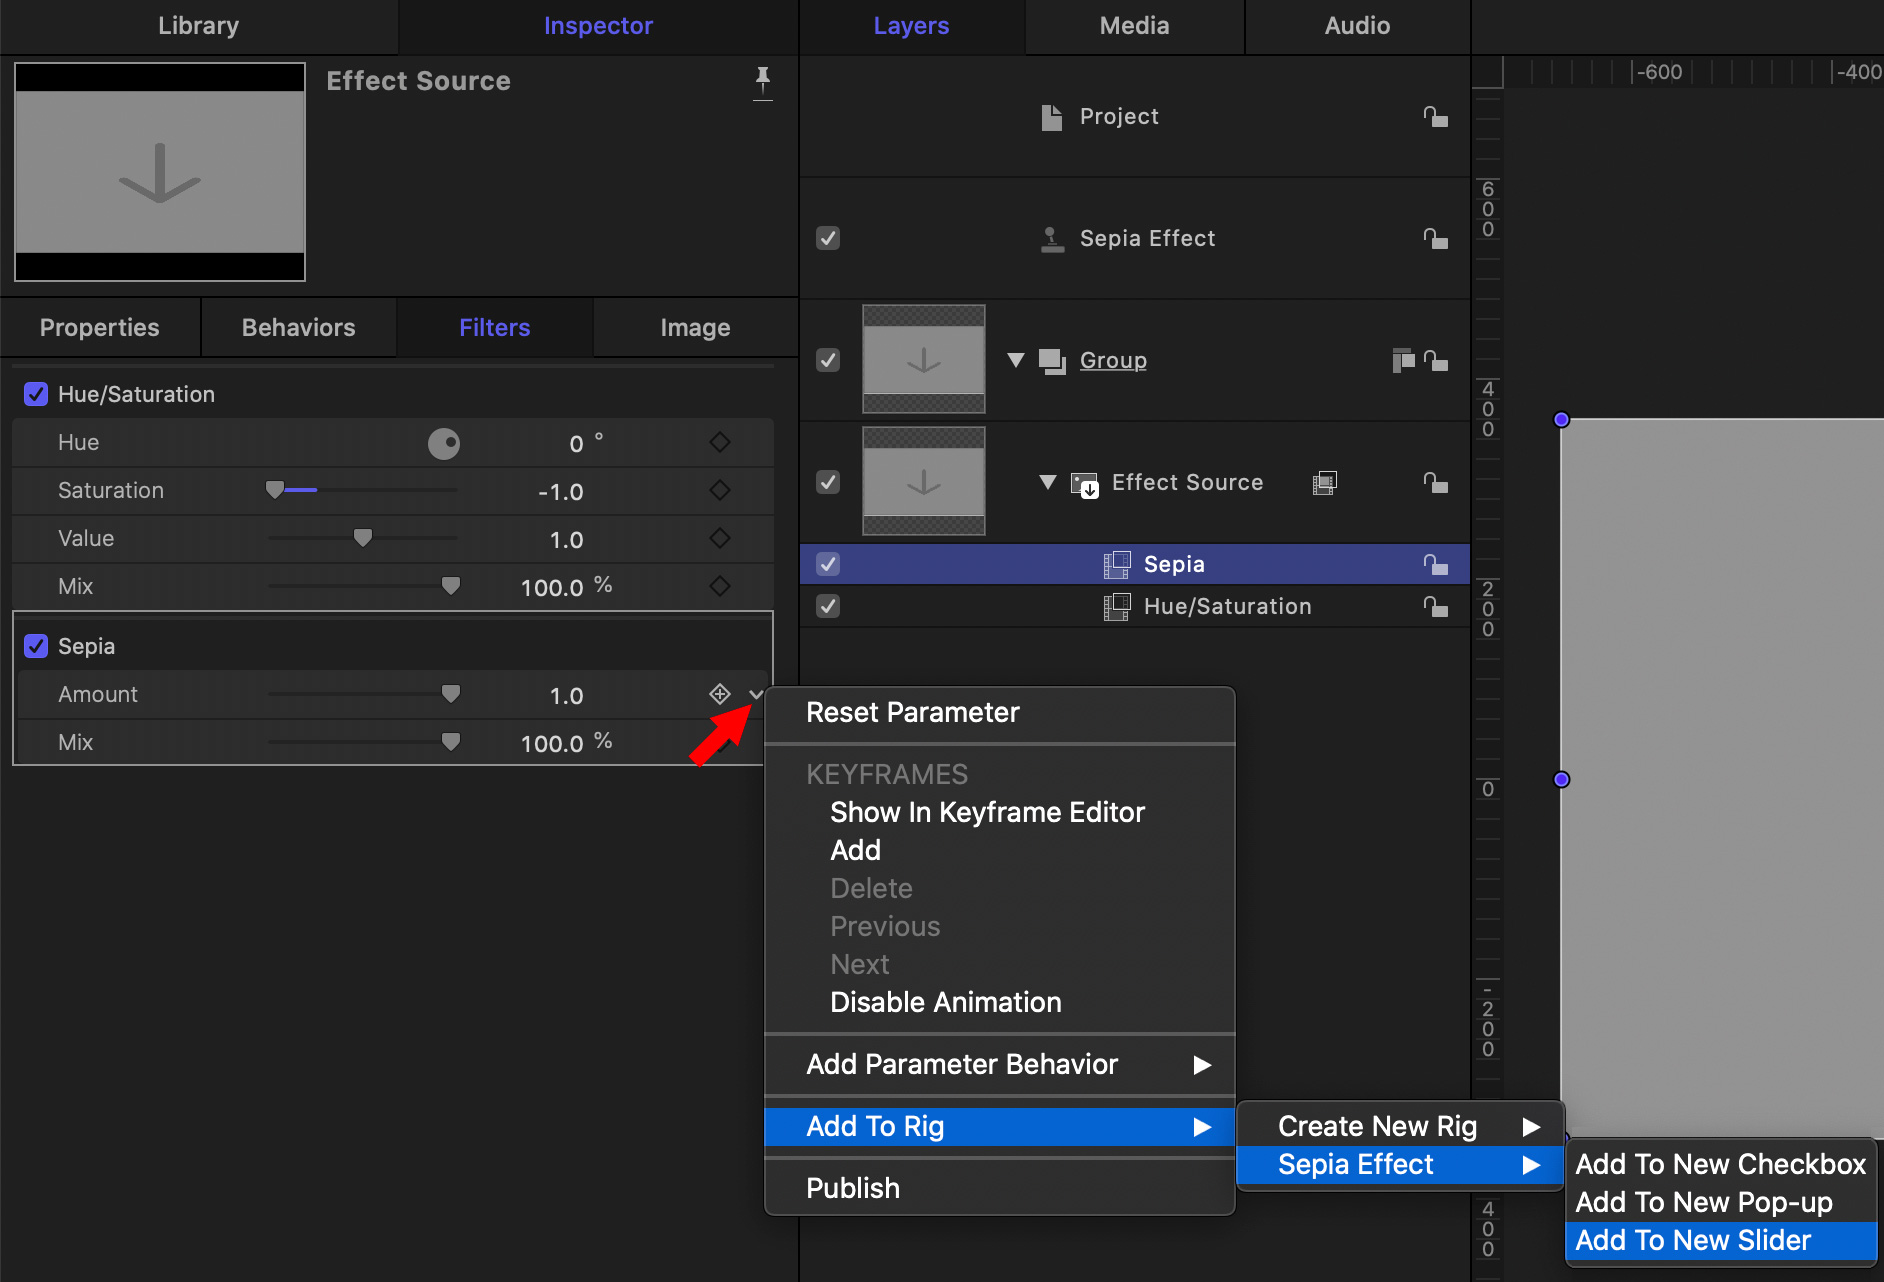
In the Layers panel, select the Sepia filter. We need to add a control that allows Final Cut to adjust the amount of sepia coloring applied to a clip.
(Click to see larger image.)
Go to Inspector > Filters > Amount and click the small, downward-pointing arrow to the right of the Amount slider.
Choose: Add To Rig > Sepia Effect [or whatever you renamed your rig] > Add to New Slider

A new Widget appears, indented under the Sepia Effect rig we just created. Rename it Sepia Amount. This name is important, because it’s the name for this control that will appear in Final Cut.
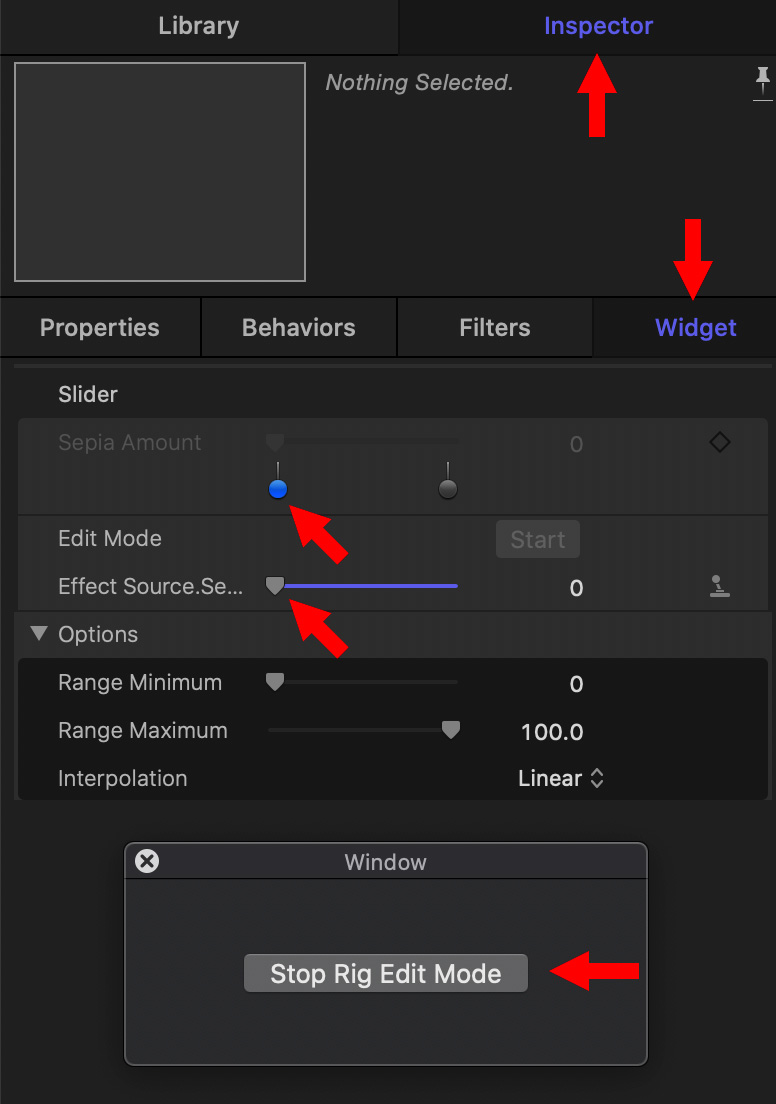
With the slider widget (“Sepia Amount”) selected, go to Inspector > Widget.
We have now set the minimum value for this color effect to zero. Because the right dot represents the default value for this effect, which is “full on,” we don’t need to change it. But, if you did, the process is the same.
As practice, drag the slider above the two dots back and forth. The Effect Source slider should move in tandem with it, from zero on the left to 1.0 (full color) on the right.
NOTE: Feel free to play with other settings. Rigging in Motion is extremely powerful and flexible, as you can see from all the different controls available for effects inside Final Cut.
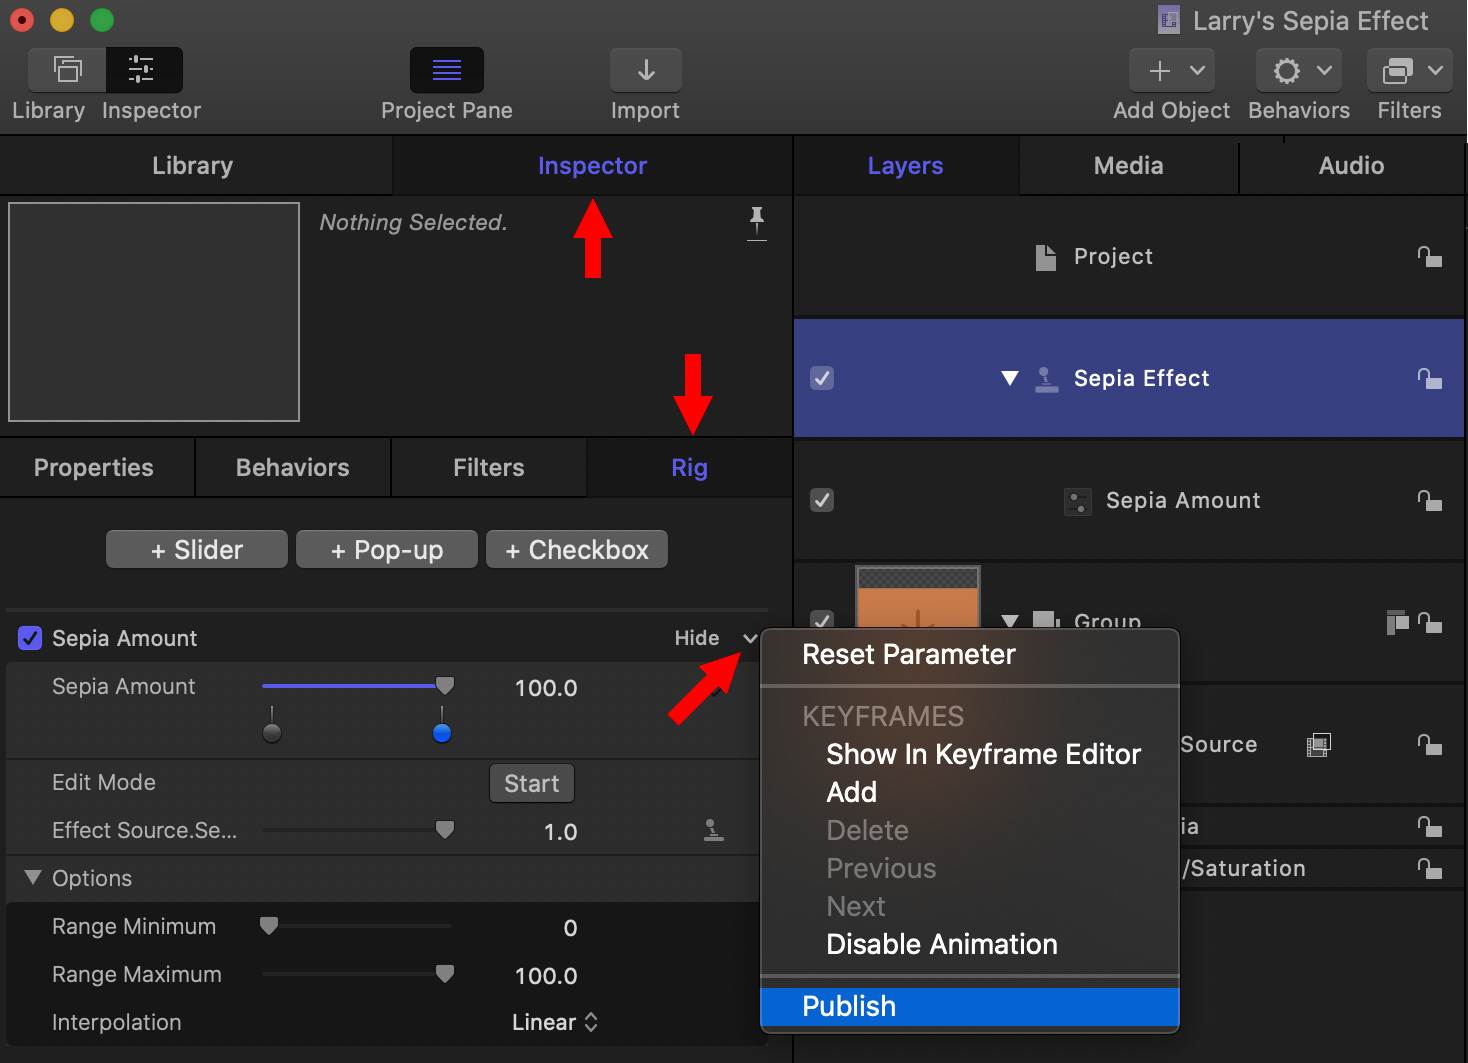
PUBLISH THE RIG
(Click to see larger image.)
When you are done adding, editing and verifying your effect controls:
This finalizes the effect and allows Motion to pass the control to Final Cut.
SAVE YOUR EFFECT
When you are done creating your effect, choose File > Save.
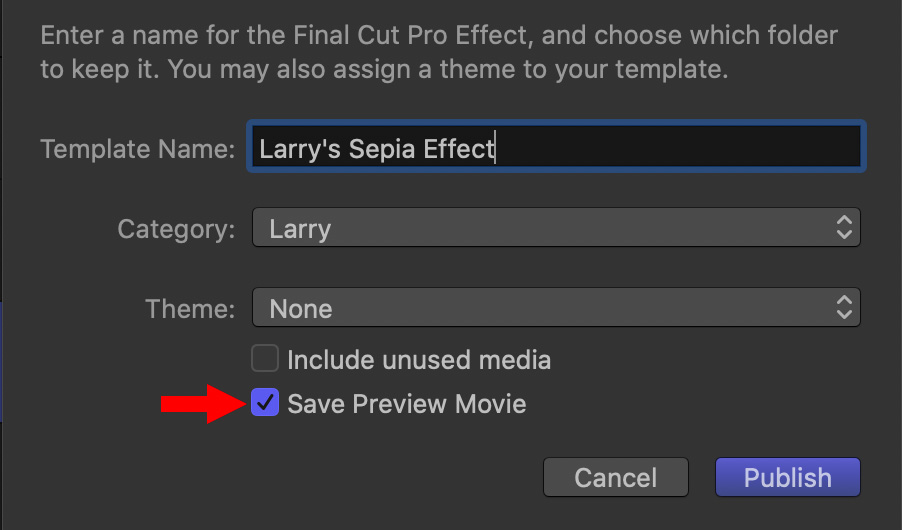
In the Save window, give your effect a name (keep it short so you can read it in Final Cut), assign it a category and theme so you can quickly find it. (I don’t create many effects for myself, so I store them all in a new Category called: Larry. Um, no, you can use your own name, you don’t need to use mine.)
If there is animation with the effect, I’ll also Save a Preview Movie.
SWITCH TO FINAL CUT
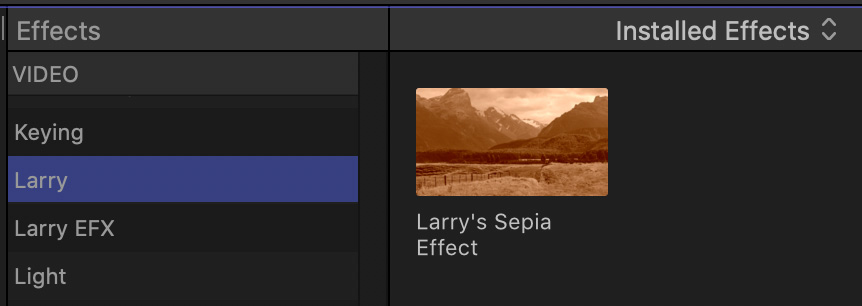
Open Final Cut Pro X, then go to the Effects browser, go to the category in which you saved your effect and – ta-DAH! – there it is!
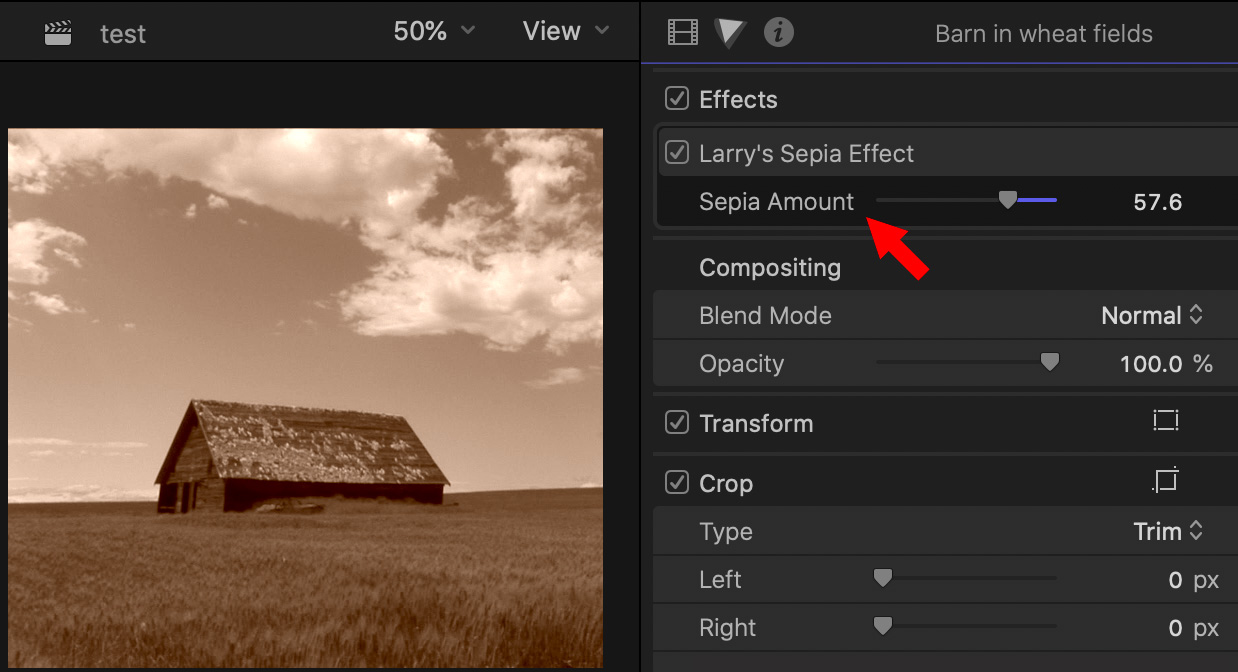
Apply the effect to a clip, the same as any other FCP X effect. In the Inspector, the controls that you published are now available for you to adjust (red arrow).
TWEAK YOUR EFFECTS
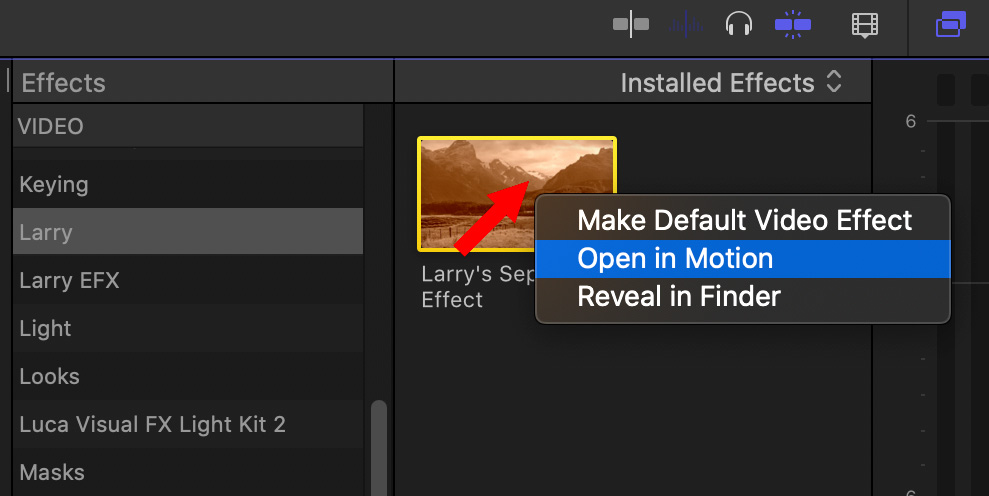
If you need to tweak an effect, right-click it and choose Open in Motion.
The effect opens in Motion, as a project that you can edit. Make your changes and save the project. Motion saves your changes and updates the file in Final Cut automatically.
EXTRA CREDIT
If you create a Motion project, only to discover later that you need to add this to Final Cut, you can do so, but only as a generator.
When your effect is complete, choose File > Publish as Template.
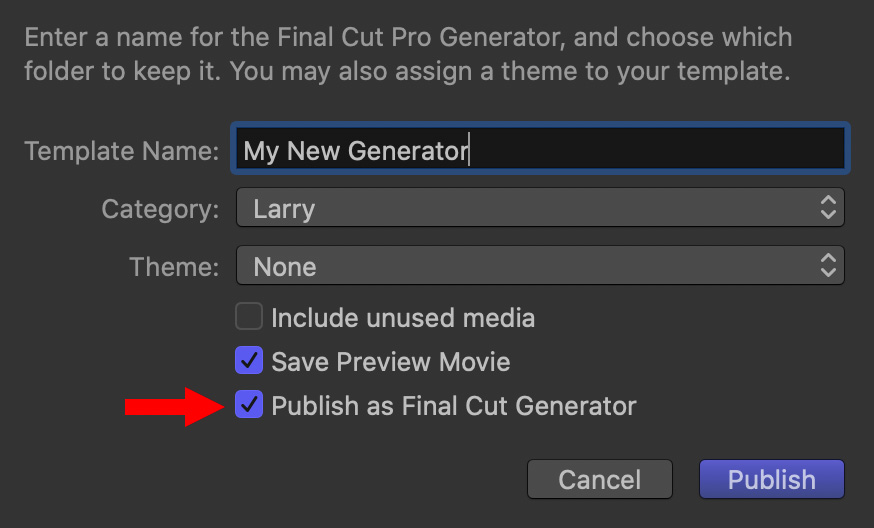
Give this a name, category and theme, the same as earlier.
While you can create a generator from a Motion project, you can only create titles, effects or transitions by selecting that option first from the Project Browser.

2,000 Video Training Titles
Edit smarter with Larry Jordan. Available in our store.
Access over 2,000 on-demand video editing courses. Become a member of our Video Training Library today!
Subscribe to Larry's FREE weekly newsletter and
save 10%
on your first purchase.