
![]() With the release of the 22.3 update to Premiere Pro, came significant changes to how we export sequences from Premiere.
With the release of the 22.3 update to Premiere Pro, came significant changes to how we export sequences from Premiere.
Fortunately, Adobe streamlined the tools without removing any of their power or flexibility. Here’s how they work.
![]()
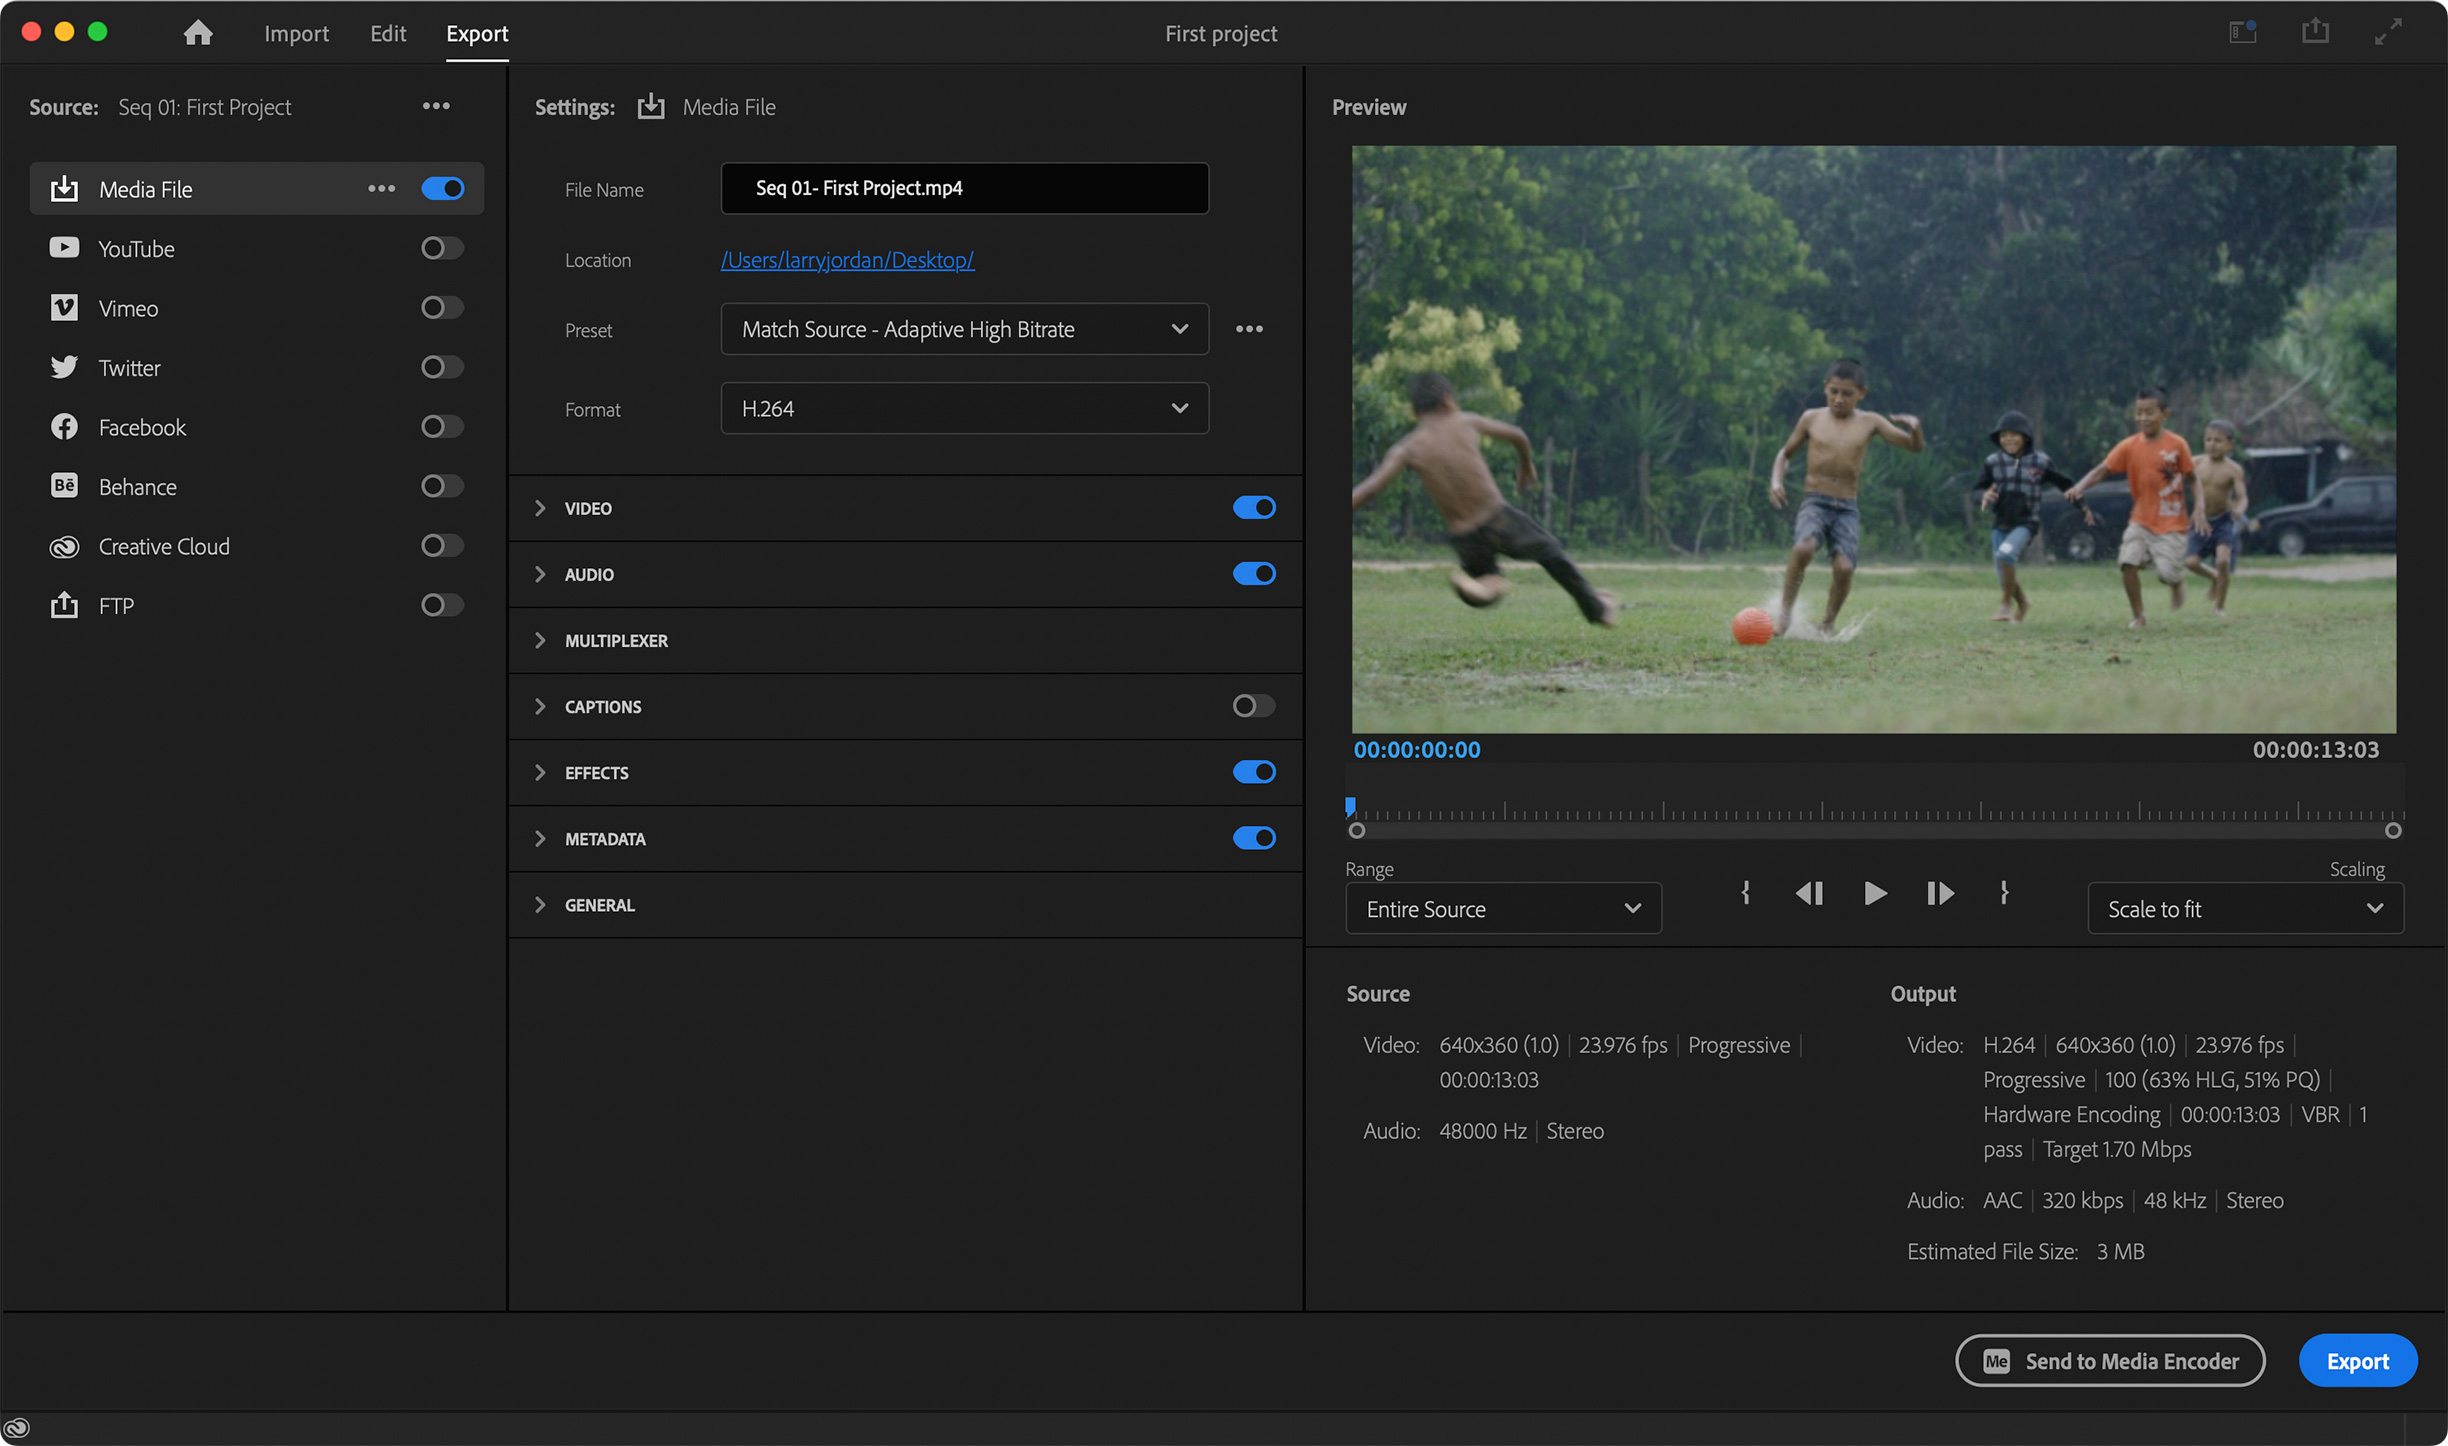
(Click to see larger image.)
The new Export panel appears.
On the left are typical export destinations. These can be renamed, duplicated or deleted by clicking the three periods just to the left of the blue/gray switch.
In the middle are the output settings. These are the same as those traditionally found inside Adobe Premiere
On the right is a playable view of the project itself, along with technical details displayed below the image along with two buttons.
NOTE: The export settings are exactly the same as those we’ve used for years in Adobe Media Encoder or Premiere. Just made more accessible.
DESTINATIONS
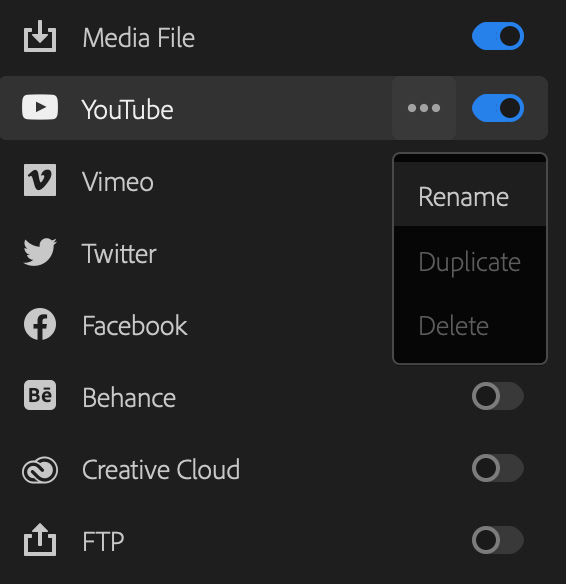
The Destinations panel supports exporting multiple files of the same project. This is a big time saver.
SETTINGS
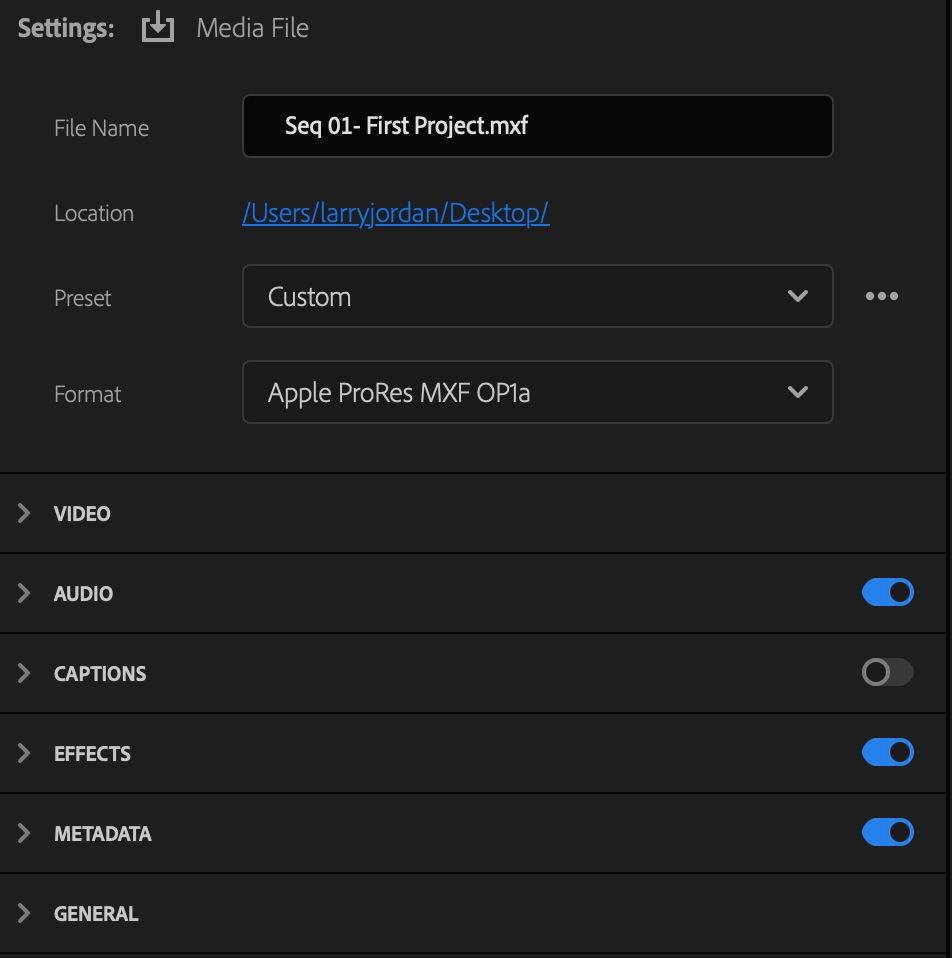
The default export setting for a Media File is H.264, which is highly compressed However, it is easy to change the format to a higher-quality codec, such as ProRes.
NOTE: All these settings are the same as those we used for years in Adobe Media Encoder. (You can learn what they mean in Adobe’s Help files.)
PREVIEW & OUTPUT
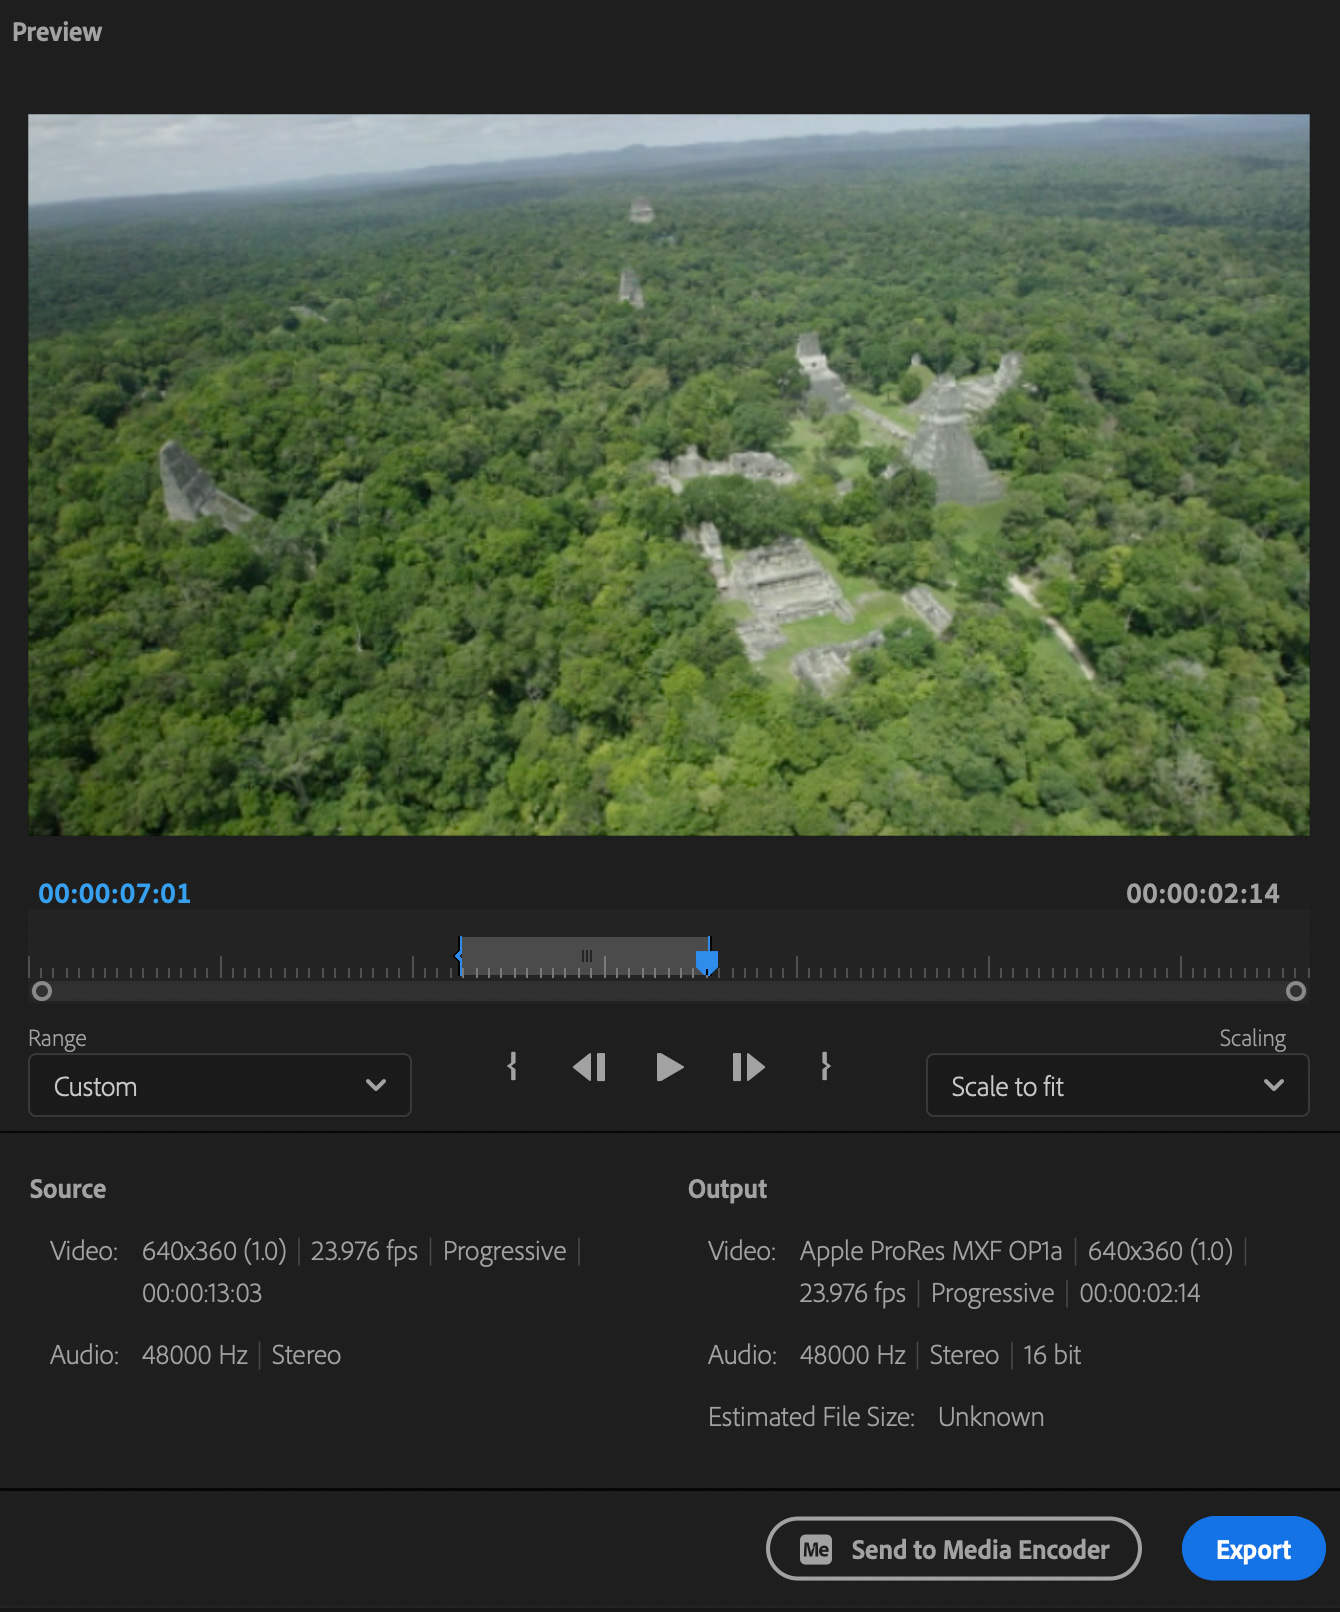
The Preview panel defaults to exporting the entire project. However, press I or O to set an In or Out in the timeline below the Preview panel.
The technical settings are displayed below the image.
When you are done, click Export.
NOTE: Or, if you decide not to export at this time, click Edit at the top left corner of the interface to exit this screen
SUMMARY
This new interface brings all the controls we learned to use in Adobe Media Encoder into Premiere, making them more accessible. That which changed is the interface, but everything you already know still applies.
I like this new interface! It flows smoothly from left to right, provides access to all the settings I need and feels more open than the export window in the past.

2,000 Video Training Titles
Edit smarter with Larry Jordan. Available in our store.
Access over 2,000 on-demand video editing courses. Become a member of our Video Training Library today!
Subscribe to Larry's FREE weekly newsletter and
save 10%
on your first purchase.
6 Responses to The New Export Interface in Adobe Premiere Pro 22.3
I’m not a fan. It didn’t know where my custom presets were located, and I don’t know where they are either but they were always available within the old export panel. I have found these new updates less desirable for my workflow. It would be nice to have a choice of using the new panels or sticking w/the older, quite useful ones.
I don’t like the full screen interface. When we edit on big 27-36 inch screens it is ridiculous to have the interface fill the screen, and then trying to maneuver around and find all of the codex’s and the ones that I have customized are not readily seen or available. I looks like something you would find in a free editing system or iMovie. Not a fan.
Hi Larry!, I am Felipe from Spain.
I have this new version and I am happy with it except for one thing. In older versions if I had any clip with warp not analyzed, when I tried to export, I used to have an Incomplete Effect Analysis dialog box. But in this new version, it exports everything and if you have some clips with these blue banners, the file exported will contain them It is very frustrating. Do you have any idea how to solve it?, or how to turn on that message again? Thank you!
Felipe:
Hmmm… interesting question. I don’t have an answer. Perhaps another reader does, however, I suspect you’ll need to contact Adobe Support.
Larry
Terrible change. Now every time I want to export, I have to spend five minutes getting the tools panel back to the placement/sizing where I had it. They should be separate panels, not joint.
Michael:
What made me finally accept this is that all the export controls we had in the old interface are still in the new interface and are easier to access. Adobe rearranged stuff, but they didn’t take anything away.
Larry