
[ This article was first published in the November, 2010, issue of
Larry’s Final Cut Pro Newsletter. Click here to subscribe. ]
Here’s another technique that grew out of a recent webinar — creating cast shadows using Boris Title 3D. Title 3D is bundled with your version of Final Cut, so you already have this installed on your system.
IMPORTANT NOTE: Boris Title 3D is not stable inside Final Cut Pro 7 unless you have the latest version; which is free. Please watch this free demo with instructions on how to find out what version you have and where to upgrade. (The information you need starts about 1:20 in.)
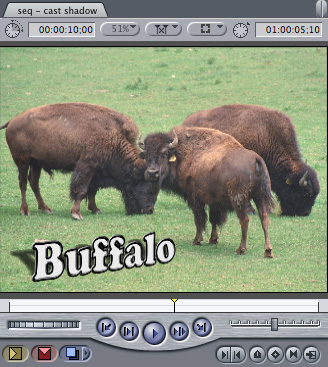
Here’s what we are going to create. An outlined, angled clip with a cast shadow. You can’t create this using Final Cut’s Text tool.
NOTE: This demo should work with every version of Final Cut from about FCP 5 or later.
1. Start by adding a background image to track V1 in Final Cut Pro.
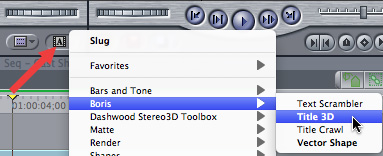
2. Click the Video tab in the Viewer and go to the lower right corner and click the Generator button. (It has a small letter A on it.)
3. From this pop-up, select Boris > Title 3D.
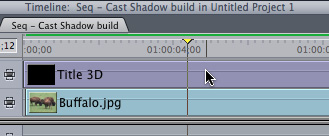
4. Edit this clip so it is on the track above your background clip.
5. Double-click the clip to load it into the Viewer and click the Controls tab.
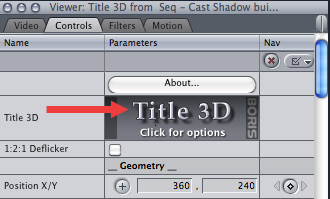
6. Double-click directly on the Title 3D tile to open up the text editor.
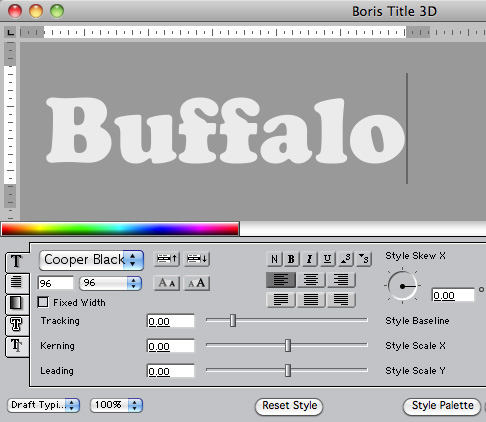
7. Enter the text for your title in the upper portion of this window. For my example, I’m using “Buffalo”.
8. In the lower portion of the window set the font and size of the text. In my example, I’m using 96 point Cooper Black. Although you can, I’m not making any adjustments to any other setting in this window.

9. Click Apply to accept your entry (lower right corner) and look at it in the Canvas. If the position is wrong, DON’T move this clip in the Motion tab!
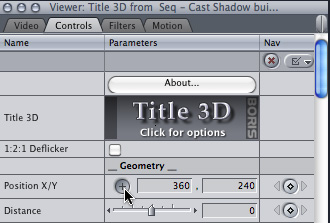
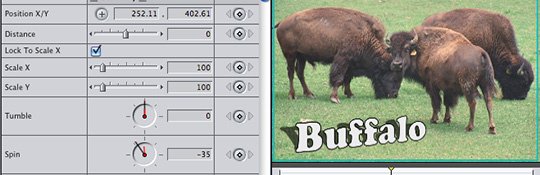
10. Instead, click the cross-hair next to Position X/Y, then, without clicking anywhere else, click in the Canvas and drag your text clip where you want it to go.
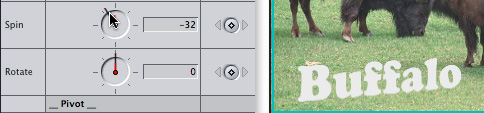
11. Although this is optional, you can impress your friends by scrolling down a little farther in the Viewer and adjust the Spin setting. Watch how this provides a 3D perspective to your text.
(Yeah, OK, go ahead and see what Tumble and Rotate do. I’ll wait…..)
We now have our text positioned, rotated, and sized properly. Now to add the shadow.
12. Scroll up to the top of the Viewer and double-click the Title 3D tile in the Controls tab.
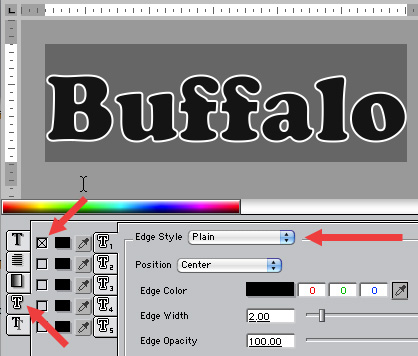
13. In the lower panel, far left side, are five tabs. Click the fourth one down. This allows you to add edges and bevels to text.
14. Before you can apply any effects you need to select the text you want to apply it to. So, select your text. (This image shows our text selected with the edge effect applied.)
15. Then, click the checkbox for the top box. By default it adds a plain back line around all your text. Since all we want to do is define the edges of the characters a bit better, this is fine. However, feel free to see some of the other choices available.
NOTE: Remember, you need to select your text before you can apply an effect.
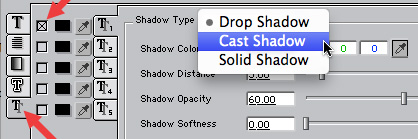
16. To add a cast shadow, click the bottom tab on the left side.
17. Be sure your text is selected, then click the top checkbox, and change the popup menu to Cast Shadow.
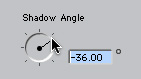
18. With your text still selected, adjust the shadow angle so it falls in the direction you want. For my example, I set this to -36º.
Click the Apply button and admire your new effect.
Cool, again!

2,000 Video Training Titles
Edit smarter with Larry Jordan. Available in our store.
Access over 2,000 on-demand video editing courses. Become a member of our Video Training Library today!
Subscribe to Larry's FREE weekly newsletter and
save 10%
on your first purchase.
One Response to Create Text with Cast Shadows Using Title 3D
Larry, How does one set up Boris Title 3D in FCP7 where as you make the changes they show up in the Canvas window in FCP7 without having to click APPLY and see the change and then go about the same routine?
Thank you!