
[This article was first published in the October, 2010, issue of
Larry’s Monthly Final Cut Studio Newsletter. Click here to subscribe.]
For my policy on software reviews, click here.
The last time I wrote about chroma-keying was August, 2008. At that time, I showed you how to use the Primatte RT keyer in Motion. Since then, Apple moved this keyer into Final Cut Pro 7 where it replaced the egregiously bad keyer that Final Cut had been using since its release.
The Primatte RT keyer is nice keyer, but it has problems with both hair and transparency.
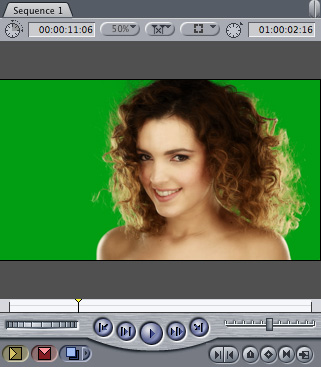
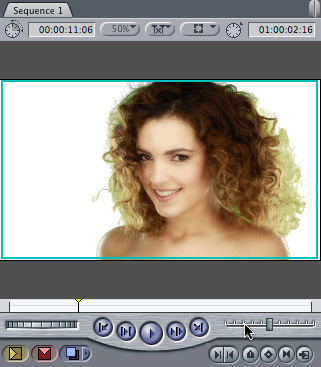
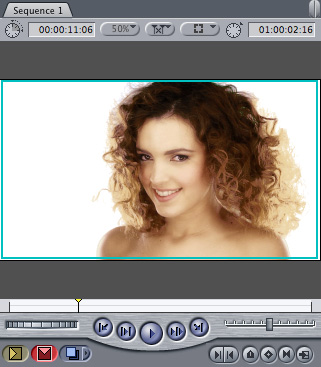
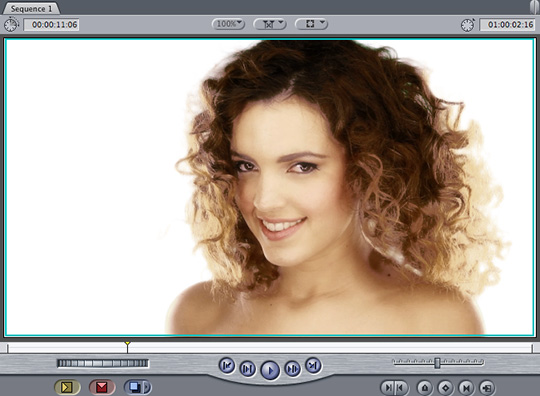
To illustrate here’s a professionally shot and lit green screen that I purchased from iStockPhoto for my recent webinar on chroma-keying.

After applying and adjusting the Primatte RT keyer, which ships with Final Cut Pro, I got this key. It isn’t bad, if you exclude the hair, However, with the hair, its awful. Look at all the green fringing, the lack of detail, and the giant, glowing arrow that says “Bad Keying Done Here.” (I, uh, made that last part up, but you know what I meant…)
Time for something better.
There are lots of different keyers on the market. But the one I want to talk about today is Red Giant Software’s Primatte Keyer Pro 4 – the big brother to Primatte RT.
The folks over at Red Giant Software sent me a copy to use for both my recent chroma-key webinar and this write-up.
Here’s why I want to tell you about it.
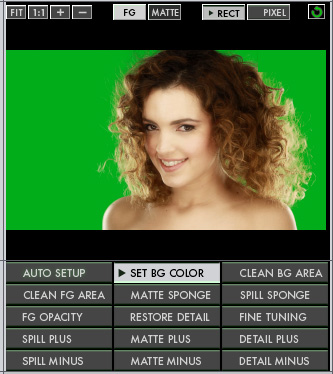
This is the interface to Primatte Keyer Pro 4 (hereafter called PKP4). You apply this to a clip the same as any other filter, then double-click the Timeline clip to load it into the Viewer, and click the Filters tab.
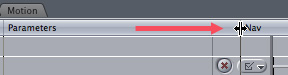
To see the entire interface, grab the vertical bar in the column header to the right of Parameters and drag it to the right until you see the entire interface.
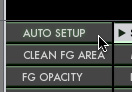
The easiest way to start is to click the Auto Setup button. More times than not, this will get you close to a finished key.
Close, but not close enough. This is how the key looks immediately after clicking Auto Setup. We still have work to do.
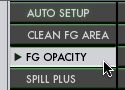
The big problem is spill through her hair. To clean this up, click the FG Opacity button.
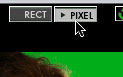
Go up to the top of the interface. There are two selection tools – RECT and PIXEL. The rectangle is the default, and allows you to select areas of the image using a rectangular marquee, but I like the control of the Pixel line better. Click Pixel.
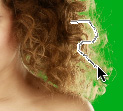
This tool allows you to draw a thin line to select areas of the image. In this case, I’m drawing a line through her hair that tells the software that the colors under this line are part of the foreground. Notice that I’ve been careful to make sure not to draw over the green background.
Here’s the results after this foreground adjustment. MUCH better.
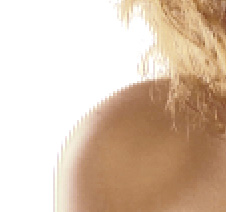
However, we still have a problem: her shoulder has severe stair-stepping around the edge (the image is magnified 200%). Getting rid of these artifacts is a feature that I haven’t seen in other keyers.
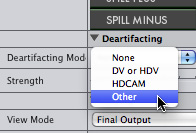
PKP4 has a deartifacting mode which virtually eliminates these stair-steps. There are four choices, with None as the default. There’s probably a theory on which of these to pick, but I look at all of them and select the one that looks the best. In this case, I selected Other.

Here’s the results on the curve of her shoulder after applying the Other setting (this, too, is magnified 200%).
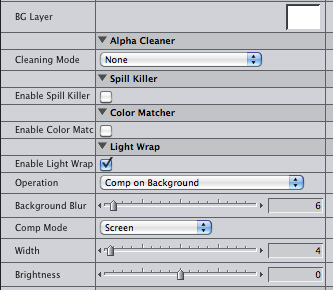
There’s one other feature I really like: light-wrapping. Here, I drop the background image into the image well in the top right corner and turn on Enable Light-Wrap. For this, the default settings are fine.
What this does is blend the foreground image of the girl with the white color of the background, similar to how it would look if they actually shared the same space.
NOTE: If you are using a moving background, drop the background video into the image well. Keep in mind the image well’s always start at the beginning of the clip. They ignore the In. If you need to start somewhere other than the beginning, export the clip using the correct start point.
Here’s how our finished key looks with light-wrap applied.
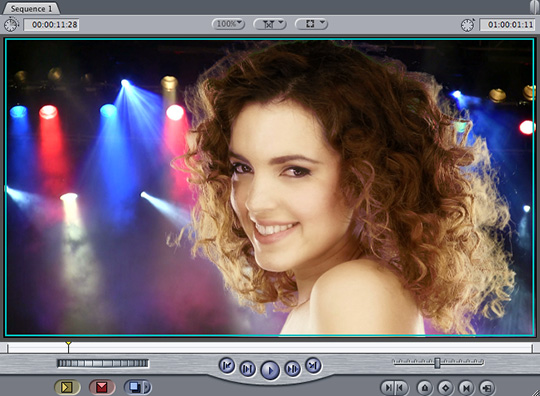
Here’s the same key, using the same settings, but with a moving video background. In this case, the hair looks more visible with light-wrap off, so I turned it off. (Background image courtesy of Pond5.com.)
Very, very nice!
NOTE: To learn more about how to create great looking chroma-keys in Final Cut Pro, take a look at this recent webinar.
UPDATE – Oct. 19, 2010
Allan Gruber writes:
Found your article on the Primatte Keyer 4 interesting. Interesting from the view point that every time I read an article on chroma keying, it makes me appreciate Ultimatte AdvantEdge even more. I don’t know if you have ever had the opportunity to use it, but if anyone does a lot of chroma keying as we do, in our opinion there really is no other choice (except maybe hardware solutions). AdvantEdge is so easy to use and incredibly quick. Every time we demonstrate it, people are absolutely amazed at the results and the speed. Truly amazing. Pricey, but the advantages (no pun intended) far out weigh the cost.
Larry replies: Allan, thanks for the update. This gives me incentive to check into recent versions of Ultimatte.

2,000 Video Training Titles
Edit smarter with Larry Jordan. Available in our store.
Access over 2,000 on-demand video editing courses. Become a member of our Video Training Library today!
Subscribe to Larry's FREE weekly newsletter and
save 10%
on your first purchase.
3 Responses to Software Review: Red Giant Software’s Primatte Keyer Pro 4
Hi Larry. I know answering to commentaries on any blog/website maybe timeconsuming, but I have to try.
The article is very interesting, and I learnt a lot from it. I have to say however that I know nothing about chroma keying.
So my question: when you use the FG opacity to the still image, I’m wondering if you would do the same if the image wasn’t a still. In other words, will I have to change FG opacity line from one to frame to the other in order to follow the hair line? I assume I have to. So my second question is, is there any way to do this automatically, (or semi-auto!).
Thanks to Allan for pointing out the Ultimatte software… I’ll give it a look.
thanks in advance!
No. The opacity of the foreground clip won’t vary from frame to frame. So, pick a typical frame, set your edges, and you are good to go.
The only time this would not work is if you are changing the lighting on the foreground clip, in which case, things get a WHOLE lot more complex.
Larry
thanks for your superfast reply!. I’m experimenting with the built-in primatte that comes along with FCP, and there aren’t all those nice features of the Primatte Pro, but it worked also pretty well.
I’ll keep experimenting.
thanks again.