
![]() While Final Cut Pro X does not natively support motion tracking – though we can use 3rd-party utilities like BorisFX Mocha Pro or CoreMelt TrackX – Motion 5.x does.
While Final Cut Pro X does not natively support motion tracking – though we can use 3rd-party utilities like BorisFX Mocha Pro or CoreMelt TrackX – Motion 5.x does.
Motion Tracking. Using an element in one image to move a second image in relationship to it. For example, move an arrow (second image) to point to a runner running in the first image.
There are three broad types of motion tracking:
Motion supports the first two tracking methods, though it doesn’t do corner tracking very well. CoreMelt and BorisFX support planar tracking. This article covers how to do simple point tracking in Motion.
GET STARTED
You will need at least two video elements in Motion:
In my case, I’ll track a circle around the nose of a jet.
(Footage courtesy: Hallmark Broadcast Ltd. (www.hallmarkbroadcast.tv))
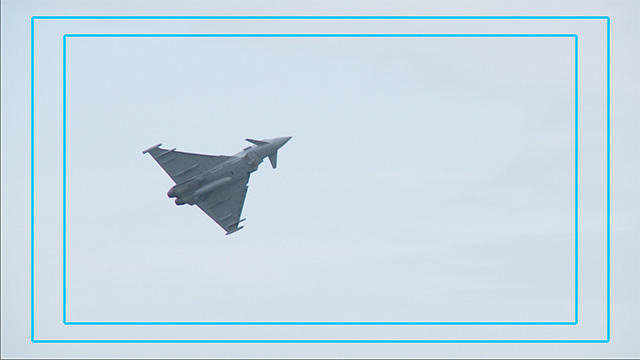
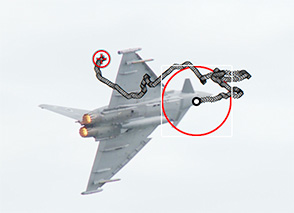
Here’s the background containing the object we want to track. Point tracking works best when you have a clearly defined point, like the nose of the plane. (I displayed the safe zone rectangles just to define the edges of the frame.)
NOTE: Point tracking breaks when the point you are tracking disappears. You solve this by creating multiple tracks – or moving up to a planar tracker. (See “If You Have Problems,” below.)
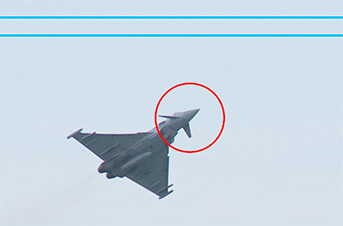
Moving the cursor to the beginning of the project, I drew a hollow circle using the Shape tool and put it in its starting position. You can put this image anywhere in the frame, just be sure to place it at the starting position with the playhead at the beginning of where you want the track to start before creating the track itself.
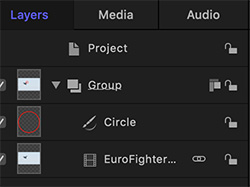
Here’s what the Layers panel looks like. Notice that the circle is in the same group as the background and above the background.
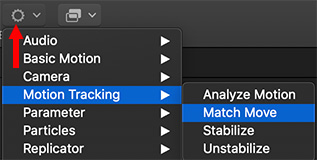
Next, select the circle (or the object you want to move) and apply Behaviors > Motion Track > Match Move.
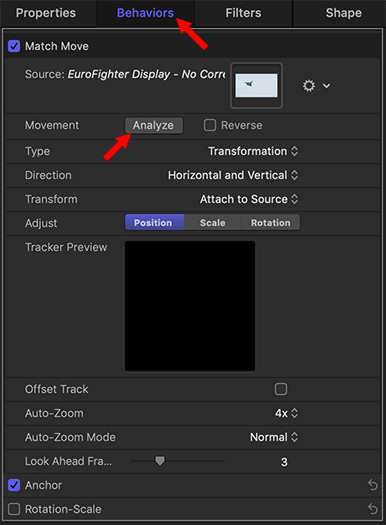
For a background with such a clearly defined tracking point (the plane’s nose) all the default settings are fine.
Click the Analyze button and watch as Motion creates a track for the circle.
Motion tracking creates a new X/Y position for the circle for each frame of video, but does not change the perspective of the circle.
Reset the playhead to the start of the track, deselect any elements in the Layers panel, then play the project. The circle perfectly tracks the nose of the plane as it moves through the sky.
EXPORT FOR FINAL CUT PRO X
You have two options to get this effect into Final Cut Pro X for editing:
To export the entire composite, make sure all layers are visible in the Layers panel.
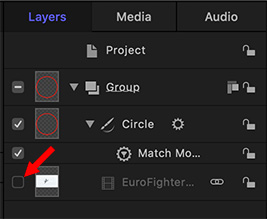
Since exporting only exports visible layers, to export just the tracked circle, uncheck the background layer to make it invisible.
In either case, choose Share > Export Movie and accept the default settings. This creates a ProRes 4444 movie with an alpha channel, which means that the background is transparent.
Import that exported movie into FCP X and the circle will automatically appear over the jet with all motion tracking in place.
IF YOU HAVE PROBLEMS
This example is pretty much best-case. In normal life, tracking points get obscured and tracks break. Here are some things to try:

2,000 Video Training Titles
Edit smarter with Larry Jordan. Available in our store.
Access over 2,000 on-demand video editing courses. Become a member of our Video Training Library today!
Subscribe to Larry's FREE weekly newsletter and
save 10%
on your first purchase.