
![]() Every editing project starts by reviewing the media you have on hand to edit. And, in Final Cut, that means using the Browser. While you probably use the Browser every day, it has a lot of features that are not immediately apparent.
Every editing project starts by reviewing the media you have on hand to edit. And, in Final Cut, that means using the Browser. While you probably use the Browser every day, it has a lot of features that are not immediately apparent.
Let me show you.
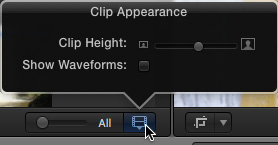
Let’s start with something simple: in the lower right corner, the slider to the left of “All” determines how many thumbnails are displayed for each clip. “All” means one thumbnail per clip. “2m” means a thumbnail every two minutes, while “30s” means a thumbnail every 30 seconds within a clip.
The clip icon allows you to vary the display size of these thumbnails using the Clip Height slider, while the checkbox allows you to show or hide audio waveforms.
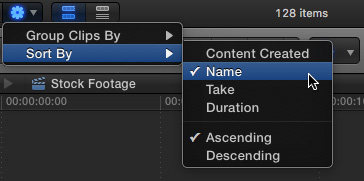
The Gear icon determines how clips are grouped and sorted. (Personally, I turn grouping off and sort by file name; however, this is totally a personal preference based on your project.)
The blue icon to the right of the gear in this screen shot displays all clips as thumbnails, while the gray icon to the right of that, displays clips as a list.
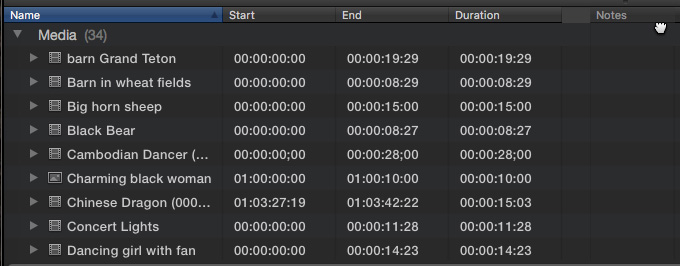
Displaying clips as a list allows you to change sort order by clicking a column header. You can change column organization by dragging a column header left or right; as I’m doing here by dragging the Notes column.
NOTE: When you choose Window > Revert to Original Layout, Final Cut not only resets all the panels in the app, it resets the Group and Sort order menus, as well as changing thumbnail timing and size. In other words, this option resets more than you might think.
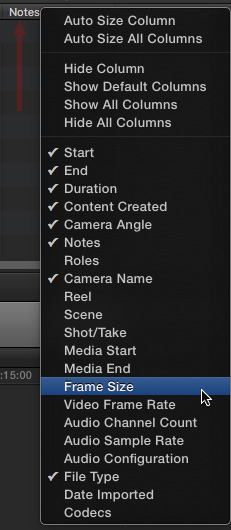
Right-click any column header to display a list of all available metadata columns. Those that are checked are currently displayed. Check or uncheck columns as you wish.
NOTE: To enter data for a field, such as Notes or Camera Name, select the clip and go to the Info tab in the Inspector.
To enable, or disable, skimming in the Browser, type “S“. When skimming is turned on, type Control-Y to display Skimmer Info. This display includes source clip timecode and any applied keywords.
FAVORITES

A very fast way to build a selects reel – or temporarily hide clips you don’t want to see – is to use Favorites. Select a clip, or a portion of a clip, then click one of these three icons in the Toolbar below the Browser.
Changing a Favorite setting does not change or remove a clip. It simply adds a tag, which we can then search on to see, or hide, the clips we want. You apply a Favorite setting to multiple ranges within the same clip.
NOTE: I have lots more on Favorites as part of my Final Cut Pro X training, available in my Store. Click here.
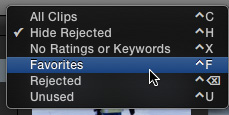
For example, to display only the clips, or clip ranges, that are flagged as a Favorite, click the menu at the top left of the Browser and choose Favorite. By default, all clips flagged as “Rejected” are not displayed in the Browser, EVEN THOUGH they are still contained in your Library.

NOTE: The only way to remove a clip from a library is to right-click the clip and select Move to Trash. This will remove a clip from the Library, but if the media is stored on external media will not delete the clip itself.
SEARCH AND STUFF
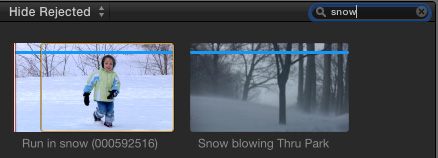
To search by file name or text in the Notes field, enter text in the search box in the top right corner. To clear a search, click the small “x” in a circle to the right of the search box.
To create an advanced search, click the small magnifying glass. (Yes, it is REALLY tiny!)
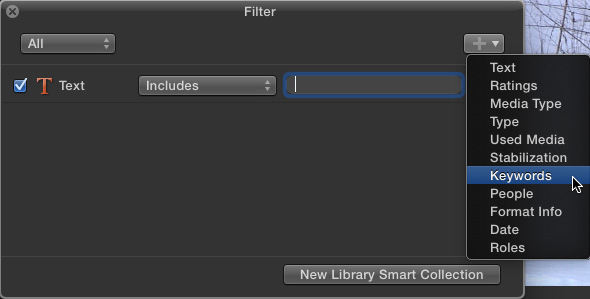
This opens the Search Filter dialog, where you can specify a number of different search criteria, then save it as a Smart Collection (which is a fancy name for a saved search).
For example, you could search on keywords AND media type AND the date the media was shot, all at the same time. The default is to search on text in the file name and Notes field.
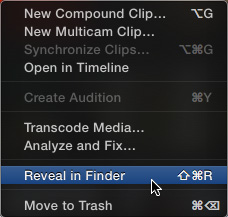
Right-click any clip to reveal a variety of media management options, including displaying the clip’s location in the Finder or transcoding the media into optimized or proxy files.
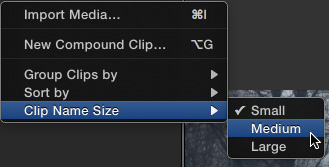
Right-click in the gray area inside the Browser, but outside a clip, to change the size of the displayed clip names, as well as sort order, import media or create a new compound clip.

To change a file name, click on the file name. However, changing the file name only applies inside Final Cut Pro X. The media file stored on your hard disk is not renamed.
NOTE: This is a good reason, if your camera shoots a lot of “CLIP001” files, to rename clips before bringing them into Final Cut. There are a number of utilities that can help, such as EditReady and Kyno.
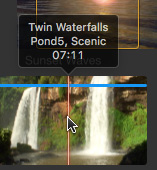
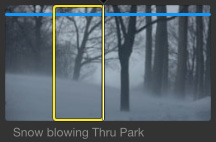
By the way, the blue bar at the top of a clip indicates that keywords have been applied to the clip. There are orange, red, green, blue, and purple bars. Here’s an article that explains all the icons inside Final Cut Pro X.

To select a clip, click it, or type C.
To select a portion of a clip, drag to select a range, or type I to set the In and O to set the out.
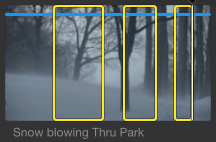
Once an In and Out has been set, press the Command key, then drag to select multiple ranges in the same clip. Multiple sections edit to the timeline in the order in which they were selected.
To delete a range, select it, then type Option+X. (Option+I deletes the In, Option+O deletes the Out.)
SUMMARY
The Browser is a very flexible tool for reviewing media. If I forgot one of your favorite tricks, let me know in the comments below.

2,000 Video Training Titles
Edit smarter with Larry Jordan. Available in our store.
Access over 2,000 on-demand video editing courses. Become a member of our Video Training Library today!
Subscribe to Larry's FREE weekly newsletter and
save 10%
on your first purchase.
13 Responses to Secrets of the Final Cut Pro X Browser
Larry, a very nice collection of hidden browser capabilities. One thing I’d like to see in your future blog-style posts is an obvious connection between a paragraph and the picture it references, by white space on the screen. You have the same amount of space between pictures and paragraphs, up and down the page. If you made the words nearer to the picture they are talking about, or put an extra space in between the final line and the next picture/topic, it would be easier at a glance to browse through an article and look for whatever you were interested in. Even if you are reading from top to bottom, sometimes you can get lost in the middle, if your attention is called away for a minute.
Brian:
Good point. I’ll see what I can do.
In ALL my articles, since I first began writing, the image is always above the text that references it. In 90% of the cases, the text that talks about an image is the paragraph immediately below it.
Larry
THANKS. I know all this stuff but forget about it. The tip on Grouping was just what I needed to get my clips displayed the way I like.
Thanks for some nice tips Larry! My personal whine is not being able to drag the icons into a screen arrangement a la FCP7 🙁
Stu
As always Larry much appreciated for taking the time to put together these very useful tips. Personally I like the way the article is paragraphed…
The ability to tag,sort and search media and then get that media to the timeline so quickly has been for me one the most exciting thing about FCPx.
Even once in the timeline using the Timeline Index is super handy. I commonly use the index to sort and select all of my titles i use as placeholders then disable (V) them before sending a clean version to graphics.
We badly need a way of isolating one clip in the Browser, without having to typing its name into the Search Field.
Because Reveal File in Browser, from the Timeline, takes us right back to the top of the Event, (not the Keyword) the clip is often lost amongst all the others, especially when in Film strip view.
This is mainly because there is no Source Viewer intermediate step, as in Legacy FCP and Avid MC. I love the benefits this provides, but I think we just a need a Command “Reveal Only this file in Browser”
John:
Put your playhead inside a clip in the Timeline. Type Shift + F. This highlights the Timeline clip in the Browser, matching the In and Out.
Does that work for you?
Larry
Thanks for an informative article.
One big issue I have with the browser, though, is that you cannot apply a search when looking to import files on your drives. You have to go to the Finder for that.
Is there a way to search from within FCP?
Thanks
Rou
Roi:
Very interesting – and you are correct. The only way to search for files on your hard disk is to use the Finder.
I thought we could search drives from the Media Import window. But we can’t.
Larry
Hi, Larry.
It would very useful for me and others too, I suspect, to be able to set one or more default browser column arrangements. Is this possible or likely?
Thank you
David
David:
This is a good comment.
Currently, Workspaces don’t record changes in Browser columns. In fact, there’s no way to save Browser column layouts, FCP X only remembers the current layout. I don’t know what the future holds, but I’ll pass your comment back to Apple.
Larry
Hi Larry-
Is there a way to batch group hundreds of clips into one giant clip so the browser is not so cluttered and so you don’t have to keep scrolling down to find the last clip used after each edit? i know it is simple to do in Edius, but can’t figure it out in Final Cut X.
Thanks!
Drew:
The easiest way I can think of to do this using multiple Events. There’s no limit to the number of Events (which are simply folders) that you can create in FCP X. The only limitation is that you can’t nest Events.
Larry