
In this technique, you’ll learn how to save custom audio filter settings in both Final Cut Pro X and Soundtrack Pro.
This tutorial was suggested by Rob Robinson, who wrote:
I’m editing a piece (first of 5 hours) that was recorded in a very live room. I’m happy with what I’ve achieved using [two audio filters in FCP X: the] Mud Removal effect plus an edited Fat EQ. Is it possible to save the parameters and apply it to the other four hours of material (other than manually)?
Larry replies: Yes for some filters in FCP X and almost all filters Soundtrack Pro, but not in FCP 7. However, you are only able to save presets for individual filters, you can’t create a preset that includes multiple filters.
NOTE: Some filters in FCP X do not allow saving presets. A quick way to tell is to click the Preset menu in the Inspector. If “Save Preset” is there, you can save customized presets.
FINAL CUT PRO X
Here’s how to customize audio filters in FCP X:
1. To apply an audio filter to a clip, select the clip.
2. Open the Effects Browser (Command+5)
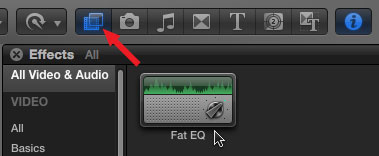
3. Locate the filter you want to apply to the clip. You can apply a filter to a clip in one of two ways:
a. If the clip, or clips, to which you want to apply the filter is selected, double-click the filter. It is instantly applied to all selected clips.
b. If the clip is not selected, drag the filter and drop it on top of the clip where you want to apply the filter.
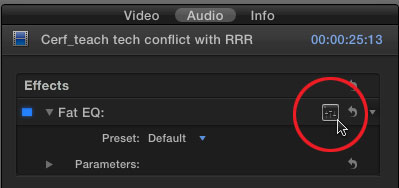
4. Make sure the clip is still selected, open the Inspector (Command+4) and click the small icon to the right of the filter name to open the filter interface.
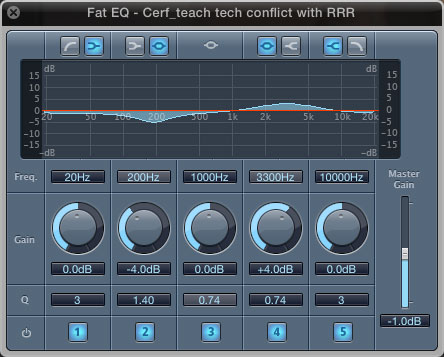
5. Adjust the filter to suit your needs. (It is WAY beyond the scope of this article to adequately cover audio filters. Check out this video training for details on some of the more popular filters and their settings.)
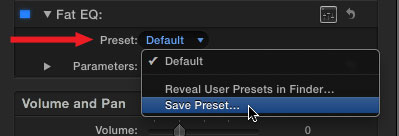
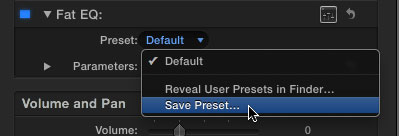
6. Once you have the filter adjusted to your satisfaction, click the Preset popup, and select Save Preset.
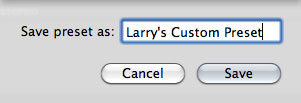
7. Give the preset a name – something that makes sense to you – and click OK.
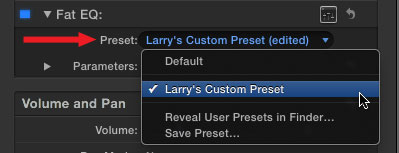
8. Now, whenever you need to reuse that setting, simply apply the filter to a clip, and select the customized preset from the Preset popup menu.
SOUNDTRACK PRO
The process is somewhat simpler for Soundtrack Pro because virtually every filter allows saving custom presets. Unlike Final Cut, which applies filters to clips, Soundtrack filters are applied to a track. This means that every clip in the track is modified by that filter.
Here’s how this works:
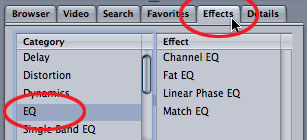
1. To apply a filter, select a track then click the Effects tab in the left pane of the interface.
2. The left column lists filter categories. The right column lists the filters inside a category.
3. In this example, double-click the Fat EQ filter to apply it to the selected track, or tracks.
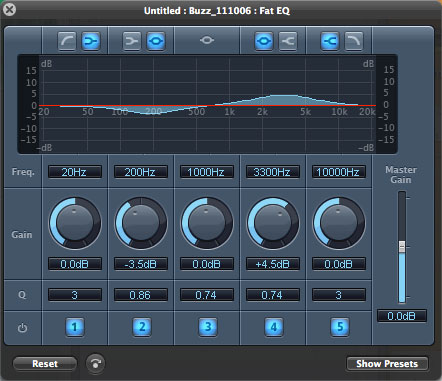
4. When you first apply a filter to a track, the filter interface opens up. Make whatever adjustments to the filter you feel are necessary. (Every filter interface is difference, but the process of saving presets is the same.)
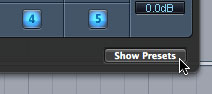
5. When you are ready to save your settings, click the Show Presets button in the lower right corner.
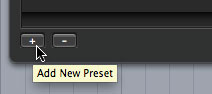
6. To create a new preset, click the Plus button in the lower left corner.
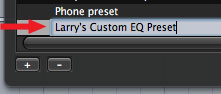
7. In the highlighted blank space, give the filter a name.
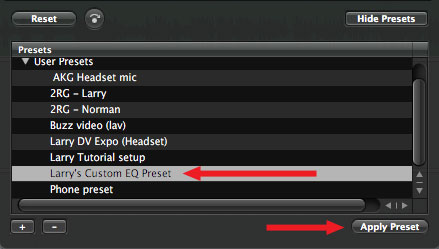
8. Now, whenever you need to apply that same setting, click Show Presets, then either double-click the preset you want to apply from the displayed list, or highlight the preset and click the Apply Preset button in the lower right corner.

By the way, if you ever need to see the audio filter interface again, click the Advanced button next to the filter name in the Effects window.

2,000 Video Training Titles
Edit smarter with Larry Jordan. Available in our store.
Access over 2,000 on-demand video editing courses. Become a member of our Video Training Library today!
Subscribe to Larry's FREE weekly newsletter and
save 10%
on your first purchase.
3 Responses to FCP X: Saving Audio Presets
[…] FCP X: Saving Audio Presets […]
I have 8 interviews that I am using for a documentary, and in my workflow, I have them trimmed down to the points i need them in the timeline. I am trying to adjust the equalization of the the clips to get a better sound, so what is the best workflow? Obviously I don’t want to adjust every single clip individually (speaker 1, speaker 2, speaker 1, speaker 3…etc) because that would take forever. I’ve come up with 2 solutions.
1) Would making each speaker a compound clip (kind of like it’s own audio track) and adjust the EQ to apply it as a whole. This makes the timeline a a whole much larger, and since audio is additive, would this create unwanted problems because of the “gaps” (where speaker 1 is silent because speaker 2 is speaking). I’m not sure if I was to cut these gaps out, if the adjustment would stay to not.
2) start with one clip for each speaker, adjust the EQ using the custom FAT EQ filter, and then save each one was a preset and apply them to the appropriate clips… sort of like saving a color correction preset for each clip.
Mike:
Both options work.
#1 is better if you expect to make changes to the sound during the edit. Gaps don’t cause any problems.
#2 is faster and easier, but harder to adjust once you’ve applied the filter to multiple clips.
Larry