
![]() There are many reasons to send a project from Premiere Pro to DaVinci Resolve. For example we could use Resolve to mix the audio or create new effects, but the main reason is using the color grading tools in Resolve for your sequence.
There are many reasons to send a project from Premiere Pro to DaVinci Resolve. For example we could use Resolve to mix the audio or create new effects, but the main reason is using the color grading tools in Resolve for your sequence.
Premiere has excellent color tools. Resolve’s tools are better.
Fortunately, it’s fairly easy to move projects between apps. Easy, but there are a lot of steps. Here’s how it works.
NOTE: Here’s a webinar that provides an overview of the Color page, as well as how to round-trip files between Premiere and Resolve.
SEND TO RESOLVE
(Footage courtesy: John Putch “Route 30, Too!” (www.route30trilogy.com). Click to see larger image.)
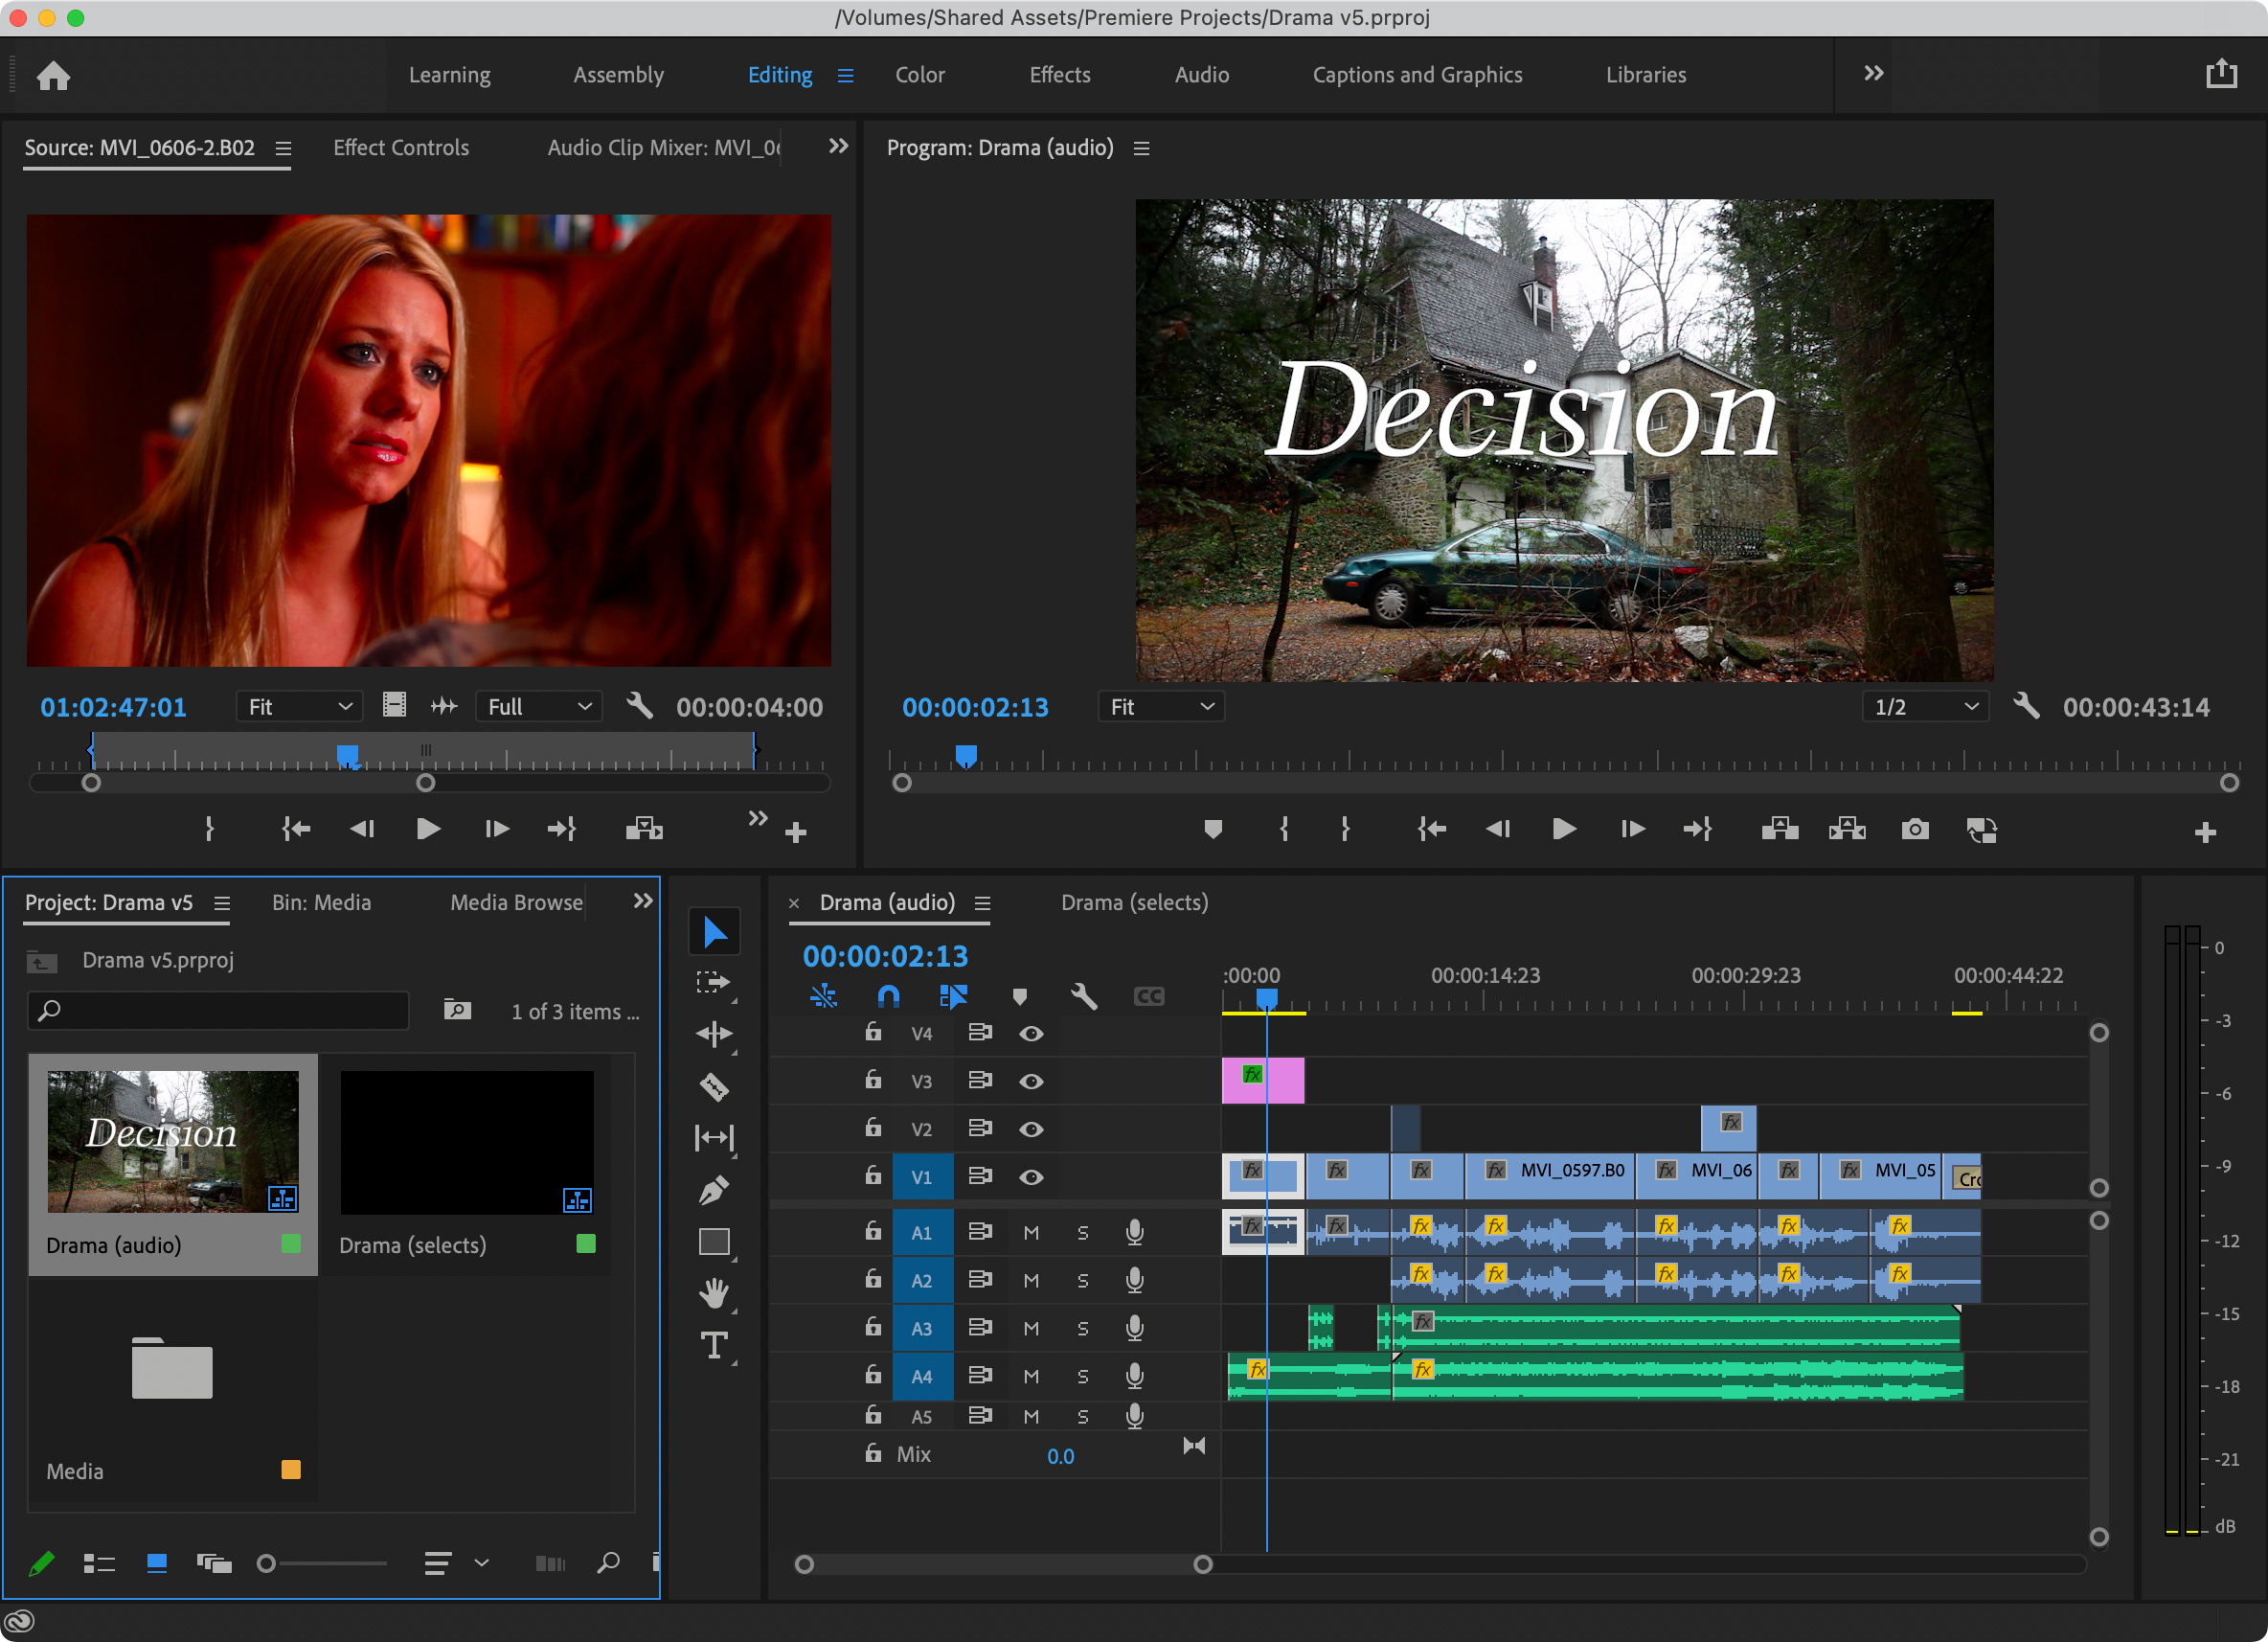
Here’s a sequence that I want to send to Resolve for color grading. To start, either:
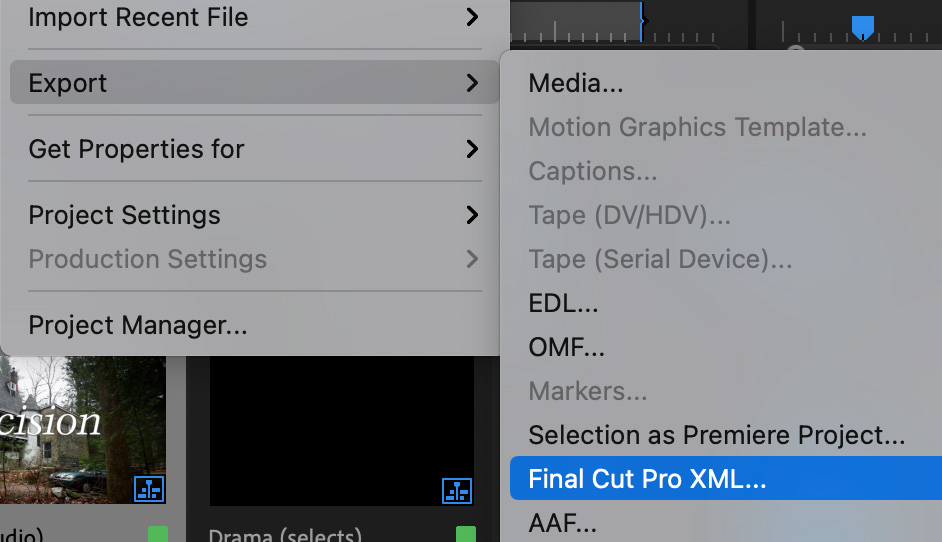
Then, select File > Export > Final Cut Pro XML. In the resulting window, select a location and file name for the exported file.
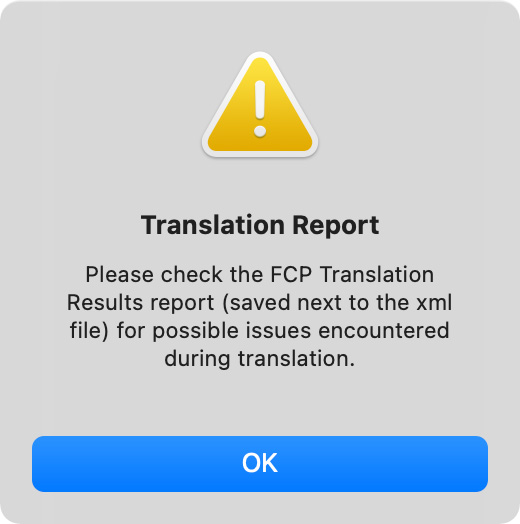
When export is complete, you may see a Translation Report. It is stored in the same location as the exported XML file. This lets you know there may be a problem with the export.
Resolve User Guide: In workflows using imported XML or AAF projects (or even EDLs), it’s easiest to relink and conform to the accompanying media files if they’re all located in a single directory path. Having media sorted into multiple directories is fine as long as they’re all within a single main directory that you can select at the appropriate stage of project import.
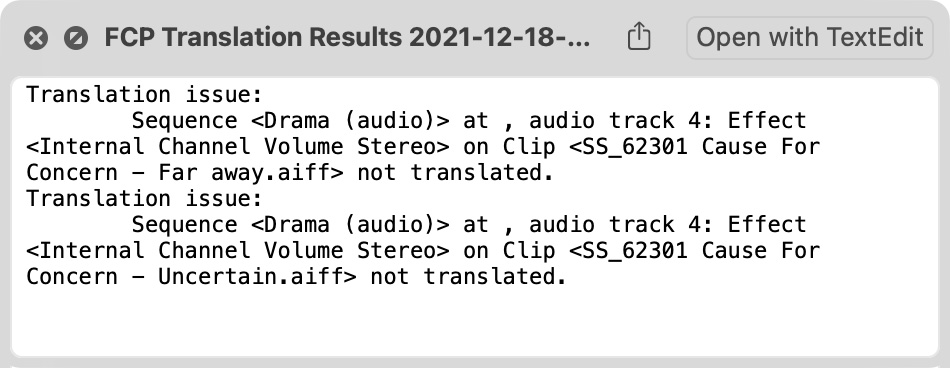
Opening it shows the problem. With both these notes, the problem file is an audio file. Since we are sending this sequence to Resolve for color grading, this isn’t an issue. However, it is a good idea to fix all translation problems before final delivery.
You are now done with Premiere, until it comes time to reimport the finished color graded files.
IMPORT INTO RESOLVE
Open DaVinci Resolve and create a new project.
NOTE: This tutorial is using the free version of DaVinci Resolve 17.4.2.
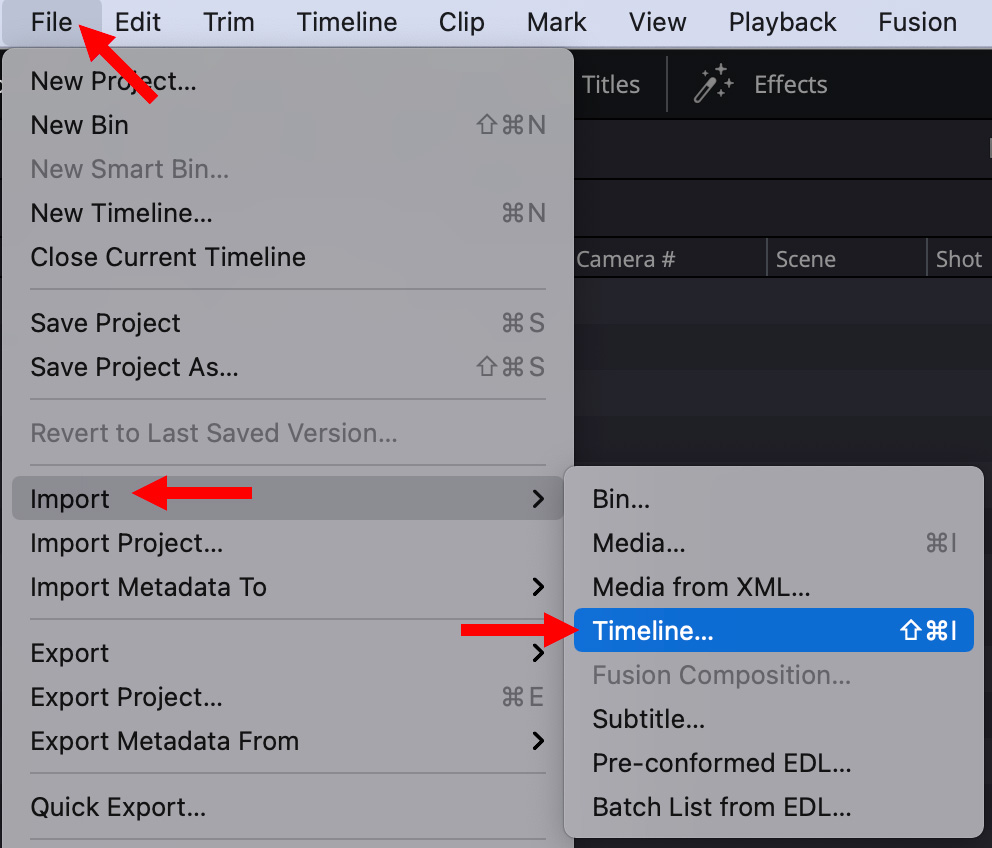
Choose File > Import Timeline (Shortcut: Shift + Cmd + I)

In this dialog, give the Timeline a name (red box). The defaults are all fine, except for Mixed frame rate format.
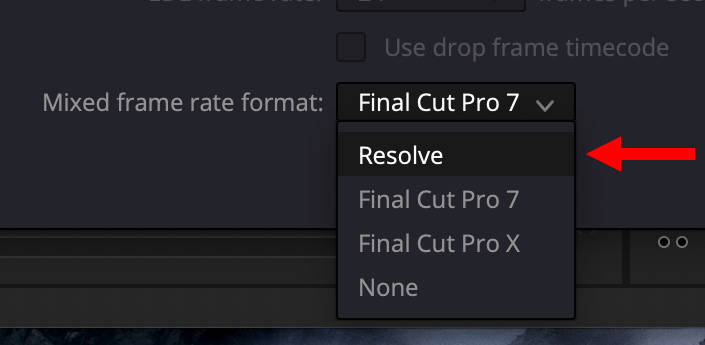
Resolve User Guide: If you are importing clips “containing a variety of frame rates, the Mixed frame rate format menu lets you choose the method used to conform mixed frame rates for rendering and playback…. For projects imported from Media Composer, Premiere Pro, Smoke, or other NLEs, you should leave this set to ‘DaVinci Resolve.'”
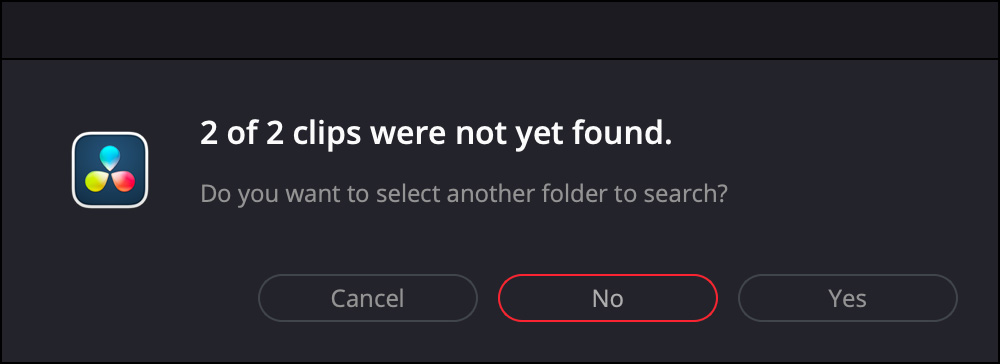
If media is missing, this box appears so you can decide what to do about it. Since the two missing files are a title and an audio file, we don’t need to fix this.
Resolve User Guide: “When importing XML project files from Final Cut Pro X, Premiere Pro, or legacy Final Cut Pro 7, DaVinci Resolve supports the import of Opacity, Position, Scale, and Rotation settings. Imported Composite and Transform settings for any given clip appear in the Inspector of the Edit page, or in the Edit Sizing mode of the Sizing palette in the Color page. If these settings have been keyframed, the animation will appear in DaVinci Resolve.”
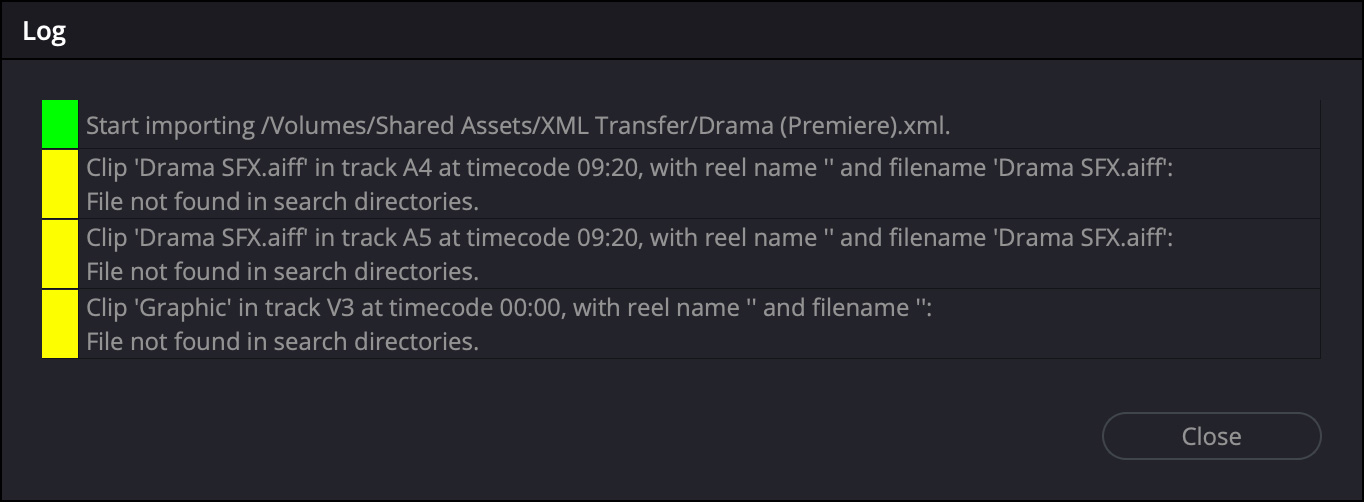
This log details any problems with the imported media or sequence.
Resolve flags missing media as red in the timeline. Titles are off-line because they are in a format proprietary to Premiere. This is OK because you are bringing the color graded files back to Premiere for final output, and the title will be replaced in Premiere.

(Click to see larger image.)
You can now switch to the Color page in Resolve and get to work.
EXPORT FINISHED FILES FROM RESOLVE
![]()
When color grading is complete, switch to the Deliver page (red arrow) to export the finished files from Resolve back to Premiere.
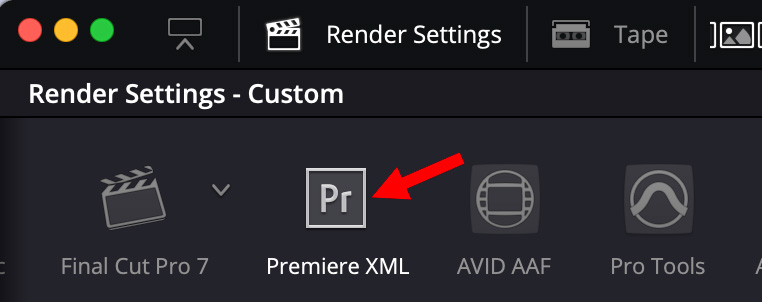
At the top left, scroll through the export settings until you see Premiere XML. This option will export the finished color movies, plus an XML file that explains to Premiere Pro what to do with them.
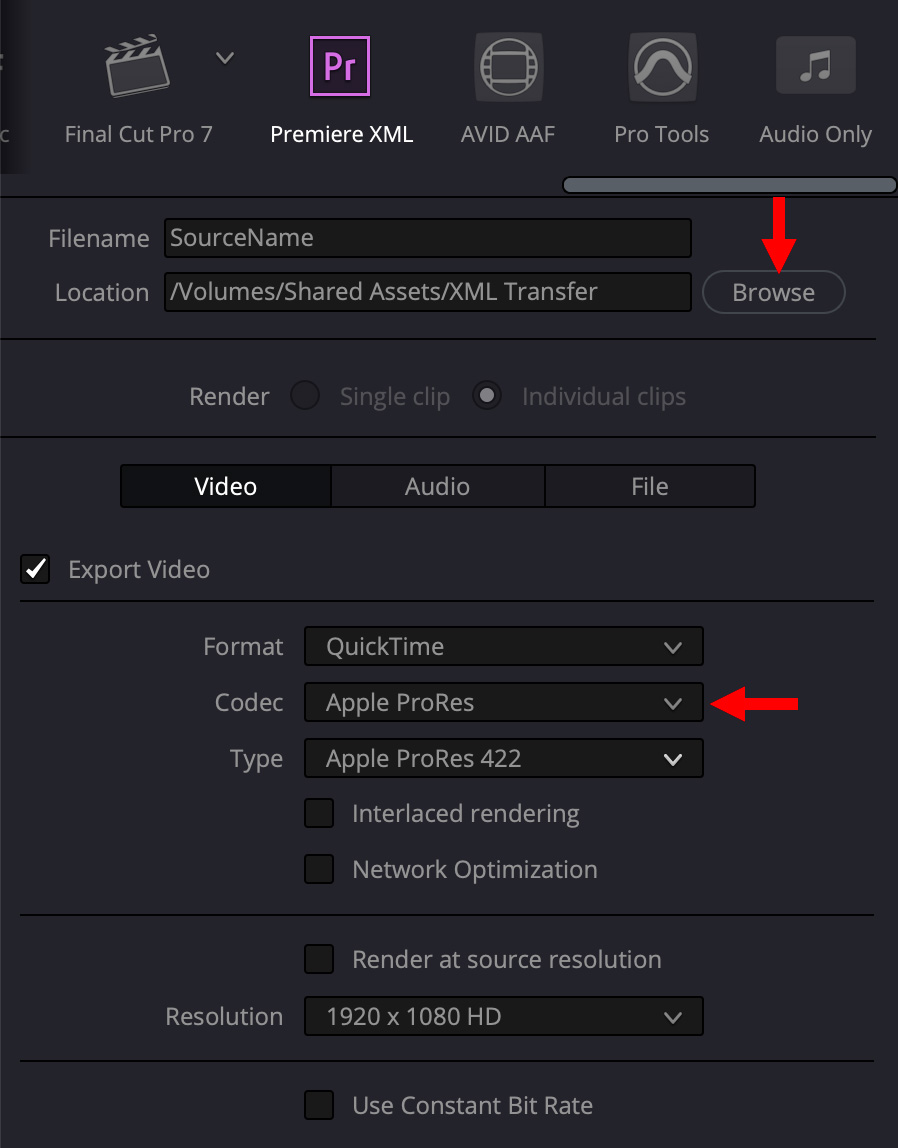
In the Render Settings window, on the left side, pick the location where you want these files exported (top red arrow), then the codec you want to use for the files (bottom red arrow).
NOTE: You can use either local or network storage as a destination.
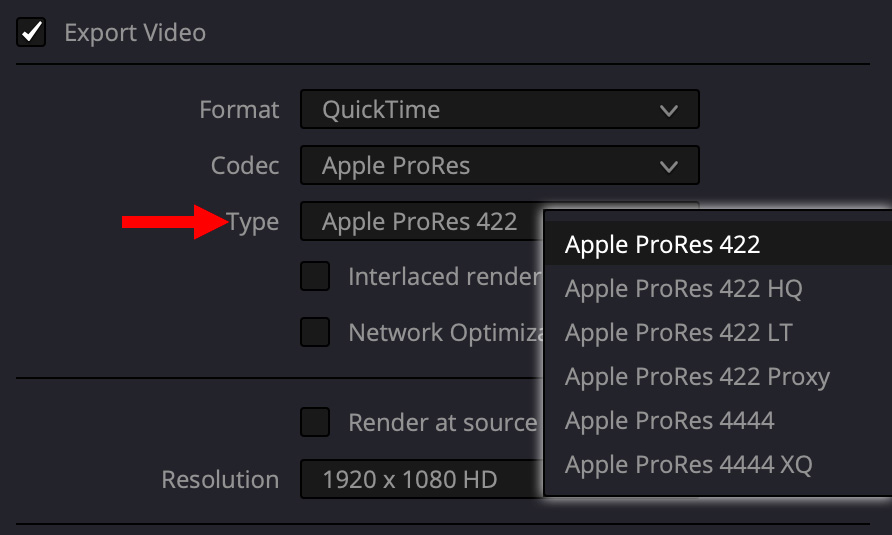
For most movies, ProRes 422 (or ProRes 422 HQ) are an excellent choice. However, you can select from any of the current ProRes formats. For HDR work, though, or animation, I recommend ProRes 4444.
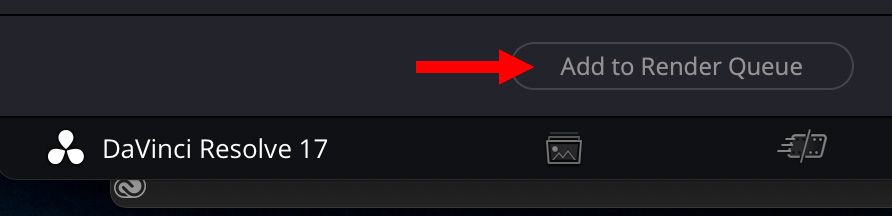
When you are happy with the settings, click Add to Render Queue at the bottom of this panel.
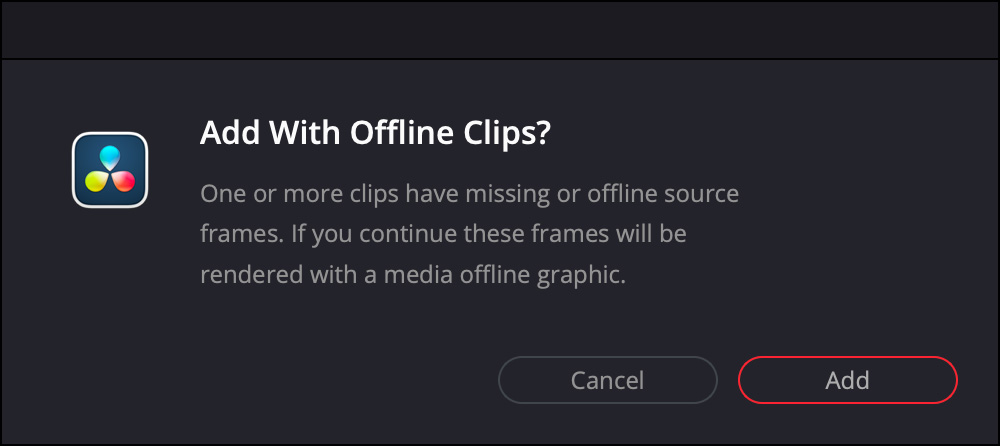
Resolve displays a warning that some clips are off-line. Since it will be easy to copy and paste clips from one sequence to another in Premiere, we can easily fix this problem once the color-graded footage is back in Premiere.
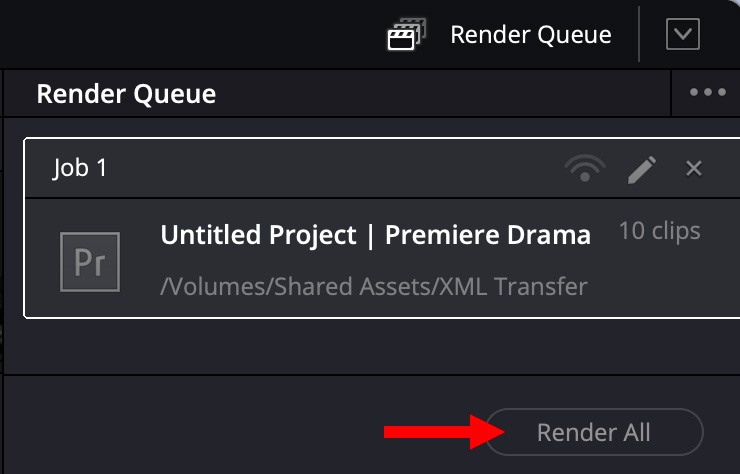
The Render Queue panel gathers all exports into one place so that you can export them when you want. When you are ready, click the Render All button.
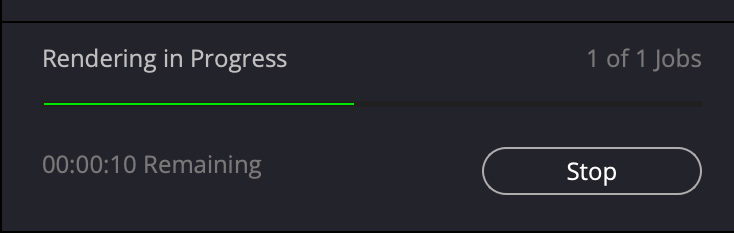
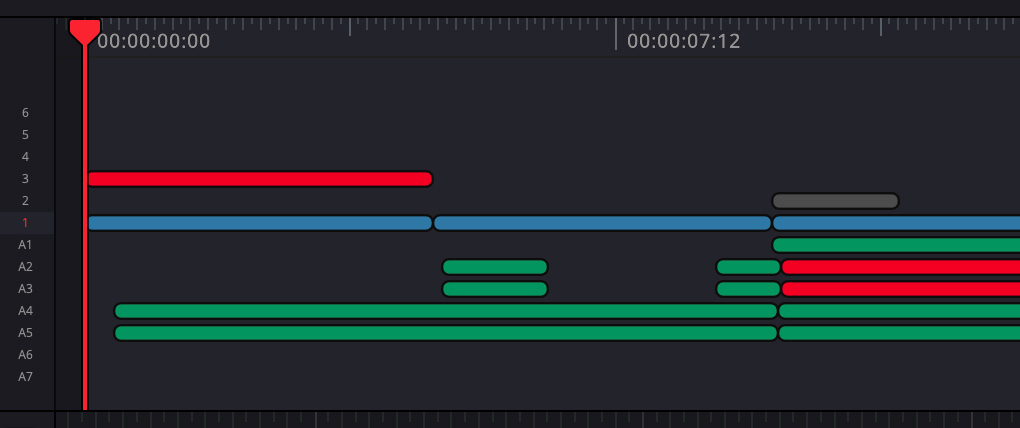
As a project renders, Resolve displays a green status bar in the Render Queue window, along with highlighting each shot as it is rendered. Resolves renames all the clips so that there’s no possibility of a new clip overwriting an existing clip.
At this point, you are done with Resolve.
NOTE: If you did both a color grade and audio mix in Resolve, both final video and audio would be exported at the same time from Resolve.
IMPORT INTO PREMIERE
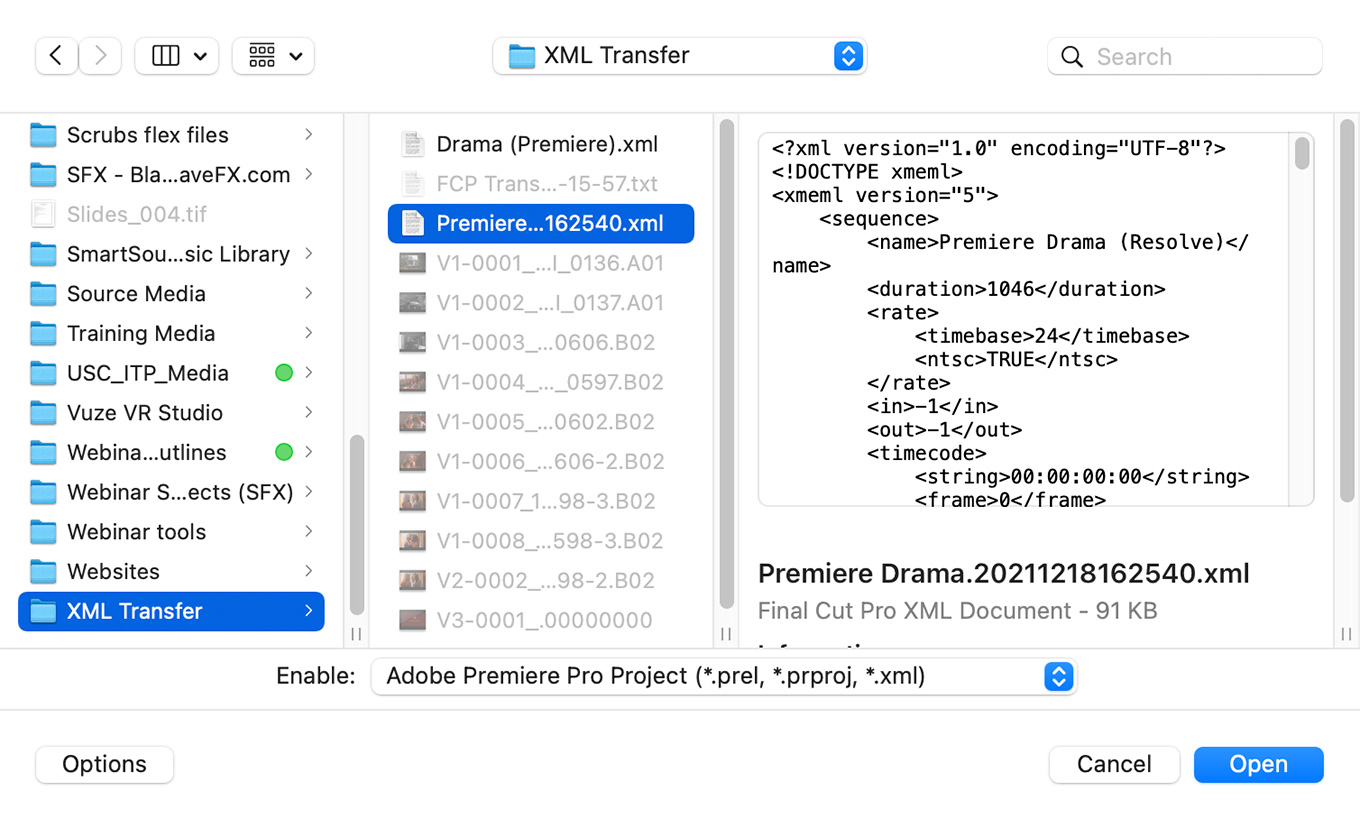
Choose File > Open and navigate to the location of the XML file exported from Resolve. Click Open to begin the import process. Since all the clips are in the same folder as the XML file, importing tends to be very quick.
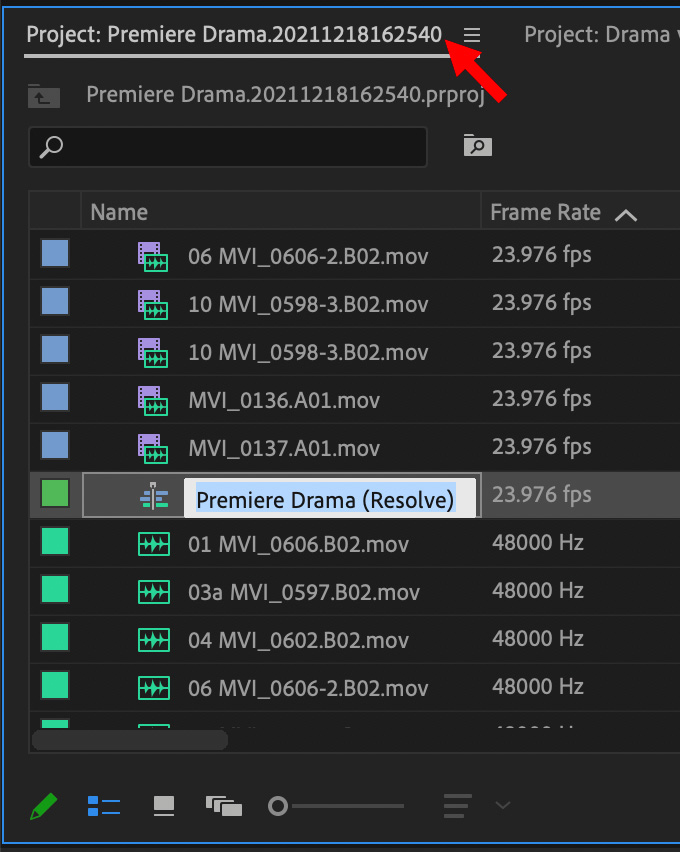
Premiere creates a new project for the imported clips and renames the sequence with “(Resolve)” at the end of the sequence name.
Open the sequence into the timeline and use copy/paste to copy the original title into the new sequence and fix any other missing clips. As well, verify that everything else in the sequence looks good, too.
NOTE: There are some special cases during export, specifically speed effects. The Resolve manual covers these exceptions in detail in the Chapter “Delivery Effects Processing.”
At this point, everything is color graded and back in Premiere ready for the final polish and ultimate export.
Cool.

2,000 Video Training Titles
Edit smarter with Larry Jordan. Available in our store.
Access over 2,000 on-demand video editing courses. Become a member of our Video Training Library today!
Subscribe to Larry's FREE weekly newsletter and
save 10%
on your first purchase.
2 Responses to Round-tripping Sequences from Adobe Premiere Pro to DaVinci Resolve – and Back
This is cool…but I wish it would work with VEGAS!
Gregg:
If Vegas can export an EDL or an AAF, you should be able to move it into Resolve.
Larry