
![]() There are many reasons to send a project from Final Cut Pro to Resolve. For example we could use Resolve to mix the audio or create new effects, but the main reason is using the color grading tools in Resolve for your project.
There are many reasons to send a project from Final Cut Pro to Resolve. For example we could use Resolve to mix the audio or create new effects, but the main reason is using the color grading tools in Resolve for your project.
Final Cut has excellent color tools. Resolve’s tools are better.
Fortunately, it’s fairly easy to move projects between apps. Easy, but there are a lot of steps. Here’s how it works.
NOTE: Here’s a webinar that provides an overview of the Color page, as well as how to round-trip files between Final Cut and Resolve.
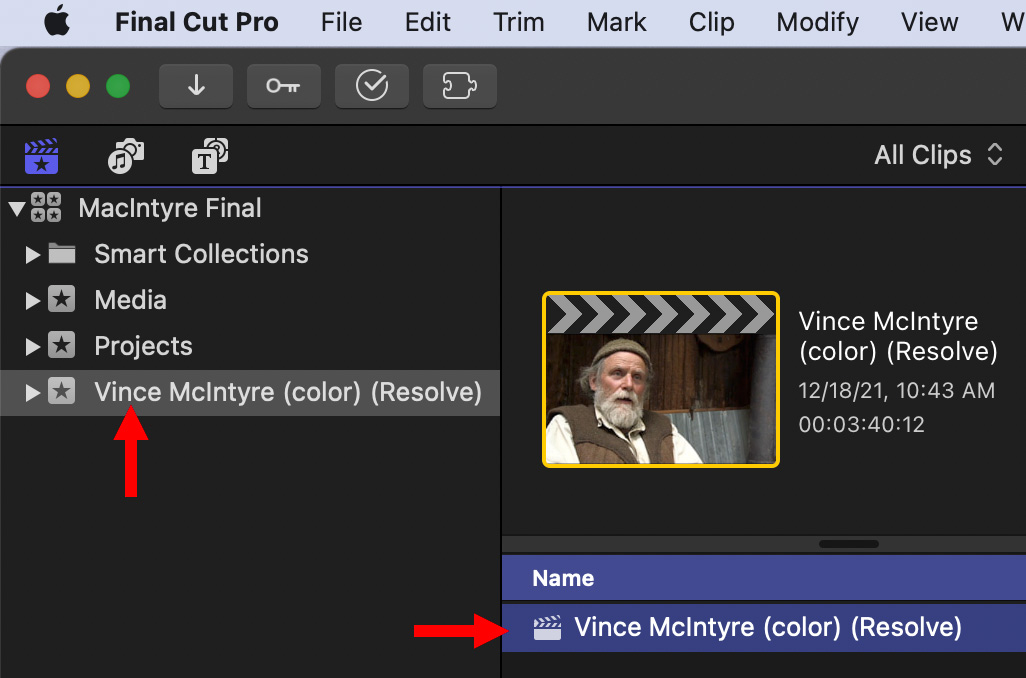
SEND TO RESOLVE

(Footage courtesy of EditStock (www.editstock.com). Click to see a larger image.)
Here’s a project that I want to send to Resolve for color grading. To start, either:
NOTE: Resolve supports compound and multicam clips from FCP X, so you don’t need to break them apart before exporting the XML file.
Choose File > Export XML.
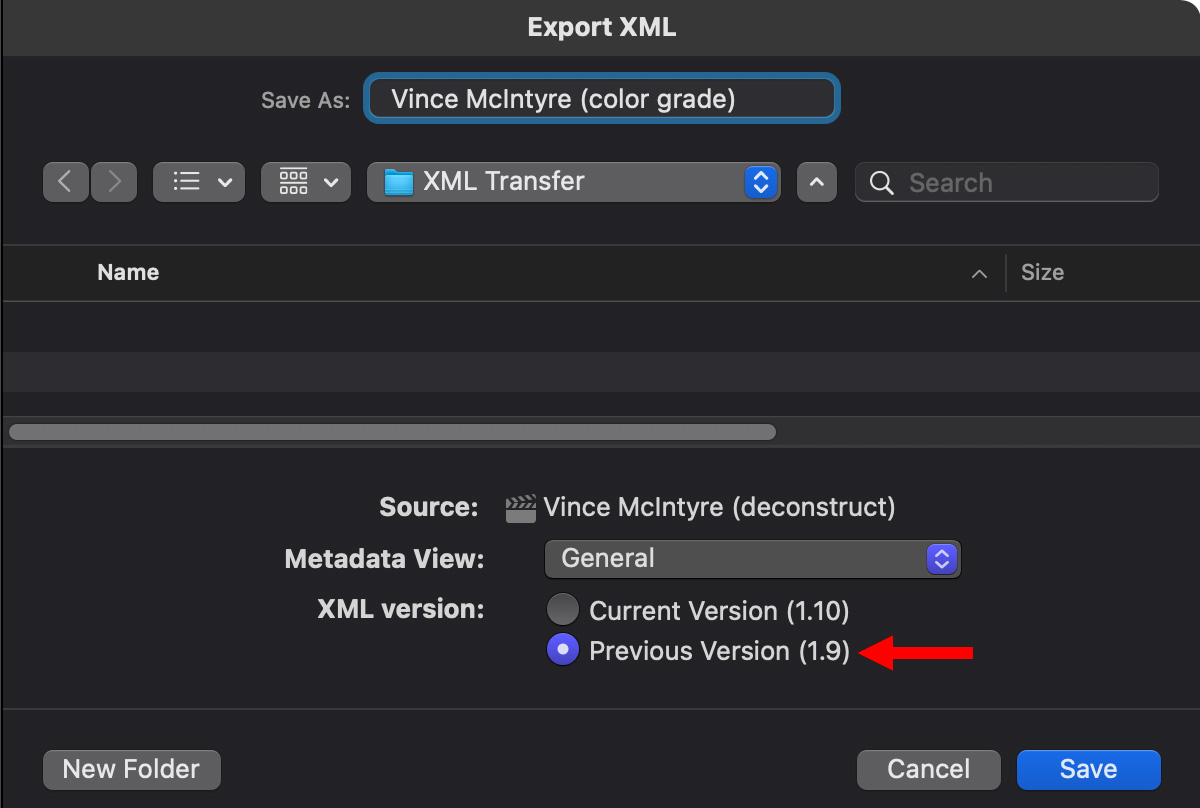
In this dialog, it is CRITICAL to choose XML version 1.9 (red arrow). Resolve only supports XML v1.3 – 1.9 at this point.
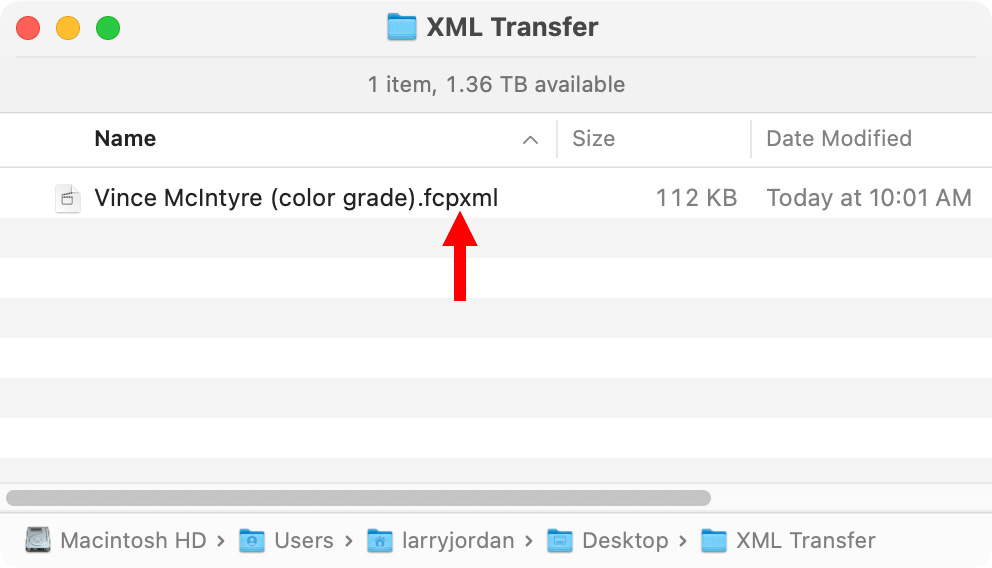
The rest of your choices are normal: give the file a name and pick a storage location. For this example, I created a folder called “XML Transfer” to store my files. You can pick any location you want; in this example, I put it on my server.
Resolve User Guide: “In workflows using imported XML or AAF projects (or even EDLs), it’s easiest to relink and conform to the accompanying media files if they’re all located in a single directory path. Having media sorted into multiple directories is fine as long as they’re all within a single main directory that you can select at the appropriate stage of project import.”
NOTE: You know you’ve exported the right version if it has an “FCPXML” file extension. Version 1.10 and later create “FCPXMLD” files, which won’t work.
At this point you are done with Final Cut until it comes time to reimport the color graded files.
IMPORT INTO RESOLVE
Open DaVinci Resolve and create a new project.
NOTE: This tutorial uses the free version of DaVinci Resolve 17.4.2 so you can experiment with this yourself.
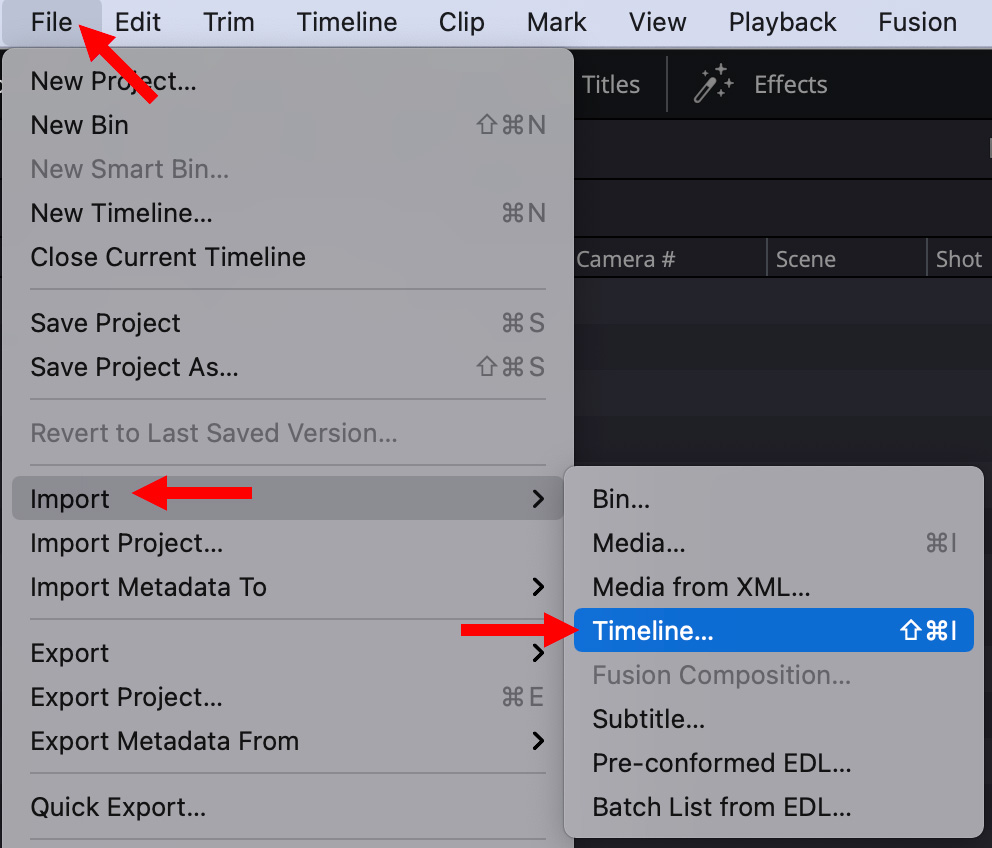
Choose File > Import > Timeline (Shortcut: Shift + Cmd + I).
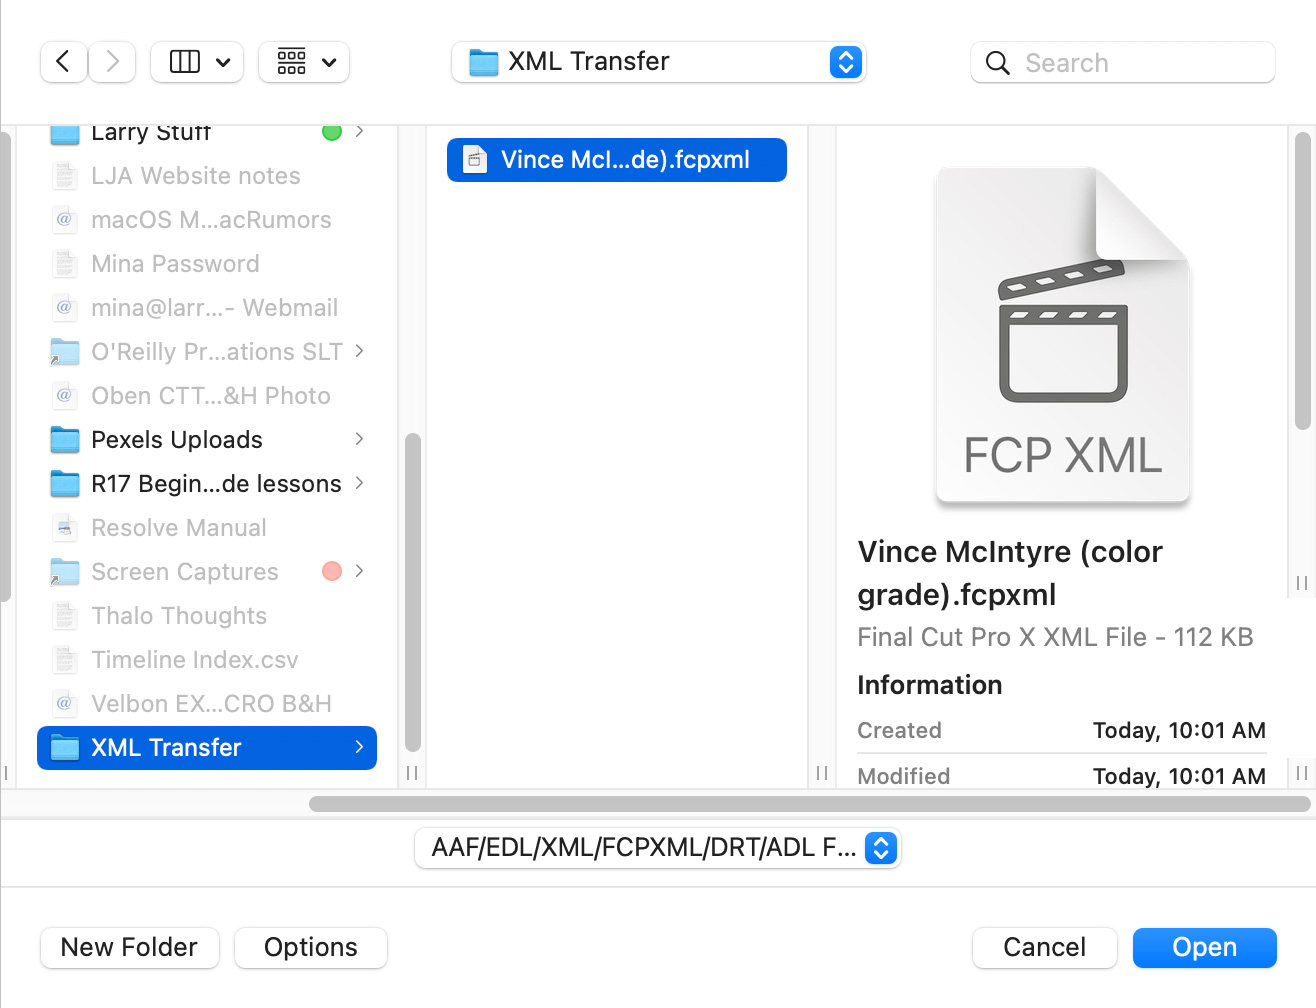
Select the XML file you exported from Final Cut in the file picker window and click Open.
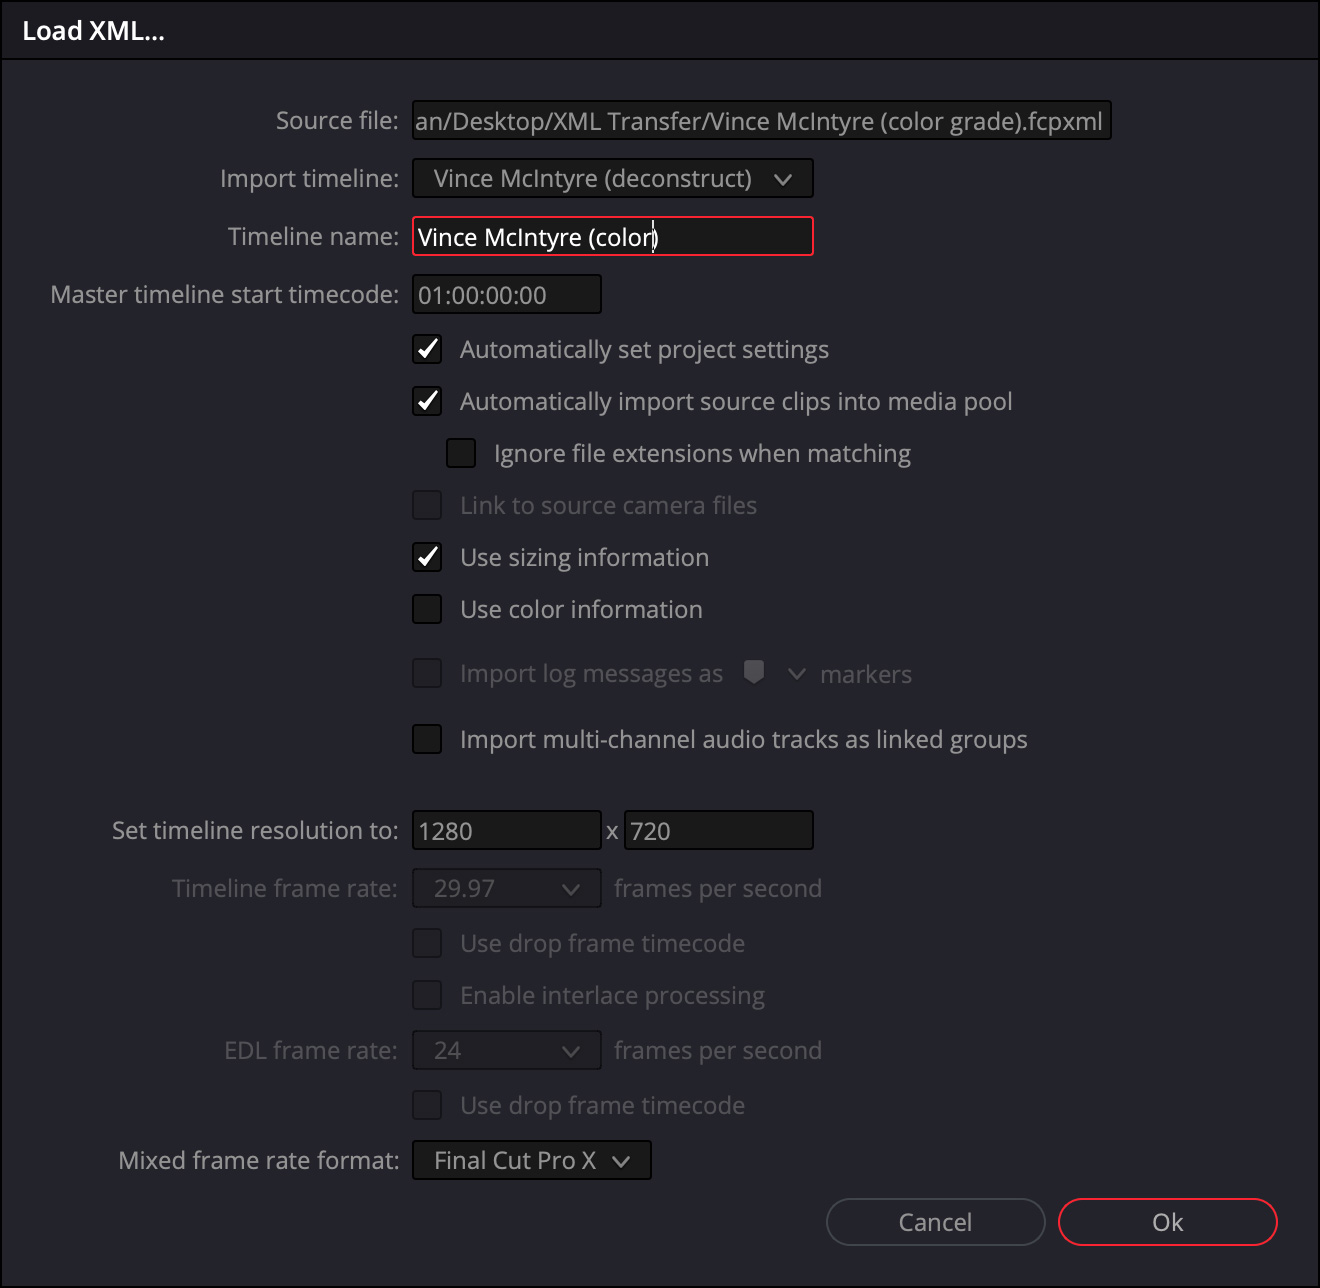
This dialog appears in Resolve. Give the Timeline a name (red box). If you are color grading, the default choices are fine, they simply match Resolve to the project settings in Final Cut. Then click OK.
Resolve User Guide: “When importing XML project files from Final Cut Pro X, Premiere Pro, or legacy Final Cut Pro 7, DaVinci Resolve supports the import of Opacity, Position, Scale, and Rotation settings. Imported Composite and Transform settings for any given clip appear in the Inspector of the Edit page, or in the Edit Sizing mode of the Sizing palette in the Color page. If these settings have been keyframed, the animation will appear in DaVinci Resolve.”

A log appears, detailing any problems that occurred with the transfer.
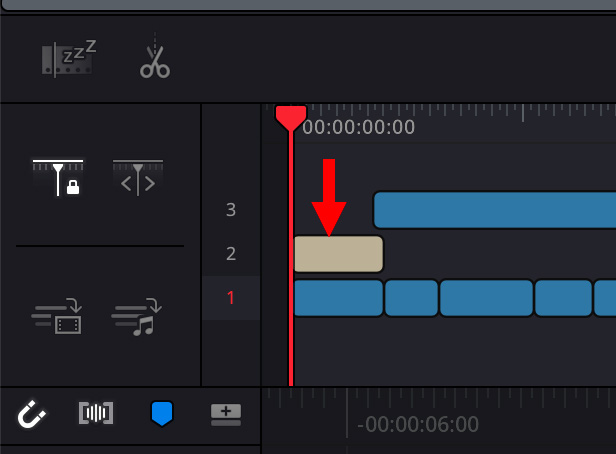
Resolve does not import titles (gray box), because they are in a format proprietary to Final Cut. This is OK because you are bringing the color corrected files back to Final Cut for final output, and the title will be passed through Resolve and reappear in Final Cut.
Any files that are missing will be flagged red and you can relink them in Resolve. In this case, though, everything relinked perfectly.

(Click to see larger image.)
You can now switch to the Color page in Resolve and get to work.
EXPORT FINISHED FILES FROM RESOLVE

When color grading is complete, switch to the Deliver page (red arrow) to export the finished files from Resolve ready for reimport into Final Cut.

At the top left, scroll through the export settings until you see Final Cut Pro. Click the small down-pointing arrow and choose Final Cut Pro X.
This option will export the finished color graded movies, plus an XML file that explains to Final Cut Pro X what to do with them. It will also pass through any unprocessed clips, like titles.
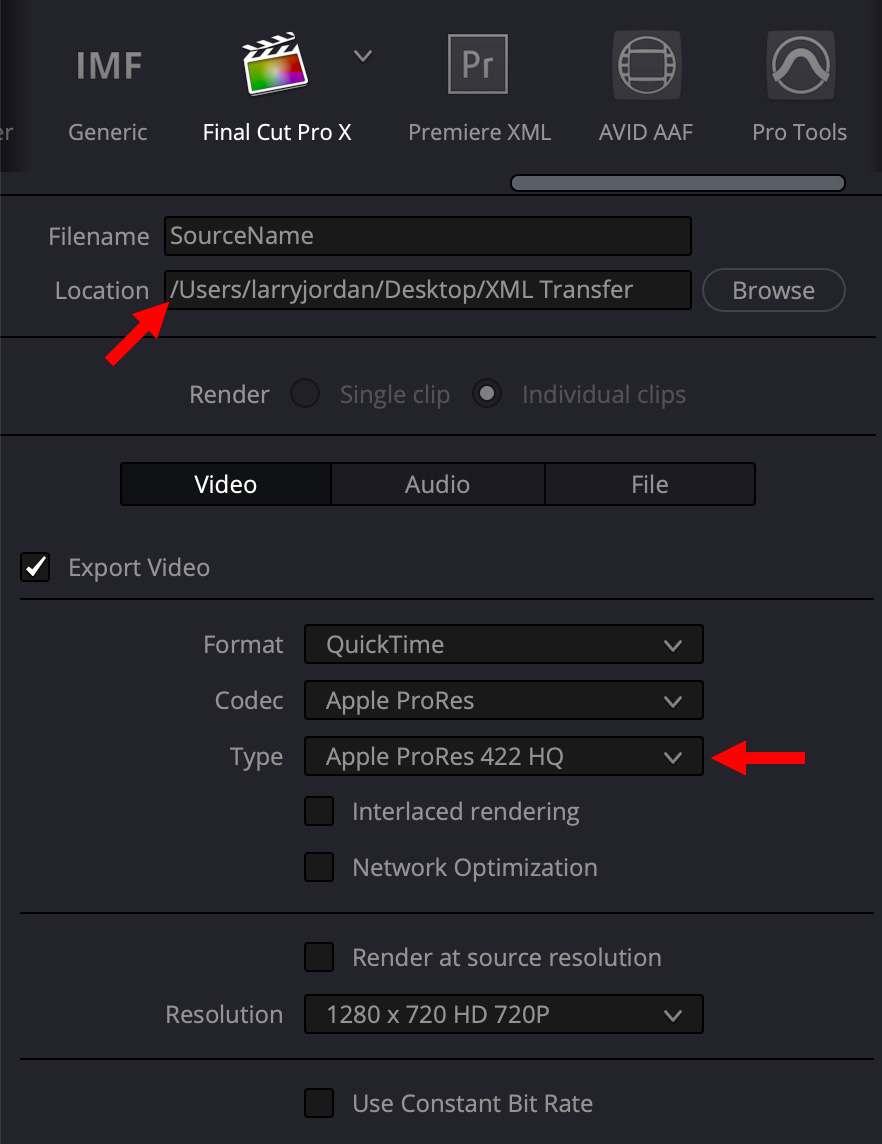
In the Render Settings window, on the left side, pick the location where you want these files exported (top red arrow), then the codec you want to use for the files (bottom red arrow).
NOTE: You can use either local or network storage as a destination.
For most movies, ProRes 422 HQ is an excellent choice. For HDR work, though, or animation, I’d recommend ProRes 4444.

When you are happy with the settings, click Add to Render Queue.
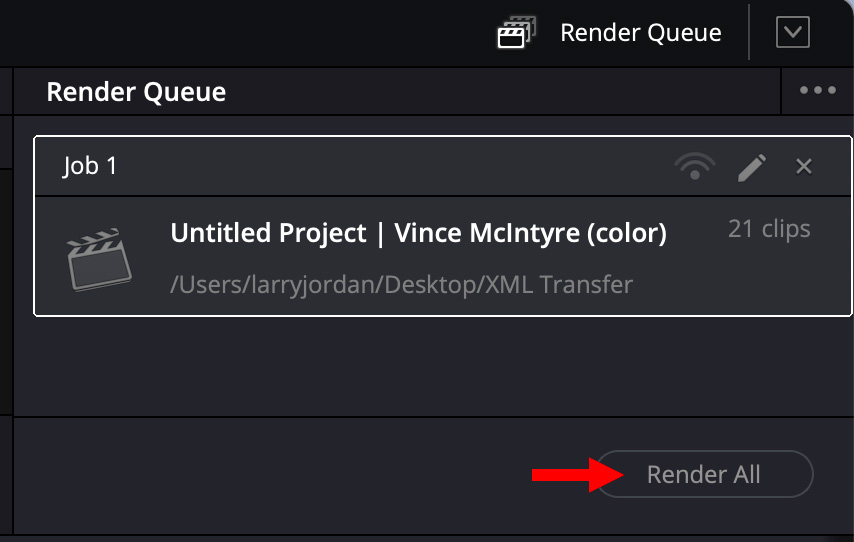
This Render Queue panel gathers all exports into one place so that you can export them all at once when you want. When you are ready, click the Render All button.
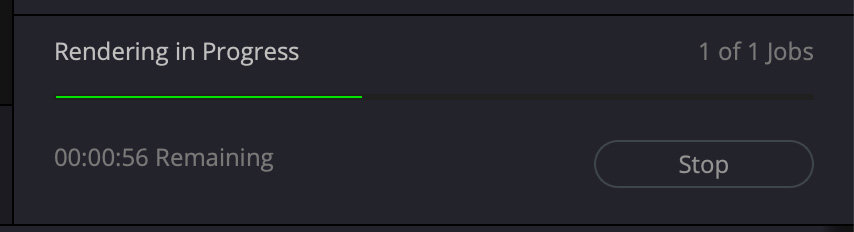
As a project renders, Resolve displays a green status bar in the Render Queue window, along with highlighting each shot as it is rendered.
You are now done with Resolve.
NOTE: If you both color graded and audio mixed in Resolve, both final video and audio would export at the same time from Resolve.
IMPORT INTO FINAL CUT
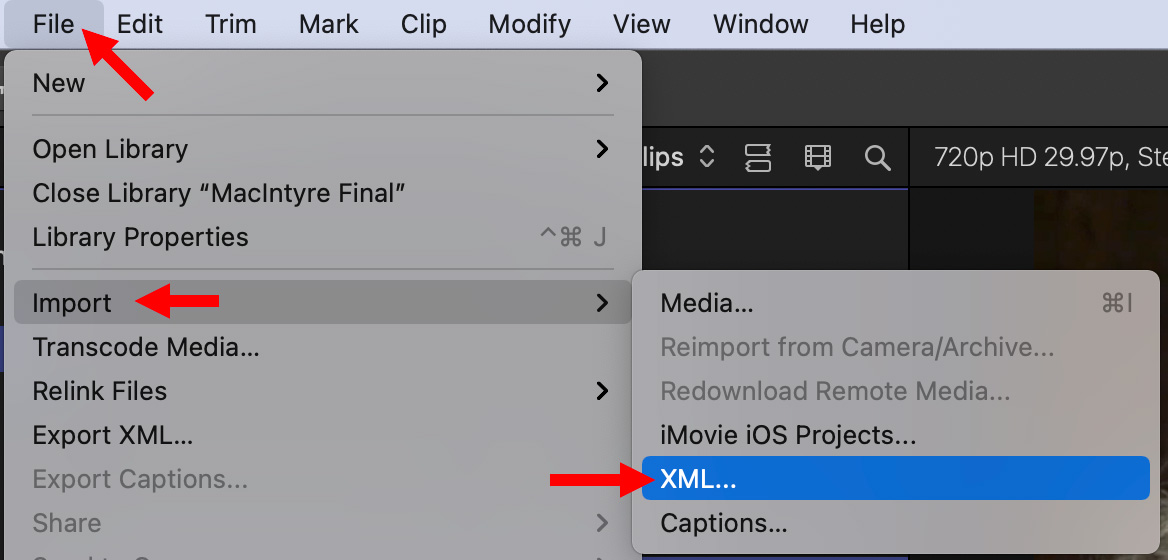
Open the Library containing the original project. Then, with the Library selected, choose File > Import > XML.
NOTE: You do not need to create a new event or project. Simply select the Library.
Navigate to the XML file that Resolve created and select it.
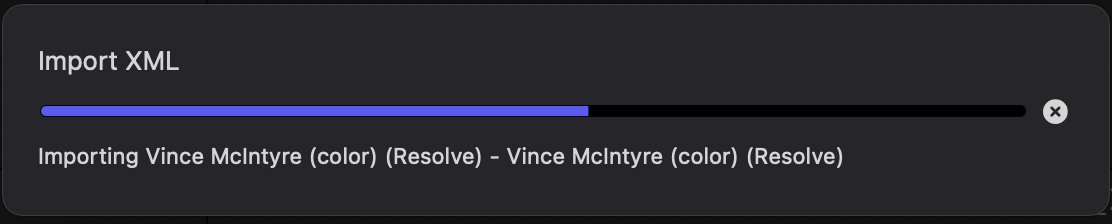
Final Cut displays a progress bar during the import, but, even for large projects, importing is quick.
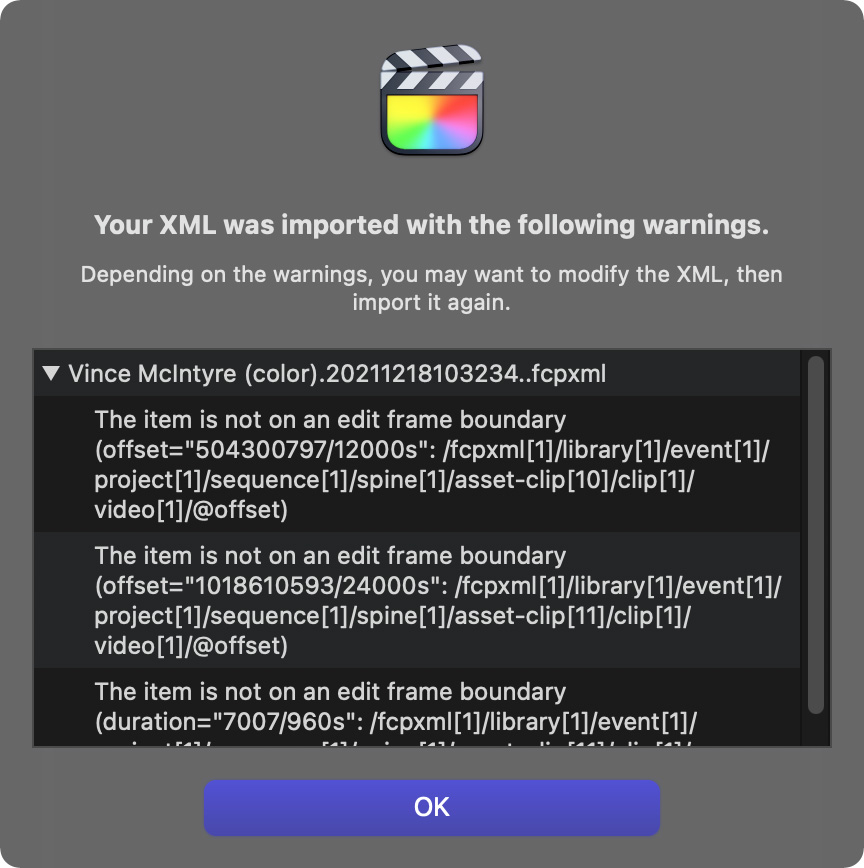
This window displays any problems that occurred. Make note of any problem areas you need to check, then click OK.
A new bin and project are created, containing all the color graded clips.
Double-click the Project name to open it in the timeline, then verify that everything transferred OK.
Notice that all titles were preserved and most are still OK. A few, more complex, titles may need to be rebuilt but the durations, locations and text content were preserved.
NOTE: There are some special cases during export, specifically speed effects. The Resolve manual covers these exceptions in detail in the chapter “Delivery Effects Processing.”
At this point, everything is color graded and back in Final Cut ready for the final polish and export.
Cool.

2,000 Video Training Titles
Edit smarter with Larry Jordan. Available in our store.
Access over 2,000 on-demand video editing courses. Become a member of our Video Training Library today!
Subscribe to Larry's FREE weekly newsletter and
save 10%
on your first purchase.
9 Responses to Round-tripping Projects Between Final Cut Pro and DaVinci Resolve
moving projects between FCP X & Resolve is made easy in this tutorial.Thank you very much….
A very helpful tutorial. Presumably, projects can be imported from FCP and exported for use in Premier. If so, that’s very useful!
Philip:
Correct. You can import from FCP, then send it back to Premiere. And vice versa.
Larry
Useful and well explained as usual. Thank You !
When i back to Davinci I can’t extend my clips length!
Rakish:
From this brief description, it sounds like your clips have no “handles,” which is extra media before the In and after the Out of the clip that you created in Resolve. The length of these handles depends upon where the clips originated, how they were exported, and how they were trimmed in both DaVinci Resolve and Final Cut Pro. Check the User Manual / Help pages for assistance with exporting.
Larry
Hi Larry, This is an exclent and very comprehensive old post, that I have used as successfull refrence for years. Today I am having problems while rendering my color graded sequence in Resolve, to be sent back to FCPX. Whenever the Resolve Status Bar gets to 99%, it gets stuck and the beachball of death appears. The rendered files are correctly and completely rendered at it’s destination but the process never gets to the point of making the xml file I need to import in FCPX. Any ideas or workarounds? Thanks a lot!
EBM:
Hmm… I’m sorry you are having this problem.
It sounds like a Resolve problem with creating the XML file. I would contact Resolve support.
Larry
Thanks for your reply. So far, the process to make the XML does take place until 100% but it takes a ridiculous amount of time (an extra hour after having rendered all of the clips). The thing is that the xml is not very complete when I import it back in FCPX (Clips missing and/or incomplete). The imported sequence looks way different than the one I sent in first place. I will eventually contact Resolve support to ask them why this is happening. I’ve been doing this for years before but never for a long project (3 half and hour episodes).
Thanks for taking the time!