
 [ Please read my Disclosure Statement covering product reviews. ]
NOTE: I discovered this filter while researching my recent webinar:
3rd-Party Plug-ins for Final Cut Pro X.
Today is a time where everyone wants to shoot using natural light, or, put another way, not one wants to lug lights around anymore. During the day, this isn’t necessarily a bad thing, but at night… well, things are different.
One of the main differences between shooting during the day and shooting at night is that there is a significant decrease in the amount of available light at night. (Strange, but true.) What this means is that if you are using low-end cameras that are optimized for shooting in daylight, your night images are going to look very noisy.
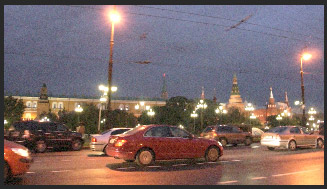
Noise is defined as grain or artifacts which mess up an otherwise very interesting shot. You can see an example of this in the screen shot above. The noise is everywhere, but is especially visible in the sky; it looks like excessive grain. (Footage courtesy of Neat Video.)
In fact the noise in this image is SO bad, that it gets in the way of the audience appreciating your incredible night-time composition and story-telling.
There are a number of companies that also provide video noise reduction filters; Boris FX and Red Giant come immediately to mind. But a company that specializes in video noise reduction is Neat Video (www.neatvideo.com). Their Reduce Noise filter is fast, easy to use and creates some amazing results.
WHAT IT WORKS WITH
The Neat Video Reduce Noise filter works with:
(I’m expecting a release for Bic pens later this month; um, that’s a joke.) For this review, I’m uisng Final Cut Pro X, though the results should be the same regardless off what software you use the filter with.
HOW IT WORKS
After you download and install the filter from the Neat Video website, you use it like any FCP X filter:
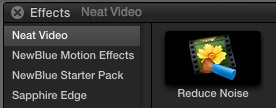
The Reduce Noise filter is located at the top of the Inspector. Reducing video noise is a three-step process:
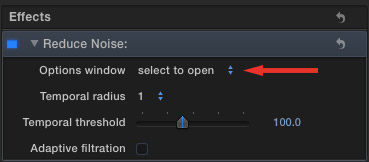
To begin the process, double-click the “select to open” popup menu to display the analysis and settings window.
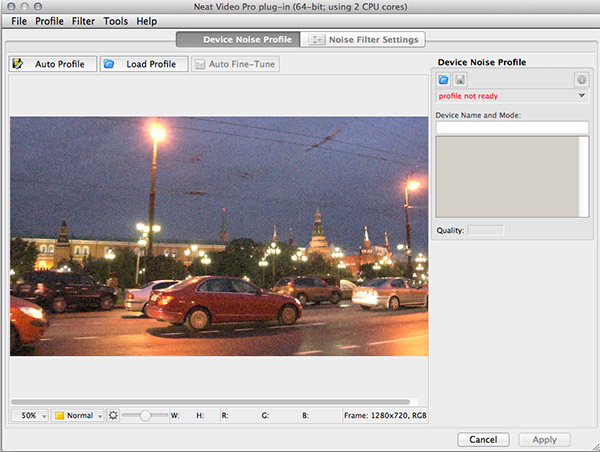
This allows you to examine the video clip in detail at a variety of sizes. This is fine for people with lots of time. I just want to get the clip fixed and get on with my edit.
NOTE: Neat Video has a lot more information about how to use and adjust, the filter on their website.
This window provides a wide variety of settings and tools, but, for simplicity and speed…

Click the Auto Profile button in the top left corner. This tells the filter to analyze the noise in the clip. Analysis is fast, but it isn’t instantaneous. (You can also save analysis profiles if you have a lot of clips to correct. This is useful if you shot a bunch of angles of the same night scene using the same camera on the same night.)

Select an area that contains a sample of the noise you want to get eliminate. In this example, I’m selecting a portion of the sky which makes it really easy to identify noise vs. essential image detail.

Click the Apply button to apply the corrections to the clip. The speed of applying the filter depends upon the duration of the clip, the frame size of the clip, the amount of noise in the clip, the temporal radius, and the speed of your processor.

In my case, with this clip, this felt like about 3x real-time; it went too quickly for me to want to spend the time to actually time it. The filter displays a thermometer to give you a sense of how long to wait.

Here’s the result – displayed at 25% size in the Final Cut Pro X Viewer. The image improvement is pretty darn amazing!

Compare these detail images which are both at 100% scale. The one on the left is before processing. The one on the right is after. Removing noise from an image generally softens it as well; there’s no such thing as a free lunch. So the challenge for developers is to reduce the most noise while softening the image the least.
Using the filter is fast, simple and straight-forward, provided you remember to double-click the Options menu in the Inspector to analyze the clip.
SUMMARY
The Neat Video Reduce Noise filter can save your posterior. The ideal solution to shooting in low light situations is to bring some lights. However, for those situations where that isn’t possible, this filter can convert trashy video into something near art in less time that it took to read this review. Both your clients and your viewers will be grateful.
PRICING
Pricing ranges from $49.90 to $199.90, depending upon the software you are using it with. They also have a free demo trial version. The version I am reviewing is the Pro plug-in for Final Cut Pro X, which costs $99.
Visit their website at www.neatvideo.com.
Visit our website to see Final Cut Pro Training & more!

2,000 Video Training Titles
Edit smarter with Larry Jordan. Available in our store.
Access over 2,000 on-demand video editing courses. Become a member of our Video Training Library today!
Subscribe to Larry's FREE weekly newsletter and
save 10%
on your first purchase.
16 Responses to Product Review: Neat Video Reduce Noise Filter
← Older Comments-
 Coburn says:
September 12, 2019 at 4:09 pm
-
 Larry says:
September 12, 2019 at 4:14 pm
← Older CommentsIS THIS (NEAT Noise Filter) STILL AVAIALBLE FOR FINAL CUT PRO 7. IT’S NOT ON THEIR WEBSITE
Coburn:
Try contacting the folks at Neat directly – via Support. They may still sell a legacy version.
Larry