
![]() [ Please read my disclosure statement on product reviews here. ]
[ Please read my disclosure statement on product reviews here. ]
The ioSafe 214 is like a black box recorder on an aircraft — if disaster strikes, this unit helps guarantee to get your data back. Designed to protect your data in fires of up to 1500 degrees for 30 minutes, or submerged in water up to 10 feet deep for three days, think of this as the “What’s the worst that could happen?” box.
Designed as an easily-accessible network server that runs on Mac, Windows, or Linux, this system can serve as a server for simple editing, or, more importantly, as a Time Machine backup for all your critical data.
NOTE: ioSafe was founded in 2005 and is currently privately held. Their first product in this category was the N2, which was released in 2012. The current 214 model was released in November, 2013. The 214 is based on the Synology DiskStation 214, from which ioSafe took the name.
WHAT I WAS SHIPPED
The folks at ioSafe lent me a 2 TB ioSafe 214. Because this is configured as a RAID 1, the two internal drives format to 1 TB of usable storage space. (See my note on RAID configurations later in this review.) The retail price starts at $899 for a 2TB unit, and grows to $1,999 for an 8 TB unit using enterprise drives.
NOTE: Here’s a link for a discussion of desktop- vs. enterprise-class drives: www.eaegis.com/the-differences-between-an-enterprise-class-hdd-and-desktop-class-hdd.aspx.
SECOND NOTE: If you have extensive storage needs, I’ve been told that ioSafe is coming out with a similar unit with a much larger storage capacity within the next couple of months.
The ioSafe website is: iosafe.com.
A NOTE ON DATA RECOVERY
Built into the purchase price of the ioSafe is a no-deductable first-time guarantee to recover your data in the event of disaster. (They also have additional options for business, which are detailed on their website.)
For simple problems, ioSafe handles the disk recovery in-house. For more complex jobs, they use DriveSavers. I’ve known of DriveSavers for many years and the fact that ioSafe has aligned with them is a very good thing.
In a real world situation, you return the damaged unit to ioSafe who would extract the data and send it back in a replacement unit – all costs covered, including shipping in both directions (assuming the unit is covered by their Data Recovery Service).
WHAT IT LOOKS LIKE
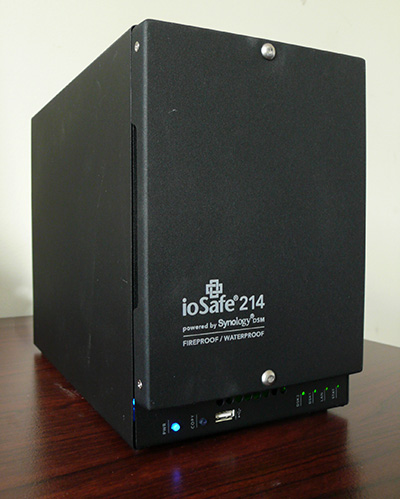
The ioSafe is HEAVY – for reasons you’ll see in a minute. It includes both a Kensington security slot, as well as an optional “lock-it-down-to-the-floor” security system. For simplicity, I decided to just put it on my desk.
It has one USB 2 connection in the front and two USB 2 connections on the back. There’s also a gigabit Ethernet connection and power. (AND!! they included a little plastic strain-relief clip for the power cord so it doesn’t become accidentally disconnected. I wish every hard disk manufacturer did this… not mentioning G-Technology by name.)
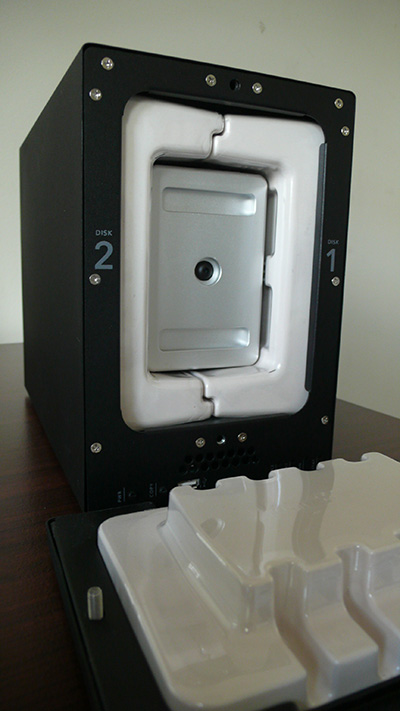
The reason for all the weight is the internal insulation necessary to keep the hard drives cool during a fire, or dry during submersion. In this photo, you see the removed front panel, as well as the interior drive housing.
ioSafe supplies an allen wrench – a very common screw type – to open the unit. I couldn’t resist – I opened it. The lighter color plastic is the fire protection. (There is a good explanation on the ioSafe website on how this works.)
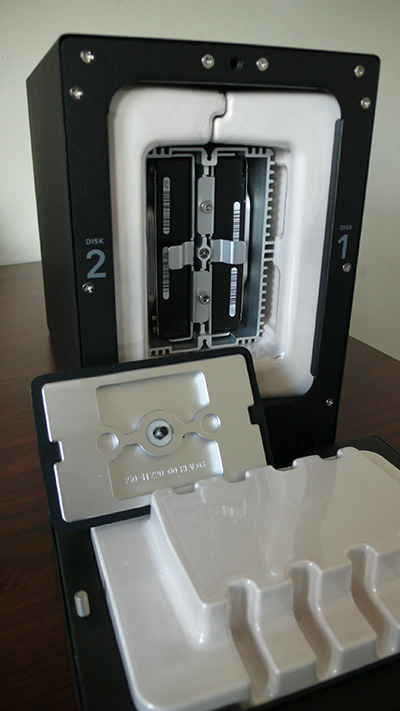
The inner aluminum door provides the water-proof seal protecting the two hard disks.
Here’s another look at the seal (the black stripe around the edges of the aluminum “door”) and the waterproof cage protecting the drives.

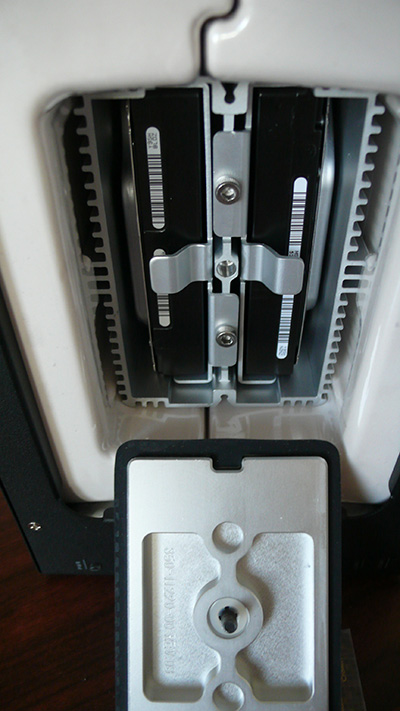
The drives themselves are industry-standard drives on aluminum sleds, which slide out easily once the single allen screw securing each of them is removed.
NOTE: One of the problems with using aluminum for the sleds is that is is very, very soft. Pushing too hard on the sled handles causes them to bend, which happened to me. Bending them too much will cause them to break; which almost happened to me.
The unit uses an all-steel shroud and feels very substantial. Overall, construction is excellent.
GETTING READY FOR INSTALLATION
However, getting the unit installed almost brought this review to a dead stop; because the installation instructions are shipped on a CD. And my iMac does not have a CD player.
There is a QuickStart Guide taped to the top of the unit, but that only talks about registering the unit for disaster recovery, nothing about installation. In fact, nowhere in the package is there guidance on how to get this thing hooked up.
Bummer.
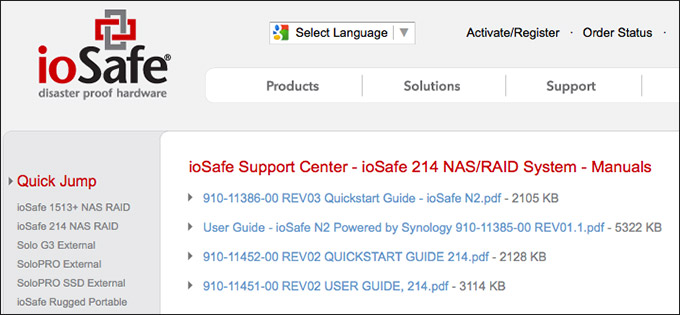
So, I went to the ioSafe website to download the user manual. But there is no 214 user manual on the site. Only one for the older N2 product. No reference to the unit I was sent. (And I had never heard of the N2.)
I went to the Synology site to download drivers, only to download a PAT file — whatever that is – which could only be opened using Photoshop. Weird, but true. And, ah, useless.
Back to the ioSafe site, this time to check out their support pages. There were no instructions on how to configure the 214. LOTS of interesting answers in their FAQ, but none related to getting started.
Because I didn’t know what else to try, I downloaded the DSM listed at the top of ioSafe’s website. Same PAT file that I got from Synology. Still didn’t work.
Back to Support, this time scrolling way down to a section labeled “Mac” and downloaded the Synology Assistant program. THIS was a standard DMG file, which we are all used to installing.
NEXT BIG WARNING
However, you should NOT run the Synology Assistant program unless the ioSafe is powered up and connected to your network via Ethernet. There should be some notice about this in the QuickStart, or the hopefully-to-be-released 214 manual — but there isn’t.
There isn’t even a warning when running the installer. Sigh… it isn’t that hard to put a notice someplace saying: “Hey, before you install the software connect the device and make sure it’s turned on.” (In point of fact, ioSafe mentions this on page 24 of the N2 manual, if you actually look hard enough and download the “wrong” manual.)
NOTE: Something else you need to know that is not easy to find is that if you get the hard drives installed by ioSafe prior to taking delivery of the unit, they also install the operating system. If you get an empty unit, you need to install the OS yourself. Having the OS pre-installed makes installation virtually painless… if you know about it, that is.
Finally, after chasing this issue for about an hour across the web, I got the unit connected and the software – called Synology Assistant – installed. This Assistant is actually the software you need to manage the drive. It isn’t really needed to install the drive, but I didn’t figure that part out until I was writing this review.
So, their installation support needs a LOT of work for us newbies.
THE ACTUAL INSTALLATION
Once the right installation file is found and downloaded, installation is simple.
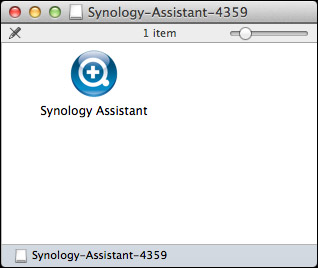
While you can double-click the Synology Assistant to run the installer, you are better off copying it to your Applications folder and running it from there. The reason is that this is more than an installer, it also manages and monitors the drive.
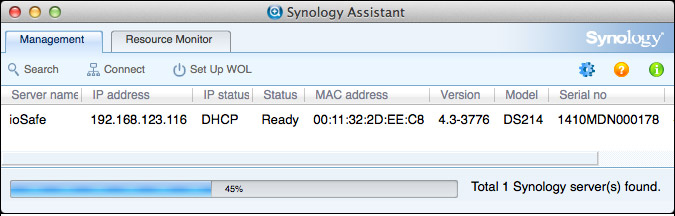
As long as the ioSafe is powered up and connected to the network, the Assistant should find it. There are no settings you need to change in the Management tab.
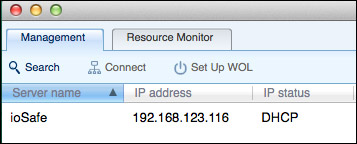
Be sure to write down the IP address, as you’ll need this in a bit.
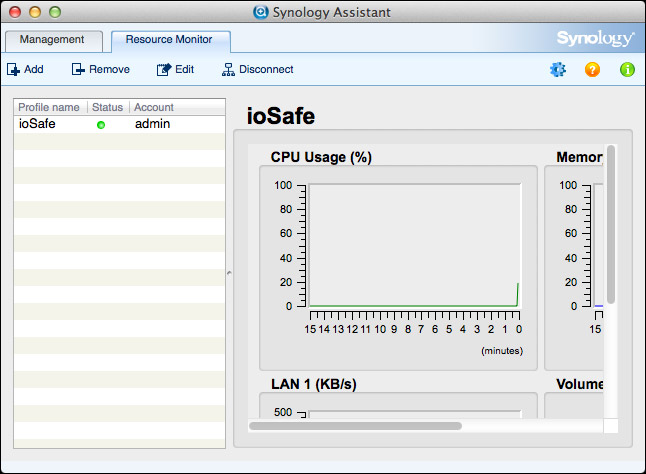
Click the Resource Monitor tab in the top left of the window, then click the Add button to add the ioSafe to the application.
After a few more screens, which require no technical knowledge, the system is added and ready for monitoring.
This is a great place to see how your unit is doing – we’ll come back to this screen later.
MOUNTING TO THE DESKTOP
The ioSafe is a server, not a hard disk. Which means that you need to add it to the desktop as a separate step, it won’t automatically appear.
Switch back to the Finder and select the Go menu at the top of your screen. Select Connect to Server. (The keyboard shortcut is Cmd+K.)
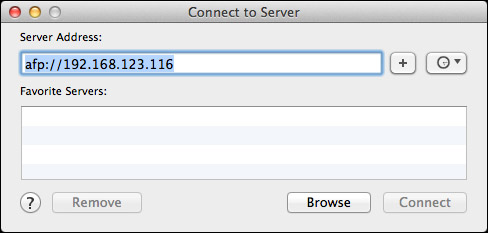
In the Connect to Server dialog, enter afp:// followed by the IP address of the ioSafe that you wrote down earlier. (Your IP address will be different from mine.)
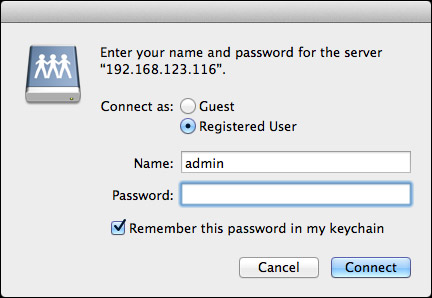
In the next dialog, enter the administrator’s name and password. (The defaults are “admin” with a blank password.) If you want to reconnect to this device without logging in, click “Remember this password in my keychain.” You can always change the user name and password using Synology Assistant.
After a few seconds, a new volume appears on your desktop named “default_share” — this is the ioSafe. From this point on, you can treat it as you would any other server or locally-attached hard drive.
A DISCUSSION ON RAIDS
The reason you buy an ioSafe is that you want to keep your data safe and secure. You don’t buy this system for raw speed.
The ioSafe comes with two hard drives, configured as a RAID 1. What a RAID 1 does is simultaneously write all files to both drives at the same time. What this means is that if one of the drives dies, all your files are safely stored on the other drive. (Here’s an article that explains RAID levels.)
RAID 1 also means that your total storage is equal to the amount of storage on a single hard drive; because each hard drive is a duplicate of the other.
A NOTE ON SYNOLOGY
I had not heard of Synology RAIDs prior to getting this unit. However, from the brief research I did on their website and across the web, Synology is a very well regarded RAID supplier. They make the RAID and server chipset that ioSafe uses for their product.
NOTE: Like virtually all hard drive and RAID vendors, hard drives are made by Toshiba, Western Digital or Seagate; and the chipsets that control them are almost always made by companies most of us have never heard of. The value ioSafe brings is the fire and water-proof enclosure and the ability to recover data after the unit has been destroyed.
SPEED AND PERFORMANCE
The ioSafe connects via gigabit Ethernet or USB 2. USB 2 is desperately slow and, unless you have no other options, should not be used.
NOTE: There is a USB 2 port on the front which can be used to connect a single hard drive, with a Copy button that allows you to copy the contents of a single hard drive into the ioSafe.
The maximum throughput on gigabit Ethernet is about 125 MB/second. But, due to a variety of constraints throughout a network, a more reasonable real-world maximum is about 105 MB/second. This is actually a pretty reasonable data rate – especially for a RAID 1 device – but, again, you are not buying an ioSafe for its speed, but its security.
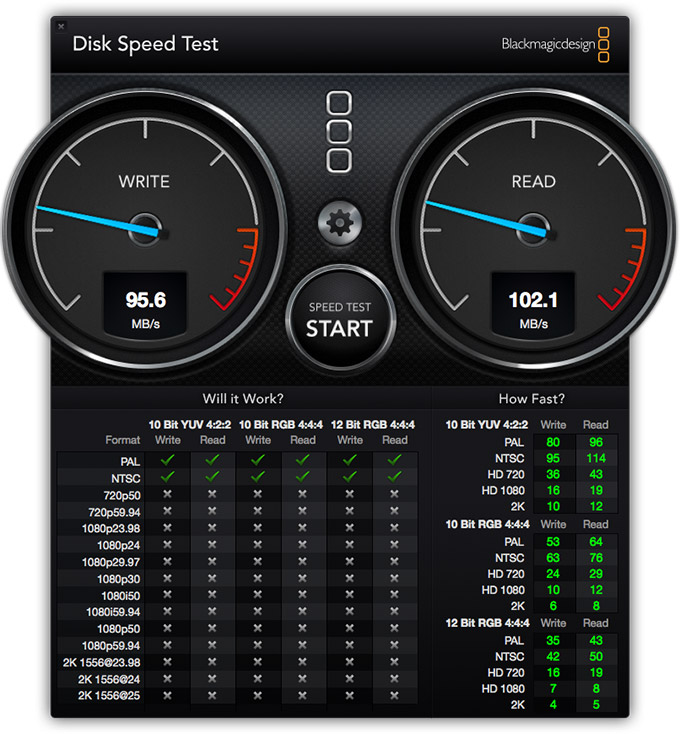
Here are the speed results for transferring large data files; smaller files tend to transfer a bit more slowly. The fastest speed I saw this measure was about 105 MB/second for reads.
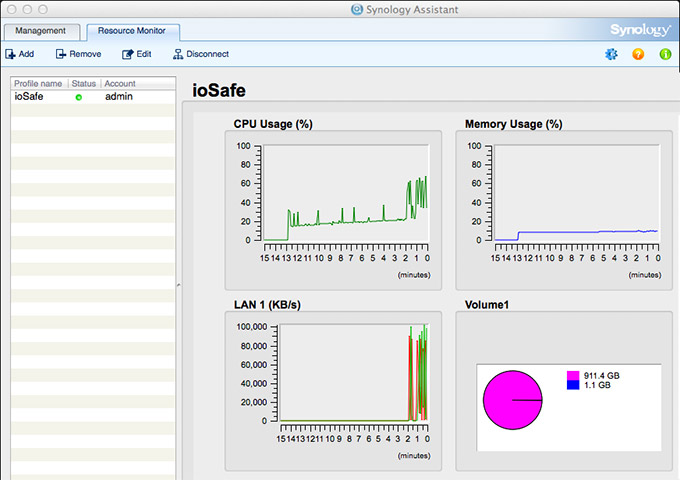
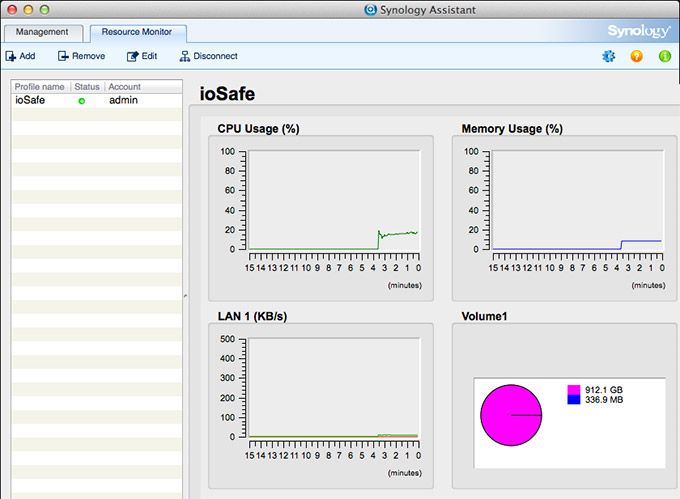
And here is the management console showing activity during the test. (Notice that while network operations, indicated by the LAN setting, are pretty much maxing out, neither the memory nor the CPU were working overly hard.)
Then, I transferred an 82 GB file from a locally-attached RAID to the ioSafe.

Total CPU load on the computer varied between 11 – 14%

Data transfer rates between the computer and the ioSafe fluctuated between 90 – 120 MB/sec, which is about as fast as I could expect.
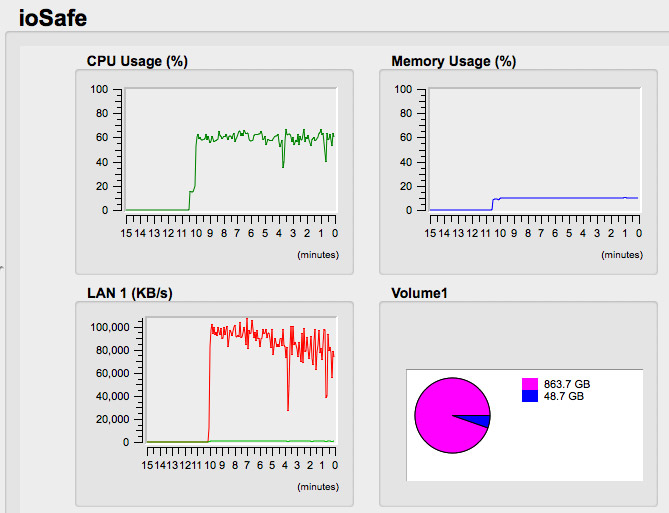
And, the Resource Monitor panel showed that the system was more than capable of keeping up with the flow of data.
As an additional test, because the ioSafe is a server, I connected a second Mac to it, and copied another 27 GB file at the same time. Since the maximum throughput of gigabit Ethernet is about 105 MB/second, the total speed of each transfer dropped so that the combined total didn’t exceed that maximum limit. This, too, is what we would expect from any server.
NOTE: This means that performance will vary depending upon the number of attached users and how heavily they are taxing the server. Again, this unit is principally designed for security, not speed.
So, from the point of view of fast file transfers into a secure location, it doesn’t get any faster than the ioSafe. While I would not use this for high-performance editing, I could easily see using this as my primary network-based Time Machine backup for all critical data.
NOTE: To be truthful, you could use this for editing, provided the following conditions were true:
• You are the only user connected to the unit
• You are only editing SD or HD video, nothing with higher resolution
• You are not doing multicam editing
WHAT I DIDN’T TEST
I didn’t test this unit by setting it in the middle of a fire, nor by drowning it. There were two main reasons for this:
However, here are two videos from independent sources that you can use to judge for yourself whether this lives up to its billing.
SUMMARY
The ioSafe promises to keep your data safe in case of a disaster; and, based on what I’ve seen, I believe them. This is not a unit for archiving, but for quickly and easily making daily backups for on-site storage.
While the installation is unnecessarily confusing, the actual operation of the unit could not be easier. All that insulation keeps the drive virtually silent, the transfer speed is impressive, and the ability to easily attach it to the network for multiple-user access is an outstanding benefit.
If you are leery, as I am, about storing company-critical documents in The Cloud, this is an excellent option at a reasonable price to protect your most important data against disaster because all of your data is safely stored locally, where you can keep an eye on it.

2,000 Video Training Titles
Edit smarter with Larry Jordan. Available in our store.
Access over 2,000 on-demand video editing courses. Become a member of our Video Training Library today!
Subscribe to Larry's FREE weekly newsletter and
save 10%
on your first purchase.
3 Responses to PRODUCT REVIEW: ioSafe 214
Wow, assuming Larry wrote this, this is your best review ever. Lost of detail including what did not work. Many reviews sound like ads these days and are very annoying.
Thanks,
Robert A. Ober
Robert:
I write all the product reviews posted to my site. And thanks for the kind words.
Larry
Thorough review. I did one as well, as part of my 4K Reality Check on Streaming Media Producer.
The ioSafe 214 I received was already preconfigured so I didn’t have any of those headaches- and my iMac has an optical drive, but you do make a good point- it’s time to ship stuff on USB sticks.
Here’s my thoughts using the ioSafe 214 for 4K, you can delete this paragraph if you don’t want other reviews posted on your site.
http://www.streamingmedia.com/Producer/Articles/Editorial/Featured-Articles/Reality-Check-What-Does-a-4K-Production-Workflow-Require-97411.aspx
I have to take issue with your comment about not editing anything higher resolution than HD.
I know HD purists who, in FCP-7 days, insisted everything be converted to ProRes HQ. That’s about 30 MBps.
Which, according to your testing, the ioSafe should do just fine.
I moved to Premiere and I edit my 4K files from my GH4 natively. They run 80 Mbps, which is 10 MBps.
If the ioSafe can do HD, then it can certainly do DCI HD- which it has been doing, for weeks, for me.
If I were to convert all my 4K to a bigger codec, sure, then 100 MBps is a bottleneck.
But I don’t, and that’s the whole point of the new software being able to edit natively.
I understand that FCPx can transcode the files in the background to ProRes for smoother editing, but that’s also something the end user can turn off. A fast enough computer these days can easily handle 4K. My Alienware X51 is a year old and 4K with a few filters on it plays smooth as silk, because the low data rate file is passed over the network, expanded and handled inside my capable machine, where it makes the most sense.
So could you elaborate on why no resolutions above HD? What is the basis for stating that limitation?