
 [Updated 1/28/2019 to include an interview with Mike Woodworth, CEO of divergent media.]
In today’s world of digital media, dealing with multiple codecs, frame sizes, even frame rates is a sad fact of life. While our editing software can handle all these options, it is often far better to standardize your media into a single format prior to editing.
EditReady is a utility designed exactly for this purpose.
NOTE: With Apple discontinuing legacy 32-bit codecs in the next version of the Mac operating system, EditReady provides a fast, yet comprehensive way to convert older media and preserve your assets.
EXECUTIVE SUMMARY
EditReady is published by divergent media, an independent software company focused on providing flexible tools for monitoring, quality assurance, and acquisition for the video production industry.
EditReady supports single or batch transcoding of media files into common formats for editing in Avid, Adobe or Apple software. It also supports watermarking, timecode burn-in, image scaling, LUT assignments and frame rate adjustments to support extreme slow motion.
Key new features in EditReady 2.5 are support for transcoding only a portion of a clip (which saves storage space) and support for the new Blackmagic RAW video codec.
The software has a very nicely written 35-page manual which covers all operations in an accessible manner.
Developer: divergent media
Website: www.divergentmedia.com
MSRP: $49.99 (US)
Free trial is available
INSTALLATION
The software is purchased directly from divergent media’s website. Installation is straight-forward using a Mac standard installer that you’ve used dozens of time.
Aside from the time to download, installation takes less than five minutes. The program is stored in the Applications folder of your Mac.
BASIC OPERATION
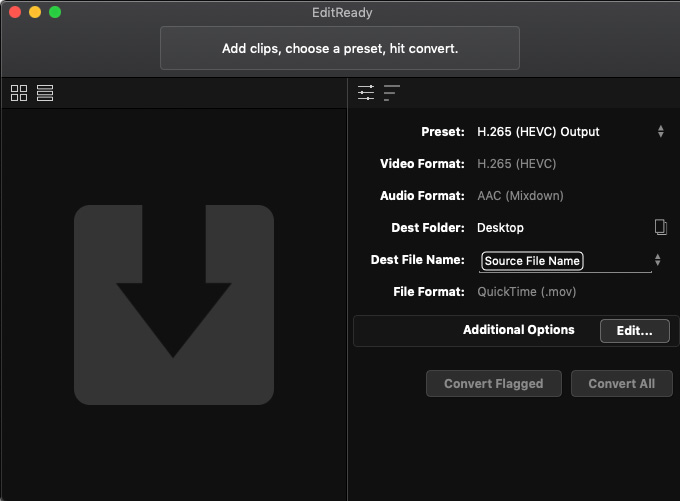
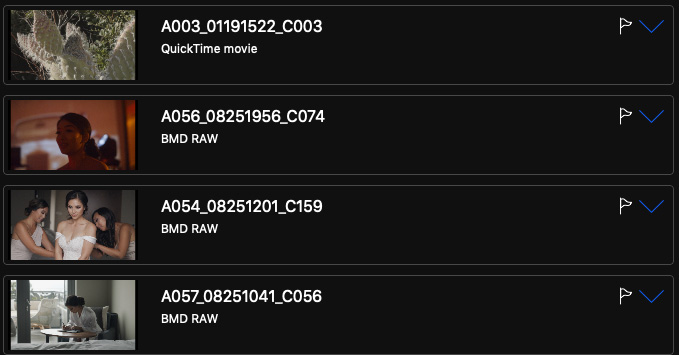
Here’s the basic interface. Um, you’ll never guess where to drag a clip, or group of clips, that you want to transcode.
Oh… you guessed. (You could also type Cmd-O, but that’s pretty boring.)
The panel on the right contains settings for how you want to convert (transcode) your media.
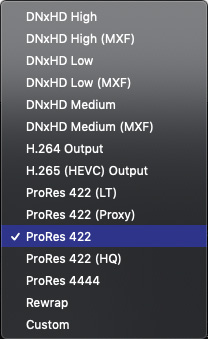
At the top are a collection of presets that allow you to quickly apply settings to all selected clips.
NOTE: You can either batch convert all the clips you imported to this one preset, or flag some clips as favorites and just transcode those. In all cases, you are transcoding clips into the single, selected preset.
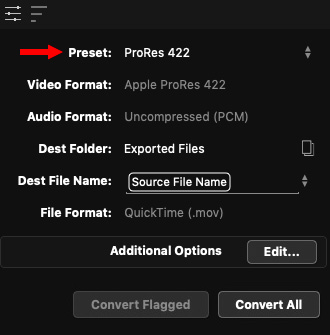
As you would expect, you can select a destination folder, including one stored on a server which I’ve done here, and apply a file naming template to all the clips. This allows you to standardize names as well as formats.
When you are ready to convert, click Convert All, or Convert Flagged if you are just converting favorites.
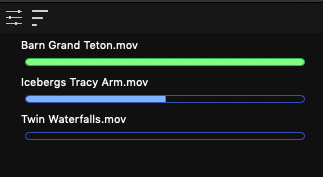
The conversion process is indicated by these three bars:

When transcoding is complete, the system notifies you.
NOTE: It would be helpful if there was a way to dismiss this notification once it appears. However, like a young puppy, it just hangs around forever.
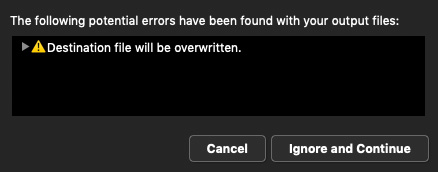
If there’s a naming conflict, the system will notify you, as well.
DEEPER FEATURES

Double-click any clip to access a small preview window. This not only allows you to view the media clip, but key metatdata as well.
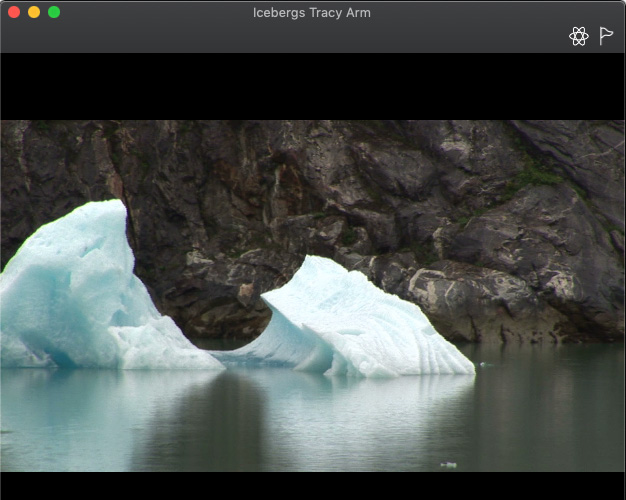
Type Cmd+3 to view the large, built-in Preview window.
A big, new feature of EditReady 2.5 is the ability transcode just a portion of a clip. (called “clip trimming.”) This is highly useful in saving space prior to editing, when shooting massive amounts of media most of which you will never use.
Another big new feature is that EditReady supports the new Blackmagic RAW format, which neither FCP X nor Premiere currently support. In fact, it is designed to quickly support new formats as they are released, as you’ll read in the interview, below.
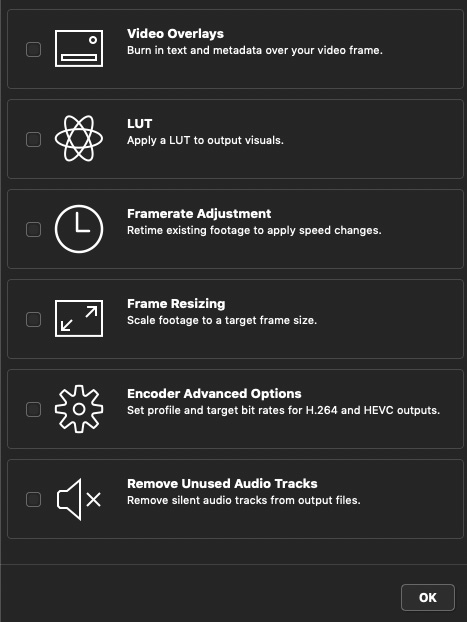
Click Additional Options > Edit to open an interface which allows you to add watermarks, burned-in timecode or other metadata, apply LUTs and other features.
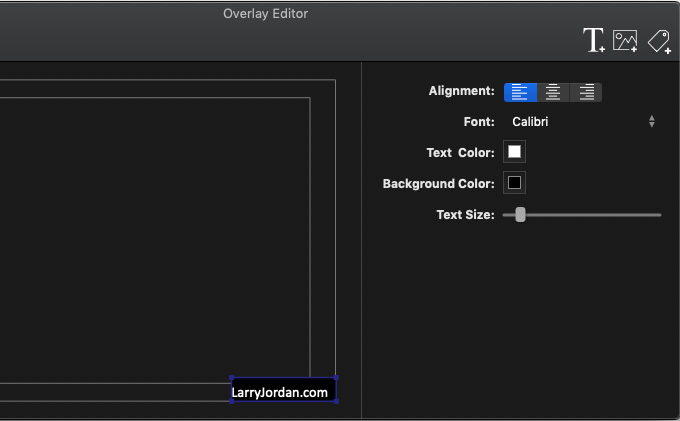
While not a full-featured text editor, the Overlay Editor does allow you to create text or image watermarks, change the font and size, add a color background behind it, and precisely position where the watermark occurs.
NOTE: Normally, I create watermarks in Photoshop. I really like the ability to position the watermark anywhere I want on the frame using this Editor.
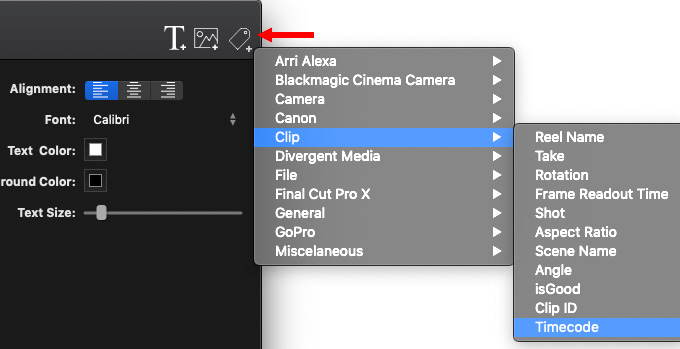
Using this same window, you can also burn-in a wealth of other metadata, as you can see from the screen shot above.
NOTE: Video overlays are not displayed in the Preview window, you need to transcode a file to see them.
METADATA
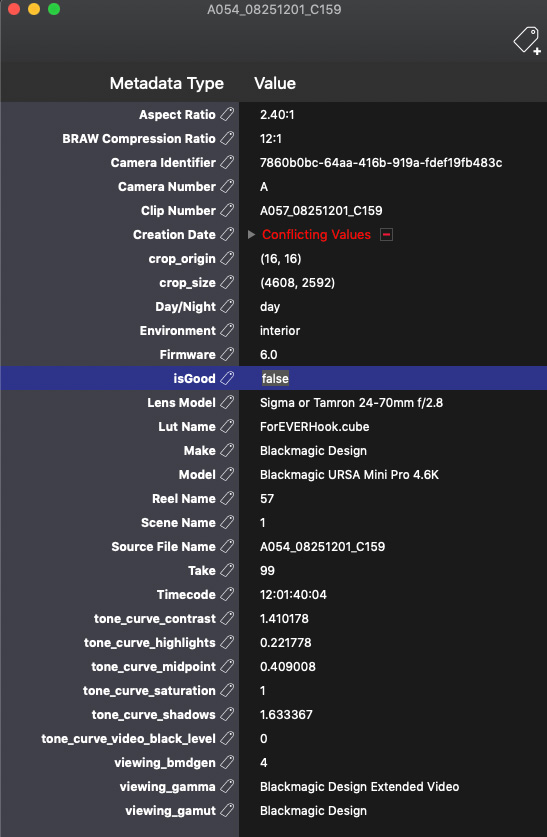
One of the hidden strengths of this program is metadata, which is a fancy word for “labels.” Select any clip and type Cmd+2 to view and/or modify all the metadata associated with that clip.
You can modify metadata on a clip-by-clip basis or for the entire batch. In fact, you can:
The metadata section is very nicely thought out.
[UPDATE] MIKE WOODWORTH INTERVIEW
As I was preparing this review, I interviewed Mike Woodworth, CEO of divergent media. Here’s our conversation.
Larry: Why did you create EditReady?
Mike: EditReady grew naturally from another product we made at the time called ClipWrap which let users rewrap HDV and AVCHD footage for use in QuickTime apps. We saw the market was moving toward a much wider pool of cameras shooting in many formats, and shoots were more and more likely to mix and match footage from multiple cameras. We wanted to make a tool that could tame some of the mess of working with multiple different cameras on the same project.
We’re not going to ever be able to compete with Apple or Adobe on a general purpose transcoder. So we chose the place users are most likely to realize a strong benefit from a tailored workflow.
Larry: This seems like you’ve designed it for DIT work and prepping files before editing. True?
Mike: That’s right, EditReady is meant to ease the handoff between production and post production. For some productions that will happen in the field under the supervision of a DIT. On other projects it might be the Assistant Editor’s job to prep footage while loading it into the NLE. Even more projects are a single person changing hats.
The transcoding and metadata tools in EditReady can help normalize multiple cameras into a commonly tagged bin of clips, which intercut seamlessly in any NLE, and load into any asset management tool.
Larry: How is EditReady affected by Apple’s dropping support for legacy codecs?
Mike: At the moment, we have 32-bit QuickTime codecs annexed in a background process. Those will continue to work as long as Apple loads 32-bit frameworks. We are in the process of transitioning those formats to our ffMPEG fallback. If all goes well, it should be a seamless transition for our users.
Larry: As your appendix states, you are using ffMPEG libraries in the software. When I wrote a review of ffMPEG, Apple told me in no uncertain detail how much they hate that software. Has this given you any grief and should users worry?
Mike: We use ffMPEG as a fallback path, only for codecs not supported by Apple’s native AV Foundation. That means for any and all ProRes encode and decode operations EditReady will use macOS’s built-in codecs. What FFmpeg does allow us to do is offer support for new cameras that ship with unique variants of MPEG-2, H264 or HEVC based acquisition codecs significantly sooner that other apps waiting for Apple to add native support. We think allowing early adopters of cameras an onramp into ProRes and DNxHD/HR workflows as soon as possible benefits the entire ecosystem.
Larry: It looks like you can take a batch of files and batch process them into a single format, but you can’t take a single file and create multiple derivatives at the same time, but you can do so one at a time. Correct?
Mike: You can take a single file and convert it to multiple formats by switching back to the settings tab after starting a batch. You can also open additional windows to start multiple batches that target different output presets or file paths. EditReady intelligently manages multiple queues to ensure that we maximize system resources, since some hardware components like the H.264 accelerator have limits on the number of parallel tasks they can execute. You are right however, the primary use case is quickly and easily converting many clips into a standardized mezzanine codec.
Larry: If there’s one thing you want my readers to know about EditReady, what is it?
Mike: We’re a small company with limited resources, so we rely on customers to tell us what they need. If you give the app a try and have a specific request for your workflow, or need support for a specific camera on your production, drop us an email. We pride ourselves on our customer support and being quick to add new camera support.
EXTRA STUFF
EditReady supports DNxHD, but requires you download the free drivers from Avid’s website.
NOTE: In most cases, EditReady outputs QuickTime (.mov) files. However, when DNxHD or DNxHR are the destination video formats, you may optionally choose to output in either the OP-1A or OP-Atom formats, using the “File Format” dropdown.
SUMMARY
EditReady is a focused, flexible, capable program designed to convert media from one format to another as quickly and easily as possible. The results I looked at were as high a quality as other compression software and the interface makes using the program straight-forward.
If standardizing your media, file names or metadata are important to you, checking out the free trial for EditReady should be on your To-Do list.

2,000 Video Training Titles
Edit smarter with Larry Jordan. Available in our store.
Access over 2,000 on-demand video editing courses. Become a member of our Video Training Library today!
Subscribe to Larry's FREE weekly newsletter and
save 10%
on your first purchase.
13 Responses to Product Review: EditReady, from divergent media
Does it work with Windows 7?
Tim:
No.
Larry
EditReady really helps our workflow in that it automatically combines segmented files from our Canon XF memory cards, and gives the resulting file a human-readable file name, instead of a string of numbers. It re-wraps the data, instead of transcoding, so it’s fairly fast. Super handy.
Larry, I noticed in your screen shot of the metadata edit window that you have conflicting values warning for the creation date. I’m new to EditReady and have only used it with footage shot on some Canon prosumer cameras. But every time I open that window I seem to have that error. Do you know what it’s about? I though maybe it was because my cameraman was a fairly new professional and he did something wrong. But since it’s showing up in your system, maybe there is more to it.
Hey Steven,
It’s Mike from divergent media. We collect all the various forms of metadata related to creation date (including os level file dates) and compare them. It is not uncommon for these to not all match exactly. This is not something you need to worry about, unless you plan to use creation date metadata somewhere down stream in your workflow. If you do nothing, we’ll copy each one back into the place we found it on the output file. If you are planning to use creation date for something important, like naming your files, or an overlay burn in… you can tell EditReady which date to use by clicking the disclosure triangle next the warning and checking the check box next to the correct value. That will then override all the other instances of that metadata during output, and in any burn in or file names based on the metadata key.
-mike
Hi, I have purchase the EditReady 2, when converting h.264 to ProRes 422, or some file to some file I see a big Contrast on my image like 2 stops.
When using compressor I see exact image as source was, maybe there’s any solution?
Kelbin:
My best advice, in situations like this, is to contact EditReady directly. They know their software best and can help you figure out the solution.
Thanks,
Larry
We are looking for a program for a producer to log his footage by time code. Is this a good program for that?
David:
EditReady is a wonderful program with many useful features, but it is not geared toward logging. Have your producer check into the logging options in Lumberjack System: http://www.lumberjacksystem.com
Larry
ProRes 4444 XQ isn’t shown in the list of transcode options. Divergent Media writes of “leveraging the official Apple version[s]” of ProRes. I hope they got that one.
Dennis:
I don’t know what formats EditReady supports, this article was written a while ago. However, I can’t think of a single reason where I would use ProRes 4444 XQ instead of ProRes 4444. The only difference is bandwidth. Both are already 12-bit and extremely high bandwidth. The image quality of ProRes 4444 is indistinguishable from that of the original image.
Larry
Hi Larry,
By definition, an uncompressed 4:4:4 codec encodes all there is in an image. 1920×1080 50p 10-bit uncompressed video is 3110 Mb/s. 12-bit is 20% higher. For ProRes 4444 XQ Apple predicts 826 Mb/s. So ProRes 4444 XQ compresses by at least 73%. That’s not all data compression. Something of the original image isn’t there in the ProRes 4444 XQ. Presumably that something isn’t visible. But whether step-after-step of non-visible-loss can amount to a visible loss is another question.
For tedious multi-step effects, on short clips, why not use an uncompressed 4:4:4 codec just to be safe? I don’t own an uncompressed 4:4:4 codec, so which ProRes codec should I use?
ProRes 4444 should probably be called “ProRes 4444 HQ” because its image quality is the same as that of ProRes 422 HQ except that it is 4:4:4 instead of 4:2:2. Apple’s ProRes White Paper says this.
I’m baffled by Apple’s description of the difference between ProRes 4444 [HQ] and ProRes 4444 XQ. Apple suggests XQ’s advantage is with HDR video. But dynamic range is a matter of bit depth, not of detail. Both codecs are 12-bit capable. Even if the [HQ] codec somehow chiseled its 11th and 12th bits, that could only save it at most 2/12 in bit rate, whereas [HQ] has 1/3 less bit rate than XQ. So likely ProRes 4444 XQ preserves more detail than ProRes 4444 [HQ].
Thus I use ProRes 4444 XQ, just in case. Also, in making preservation masters you never know what the next guy will want to extract from them. It’s horrible to pass video in an unpopular codec, ProRes 4444 XQ, into the future, but hopefully someone will convert it to uncompressed 4:4:4, which is how preservation should be.
Dennis
Dennis:
I don’t know enough to agree or disagree with some of your comments. However, a key difference between an uncompressed 4:4:4 codec and ProRes 4444 is that ProRes 4444 also includes the alpha channel.
Also, ProRes 422 is a 10-bit codec, while ProRes 4444 is a 12-bit codec, according to what I’ve been told by Apple.
And I agree, dynamic range is bit-depth based.
Larry