
 Last week, Robert B. sent me this note:
Larry, I’m just enjoying your typical stellar performance, as usual, on the Digital Production Buzz. I know you mentioned the whole equipment stack a year or two back where you described what mic, preamp, mixer, etc… Can you remind me?
So, I went back into my archives and discovered that my article describing The Buzz was far older than a “year or two.” The only one I found was when we were creating video for the show. So, I thought it would fun to share my current process with you. Most of the time I write about technology separate from accomplishing a task. In this article, I want to write about how I accomplish the task of a weekly, live audio podcast using technology.
ABOUT THE DIGITAL PRODUCTION BUZZ
The Buzz, as we call it, is the second-oldest podcast on the planet. Steve Martin and Ron Margolies started it in Sept. 2000. (The only older podcast is “All Things Digital,” which Adam Curry started in April, 2000.) Philip Hodgetts took over the show from Steve and Ron, and I took over from Philip in November, 2007. I’ve been the executive producer and host ever since. Our original producer was Cirina Catania. For the last two years, Debbie Price has produced the show.
The show airs live every Thursday night at 6 PM Los Angeles time and runs slightly less than an hour. Using an interview format, we talk with four to six guests each week. Each interview runs between 8 – 11 minutes.
The show is distributed over iTunes, iHeartRadio, and Spotify; as well as the Buzz website. Each show is heard by tens of thousands of people in 195 countries around the world.
Here’s a link to the show’s home page.
SHOW FORMAT
While the show airs live, not all guests can make a 6 PM Thursday air time. So, many of our interviews are recorded using either Skype (our preferred method for most interviews), or the telephone for those guests that don’t have access to Skype.
I prefer to use Skype because it allows me to record the interview in dual-channel mono format, which means my voice is on one channel while the guest is on a second channel. This vastly simplifies editing by allowing separate cleanup and EQ on each voice.
Each show follows a consistent “show clock,” which determines the format, but not the content, of each show so that we can easily integrate news, interviews, commentary, intros and commercials without having to “reinvent the wheel” each week. When you have a small production team, the more you can organize and standardize each show, the easier it is to produce.
NOTE: I describe this process as creating a “workflow.” This is an organized, generally written, process for efficiently completing a task. Yes, this will be on the quiz.
RECORDED INTERVIEWS
Like many, the latest changes to Skype have made our recording life more challenging.
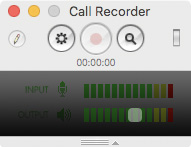
However, a great little Skype plug-in called Call Recorder from Ecamm Networks makes our audio recording of Skype calls a piece of cake. I’ve used this software to create hundreds of interviews.
NOTE: I understand that this utility also records video, but I’ve never used it for that.
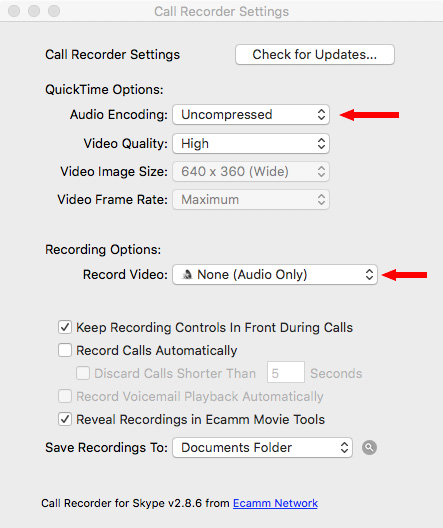
I tend to set my audio levels around -12 dB, while Call Recorder sets the guest levels around -6 dB. It also seems to include a brickwall limiter so that guest audio levels never spike. I also like that everything it records can be saved in uncompressed, WAV, format and it makes backups automatically.
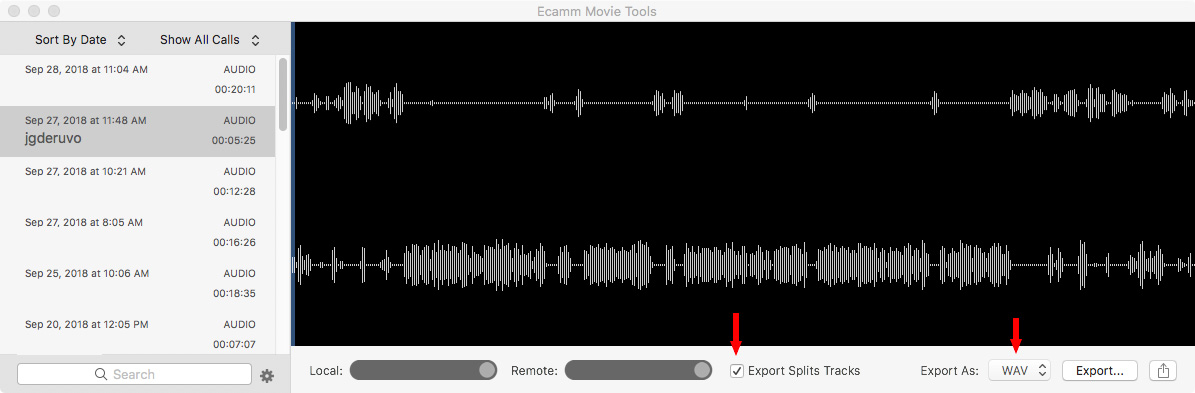
(Click to view a larger image.)
Once a recording is complete, Call Recorder has a button that automatically opens Ecamm Movie Tools, which displays the recording; my voice is on the top track. What I especially like is that I’m able to export split tracks – each voice in its own clip – as an uncompressed WAV file. This provides the highest possible voice quality for each guest.
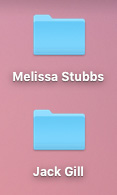
Each guest is stored in its own folder on my hard disk, for example, these two folders are guests for our upcoming Oct. 4, 2018, program. Both audio files, one for me and one for the guest, are stored inside. I’ve never had a problem syncing the two files in Audition.
INTERVIEW RECORDING GEAR
Here’s the gear I use to record interviews before the show airs:
NOTE: I used to use TOSlink directly out of the Aphex which provided a clean digital signal for the computer. However, Apple stopped supporting TOSlink several years ago. Sigh…
MIXING SPECS
All interviews are edited using Adobe Audition.I generally record about 50% more than is needed for each guest. The main reason is that no one speaks English anymore. They speak a series of “um’s” and “ah’s” strung together by words.
Sigh…
I’ll do simple audio editing on each interview to remove stumbles, “um”, and “you knows.” About one in ten interviews will involve shuffling or trimming answers, but I try to leave these as the guest presented them.
One guest, who’s name I’ve thankfully forgotten, had 240 edits in an eight-minute interview. They SPOKE for 20, but when I took the “ums” out, there was actually eight minutes of content. I figure my audience has only a limited amount of time, they don’t need to listen to someone constantly saying “ah…”.
English is SUCH a hard language.
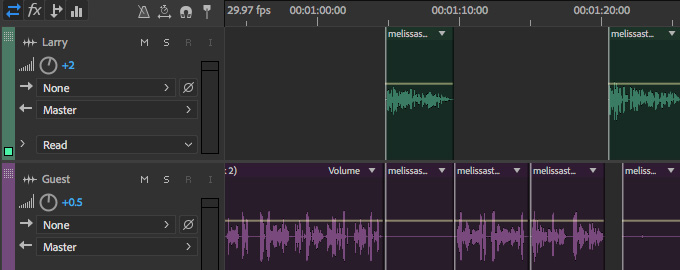
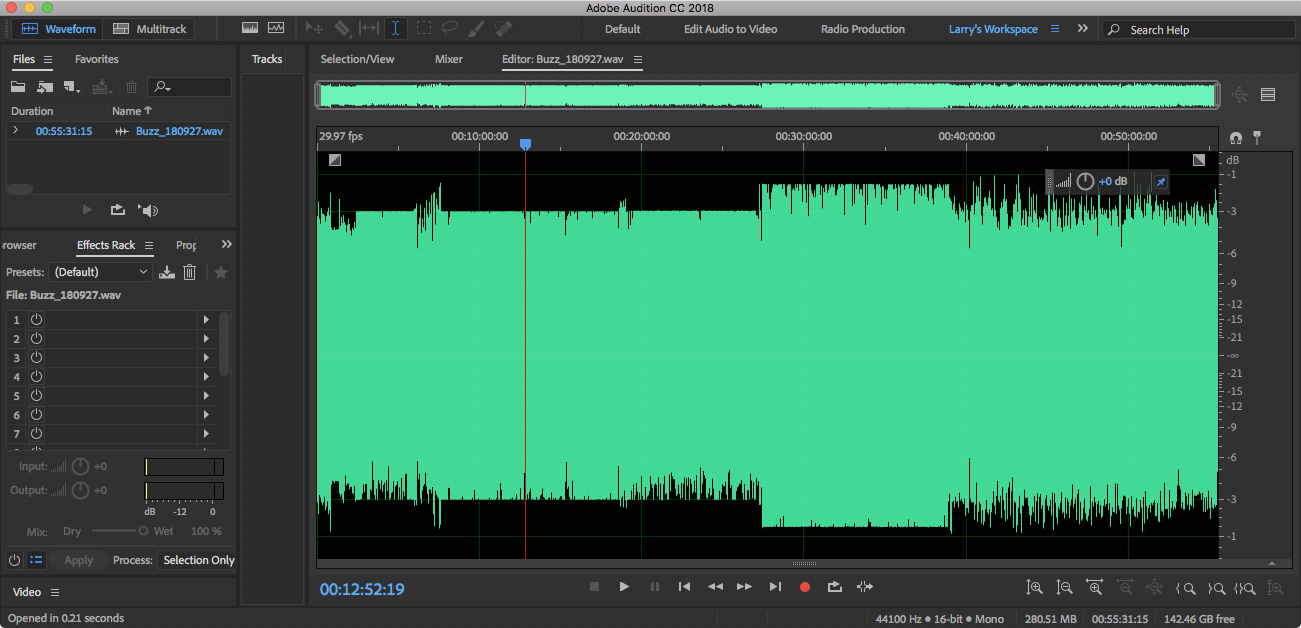
Here’s a typical interview in Adobe Audition where each voice has its own track, EQ and compression.
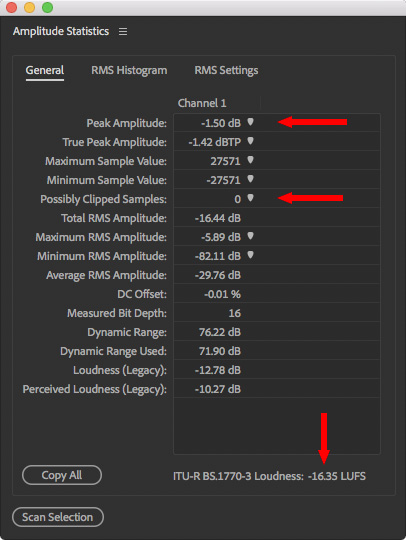
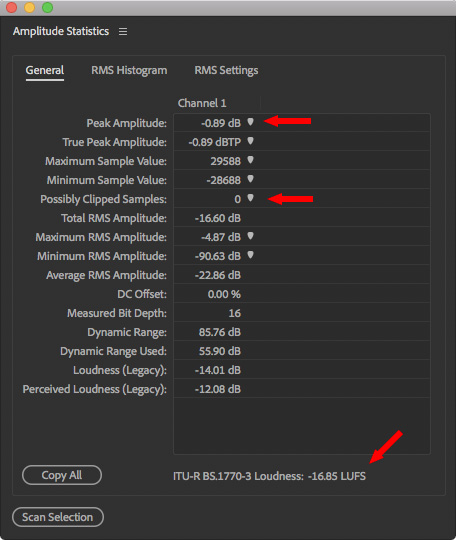
I mix each interview so that peaks bounce around -3 db, but the KEY spec we follow is to set average levels between -16 and -17 LUFS, as measured in Premiere using Amplitude Statistics. This is SUCH a helpful measurement tool – it allows me to keep all my interviews consistent.
NOTE: Cable and broadcast requires LUFS levels around -24. For the web, though, I’ve found -16 LUFS works better; and I currently recommend it.
In the analysis screen above, I’m looking specifically at three numbers:
LIVE INTERVIEWS AND SHOW
(Click to see a larger image.)
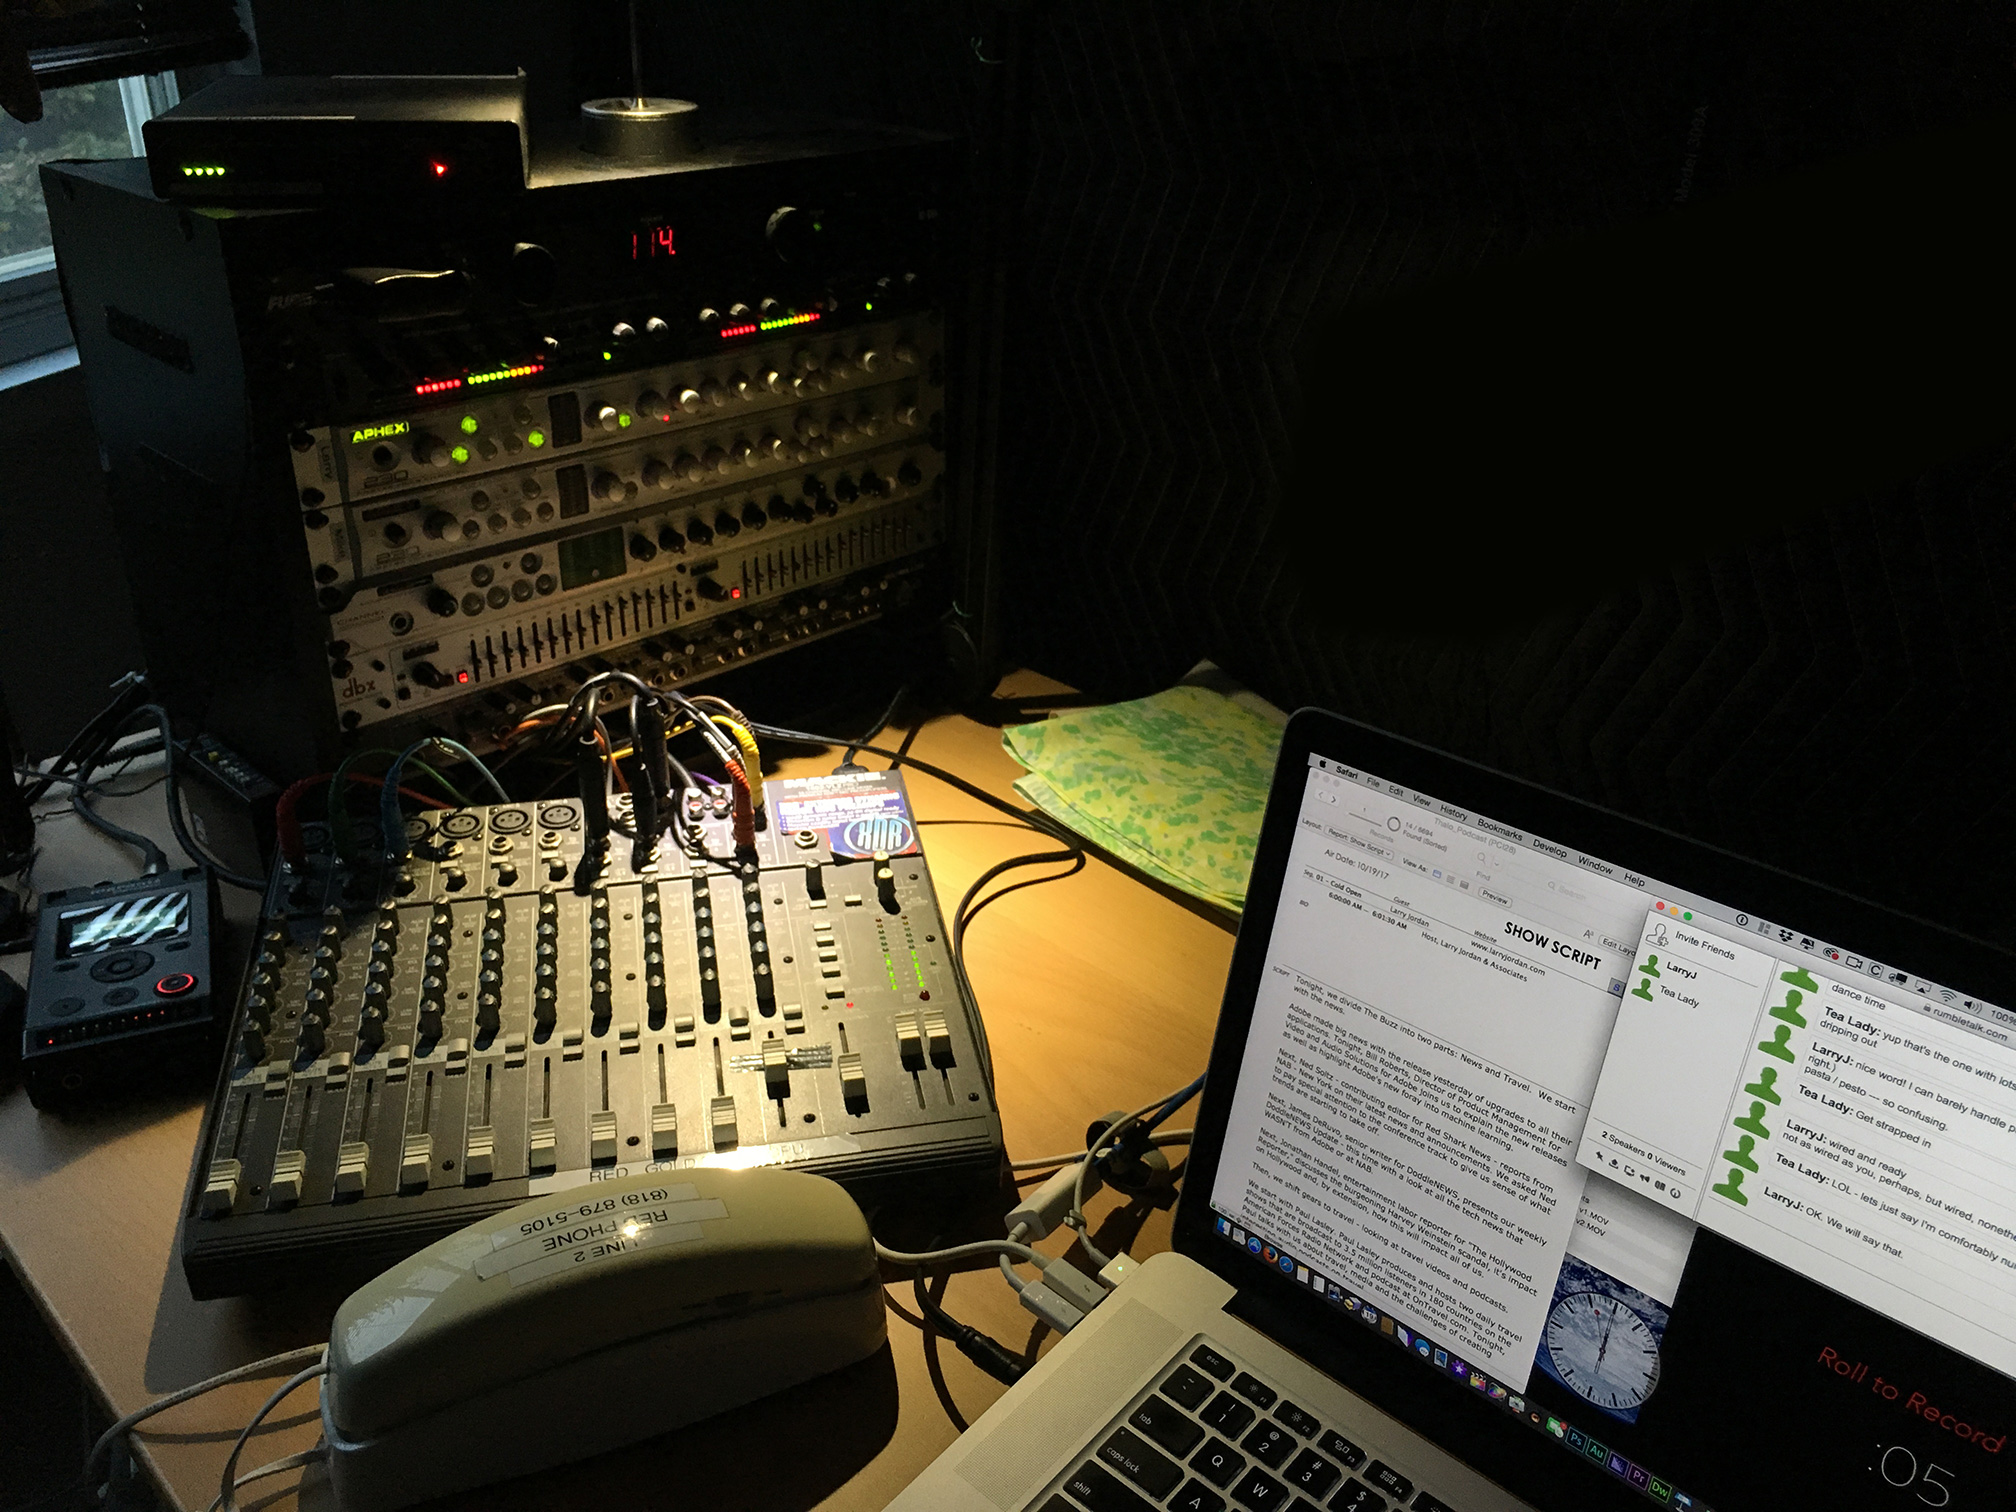
The live show uses entirely different gear. This is a photo of my setup. The system supports up to three live mics, the black backdrop is a sound blanket placed diagonally in the room to kill echoes and deaden room tone.
One of the great secrets of live podcasting that Philip Hodgetts told me when I took over the show is to pre-produce a “Show Bed” before each show. This includes all music and commercials, properly placed and timed into a single QuickTime movie. To this, I add a countdown clock that times each segment, telling me when it is time to transition.
All my timing is planned long before the show starts, with countdowns that time me out of each segment. As well, all music bumpers, show open and close are included in this movie – all at full level. Then, as the shows airs each week, the movie counts me down for each segment, displays a note when music is playing so I can sneak it under a guest and, if necessary, I can stop playback for a guest that is running long without screwing up the timing of the entire show.
If you look closely at the image of my setup, you’ll see the MacBook Pro with the countdown in the lower right showing 5 seconds left in this segment, along with a note to press “record” on the Marantz to record the show.
We use a shared FileMaker database for all show guests, elements and scripts – you see it on the left side of the MacBook Pro screen, along with a live chat used by the production team to stay in touch during the show.
I split the output from the Mackie mixer with the left channel going to the Marantz which records the show for later posting, and the right channel streaming live as a mono feed through Mixlr. All interviews are mixed mono so there’s no loss in quality or levels using this technique.
RECORDING GEAR
STREAMING GEAR
All the above, plus:
FINAL SHOW MIXING
(Click to see larger image.)
Creating the finished Buzz show is a two track mix in Adobe Audition between the show bed and the sections that were recorded live. In this screen shot, I keep debating whether to use the hard limiter on final output or not. Sometimes I do, sometimes I don’t. For really soft guests, I tend to use it.
Also, although it looks like the peaks are varying fairly significantly, my average levels are consistent across all interviews. Just as I do for interviews, I also check my stats for the entire show.
After I fix anything that went wrong in the live show and do a final integration of all the elements, I output two versions of the show:
WAV output specs are:
MP3 output specs are:
The WAV file is archived, while the MP3 is posted to our account at Libsyn.com for distribution to all our outlets.
SUMMARY
There’s a lot of moving parts in a weekly show. The most important of which is to establish a standard workflow and specs so that you can nail down all the tech and concentrate on the content. Otherwise, you spend all your time chasing your tail, wondering why the gear isn’t working.
I was also willing to invest in hardware that simplifies the software processing and editing. When you do a weekly show, with both limited staff and time, you don’t want software carrying the entire burden.
Even though I’ve been doing the show for almost 12 years, I still remain fascinated by all the tech it takes to accomplish, and thought it would be fun to share with you today. As always, feel free to ask questions.

2,000 Video Training Titles
Edit smarter with Larry Jordan. Available in our store.
Access over 2,000 on-demand video editing courses. Become a member of our Video Training Library today!
Subscribe to Larry's FREE weekly newsletter and
save 10%
on your first purchase.
3 Responses to A Technical Look at the Digital Production Buzz Podcast
Great and very interesting info Larry… thank you for presenting it to us!!
Billy Walker
Hi Larry, I’m impressed with your workflow and your obvious generosity, thanks for sharing!
R
Very informative. Thanks!