
![]() New with the May, 2021, update to both Premiere Pro and Audition is the Loudness Meter. While similar to the Loudness Radar, the Loudness Meter provides a different way for us to look at our audio.
New with the May, 2021, update to both Premiere Pro and Audition is the Loudness Meter. While similar to the Loudness Radar, the Loudness Meter provides a different way for us to look at our audio.
UPDATE: The big reason to learn about the Loudness Meter is that the Loudness Radar does not work on Apple silicon systems. The Loudness Meter is the only option to view average audio levels.
AUDIO DIGRESSION
There are two ways basic ways to view audio levels:
Peak levels show us the instant by instant loudest portions of our audio, while average levels look at audio levels over time.
Most video editing applications show peak levels by default. However, most distributors are more concerned about average levels. Since there is about a -20 dB difference between the two, it is important to make sure you are both speaking the same language.
NOTE: This caused no end of confusion when I first started teaching many years ago, because at that time, I wasn’t aware of the difference.
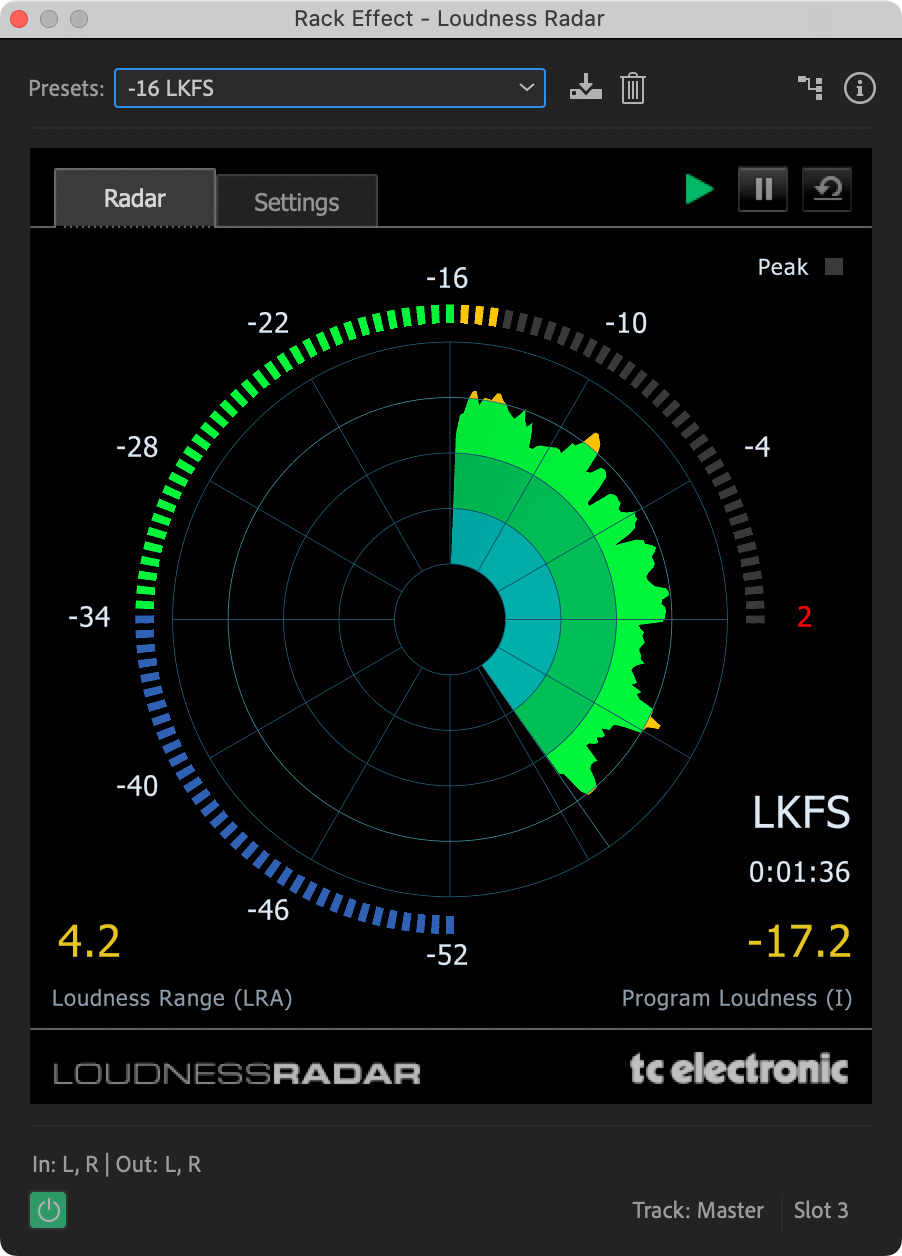
(Premiere’s Loudness Radar.)
I am a huge fan of the Loudness Radar. This displays average levels, measured in LKFS, during playback. LUFS and LKFS are identical. The US prefers LKFS, while the rest of the world prefers LUFS. Both measure average audio levels over time in increments of 1 dB. We use dB to measure peak levels and LU to measure average levels.
Most distributors, including broadcast, cable, Netflix and YouTube, now specify the average audio levels for the programs they distribute. For example:
It is essential that the programs you create meet these levels. The Loudness Meter enables you to do that.
THE LOUDNESS METER
You apply the Loudness Meter the same as any other effect. In both Audition and Premiere Pro, it should be applied to the Master audio track, because you want to monitor the total mix. There’s no advantage to putting it on a single track.
NOTE: In Premiere, the easiest way to do this is using the FX bus in the Track Mixer.
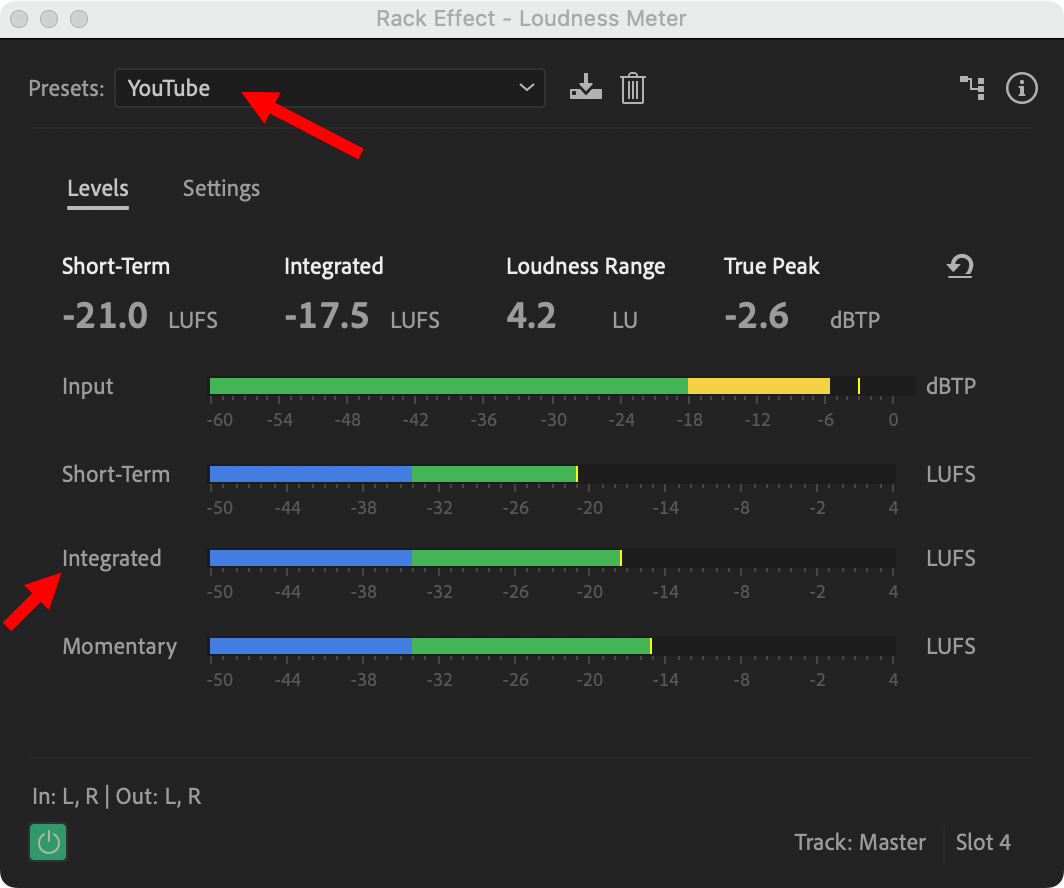
While the Loudness Radar displays aggregate audio levels over time, the new Loudness Meter displays these values on a instant-by-instant basis.
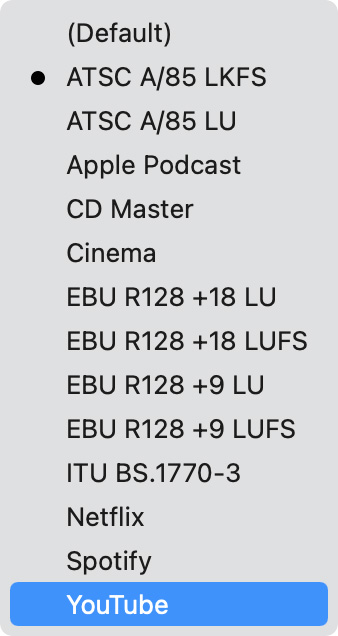
The Preset menu, illustrated on the right, offers 13 presets, as well as the ability to create your own settings.
The Input line displays current peak audio levels during playback. This is the same value as traditional audio meters.
Short-term and Momentary monitor short duration average levels. (Adobe has not yet published the specific settings for these indicators.)
Integrated is the level we are concerned with. This displays the on-going average levels for our program, and most closely matches the levels displayed by the Loudness Radar.
NOTE: The Integrated number at the top is for the current playback, while the bar indicates on-going changes. In order for the Loudness Meter to calculate audio levels for the entire program, you need to playback the entire project. (Audition has a shortcut for this, using Window > Amplitude Statistics.)
In short, select the preset you need to use. (Use the YouTube setting for all social media.) Then, playback your project and watch the Integrated values to make sure you are meeting specs.
CHANGE SETTINGS
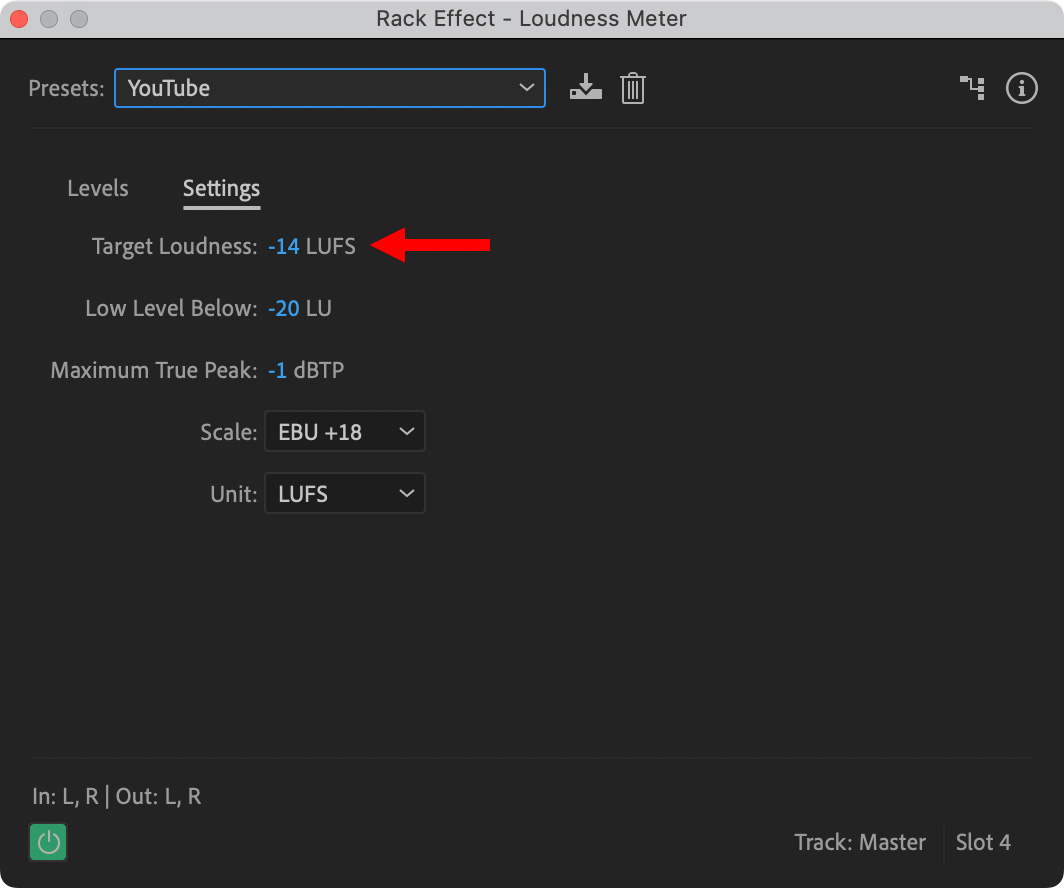
Click the Settings text button to view the settings for the selected preset.
The key value here is Target Loudness. This is the average audio level spec required by your distributor. Unless you are given good reasons, don’t change the other the settings.
NOTE: True Peak is a more accurate reflection of the loudest peaks in your audio because it compensates for dynamic changes between samples. (Yes, I know, this gets really geeky, really fast.) Anyway, leave Maximum True Peak set to -1 dBTP and NEVER!! above 0.
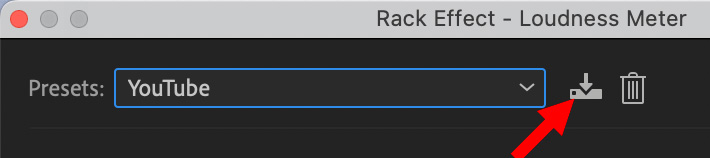
To save a custom setting, click the Save to Disk icon (red arrow), give the preset a name and click OK. To delete the currently selected preset, click the trash can icon, on the right.
SUMMARY
While I like the Loudness Radar’s audio levels over time display, the fact it doesn’t work on Apple silicon makes it a non-starter for editing on today’s M1 MacBook Pros or Mac Studio computers.
I like the presets of the new Loudness Meter, especially with the inclusion of social media. I also like the continual feedback that the Loudness Meter provides.
Remember, the Loudness Meter, like audio meters in general, only measures levels, you need to adjust those levels in the mixer.

2,000 Video Training Titles
Edit smarter with Larry Jordan. Available in our store.
Access over 2,000 on-demand video editing courses. Become a member of our Video Training Library today!
Subscribe to Larry's FREE weekly newsletter and
save 10%
on your first purchase.
One Response to Premiere Pro: The Loudness Meter [u]
[…] by Larry Jordan […]