
![]() One of the features in Final Cut Pro X that I like is Spatial Conform, which quickly scales a picture to either fit the frame, fill the frame, or display at 100% size.
One of the features in Final Cut Pro X that I like is Spatial Conform, which quickly scales a picture to either fit the frame, fill the frame, or display at 100% size.
This got me wondering about Adobe Premiere Pro CC and whether it had something similar. So, I turned to my friend Kevin Monahan, Support Product Manager at Adobe for their Digital Video Products.
Larry: Is there a way to edit a high-res image/clip into the Timeline so that the image fills the frame at the time of the edit?
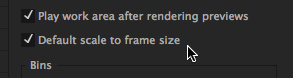
Kevin: Yes. In Preferences > General, there is a preference for “Default Scale to Frame Size.” That allows you to edit oversized footage into a sequence with a smaller frame size. Setting this preference affects every clip imported after the change is made but doesn’t affect any clip already in the project.
NOTE: You can also change the behavior for any clip already in the Timeline by selecting the clip and choosing Clip > Video Options > Scale to frame size. This option is also available by right-clicking the clip.
However, I would not recommend this method as it reinterprets the scaling of the clip, setting it to 100% [in Effect Controls]. This means that Premiere Pro interprets the new size as 100% scale. If the user then attempts to zoom in, the resolution is lost and the image will appear grainy. In other words, if you scale or reposition the clip, you will be degrading the image quality. I never liked this option for this reason. In the past, I chose to make an effects preset to rescale the footage properly to fit the frame.
Now, however, we have a better option, as I explain in the answer to your next question.
Larry: Is there a way to quickly resize an image/clip so that it fills the frame precisely, without dragging the size sliders in Effect Controls?
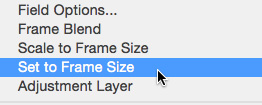
Kevin: Yes, this is a pretty recent feature called “Set to Frame Size.” Once the clip(s) are in the Timeline, Ctrl-click on the clips and choose Set to Frame Size from the contextual menu. (You can’t set this until a clip is in the Timeline.)
When you use the Set to Frame Size command, the native pixel resolution of the image is preserved, and Premiere Pro will remember the original image size when zooming in on the image.
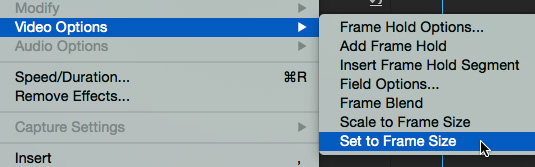
Likewise, you can choose Clip > Video Options > Set to Frame Size. A keyboard shortcut can also be set up for this command.
My feeling is that this should also be available as a preference and some day it may be.
Larry: Is there a way to convert an image/clip from “fill the frame” to 100% size once it is edited into the timeline?
Kevin: One can create a “Rescale to 100%” effects preset for your particular format. You could also merely reset the Scale property in the Effect Controls panel.
The moral of the story is: “Scale to Frame Size” is not as useful now that we have the newer “Set to Frame Size” function.
Larry adds: I knew about “Scale to Frame Size,” but “Set to Frame Size” was new to me and is a very effective way to scale images in Premiere.
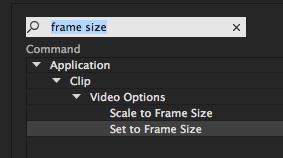
Also, you can quickly set a keyboard shortcut for either option by searching on “Frame Size” in the Keyboard Shortcuts menu.
Thanks, Kevin!

2,000 Video Training Titles
Edit smarter with Larry Jordan. Available in our store.
Access over 2,000 on-demand video editing courses. Become a member of our Video Training Library today!
Subscribe to Larry's FREE weekly newsletter and
save 10%
on your first purchase.
5 Responses to Premiere Pro: Display Large Images
Hi Larry,
Thanks for creating this article. I am sure that a number of people will find this info useful.
Regards,
Kevin Monahan
Support Product Manager, Digital Video Applications
Adobe
Hi Larry,
What, in effect, is it doing to the image when “Set(ting) to Frame Size” compared to “Scale to Frame Size”?
All the best,
Ethan Derner
Ethan:
Basically, Set Frame Size scales the image to fit the project and sets the Scale setting to 100%, essentially reducing the resolution of the image.
Scale Frame Size scales the image to fit the project, without changing the Scale setting. This effectively fits the image, while still preserving all the image data (resolution.)
Larry
Hi Larry,
I’m a little confused as to which setting I should use when I want to crop in on 4K footage to reframe my shots. In your other article you suggest Set to frame size is the best but in your response to Ethan you say “Scale Frame Size.. …effectively fits the image, while still preserving all the image data (resolution.)”. But in the article above you say that “When you use the Set to Frame Size command, the native pixel resolution of the image is preserved” and that ““Scale to Frame Size” is not as useful now that we have the newer “Set to Frame Size” function.”
Best
Charlie
Charlie:
Set to Frame Size is the better choice.
Larry