
![]() Adobe made major improvements to multi-camera editing with the CS6 release. Gone is the four-camera limit. Now, a multicam clip can contain as many camera angles as your system can support.
Adobe made major improvements to multi-camera editing with the CS6 release. Gone is the four-camera limit. Now, a multicam clip can contain as many camera angles as your system can support.
NOTE: The phrase: “that your system can support,” is very hard to pin down. Things that can limit the number of video angles you can edit include: the data transfer speed of your hard disk, the speed of your computer, the capability of your graphics processor, the complexity of the video codec, and whether all camera angles are the same image size, frame rate and codec.
As a general guide, you should be able to edit four streams of video using a single FireWire hard drive. A two-drive Thunderbolt RAID should allow you to edit up to eight streams. A five-drive, or greater, Thunderbolt RAID should allow you to edit more than 16 streams. (As always, these are estimates and reality has an ugly way of changing the situation.)
Multicam clips can contain audio, video and/or stills. Multiple clips, for example, still images, can be contained on the same multicam track. This is a cool way to create a montage of stills.
GET READY
Clips that go into a Multicam clip (which Adobe calls a “multi-camera sequence”) need to have a common sync point. The sync point provides a common starting point so that all the clips play back together, in “sync.”
We can sync using four different sync points:
Whichever one of these that you pick, all the clips need to use the same method of syncing. And, if you use markers, the name of the marker you use to mark sync for each clip must match. For example, I often use “Slate,” or “Start.”
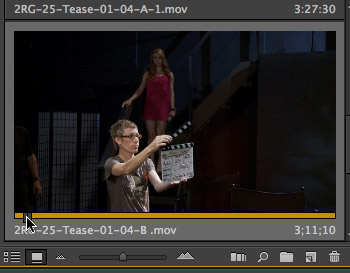
For this article, I’ll use an In to mark the sync point. New with Premiere is a mini-Timeline inside the Thumbnail view of each clip in the Project panel. Click on the image to display the small gold timeline, then slide the playhead to the point you want.
To move in small increments, press the K key and tap the J (to move backwards) or L (to move forwards) keys. This works, but I find it takes too much time. I LOVE the mini-Timeline to see what’s in a clip, but not to set the In or the Out.
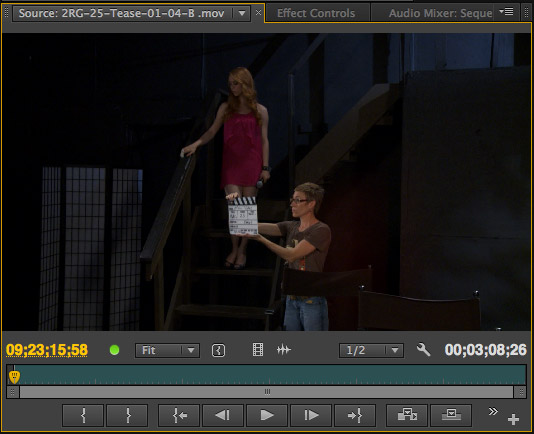
I find it is much faster to simply double-click the clip to load it into the Source monitor, drag the playhead and use the left and right arrow keys to quickly mark the In or the Out. Both methods work, pick the one you like the best.
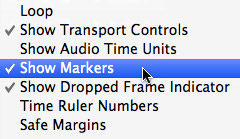
NOTE: If you are using markers to set the sync point, be sure to turn on Marker display in the Source monitor by clicking the Wrench icon and selecting Show Markers.
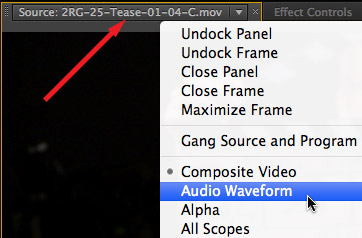
Sometimes, it is easier to sync by looking at the audio waveform than the picture. To see waveforms, right-click on the clip name in the Source tab and select Audio Waveform.
To switch back to viewing images, right-click the tab to display the same pop-up menu and choose Composite Video.
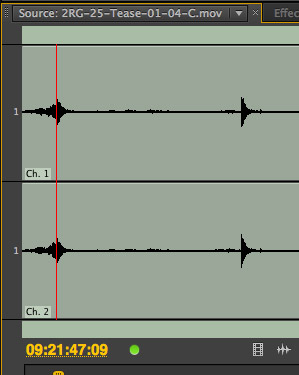
Here, the playhead is parked on the clap from the first of two clapper slates. I’m using the waveform, because the camera wasn’t able to shoot the slate, but I still need to sync the camera.
BUILD THE MULTICLIP

Once you have sync points set for all your clips, select them in the Project panel.
NOTE: The ORDER in which you select your clips is the order they will be displayed in the Multi-camera Monitor.
With your clips selected, choose Clip > Create Multi-camera Source Sequence. (You can also access this menu by right-clicking one of the selected clips.)
NOTE: You must select at least two media sources (audio, video, or stills) to create a multiclip.
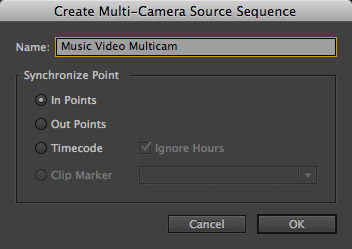
This displays what I call the “Sync Window.” Give your multiclip a name and select how you want to sync your clips. In is set as the default. Then, click OK.

A new icon, indicating your newly-created multi-camera sequence, appears in the Project panel.
SET THE AUDIO
A multi-camera sequence is just that – a special sequence designed to contain multiple clips for editing. By default, a multi-camera sequence (which I’ll go back to calling a multicam clip in just a minute) only enables the audio on track Audio 1.
This means that if you want to hear audio from any other track, you need to turn it on before you start editing the multiclip.
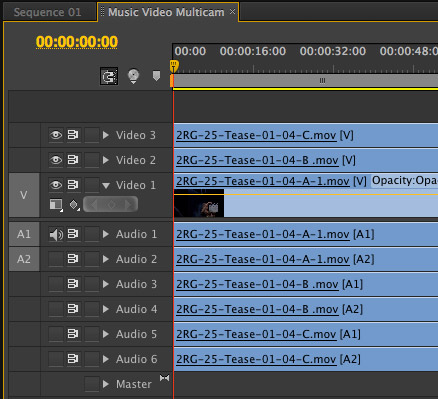
To do this, right-click the multicam clip icon and select Open In Timeline. This opens the source files into the Timeline. This allows us to change which audio tracks are audible, add effects, or add additional clips to an existing track.
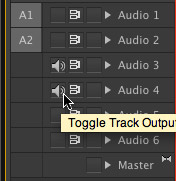
In my case, I want to only use the audio from the second camera, so I click the Toggle Track Output icons (they look like speakers) to turn them on for Audio 3 and Audio 4, and leave the rest of the audio tracks off.
Once the audio is set, you can close the multicam tab at the top of the timeline (this is optional, but decreases confusion).
EDIT THE MULTI-CAMERA SEQUENCE
Double-click the Multicam clip in the Project panel to load it into the Source window.
Set an In and an Out, as you would for any clip, and edit it into the Timeline. A multicam clip can be a sequence by itself, or part of a larger project. From the point of view of editing, it acts just like any other clip.
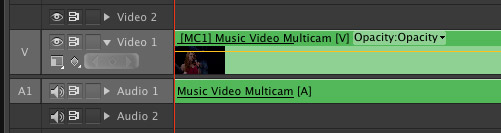
A multicam clip in the Timeline has a different color than other media clips.
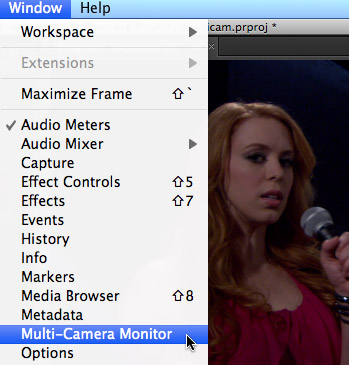
In order to edit a multicam clip, we need to use the Multi-camera Monitor. To display this, choose Window > Multi-camera Monitor.
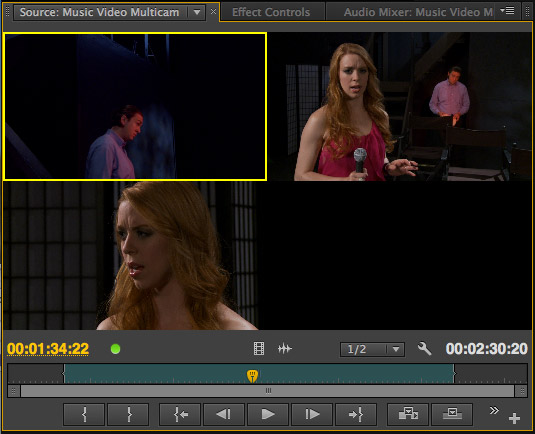
This opens the Multi-camera Monitor as a free-standing window. You can dock it with other panels, if you wish. For this demo, I’m going to use it as a separate window. This is purely personal choice, the operation of the window is the same either way.
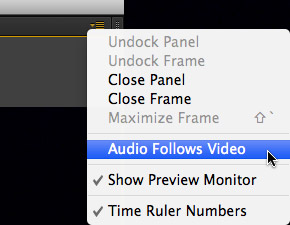
From the fly-out menu in the top right corner, you can select whether audio will follow video. If you choose this option, the audio will change each time you change camera angles. For most of my editing, I don’t want this. Instead, I want the audio to stay with the settings I set when I opened the multicam clip into the Timeline.
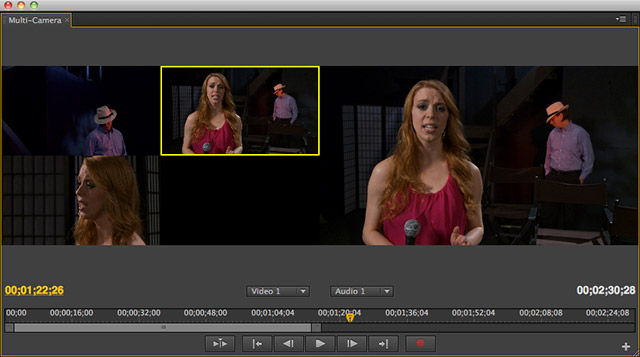
You can also select whether to display the large Preview window on the right. Turning this on – which you can see on the right in the screen shot above – will allow you to see the changes in the clip as you are cutting it.
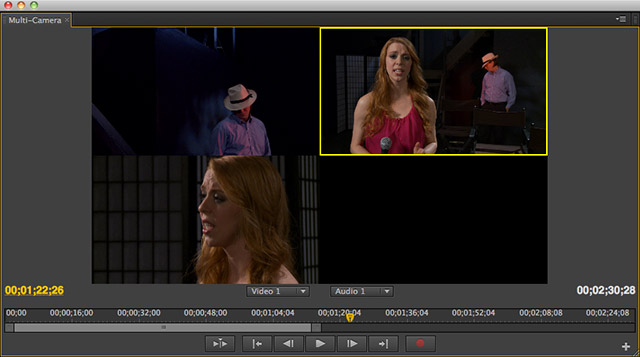
Turning this off, will make your individual clip images bigger. Again, how you decide to display this is a personal preference.
Editing a multicam clip is easy. Position the playhead at the beginning of the clip, then, in the Multi-camera Monitor, press the space bar and, when you want to change shots, click the image you want to cut to.

That cut is reflected immediately in the multicam clip in the Timeline.
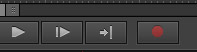
NOTE: If you are controlling the clip outside of the Multi-camera Monitor, you need to click the Red “Record” button in the Multi-camera Monitor. To me, this add a level of complexity to the editing process. It is faster, easier, and safer to control and edit clips directly in the Multi-camera Monitor.
TRIMMING
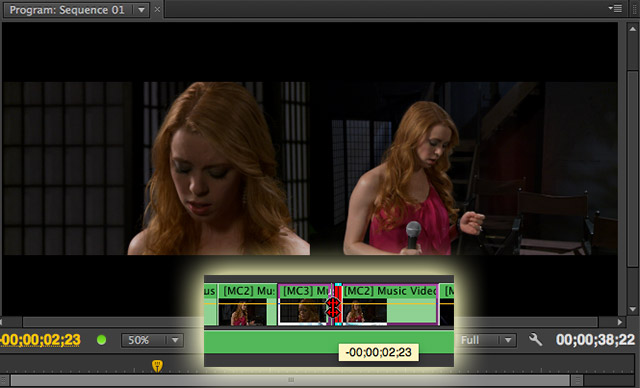
At this point, we can trim the multicam clip in the Timeline just like any other edit. Here, for instance, I was late in cutting back to the wide shot, so I am rolling the edit point to correct this. (This image is a composite of the Timeline trim and the Program monitor.)
To replace an angle in the edited multicam clip with another angle, put the Timeline playhead in the angle you want to replace and click the new angle in the Multi-camera Monitor.
To create an edit in an existing shot in the multicam clip in the Timeline, put the Timeline playhead at the point you want to create the edit and Command-click the new shot. An edit point will be created at the position of the playhead and the downstream shot will be replaced by the shot you click in the Multi-camera Monitor.
OTHER NOTES
You can use keyboard shortcuts, instead of clicking images, in the Multi-camera Monitor by typing numbers 1 through 9 on the keyboard, which correspond to the first nine angles in the Multi-camera monitor.
When replacing angles, you can type a number on the keyboard, instead of clicking the image, when the Multi-camera Monitor is active.
If you apply an effect to any clip when the Multicam Source Sequence is open in the Timeline, that affect will apply to every instance of that angle in the edited multicam clip. You can apply effects before, during, or after editing a multicam clip.
A NOTE ON DATA RATES
For those of you that know multicam editing in Final Cut Pro 7, Adobe is doing something very clever here.

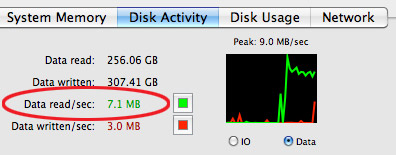
When we play a multicam sequence in the Timeline, Adobe only streams the active angle. As this screen shot illustrates, playing this multicam clip only requires 3.9 MB/second from our hard disk. (I’m using ProRes 422 Proxy as my video codec.)
However, when we play the multicam clip from within the Multi-camera Monitor, Adobe streams video from all angles, which requires significantly more bandwidth.
This means that we don’t need to “collapse” a multicam clip, because Adobe does that for us automatically as soon as we close the Multi-camera Monitor window.
SUMMARY
I am very impressed with the new multicam features in Adobe Premiere Pro CS6. Adobe has done some very solid work that can really simplify your editing.
NOTE: To see these techniques in action, I have a detailed video tutorial on Multicam Editing in Premiere Pro CS6. And, as a refresher, I created this Premiere Pro CS6 Multicam Cookbook.

2,000 Video Training Titles
Edit smarter with Larry Jordan. Available in our store.
Access over 2,000 on-demand video editing courses. Become a member of our Video Training Library today!
Subscribe to Larry's FREE weekly newsletter and
save 10%
on your first purchase.
6 Responses to Premiere Pro CS6: Multicam
Is possible to send a XML from a premiere multicam to davinci? I have been trying but I think that davinci don’t understand premiere’s XML because it’s no possible to collapse multicam sequence in premiere.
Someone could help me, please?
Thank you very much
What proxy codec would you suggest when needing to convert for CS6 Premiere? Apple Pro Res 422 Proxy is not on the AME convert list.
Thank you.
For HD: AVC-Intra
For SD: Uncompressed 10-bit
Larry
AVC-Intranis a proxy?
How can i edit multicam sequences frame size?
Is AVC-Intra a proxy file?