 [ Updated Feb. 6, 2022, with steps to create XML files and thoughts on technology obsolesence.]
There are two big questions you need to answer when the time comes to archive your project:
As we’ve discussed before, the “where” is pretty confused right now. Options include LTO tape, hard disks, DVDs and The Cloud.
But, if you are using Premiere, the “what” is getting easier to answer, thanks to the Project Manager. Let’s take a look at this powerful feature.
CREATE AN XML BACKUP FILE
IMPORTANT: Before you do anything else, create an XML version of your finished project!

Why is this necessary? Because Premiere projects use a proprietary format that only Adobe knows. No other application can open Premiere project. However, LOTS of programs can open that XML file. If you ever need to access an older project, you can do so if you created an XML file. You often can’t if you don’t.
Creating an XML file is a big deal! It is fast, it doesn’t take much storage space, and it can save your tail in the future. Get in the habit of creating one for every completed project.
NOTE: An XML files does not contain media, it only contains the instructions on how that media was edited. Media still needs to be handled separately.
THE BASICS

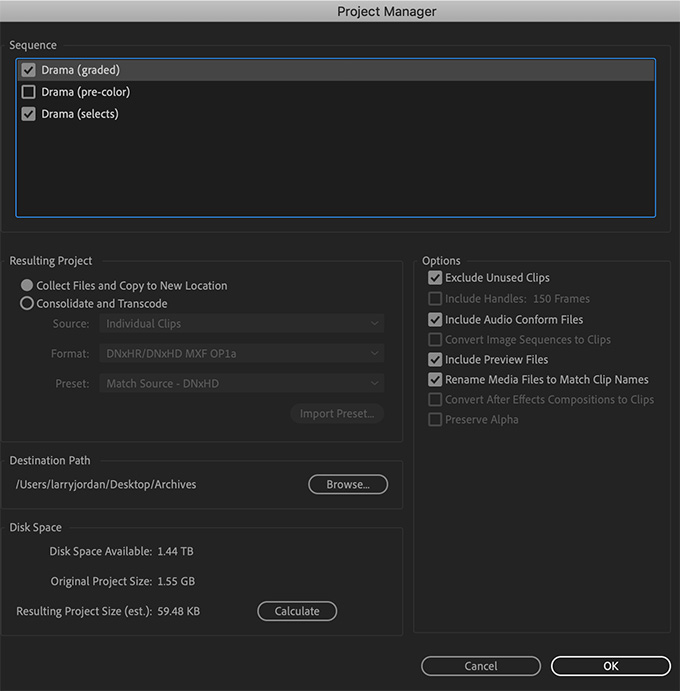
Choose File > Project Manager to display the window. Project Manager has two key functions:
In this article, we will look at the first option.
NOTE: Collecting files into a single location is also a good idea if you plan to share these files between editors.
ARCHIVING
At the top of the window is a list of all the sequences in your project. Check those that you want to consolidate and archive. While conserving storage space is important, remember this it the long-term archive of your project. Don’t exclude media that you might find useful if your project becomes a wild success and you need to create a Tenth Anniversary version.
NOTE: Nested sequences are not automatically selected. If the sequences you are selecting contain nested sequences, ensure that you include these nested sequences in your selection.

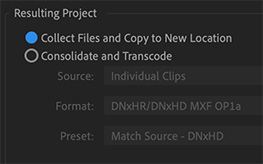
Next, check Collect Files and Copy to New Location.
This option, as you might guess, finds all the files in your project and copies them into a new location. There are several notes here:
NOTE: Project Manager does not collect and copy After Effects compositions that are dynamically linked to an Adobe Premiere Pro project. Project Manager does save the Dynamic Link clip in the trimmed project as an offline clip, however.

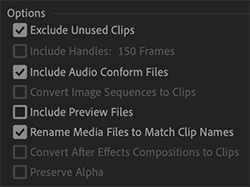
In the Options section:

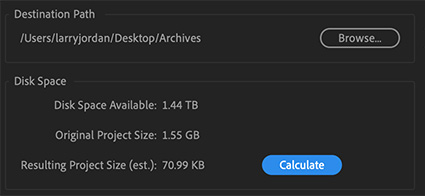
Next, set a Destination Path to a folder specific to that project. Yes, you can store projects anywhere, but, especially when archiving, putting everything related to one project in one folder is a great way to keep things organized.
Click Calculate, at the bottom, to make sure you have enough room to store the project. Then, click OK.
A NOTE ON TECHNOLOGY OBSOLESCENCE
Technology marches on, but our projects don’t. Opening a project a year from now in Premiere is pretty much assured. But ten years? Lots of technology will change by then – operating systems, applications, plug-ins, and templates, to name a few.
Adobe has done a better job of supporting older formats than Apple has. Premiere is a good example of supporting older files. Final Cut Pro 7 is not. 3rd-party plug-ins are also an issue; it’s not unusual for a developer to lose interest in developing a plug-in that was essential for your current project.
Make good notes about the tools you used and include the name and version of:
I think it is a safe assumption that you’ll be able to open both the XML file and media in ten years. But you most likely won’t be able to open any programs or plug-ins. Factor that into your planning.
SUMMARY
Some projects never need to be archived. Others, though, have a life far beyond their original release. By taking the time to collect all the different project files and put them into one place you can assure yourself they will be around when you need them again in the future.
2,000 Video Training Titles
Edit smarter with Larry Jordan. Available in our store.
Access over 2,000 on-demand video editing courses. Become a member of our Video Training Library today!
Subscribe to Larry's FREE weekly newsletter and
save 10%
on your first purchase.