
![]() If you are like me, you prefer to edit first, then color grade later; or edit first and apply effects later. This way, you avoid wasting time color correcting clips that never make the final edit. Except… working this way often means color grading the same clip multiple times in the Timeline.
If you are like me, you prefer to edit first, then color grade later; or edit first and apply effects later. This way, you avoid wasting time color correcting clips that never make the final edit. Except… working this way often means color grading the same clip multiple times in the Timeline.
The 2014 release of Premiere makes this a whole lot simpler by supporting “Master Clips.”
A “Master Clip” is a clip in the Project panel that serves as the source for one or more clips in the Timeline. A master clip can not be a sequence, multicam sequence, or bin. It can be audio, video, or a generated clip from inside Premiere. Basically, when you import a media clip into Premiere, it becomes a master clip without you needing to do anything special.
THE PROCESS
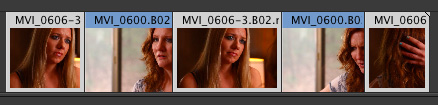
For example, here’s a dialog sequence between two women. (Footage courtesy: John Putch “Route 30, Too!” — www.route30trilogy.com). I deleted the audio to make this example easier to see, but the process is the same with or without audio.
The three highlighted shots are all from the same media clip in the Project panel; this is the “master” clip for those Timeline shots.
We can apply settings to a master clip by dragging an effect from the Effects panel to:
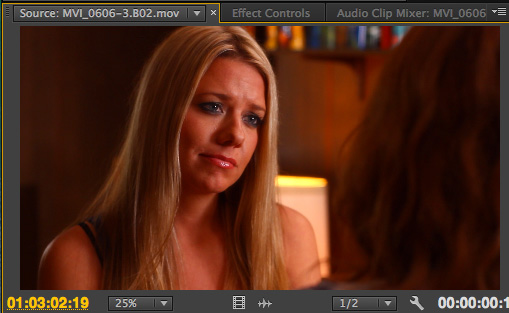
I’ve found it easiest to double-click a clip from the Project panel to load it into the Source Monitor in order to apply the effect.
NOTE: You can apply a single effect to multiple clips by first selecting them in the Project panel, then drag the effect from the Effects panel onto the selected clips in the Project panel. You can NOT create a master clip by dragging an effect into any clip in the Timeline.
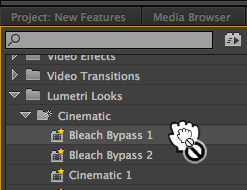
Here, for example, I’m applying a Bleach Bypass look. (Lumetri Looks > Cinematic > Bleach Bypass 1)
Drag the effect you want to apply to the Source Monitor (NOT to a clip in the Timeline). See the word “Source” in the top right corner of the monitor?
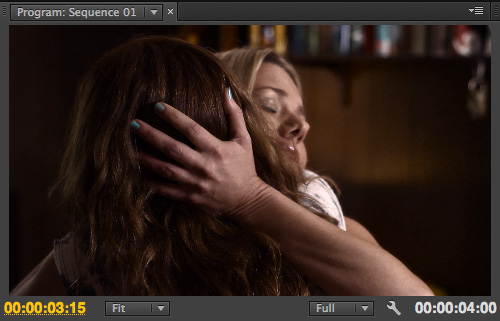
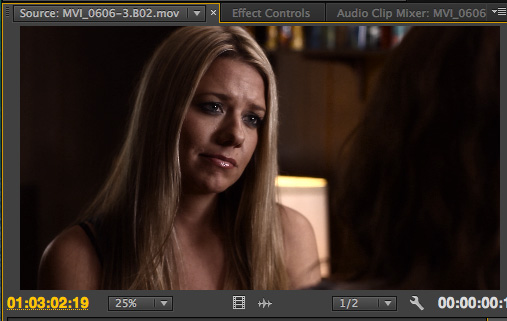
Instantly, all the Timeline clips that use that source footage are changed. (This is a different Timeline clip that is taken from the same Source clip and displayed in the Program Monitor.)
NOTE: You will see the change in the Program Monitor, not the thumbnails associated with each clip.
EXTRA CREDIT
You can apply an effect to a master clip either before or after it is edited into the Timeline. This allows you to color correct a clip before editing it, which can save time later.
Adobe adds: To view or adjust the master clip effect from a sequence clip, use the Match Frame feature. The master clip for that sequence clip is loaded into the Source monitor. Double-clicking a sequence clip loads just that segment, and not the master clip. The Effect Controls Panel then shows the track item’s effects and not the master clip’s effects.

2,000 Video Training Titles
Edit smarter with Larry Jordan. Available in our store.
Access over 2,000 on-demand video editing courses. Become a member of our Video Training Library today!
Subscribe to Larry's FREE weekly newsletter and
save 10%
on your first purchase.
11 Responses to Premiere Pro CC (2014): Master Clips
W/ CC 14 can I send a master clip to audition for sweetening/repair? So often I get interviews w/ rather loud AC or background noise, and am typically sending each individual edited segment to Audition for noise removal. If I could send the master clip, I would probably have a better sample to “Capture” ambiance for the noise removal process ( or using the automated sound remover), and it would save me many steps in repairing noise level in master timeline.
Thanks,
Jim
Jim:
Yes… But a better way to think of this is exporting a media file from the Project panel – or stored on your hard disk – before editing it to the Timeline.
A clip doesn’t become a “Master clip” until it is edited on the Timeline.
Larry
I’m going to wait a bit to upgrade, then I’ll give it a shot.
Thanks,
Jim
Hi
For some reason i can’t apply an audio effect to a master clip. any ideas why? is this not supported?
I have the same question as Richard. I’m trying to “fill left” with the master clip but it won’t let me.
I had the same issue. This is how I resolved it:
– In the Source Window, right click on the master clip you want to fill, go up to “Modify” and choose “Audio Channels”.
– The “Modify Clip” window will come up. This should list “Source Channel”, “Track”, and “Channel in track”. Under “Source Channel” choose the channel that is providing audio for both the Left and Right “Channel in track” settings. (For my project the left channel had the audio – in a stereo track – so I made sure that was providing the audio for both the left and right channel.)
– Click “OK”.
I hope this solves your problem!
Thanks. I prefer that method and it works well.
[…] and Masks | Working with Live Text Templates | Using Master Clips | Auto-sync settings and back up projects to the cloud | Importing Layered Photoshop Files | The […]
Can’t make this work in my Premiere Pro CC project. When I try to apply an effect to a clip in the source monitor or project window, I get the minus sign. I’m doing this with the sequence and record monitors up. But I double click the source clip and source monitor to make sure they are active first. Is there something going on in my preferences?
Yeah, this doesn’t appear to work for audio filters nor for the Audio Gain option, though it shows up as selectable just like the Audio Channel option. Really great that the Audio Channel option works though. Looking forward to all the options being fully implemented. It’ll be a really powerful tool.
Tried this several times without success. I’m sure I’m missing something obvious.
Have added 4pt Garbage Matt and color correction to the original clip. The changes show in the source monitor, but don’t seem to be applied to the sequence.
NOTE: It is a Multi Cam sequence.
Can you help?