
![]() One of the big new features in Adobe Premiere is automatic reframing of text and clips when converting between aspect ratios. For example, editing a 16:9 sequence, then reframing for display on Instagram (1:1) or a vertical monitor (9:16).
One of the big new features in Adobe Premiere is automatic reframing of text and clips when converting between aspect ratios. For example, editing a 16:9 sequence, then reframing for display on Instagram (1:1) or a vertical monitor (9:16).
While reframing can move and resize your text automatically, many times you want to control where it gets moved. Let me show you a simple – but not obvious – way to control the placement of text during a reframe.
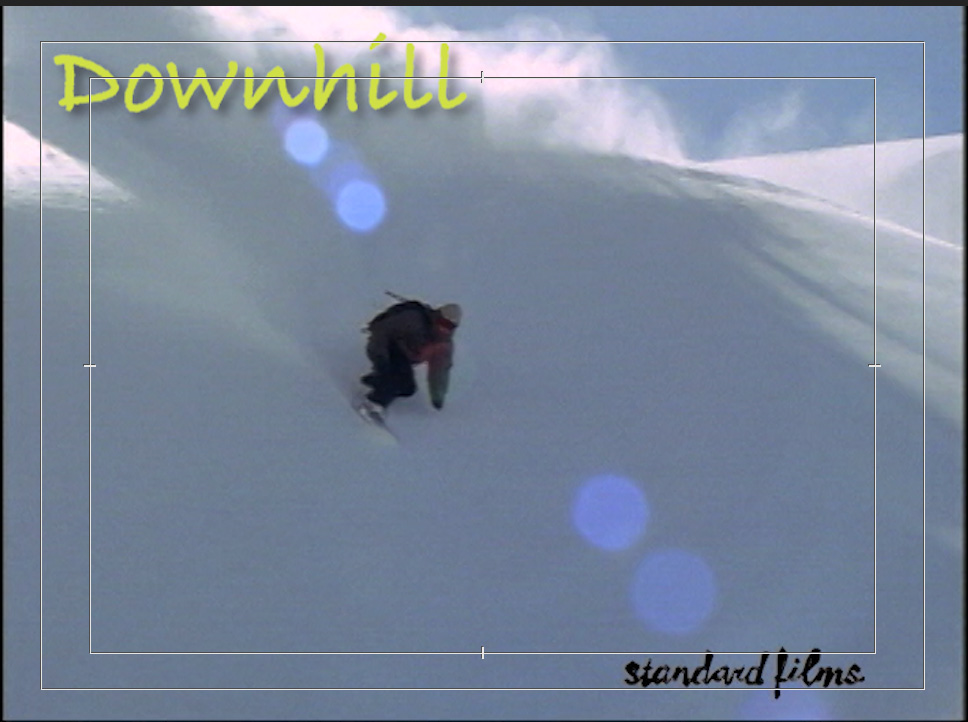
Footage courtesy: Standard Films (www.standardfilms.com)
Here’s our image, a snowboarder gliding downhill. To this, I added a title and positioned it in the upper left corner against Action Safe. (The font is Bradley Hand.)
When I created the title, I switched to the Graphics workspace in Premiere (Window > Workspaces > Graphics).
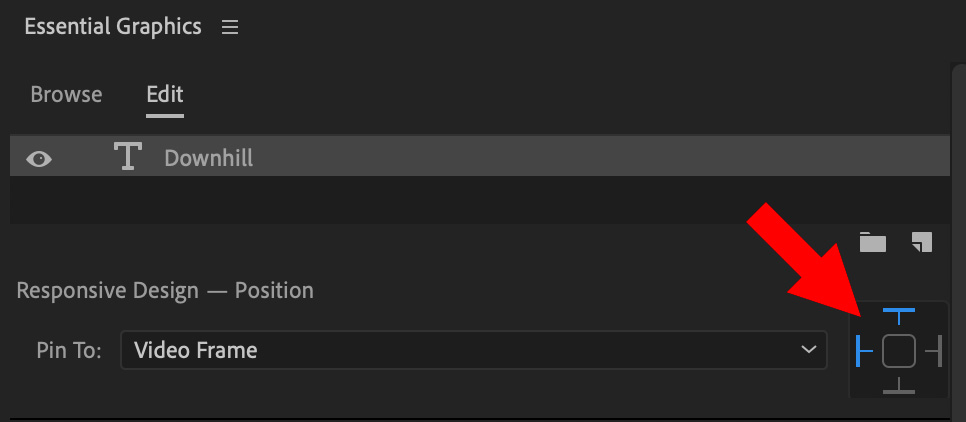
Then, at the top of the Essential Graphics panel is this “pinning control.” The blue lines indicate to which part of the frame the graphic will be “pinned.” In this screen shot, I’ve told Premiere to lock the selected text clip to the top and left edges. You can select any combination of edges that you want; however, selecting all four is a bad idea, because your text MUST move during a reframe.
NOTE: This control does not control the text, rather it controls the frame the text is in.

Over the course of the video, our snowboarder changes position in the frame. Premiere will track this movement during the reframe, so it will also need to adjust the text to compensate.
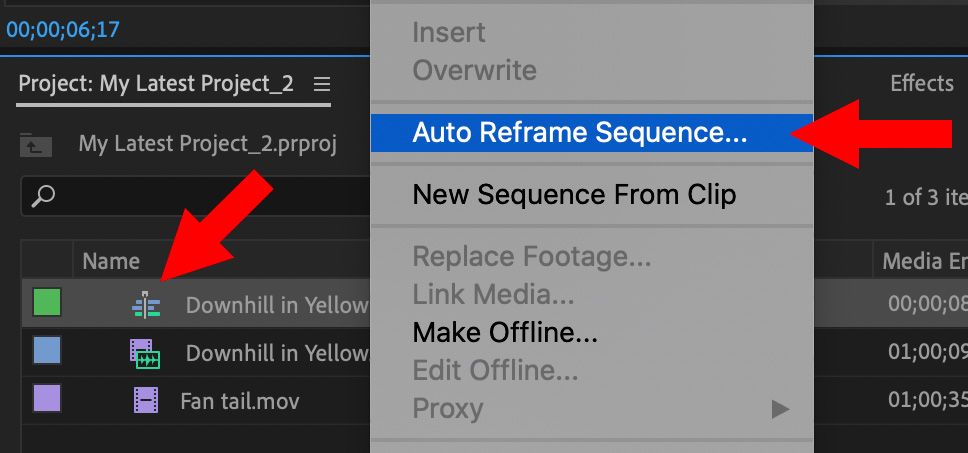
In the Project panel, Control-click the sequence you want to reframe and choose Auto Reframe Sequence.
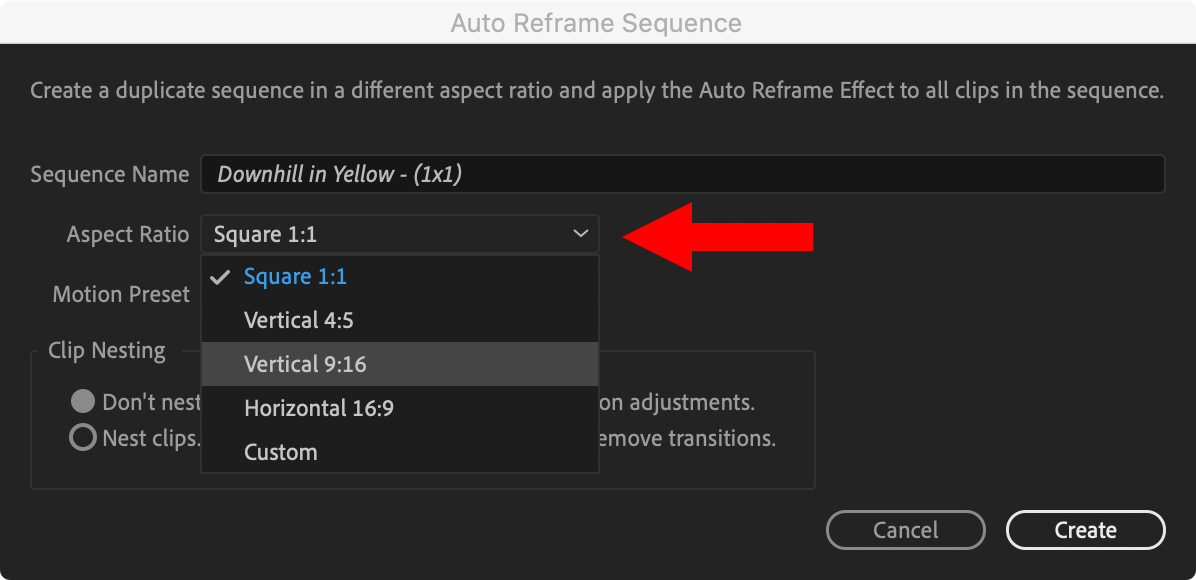
In the resulting dialog, specify the aspect ratio you want for the new sequence. In this example, I’m using Vertical 9:16.
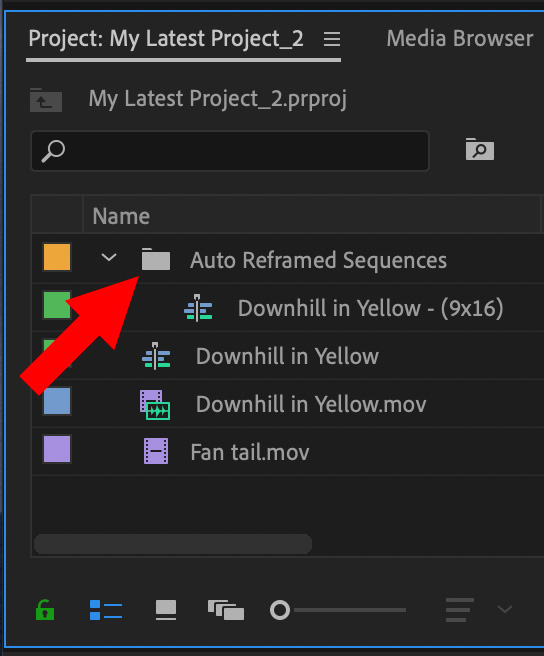
After analyzing the movement in all the clips in the original sequence, a new sequence is created and put into its own folder.
NOTE: It’s important to note that the original sequence is not modified during this process. The amount of time spent analyzing is dependent upon the duration of the original sequence.
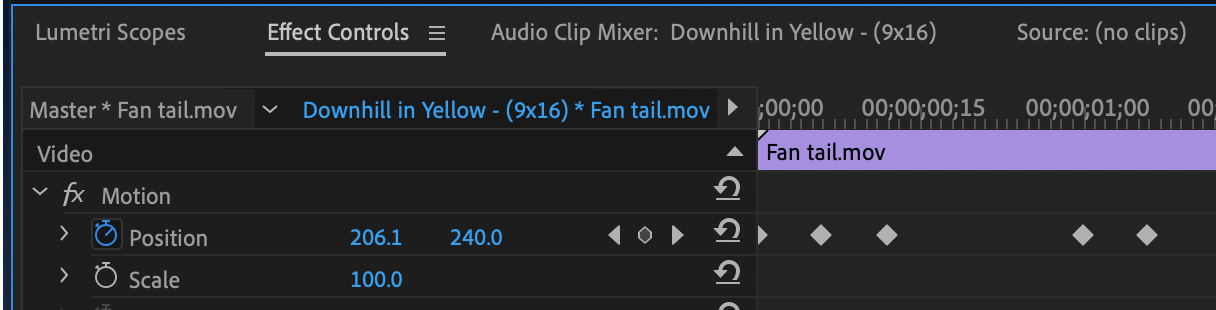
What Premiere did, essentially, was create a new sequence at the aspect ratio you specified, then apply an automatic “pan-and-scan” on the clips in the source sequence to keep all essential action in the new sequence. You can see this for yourself by selecting a clip in the new sequence, then viewing the Position keyframes in the Effect Controls panel.
NOTE: Because these moves are keyframes, it is easy to correct a position setting that you think needs improvement.
The essential fact, from a graphics point of view, is that your text remains pinned to the areas you specified when you first created them.
SUMMARY
If you don’t reframe your sequences, this is a setting you don’t need to care about. But, if reframing is part of your workflow, these “pin” controls can save a lot of time.

2,000 Video Training Titles
Edit smarter with Larry Jordan. Available in our store.
Access over 2,000 on-demand video editing courses. Become a member of our Video Training Library today!
Subscribe to Larry's FREE weekly newsletter and
save 10%
on your first purchase.