 My son called me last week asking: “How do I export segments from a longer movie in Adobe Premiere Pro CC?” I gave him a quick sketch, but, then, realized that I needed to write up something with more detail.
So, for him, and you, here’s how.
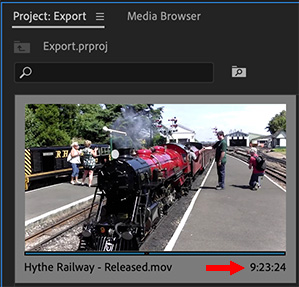
(Footage courtesy: Barrie Furminger)
A while back, knowing that I enjoy watching trains, Barrie Furminger sent me a ten-minute video he created of the Romney Hythe & Dymchurch Railway; a lovely rail tour through the English countryside.
Let’s say that I want to export excerpts of all the shots of the train engine. (And for those who are not train enthusiasts, substitute the sport, activities, or highlights of your choice.)
You might think that we need to cut this into appropriate chunks to export. But, no. More specifically, you can NOT select clips to determine what gets exported.
THE EASY WAY TO EXPORT
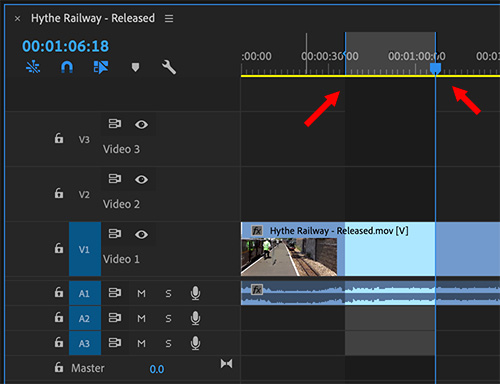
Instead, you need to set an In (shortcut: I) and Out (shortcut: O) in the timeline to mark the section you want to export.
This process is the same whether you have one or many clips in the timeline. Simply set an In and/or Out for the section of the timeline you want to export.
NOTE: You can cancel any In or Out settings by typing Option + X.
Then, choose File > Export > Media.
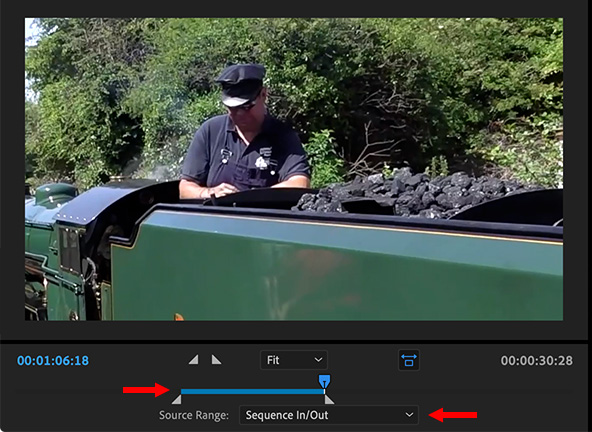
Look in the lower left part of the window and see that the timeline In and Out are preset for this sequence and that the Source Range is set to Sequence In/Out.
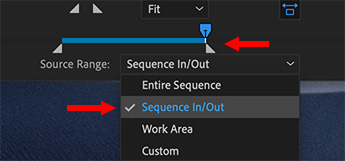
You can change this, in case you got it wrong, by choosing Custom and resetting the In and Out.

If you click Export, Premiere will start exporting immediately in the foreground. If you click Queue, it will open Adobe Media Encoder, load the file into the AME queue then wait briefly for you to change the setting or, after a short pause, start exporting the clip in the background.
Queuing will take longer, but it allows you to get right back to work editing in Premiere. If you have a lot of exporting to do, Queuing is a better choice.
EXPORT OPTION 2
There’s a second way to set the In and Out to export a segment. Rather than do it in the timeline, you can do it in the Export window.
With a movie in the Timeline, select File > Export > Media.

Change the menu at the bottom left to Custom.
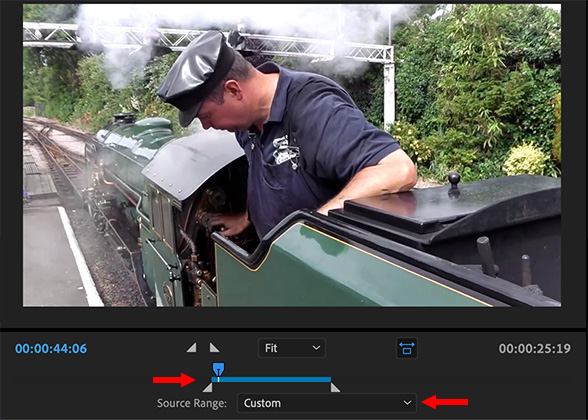
Then, drag the In and Out points to the section you want to export.
Once that’s done, choose Queue or Export, as described above.
NOTE: You can only have one In and Out in the Timeline or export window.
EXTRA SECRET METHOD OF EXPORTING
But… as I was writing this article, I discovered one MORE way to export files: from the Project panel!
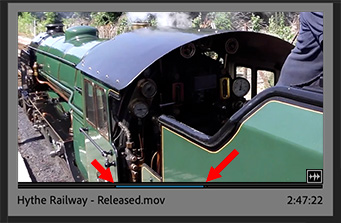
Here, I imported a clip, then, using Hover Scrub, I marked an In and Out (I and O) in the clip in the Project panel.
This time, and this is an important step, rather than use the File menu, right-click the clip itself and choose Export Media.

The Export window opens, but this time the clip is loaded into it. Note the menu at the bottom now says “Clip In/Out” with the range for the clip already marked.
Queue and Export are the same as before, the only difference is that we didn’t need to create a project to export sections.
Very cool!
3 Responses to Premiere Pro CC: Fast Ways to Export Movie Segments
Thanks bro. As a programmer it really annoys me when software isn’t intuitive and you have to look up how to do something, because the obvious thing to do it (selecting the clips you want and hitting export) doesn’t do it. Lol.
Thank you!!!! I googled this so many times and nobody has answered this question but you. Basically, I wanted to freeze the final frame so when the video stopped, it would stop on the final frame, not stop on a black screen after my video.
Happy to help.
Thanks,
Larry