
 [ Updated Nov. 7, 2021, with significant changes to text and screen shots throughout, especially regarding transcript exports. ]
Adobe released a new transcript/caption workflow with the July, 2021, release of Premiere Pro, then significantly updated it in October, 2021, with the v22 release. While captions were a part of Premiere for a while now, the automatic speech-to-text transcription is new. Here’s an overview of how this works.
BEFORE YOU START
While you can create transcripts at any time, there are two places where transcripts will be the most helpful:
Let’s take a look at both. While the initial release had problems with text exporting, Adobe fixed them in the v22 release of Premiere Pro.
TRANSCRIBE BEFORE YOU START
Both transcripts and captions are created from clips in the Timeline.
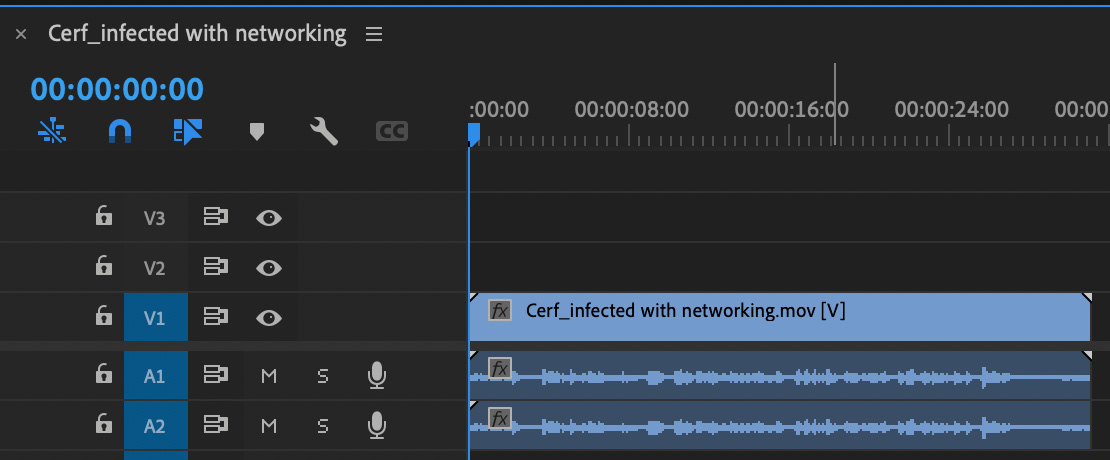
Edit the clip, or clips, you want to transcribe into the Timeline. Make sure the audio volume in the clip is loud enough to hear. And, if there are tracks that just contain sound effects or music, mute them.
NOTE: As part of the transcription process, if you assign tags to your clips – like Dialogue, Effects, Music… you can specify that Premiere just create transcripts of Dialogue clips. This means you don’t need to mute other tracks.
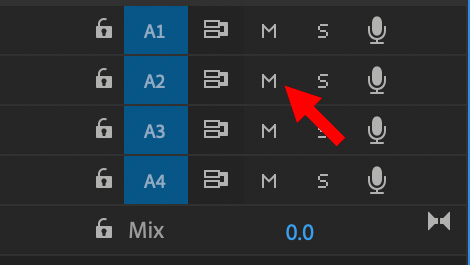
NOTE: To mute a track, click the M icon in the track header for that track.
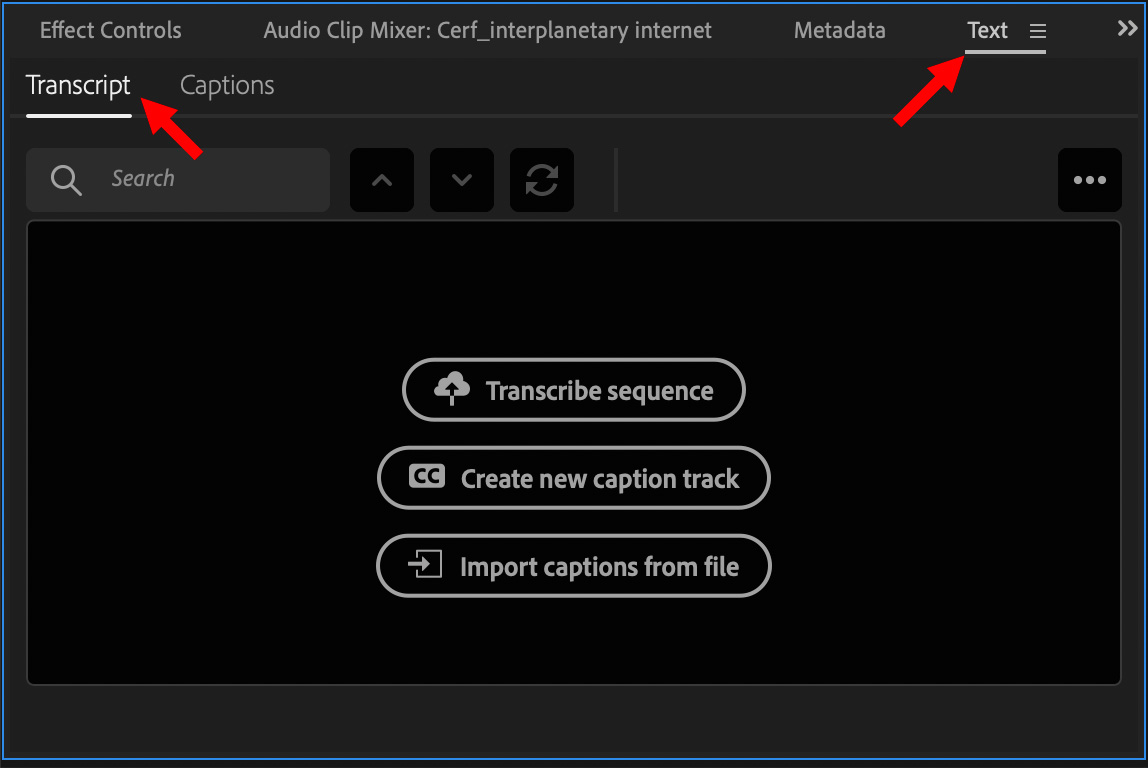
Select the timeline, so there is a blue box around it, then switch to the Text panel and click the Transcript button in the top left. (Whether you click the Transcript or Captions button, you’ll still see the same three choices.)
NOTE: The Text panel is new. There used to be a Caption window in its place, which is now gone.
Click the Transcribe sequence button to start the transcript process.
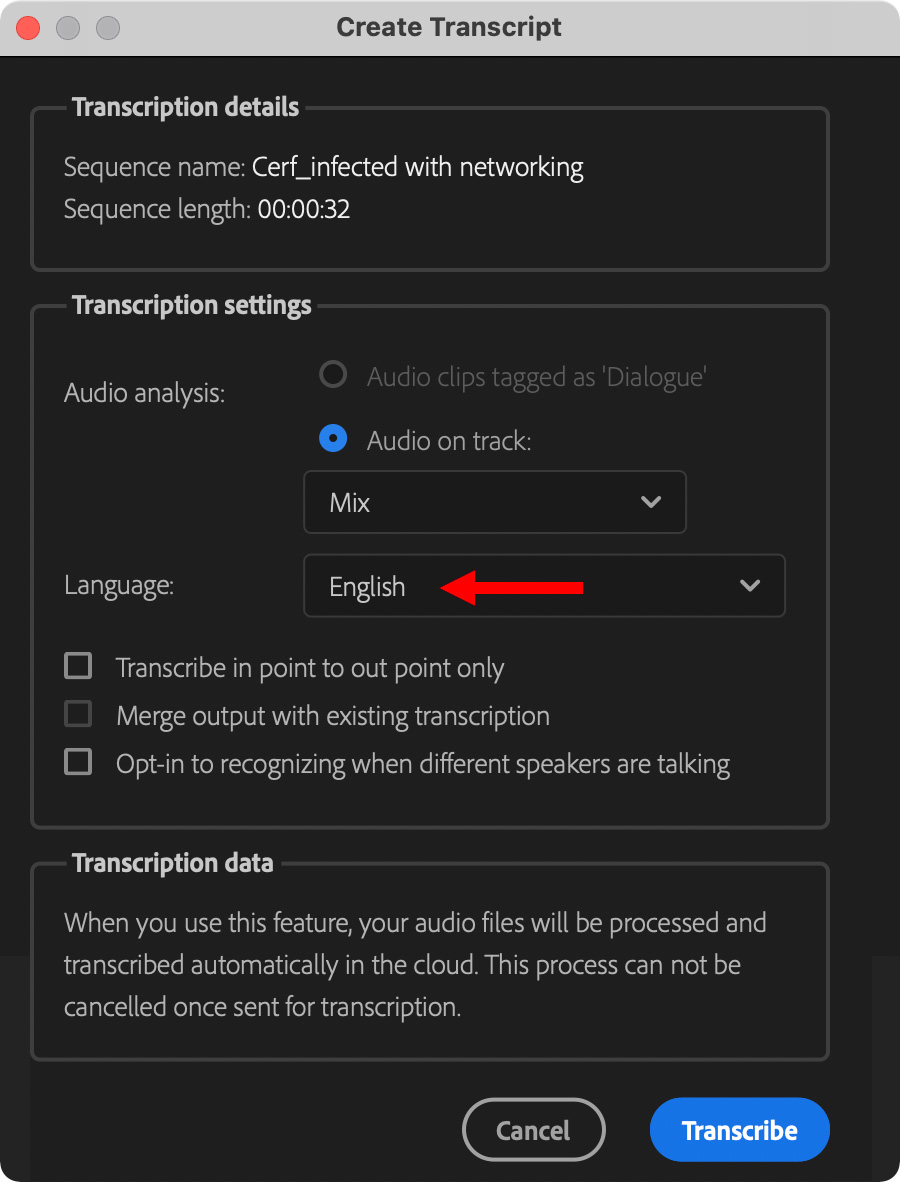
The Create Transcript window appears. Most of the time, the defaults are fine but, if you are working with a language other than English, be sure to set the Language menu correctly.
Then click the blue Transcribe button to start the process.
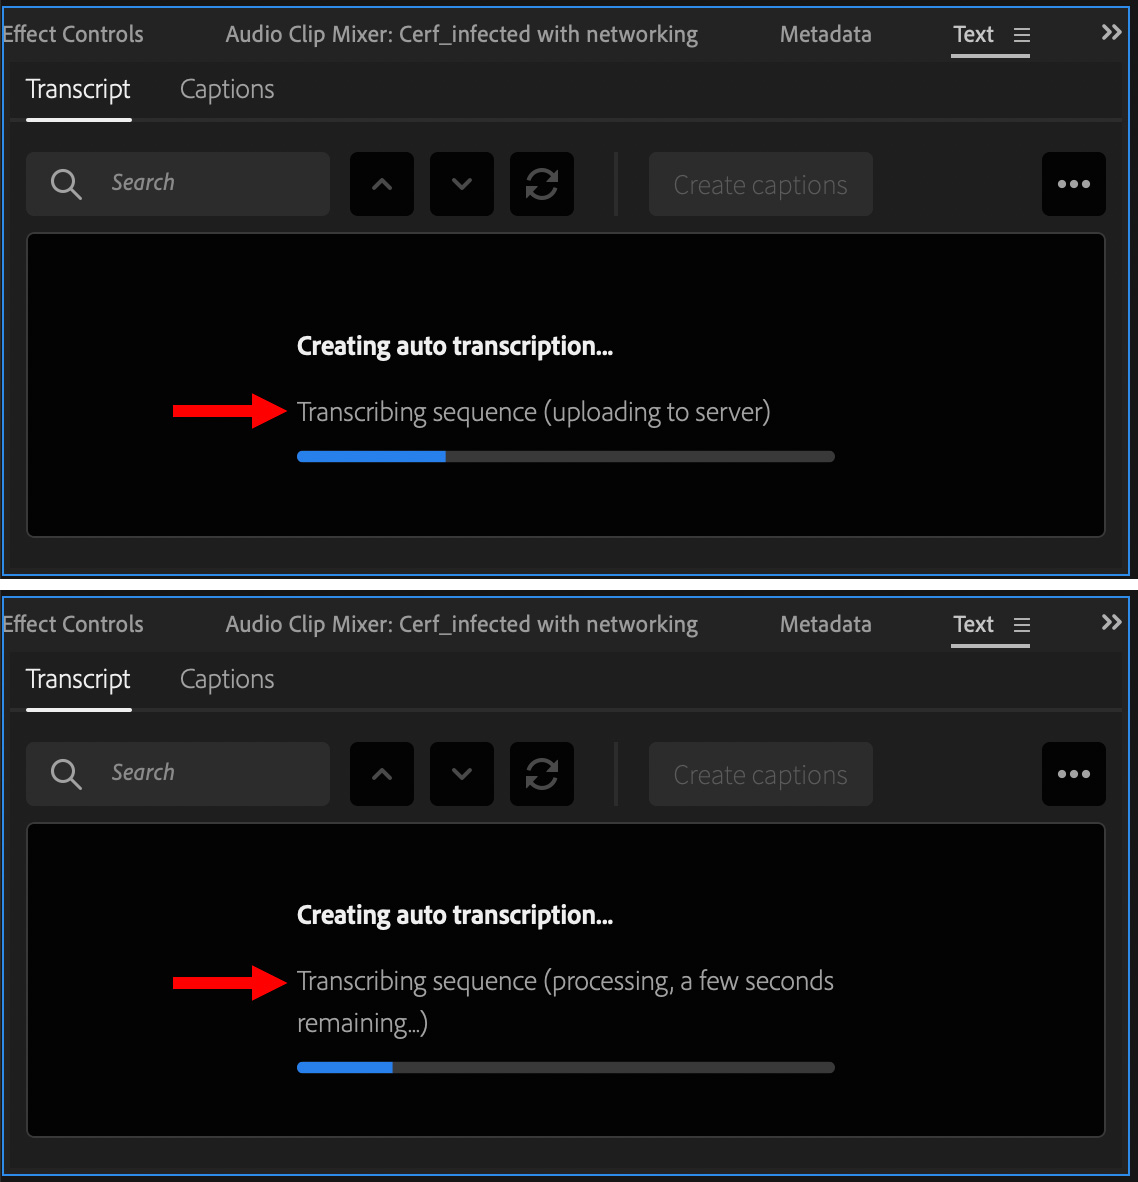
Premiere extracts the audio from the sequence and sends it to the Cloud for transcription. As well, Premiere displays screens indicating the transcription process.
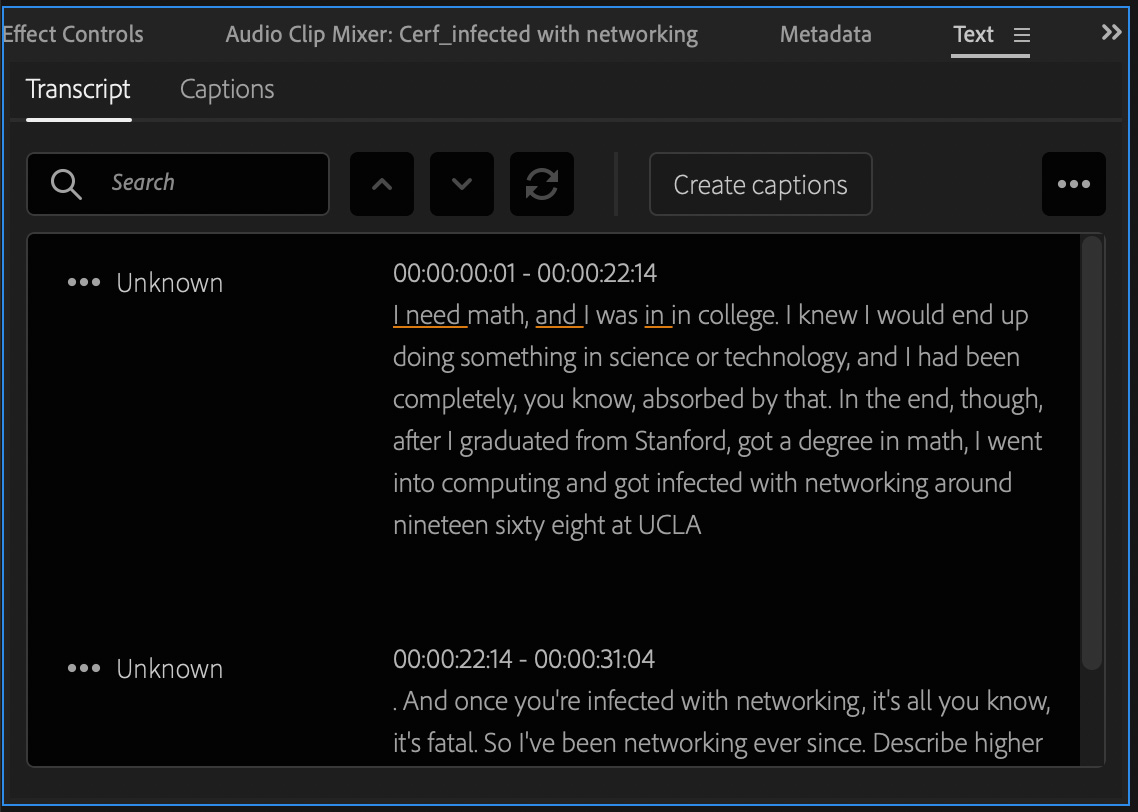
After a bit, which varies depending upon the length of the clip, the transcript appears.
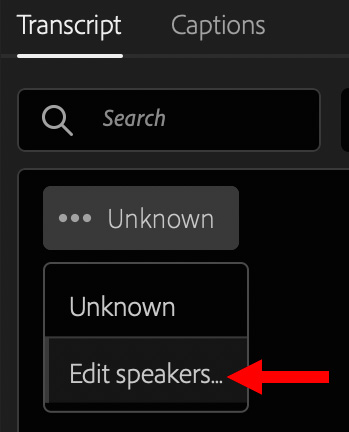
To change the name of the default speaker, click *** Unknown and select Edit Speakers.
NOTE: Don’t add a new speaker, otherwise you’ll need to change all the existing speaker names manually.
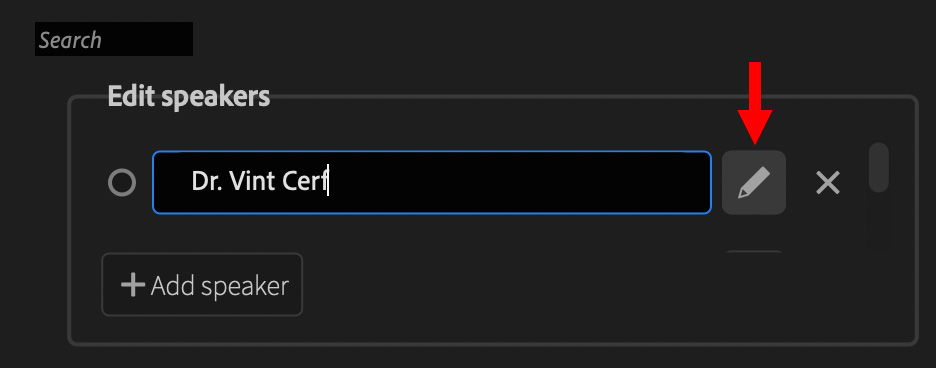
To edit a name, click the pencil and type the new name.
To add an additional speaker, click the Add Speaker button.
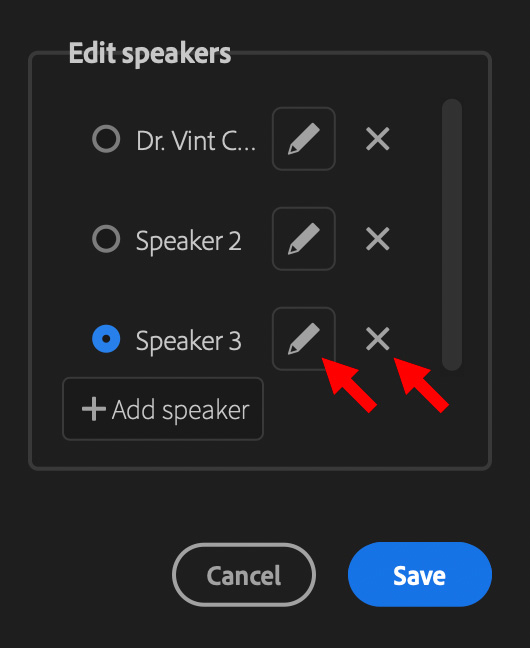
With the v22 release. Adobe changed the behavior of this window. It now expands as you add new speakers, making them easier to see. To edit a speaker, click the pencil. To delete, click the X.
When done, click Save.
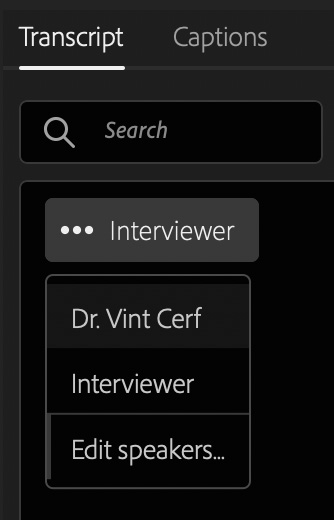
To change the speaker associated with a paragraph of the transcript, click the speaker name and pick the correct name from the list.
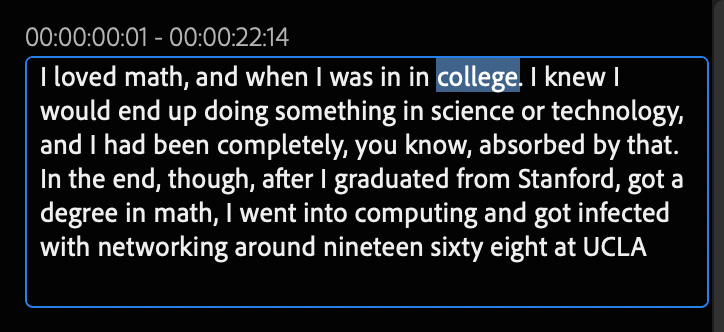
To edit a transcript, say to change a word, correct a spelling or add punctuation, click the paragraph you want to change and, like any text editor, edit it.
NOTE: Currently, Adobe tends to put the period at the end of a sentence at the start to the next paragraph. Keep your eyes open for this. It is easy to fix with manual editing.
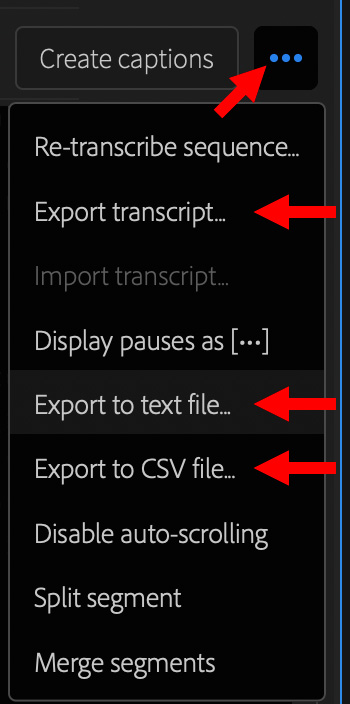
When the time comes to do something with that transcript, click the three dots at the top right of the Text window to reveal the export menu. The v22 release now provides three export choices:
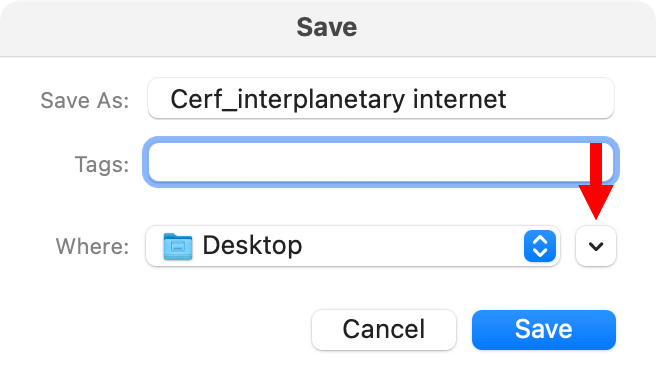
All three export options display a Save dialog so you can name the file and give it a storage location.
Export Transcript is used to create a .prtranscript file that can be opened in the Transcript panel using the Import transcript option. Use this when moving the transcript from one Premiere system to another.
NOTE: Use Import Transcript from this same menu to import a transcript that was exported from another Premiere system.
Export to Text File. Use this option to create a .txt file for proof-reading, to share with a client, or to create written content for your video.
NOTE: Select Display pauses as […] to display pauses as ellipses so that the transcript shows where there are gaps in the dialog. This is very useful to know where you’ll probably need B-roll.
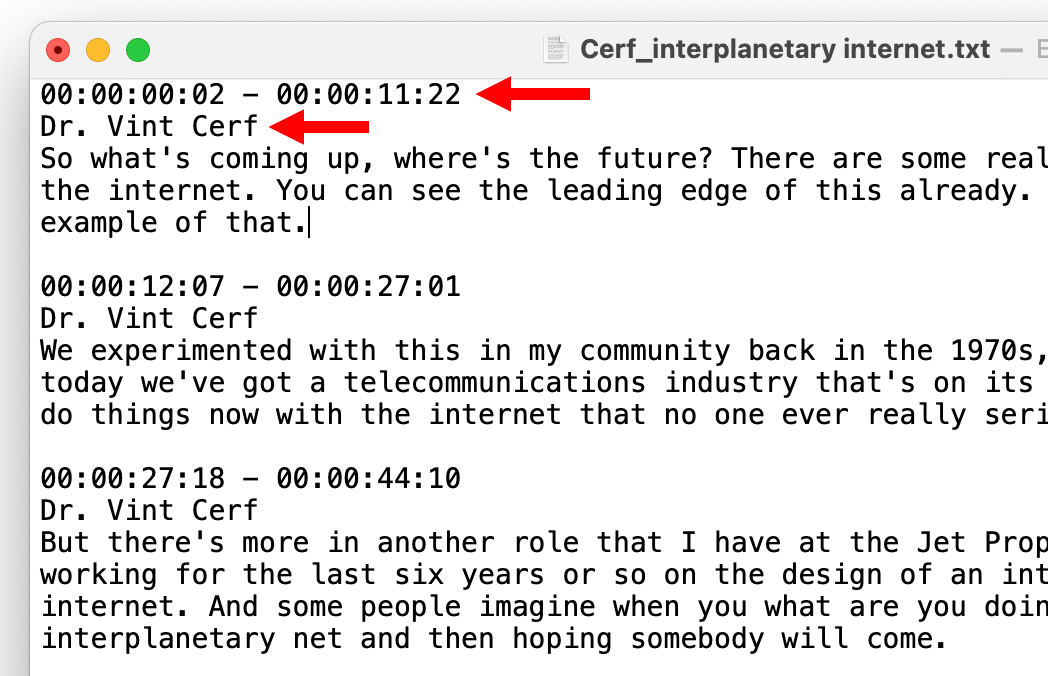
The big news with the v22 update is that exporting a transcript as a text file now includes both the timecode reference and the speaker’s name. This makes these transcripts perfect for client review and editing your talking heads on paper before you start moving clips. This was a much needed improvement from the initial release.
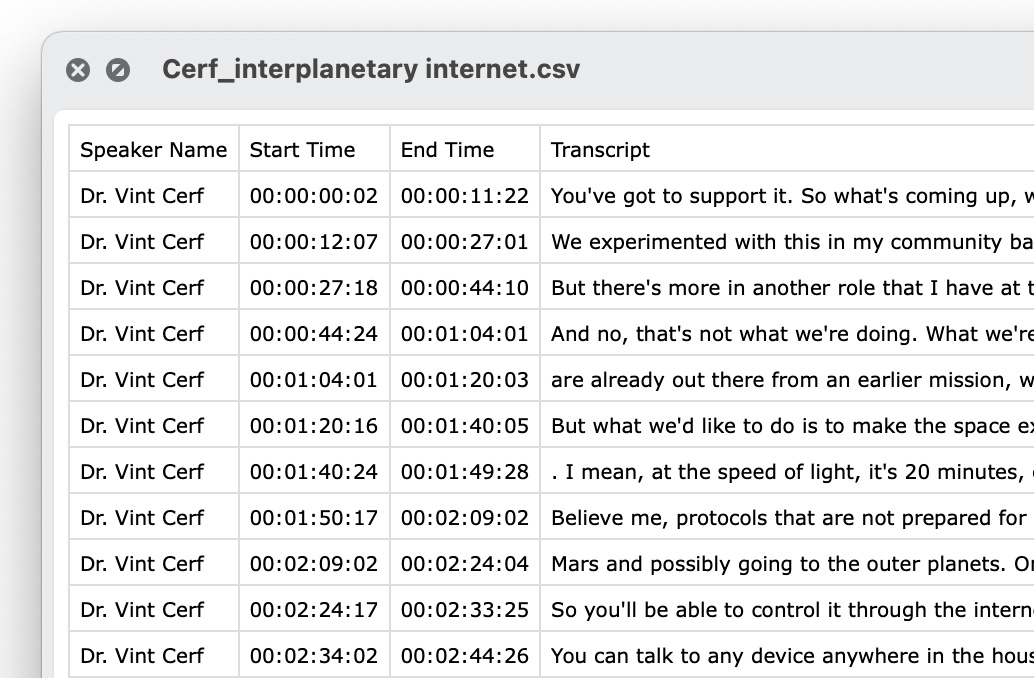
Another new feature in the v22 update is the ability to export transcripts as CSV files. This puts every element into it’s own spreadsheet cell. These can be opened in Excel, Numbers, or any program that accepts CSV files. This is another very useful feature.
Another beneficial v22 change is that you can search for text across all clips or all captions in a transcribed sequence. This is because the entire sequence transcript is loaded into the Text window when a sequence is opened. This makes finding a specific clip containing specific text very fast.
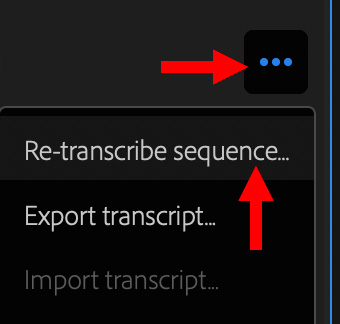
NOTE: If you add clips to a transcribed sequence, select the timeline, then choose Re-transcribe Sequence from the three dot menu at the top right corner of the Text window.
CREATING CAPTIONS
The second major use of transcripts is in creating captions. The first part of the process – creating and editing the text itself is the same.
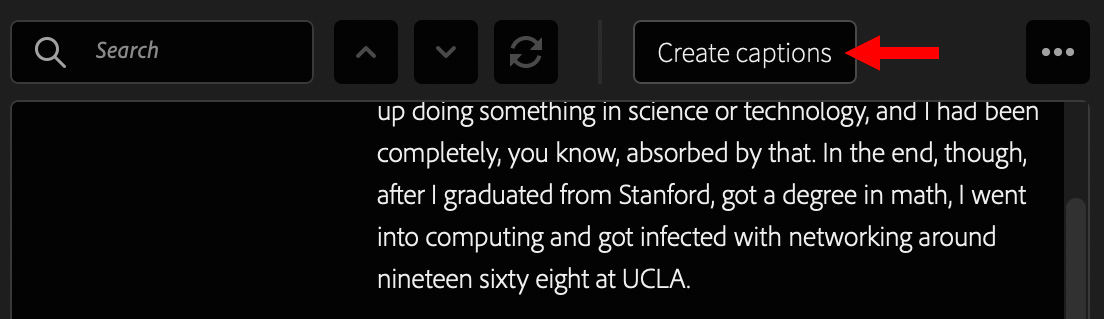
Once a transcript is created and edited, coverting into captions is amazingly easy. Click the Create Captions button.
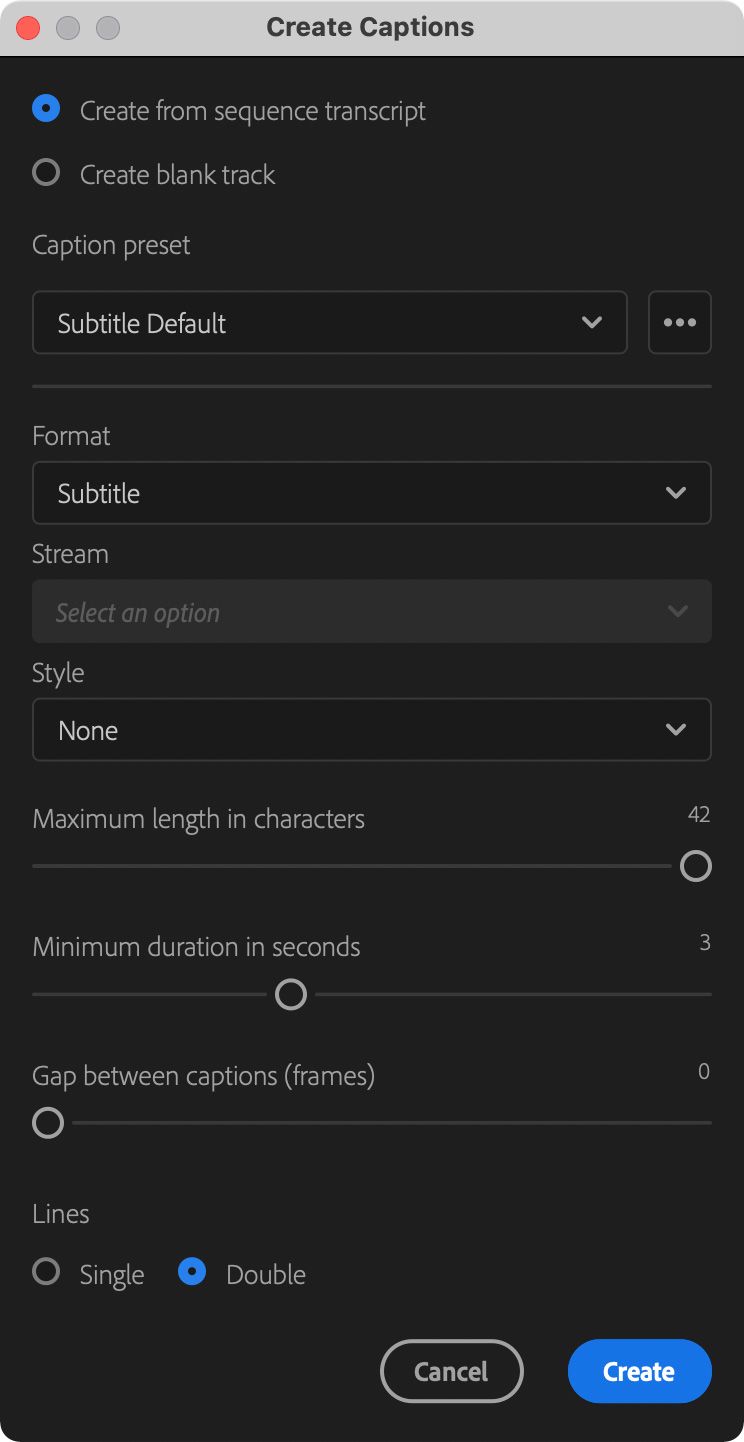
The Create Captions dialog appears. Most of the time, I just accept the defaults, but you are welcome to tweak.
Several things happen at once:
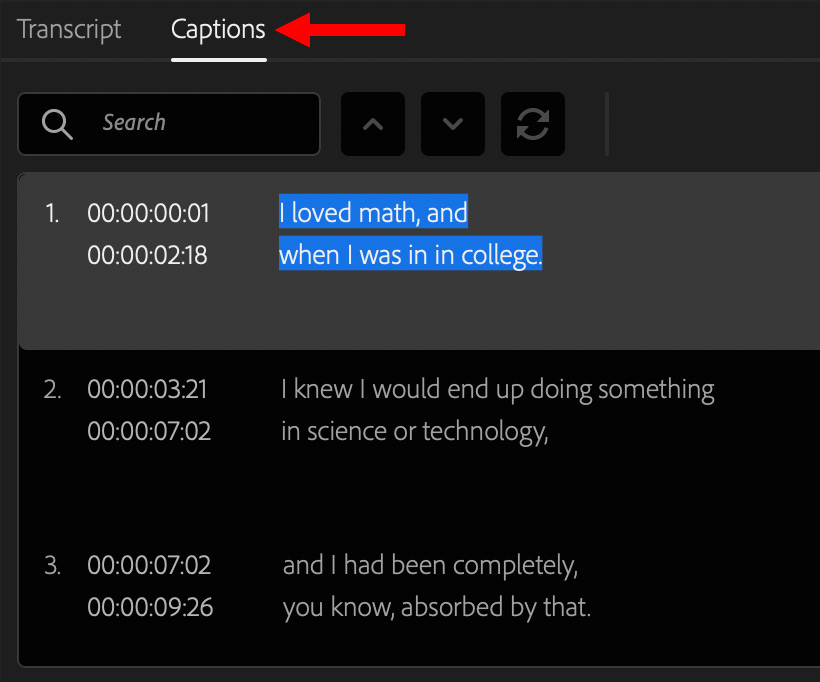
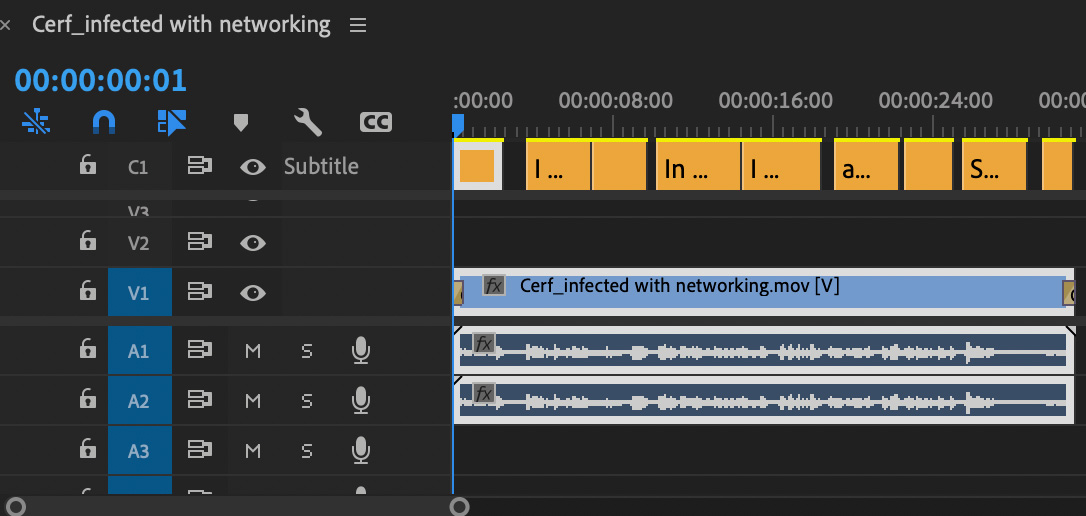
At this point, adjusting and trimming captions is the same as earlier versions of Premiere.
NOTE: When trimming captions, always use the red Roll tool. Trimming with a yellow Ripple tool will knock all downstream captions out of sync.
REVISED SUMMARY
The improvements to text transcripts make this feature seriously useful. As well, the new transcript/caption workflow is fast and easy. Best of all, Adobe is building the cost of transcription into your monthly subscription fee; at least for now.
If you haven’t looked at the new options for Speech-to-Text in Adobe Premiere Pro, now is a great time to start. This one feature can save you hours figuring out how to edit a project – especially one filled with interviews.

2,000 Video Training Titles
Edit smarter with Larry Jordan. Available in our store.
Access over 2,000 on-demand video editing courses. Become a member of our Video Training Library today!
Subscribe to Larry's FREE weekly newsletter and
save 10%
on your first purchase.

33 Responses to New Transcript/Caption Workflow in Premiere Pro [u]
← Older Comments Newer Comments →-
 Evan says:
August 25, 2021 at 2:41 am
-
 Larry says:
August 25, 2021 at 12:40 pm
-
 Steven Gowin says:
August 25, 2021 at 3:44 pm
-
 Shane says:
August 27, 2021 at 7:20 am
-
 Larry says:
August 27, 2021 at 7:28 am
-
 Gregg Ristuben says:
September 17, 2021 at 5:44 am
-
 Larry says:
September 17, 2021 at 6:34 am
-
 Arthur says:
January 11, 2022 at 8:44 am
-
 Larry says:
January 11, 2022 at 9:44 am
-
 Robby Roberts says:
October 29, 2022 at 8:14 am
← Older Comments Newer Comments →Can PP import a txt file with the speakers transcript that does not have timecode,
analyse it – ideally offline, and create captions (closed or open) at the right timings & export to srt?
Evan:
No. Captions require timecode. There’s no way to sync a text file with project audio to create captions unless timecode is part of the import.
Larry
I found the “kludge” method too with .srt files but the timecode notations happen at intervals so short that reading the transcript is hard. Hopefully export to text WITH timecode will happen soon.
One work around for the Timecode missing with Transcription… And that is to convert and use the Captions. Merge what you want together and export an SRT. Open in a text editor, add the speaker names and save it off
Shane:
The only problem with this approach is that if you are handling a client two hours of rough footage to help find selects, all that timecode gets in the way of reading the transcript. And getting rid of it is not easy.
Larry
If you open the SRT file that premiere exports in another subtitle program like Annotation Transcriber you can output an RTF with time-code file that at least gives you the TC for reference for review purposes. This is also handy for creating multiple language translations for a wider subtitle coverage.
Ideally Premiere should build in support for RTF with time-code.
Gregg:
Thanks for your comments.
Larry
Larry, Is it possible to export the final transcript (after edits) so that a transcription person can clean up the edits, and then REIMPORT the transcript into Premier?
Arthur:
ONLY if you export it using the Export Transcript function. This requires that the transcriber correct the transcript in their version of Premiere. It can’t be corrected outside of Premiere.
You can not export a transcript as a text or CSV file, correct it, then reimport that corrected file. Text and CSV files don’t have sufficient timecode references.
Larry
Larry,
Thanks for the inciteful article. It really is appreciated.
My question is regarding the timecode stamps.
When I lay my raw clips end to end chronologically in a timeline, I wish I could get the transcript to display the individual clip’s raw timecode, not the sequence timecode.
This can be done with the “timecode” window burn filter as it can be set to “Clip, media or Generate.” Am I just missing something here?