[ This article was first published in the November, 2010, issue of
Larry’s Final Cut Pro Newsletter. Click here to subscribe. ]
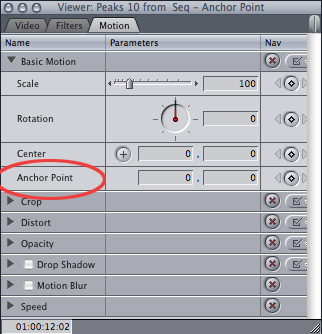
It’s hidden in plain sight, near the top of the Motion tab in Final Cut Pro: Anchor Point. But, what does it do?
FINDING YOUR CENTER
Before we jump into this, we need an essential bit of background. By default, Final Cut calculates all its effects, moves, and positioning relative to the dead center of the Canvas or Viewer. This is illustrated by the Center parameter (above) consisting of two boxes, each containing “0”.
The left “0” refers to the horizontal position of something, while the right “0” refers to the vertical position of something. By default, Final Cut places the center of an image in the center of the Canvas (or Viewer). This position is called the zero point; or, sometimes, the 0,0 point.
NOTE: Photoshop puts its 0,0 point in the top left corner of an image. FCP uses dead center. It always needs to be somewhere, but it isn’t necessarily the same between applications.
The Center parameter determines where the center of an image is placed, relative to the center of the window. When it is set to 0,0 the image is placed in the center of the Canvas (or Viewer). Keep in mind that just because an object is at the center of the frame (0,0) does not mean it is full size. Scale controls size, Center controls position.
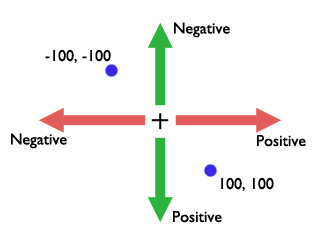
We use Center to move an image away from the zero point. In the illustration above, to move an image to the left, you enter a negative number in the left-hand box of the Center parameter. To move the image right, you enter a positive number in the left-hand box. To move an image up, enter a negative number in the right-hand box, and to move it down, enter a positive number in the right-hand box.
Thus, negative numbers move an image up and left, while positive numbers move down and right.
The blue dot in the upper left has a coordinate position of -100, -100. The blue dot in the lower right has a coordinate position of 100, 100. Using this coordinate system for the Center parameter, you can position an image anywhere in the Canvas (or Viewer).
NOTE: Because the zero point is in the center, you can place two objects equally on either side of the zero point by simply changing the sign of a number. This makes it very easy to create symmetrical layouts.
THROWING DOWN AN ANCHOR
What the Anchor Point setting allows us to do is to change where Final Cut places this zero point for two other Motion tab parameters: Scale and Rotation.
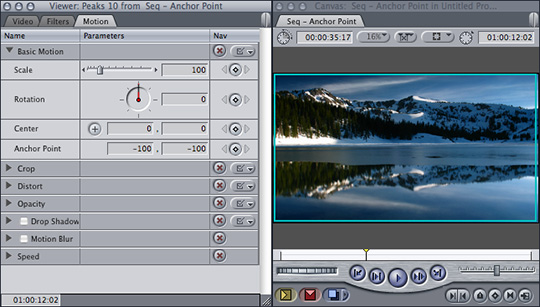
For example, setting the Anchor Point to -100, -100 doesn’t change how the image is displayed. That’s because the Anchor Point works in tandem with two other settings: Center and Rotation. (Image courtesy of Pond5.com.)
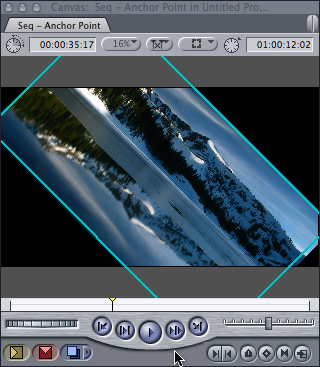
Here’s an example. Both the Center and Anchor Points are set to 0,0. I rotated the image 45º. As you would expect, it rotates around the center of the image.
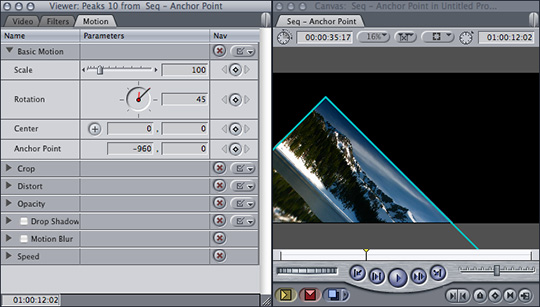
Now, I’ve moved the anchor point to -960,0 (this is a 1920 x 1080 HD clip), and see that the image now rotates on its left edge. The anchor point determines the point around which rotation occurs.
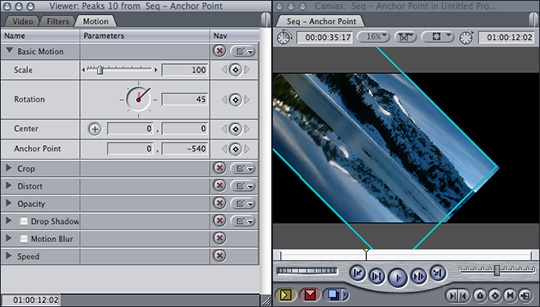
Here, I’ve changed the anchor point to 0,-540 and the image rotates on its top edge.
While the Anchor Point determines the point around which an image rotates, less obvious, but still powerful, is that the Anchor Point also controls the point from which an image zooms.
Let me illustrate.
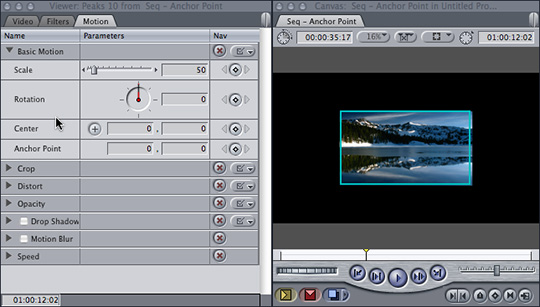
Here, I’ve scaled an image to 50%. As you would expect, it scales from the center of the image.
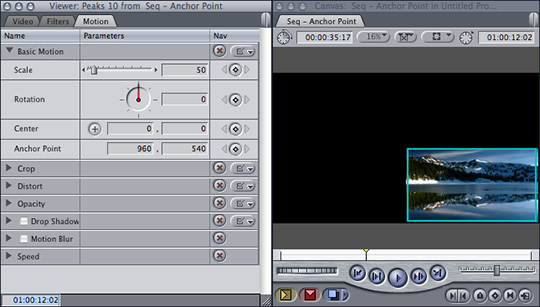
Now, I’ve moved the Anchor Point to 960, 540 (the lower right corner) and notice where the image scales from! (Correct, the lower right corner.)
Changing the anchor point is a great way to simplify animating zooms, because you can put the anchor point on the spot you want to zoom into, or from, without having to keyframe the Center parameter during the zoom.
Cool.
ANCHORING YOUR, UM, ANCHOR
Except, how do you move the anchor point? Entering the right numbers into the Anchor Point setting can be overwhelming for the numerically challenged.
Is there no option? Can no one come to our rescue? Where’s a superhero when we need one??
Fortunately, we have one. Masquerading as a mild-mannered icon that absolutely nobody understands, is the Distort tool. This tool has the power to move Anchor Points. Wow.
Here’s how it works.

Select your clip in the Timeline.
From the top-right pop-up menu, change the setting to Image+Wireframe. The white X highlights the selected clip. (Those with REALLY good eyesight will notice a small number just above the center of the X. This is the number of the track the selected clip is located on.)
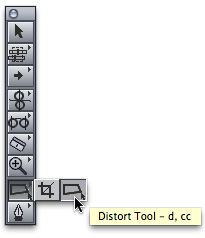
From the Tool palette, select the Distort tool. (Second from bottom, keyboard shortcut: D.)
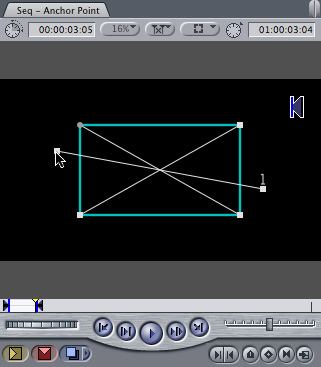
Using the Distort tool, grab the small square in the center of the X and drag it. This is the Anchor Point. Drag the Anchor Point where ever you want it. (In the example above, I turned off the image to make the Anchor Point easier to see.)
Simple – and very fast. And who knew the Distort tool had such power lurking under the surface?
Equally cool.
Webinar Note: Have you ever wondered if you knew as much as you should about the Motion tab in Final Cut? Well, here’s your chance to learn more. I’ve created a webinar titled: Secrets of the Motion Tab: Making Things Move in Final Cut Pro. This one-hour tutorial walks you through everything you need to know to make the Motion tab create magic for you.
2,000 Video Training Titles
Edit smarter with Larry Jordan. Available in our store.
Access over 2,000 on-demand video editing courses. Become a member of our Video Training Library today!
Subscribe to Larry's FREE weekly newsletter and
save 10%
on your first purchase.