
![]() Motion has a way to manipulate images in 3D that Final Cut Pro X does not. But, that doesn’t mean we are out of luck.
Motion has a way to manipulate images in 3D that Final Cut Pro X does not. But, that doesn’t mean we are out of luck.
In this example, I’ll show you how to create a 3D template in Motion that you can use in FCP to animate images in 3D.
This is where we are headed – creating an animated template in Motion that we can use in Final Cut to fly any image back into the frame so we can add explanatory text. The specific image and text are added in Final Cut. The design and animation are done in Motion.
Here’s how.
NOTE: Keep in mind that you can use any graphical elements you want, in case you don’t like my choices. This illustrates a technique, not a work of art.
GET STARTED
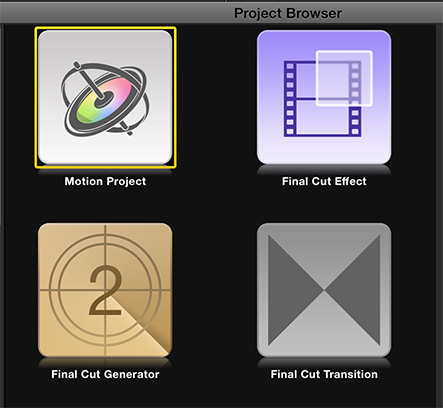
Start Motion. When the Project Browser appears, click Final Cut Generator. This allows you to create an effect in Motion that automatically appears in the Generators menu in Final Cut.
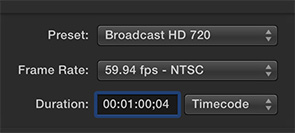
Next, in the top right corner, specify the video format of your project. In my case, I’m working in 720p/60. Specify whatever duration you want. Because I want this to hold on screen for a while, so that viewers can read the text, I set the duration to one minute. You can pick any duration you like.
Click the Open button in the lower right of the Project Browser to create the new project.
CREATE A BACKGROUND
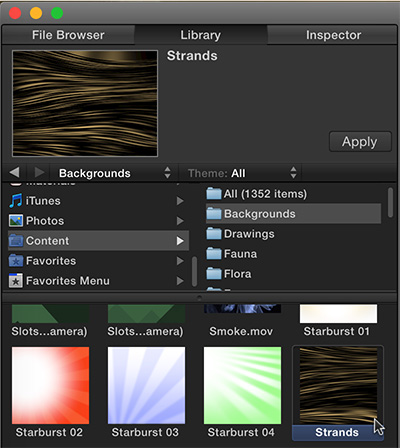
Click the Library tab, select Content in the left column, Backgrounds in the right column to view full-screen backgrounds.
Drag the background you want to use into the middle of the Layers panel. (In my example, I’m using Strands, because I want a darker background.)
NOTE TO APPLE: We could use a lot more backgrounds that are dark.
Dragging an image into the layers panel centers it in the frame and starts it at the beginning of the project.
NOTE: If you want to get fancy, add a Gaussian Blur to the Strands folder to soften the background.
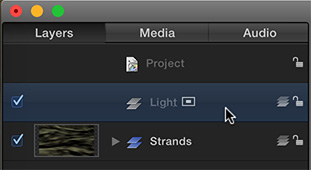
There are now two Groups in the Layer’s panel: Strands and Group. (“Group” is what Motion calls a folder.)
Select Group, press the Return/Enter key and change its name to Light.
NOTE: I like organizing my projects in layers with the background at the bottom. Groups help me keep things organized.
Next, drag the Light Group so that it is above the Strands Group.
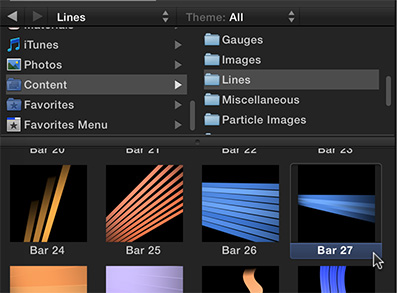
Go back to Library > Content > Lines and find some accent lines you like. Here, I’m using Bar 27.
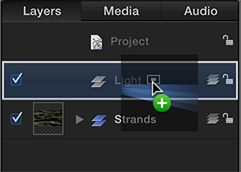
Drag the line icon into the Light folder in the Layers panel. Notice, again, that it is centered in the frame and starts at the beginning of the project.
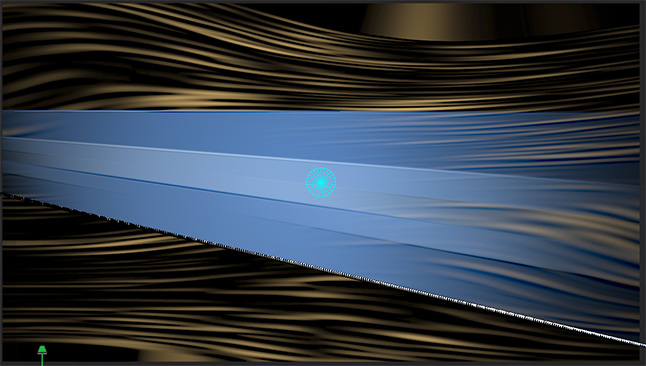
Drag the playhead a little way into the effect to see the lines composited into the frame.
Composite: A fancy word that means “combine.”
Select the Light Group in the Layers tab, grab the rotation dot for the Lines image and rotate it so the lines go in the opposite direction. (If you don’t select the Light Group, you may rotate an element within the lights effect, rather than the entire lights effect.)

Because the duration of the Light effect is shorter than our project, we need to extend the duration to fit. Again, select the Light folder and grab the right edge of the effect in the mini-timeline and drag the edge all the way to the right.
NOTE: If needed, you could also add a Hold frame or slow the clip down, if the effect itself was animated; which this is not.
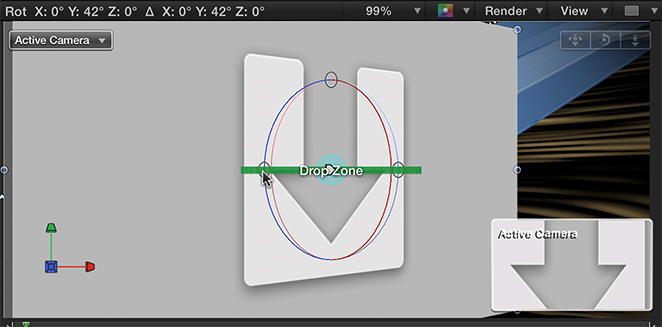
CREATE A DROP ZONE
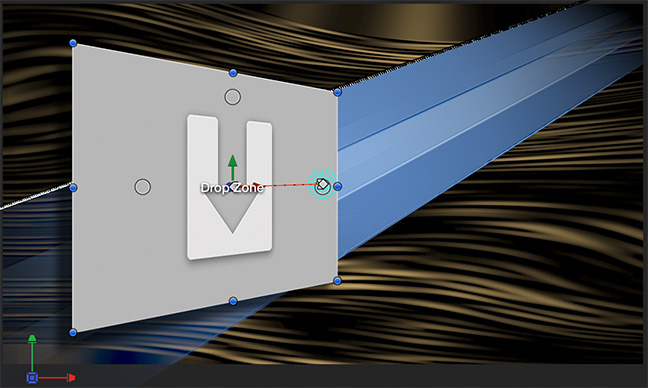
A drop zone is a container for an image that you can animate in Motion, but fill in Final Cut.
First, though, let’s create another Group. Click the Plus button at the bottom of the Layers panel.
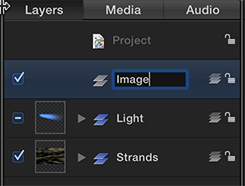
A new Group appears at the top of the Layers panel. Select it, press Return/Enter and rename it to “Image.”
Select the Image Group.
Choose Object > New Drop Zone. Because the Image Group was selected, the drop zone is added to the Image Group.
Because we want this image to float above the background, and because the background is in 3D, we need to convert this layer to 2D. Click the small “stacked rectangle” icon to switch back to 2D. (To return to 3D, click this icon again.)
NOTE: You may find that this effect looks better if the Light folder is also set to 2D. The bottom group should be in 3D.
At this point, you could drag the drop zone into position, save the file and be done. For this example, though, we’ll take this one step farther and add some animation to the open.
ADD ANIMATION
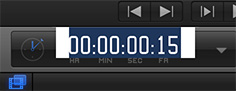
Double-click the timecode display just below the Viewer. Enter 15 to position the playhead 15 frames into the project. This allows you to dissolve to the effect for 15 frames before the animation starts. Press Enter and the playhead jumps 15 into the project.
NOTE: You can use any timecode you want, including 0 which means the animation starts as soon as you cut to the effect. Totally up to you.
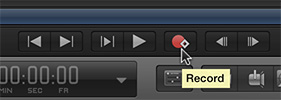
Select ONLY the drop zone in the Layers panel, then click the red Keyframe Record button in the tool bar at the bottom of the Viewer.
Drag the drop zone gently in any direction, then drag it back to where it was. This sets a keyframe at the beginning of the project.
Position the playhead where you want the animation to end. In my example, I want it to take one second to move into place, so I moved the playhead to 1:15. (Again, double-click the timecode display to specify where you want the playhead to move.)
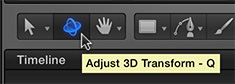
In the toolbar, click the 3D tool – it looks like a globe with rings around it – which allows you to move selected objects in 3D.
This displays the on-screen 3D controller in the Viewer window. This is by far the easiest way to move any selected object in 3D.
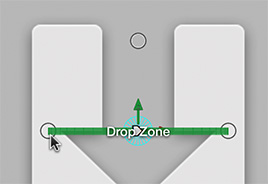
Make sure the drop zone is still selected, then grab the left hollow circle and drag. You are now moving the select object on the Y-axis.
NOTE: The top circle rotates on the X-axis, while the right circle rotates on the Z-axis. Play with these a bit to get a sense of what they can do.
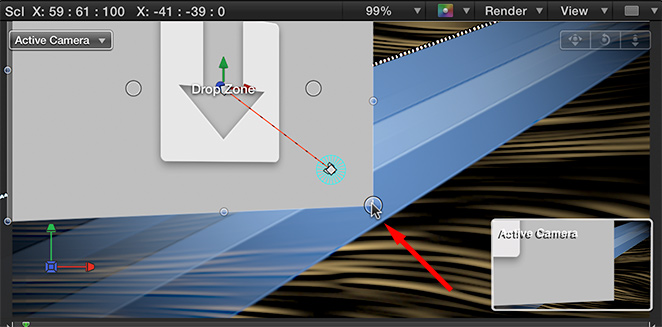
Grab one of the blue corner dots, press and hold the Shift key, and drag the dot to scale the image. (Yes, you could also use Inspector > Properties > Transform, but the dot is faster.)
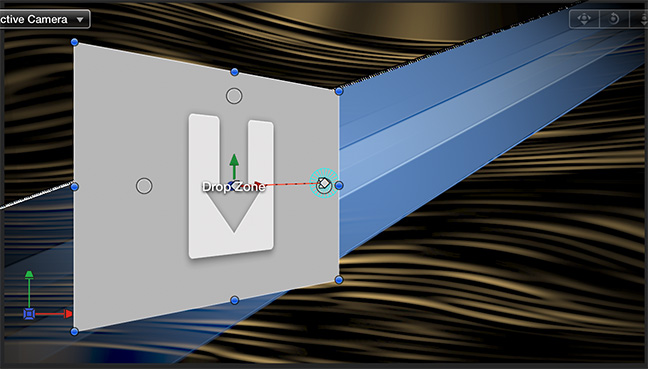
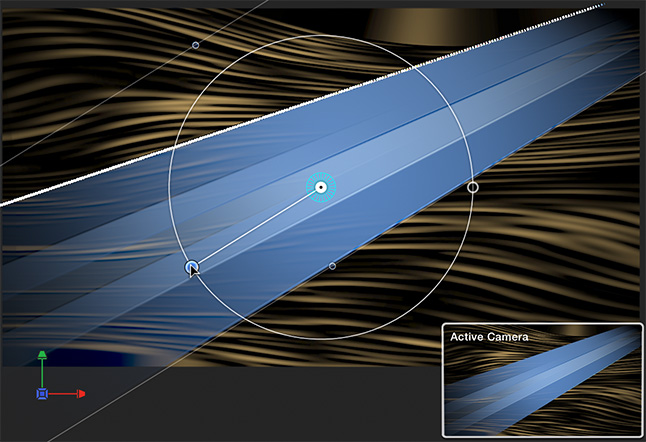
Click anywhere in the image EXCEPT near one of the dots and drag the image where you want it in the frame. In this screen shot, I’ve adjusted scale, position and Y-rotation. I also aligned the drop zone so it works with the Light we added earlier.
REALLY IMPORTANT! Once you have the selected object properly positioned, click the what-used-to-be-red-but-now-is-white button to turn off automatic keyframe recording. If you fail to do this right now, you will record keyframes for everything you do hereafter and drive yourself nuts.
Play the project and watch your drop zone fly back and reveal the background. The image inside the drop zone and text will be added in Final Cut.
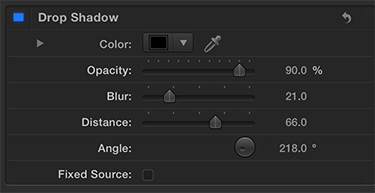
One last thing – let’s reinforce the 3D aspect of this by adding a drop shadow to the drop zone.
Make sure the drop zone is still selected in the Layers panel, click the Inspector > Properties tab.
Click the black checkbox next to Drop Shadow so it turns blue, this enables the drop shadow. Tweak the settings until the shadow looks good to you. These are the settings I’m using here.
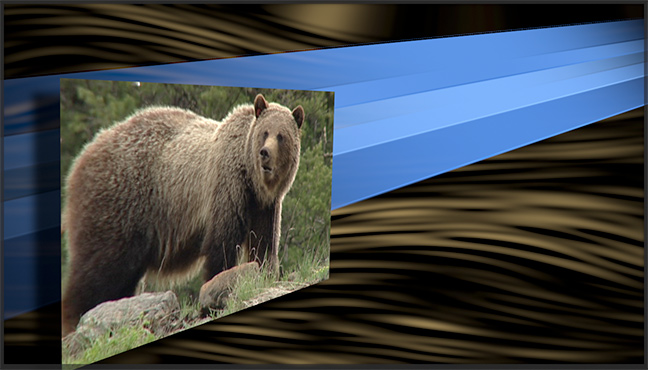
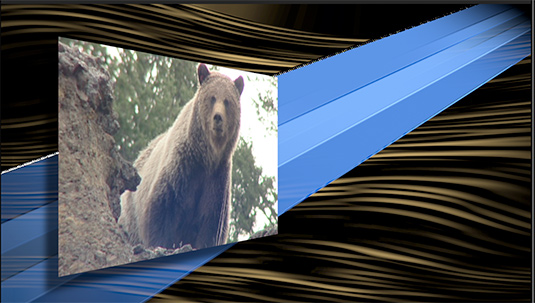
And this is what our completed template looks like.
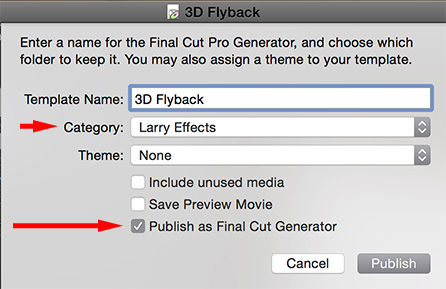
This next step is really important, otherwise this template won’t work. DO NOT select Save. Instead, choose File > Publish as Template.
Give the effect a name (I used “3D Flyback”) and pick a category within Generators where you want the Effect to appear. I created a new category called “Larry Effects” where I put all my custom effects.
NOTE: You can create as many custom categories as you want and store any generator in any category.
Also VERY important – be sure Publish as Final Cut Generator is checked, or this won’t show up in Final Cut, it will just be saved as a Motion template.
We are now done with Motion. Cool.
FINISH IN FINAL CUT
Open Final Cut, open the library you want to work with and create a project, if one does not already exist.
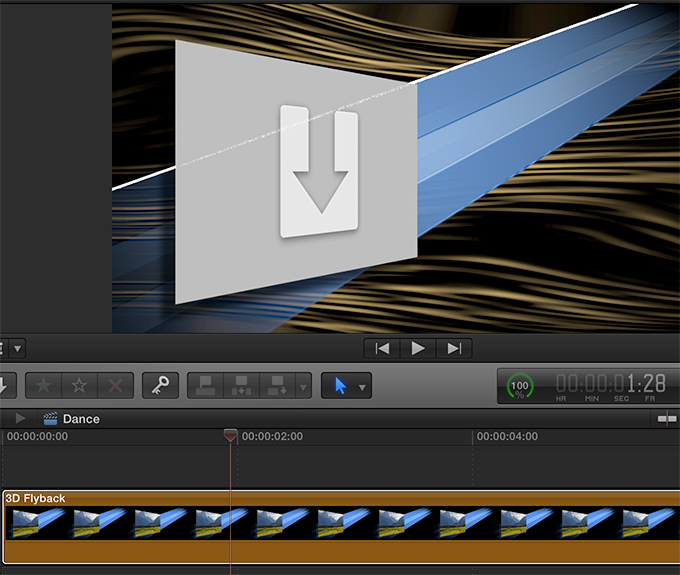
Drag the new effect from the Generators browser into the Timeline.
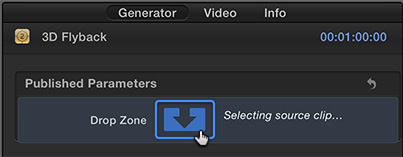
Open the Inspector, click the Generator tab, then click the Drop Zone icon.
In the Browser, click the clip you want to insert into the Drop Zone, then click Apply Clip in the lower right corner of the Viewer.
Done!
NOTE: As I was building this, I had problems getting the white edge of the Light to properly hide behind the drop zone. If you have the same problem, select a different Light image.
SUMMARY
The hard part is creating the template. Once its created, using it is fast and easy.

2,000 Video Training Titles
Edit smarter with Larry Jordan. Available in our store.
Access over 2,000 on-demand video editing courses. Become a member of our Video Training Library today!
Subscribe to Larry's FREE weekly newsletter and
save 10%
on your first purchase.