
 This article was suggested by Kiara Lovisetto, a newsletter reader in Italy, who wanted to know how to get video to pulse in time to music.
While we can’t do this in any version of Final Cut Pro, we CAN do it in most versions of Motion, starting with Motion 2. While easy to do, it is NOT obvious.
NOTE: I’m using Motion 5 for this demo, but you can use earlier versions, as well.
THE FINISHED EFFECT
I want to make a shape (or any piece of video) change size in response to the beat of some music. (In fact, in the Extra Credit section, we also have it change color.) Here’s the finished effect:
NOTE: While this finished effect is quite simple, you can easily apply what you learn hear to a much more complex project.
GETTING STARTED
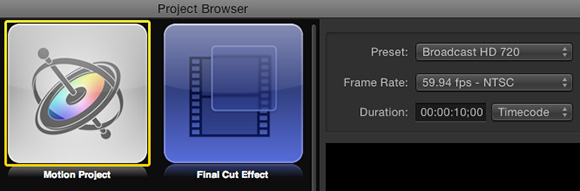
Let’s start by creating a Motion project. If you know this is going to the web, be sure to select a progressive video format. This avoids interlace lines messing with the look of your project.
In this case, I’m selecting Broadcast HD 720p at 59.94 fps. I’ll resize it to the size I want for the web – for posting to this article – using Compressor after I export the final effect.
NOTE: Internally, Motion does all its work as progressive video at the highest quality. Interlacing, and the actual video codec, isn’t applied until you export.
Make SURE your playhead is positioned at the start of the mini-Timeline. (I ALWAYS forget this step!) If you want the audio to start somewhere other than the beginning of the Timeline, put the playhead where you want the audio to start.
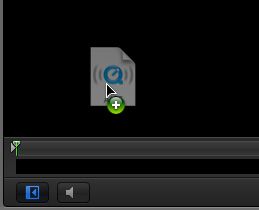
Add the audio clip by dragging it from the File Browser into the Canvas. A green bar appears in the mini-Timeline that represents the location and duration of your audio in the project.
NOTE: If, by some unexpected celestial misconvergence, you manage to start the clip somewhere other than the beginning of the mini-Timeline, simply grab the green bar and drag it where you want the audio to start.
Add the video that you want to pulse in response to the music by dragging it to the Canvas. (You can use any video clip, I’m just keeping this simple so you can see how this effect works.)
Again, make sure the playhead is at the beginning of the Timeline.
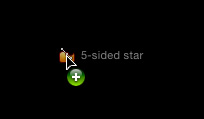
Go to Library > Shapes > 5-pointed Star and drag the 5-pointed Star shape into the Canvas. Scale and position the star however you want.
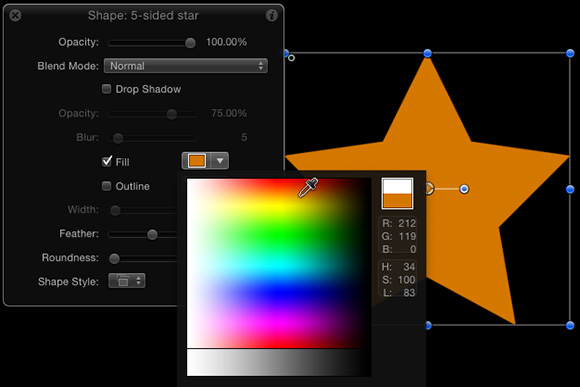
Press F7 to show the HUD. Click the Fill color selector and pick the color you want. I’m using orange, because it feels dramatic.
SETTING THE EFFECT
Here’s the tricky part.
Select the star in the Canvas.
Go to the Inspector and select the parameter you want to change. While I am using Scale, you can use any setting.
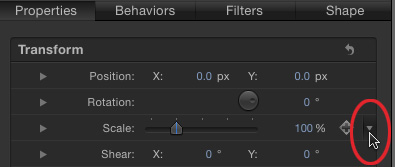
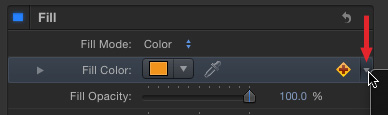
To the right of the parameter you want to change, is a very tiny white arrow. It only appears when you roll the mouse over it.
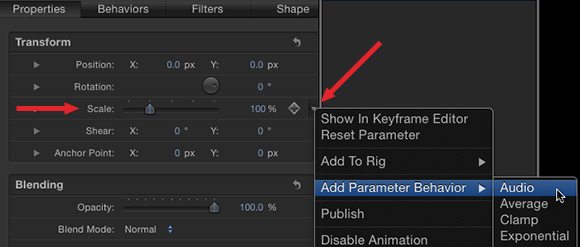
Click the arrow, drag over Add Parameter Behavior, and select Audio, which allows an audio clip to modify the Scale setting.
NOTE: I don’t have space in this article to fully explain Parameter Behaviors. However, these are settings that modify other settings over time. In other words, they provide automated animation. They are worth reading the Motion Help files to learn more.
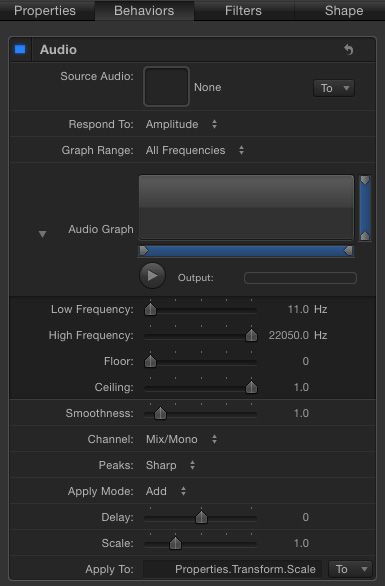
Instantly, the Audio Behavior tab is displayed. At the top is a “well” where you add the audio clip that will generate the behavior you want.

Although you can drag an audio clip into the well, since we have already added the clip to the Timeline, we just need to click the To popup and select the audio clip. (Thanks to Smartsound for supplying the music.)
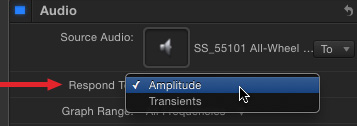
Because we want the the video to pulse with the beat of the music, set Respond to: Amplitude.
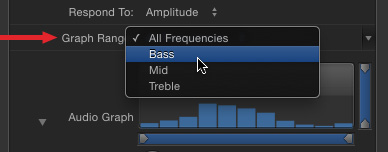
Because we want the video to respond to the beat, set the Graph Range to Bass; this is where the kick drum and bass guitar are loudest.
Done. Play the project and watch your star increase in size to the beat of the music.
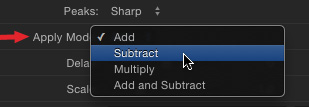
If you want the star to get smaller, rather than larger, during playback, change the Apply Mode from Add to Subtract.
EXTRA CREDIT
If you want another parameter to change with the music, repeat this process. For instance, let’s also change color during playback.
In the Inspector, click the Shape tab, then click Style. Select Add Parameter Behavior > Audio.
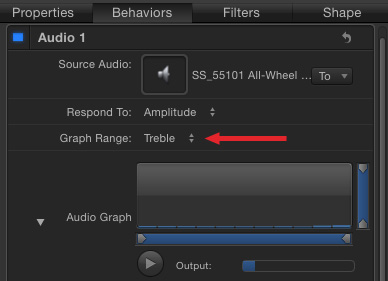
The Behaviors tab is now displayed, again, with the latest effect on top. Set the audio clip, as you did earlier.
Set Graph Range to Treble and play the clip.
If you want the color to get darker, set Apply Range to Subtract. For color changes, I prefer Add and Subtract.
Ta-DAH!!
Done. (Well, except for all the tweaking, playing, and giggling…)

2,000 Video Training Titles
Edit smarter with Larry Jordan. Available in our store.
Access over 2,000 on-demand video editing courses. Become a member of our Video Training Library today!
Subscribe to Larry's FREE weekly newsletter and
save 10%
on your first purchase.
7 Responses to Motion 5: Make Audio Move Video
Very cool. I’ve always loved this sort of thing. Here’s an example of it in a music video I made.
http://www.youtube.com/watch?v=mck_zJhncGo
[…] This article was suggested by Kiara Lovisetto, a newsletter reader in Italy, who wanted to know how to get video to pulse in time to music. […]
wow. i am excited to look for ways to create subtle but amazing modulations in video this way. very cool.
How to download this app?
Nayem:
Motion is available in the Mac App Store.
Larry
how can i use it in final cut pro ?
Sher:
Final Cut does not have an effect like this. So, the way you’d use it is to export the portion of the audio you want to animate from FCP X, then import it into Motion.
Create the effect, then save the Motion project as a ProRes 4444 file. This will retain all transparency information.
Import that movie into Final Cut and sync it with the existing audio in your timeline.
Larry