
![]() We can stabilize footage in Final Cut Pro X, so why should we use Motion 5?
We can stabilize footage in Final Cut Pro X, so why should we use Motion 5?
Because Motion 5 provides MUCH greater flexibility and control over how your video get stabilized.
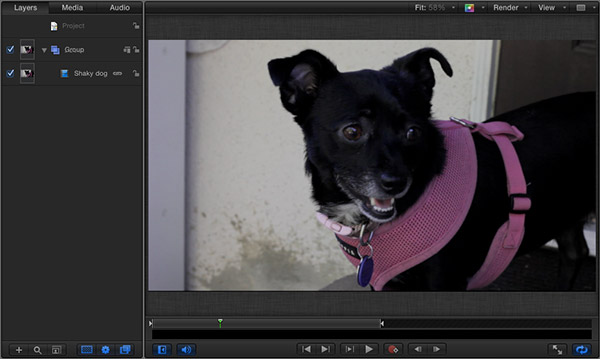
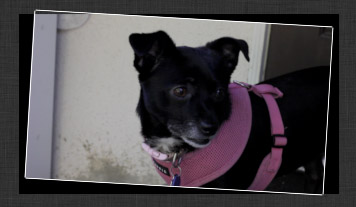
Here’s our shaky image – thanks to Michael Shaw for sharing a video of his dog. I’ve added the image to the Motion 5 timeline.
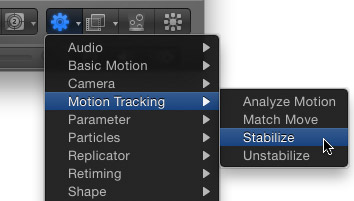
There are two broad categories of effects in Motion: Behaviors, which control how things move, and Filters, which control how things look. To smooth an image, apply Behavior > Motion Tracking > Stabilize.
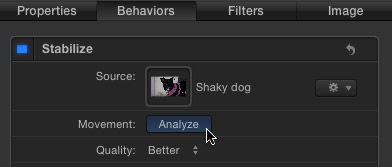
At this point, all the controls you need are found in Inspector > Behaviors > Stabilize. There are three ways we can stabilize a clip: Position, Scale, and Rotation. There are three buttons at the bottom of the Inspector that allow us to enable, or disable, correction for each of these. While Apple’s manual says it doesn’t make a difference, when I get ready to analyze a clip, I turn on – click – all three of these. After analysis is done, I turn off the settings I don’t need. More on this below.
In order to smooth a clip, it first needs to be analyzed. So start by clicking the Analyze button. This analysis can take a long time, because Motion analyzes the entire clip – at about 5x real-time. So plan on waiting a bit while the Analysis completes. However, the good news is that you only need to analyze once. After that, any changes you make are reflected instantly in the clip.
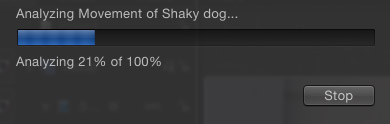
To show how much longer the analysis will take, Motion displays a progress thermometer.
HOW STABILIZATION WORKS
What Motion (and FCP X) do is track pixel movement from frame to frame. This analysis checks to see which way the camera moves, then moves in the opposite direction. So, if the camera moves left, Motion moves the frame to the right the exact same amount.
This image repositioning, naturally, results in shooting off the edges of an image; revealing black edges. So, to prevent this, Motion provides an option to zoom into the image such that it won’t shoot off any edge. This scaling is the big downside to image stabilization – hiding these black edges may requires scaling so severe that the image goes soft when zooming enlarges the image past 100% in scale.
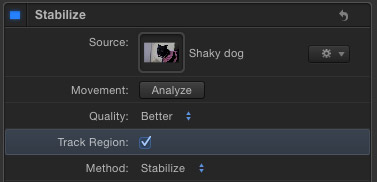
Most of the time, Motion is pretty good at guessing what is essential image movement and what is camera shake. However, you can help it separate the two by checking “Track Region.”
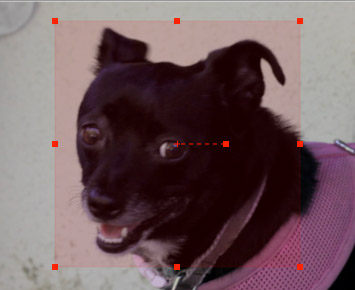
This displays a red region in the image that you can reposition and resize so that it highlights the portion of the image you want to stabilize. In my example, I’ve set this to stabilize the face of the dog. Analyzing using a tracking region is faster than analyzing the entire clip.
NOTE: You can turn this checkbox off once analysis is complete to make it easier to see the picture.
USING TRACKERS
You can also use motion tracking dots, similar to what we use when motion tracking a clip, to specifically track one or more clearly defined potions of an image. Depending upon your image, these can either help a lot or make a complete mess of things.
To apply a tracker, click the Add button next to Tracker at the bottom of the Behavior controls.
STABILIZE
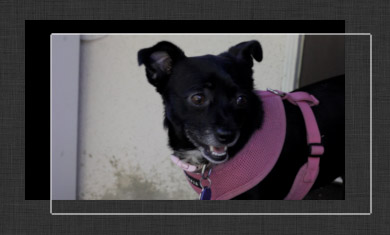
Once analysis is complete, press the space bar to view the results. Watch as Motion moves the entire frame to stabilize the image.
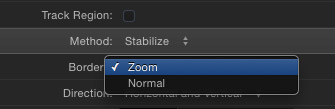
The default Method setting, which doesn’t exist in FCP X, is to Stabilize the image. This makes it look as though it were shot on a tripod. However, if you select this option, you also need to set Borders to Zoom. This tells Motion to zoom into the image such that you don’t see the edges of the image moving around the edges of the frame.
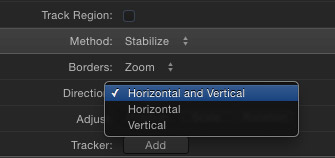
Another helpful option is Direction. This allows you to stabilize only horizontal movement, only vertical movement, or both horizontal and vertical. Don’t assume you always need to do both. You may end up with more pleasing results by selecting just horizontal or just vertical. For example, in this image, correcting just the horizontal looks better than correcting both.
There are three different adjustments you can make to further smooth the image: Position, Scale, and Rotation.
Position. This compensates for horizontal or vertical movement. This is on by default.
Scale. This compensates for shaky zooms. Of the three settings, I compensate for this the least.
Rotation. This compensates for unwanted rotation of the image.
In the screen shot above, I am compensating for all three settings. Notice how the dog’s face remains centered in the screen and with the proper vertical orientation.
SMOOTH
The good news with the Stabilize setting is that you can make a shot almost look like it was taken using a tripod. The bad news is that this REALLY zooms into an image, which can cause severe softening of the image.
Smoothing is a second, less-intrusive, option.
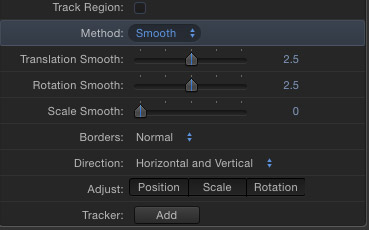
When you change the Method to Smooth, you are smoothing the jerkiness of the image, without making it look like the camera was locked to a tripod. This is the only option that FCP X provides.
When Smooth is selected, three new sliders appear – the same three that are displayed in FCP X – that give you adjustable control over what get smoothed:
Translation Smooth. This adjusts the amount of horizontal or vertical smoothing. You can further limit this control by setting Direction to Horizontal and Vertical, Horizontal, or Vertical. To decrease the amount of smoothing, drag the slider to the left. To increase the smoothing, drag the slider to the right. A setting of 0 turns smoothing off.
Rotation Smooth. This adjusts the amount of rotation smoothing. Drag left to decrease and right to increase the compensation. The default setting is 2.5.
Scale Smooth. This adjusts for shaky zooms. It is off by default. As with the other two settings, drag left to decrease and right to increase.
The three adjust settings at the bottom enable, or disable, correction for Position (X/Y), Rotation and Scale. Click these off and on to see how they change the smoothing of your image.
EXPORTING MEDIA FOR FINAL CUT PRO
To move a completed project from Motion to Final Cut Pro X, don’t save it – that just creates a Motion project, which we can’t directly import into Final Cut Pro X.
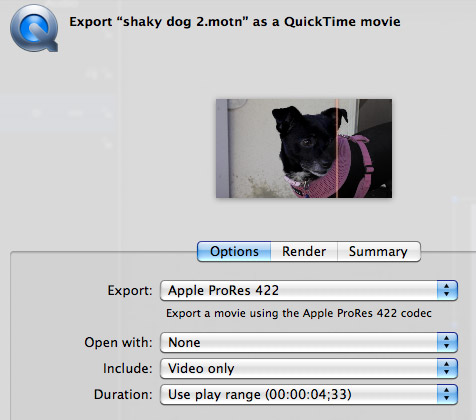
Instead, select Share > Export Media. This creates a movie file which can be imported into FCP X. For most of my work, I use ProRes 422. It’s a nice balance between image quality and file size.
However, if you need to maintain an alpha channel (image transparency) – which we do NOT need with image stabilization – you MUST choose Apple ProRes 4444. No other format exported by Motion 5 will include transparency information.
SUMMARY
This technique works best, and yields the highest quality, when you take a large image – say 1080p – and edit it into a smaller project – say 720p. When scaling a larger image into a smaller project, the zooming this filter creates won’t damage image quality as much.
The ideal solution is to shoot your material on tripod. This provides the steadiest images with the least of amount of work in post-production. But, for those times where a tripod just isn’t possible – or available – image stabilization can make a bad shot acceptable.

2,000 Video Training Titles
Edit smarter with Larry Jordan. Available in our store.
Access over 2,000 on-demand video editing courses. Become a member of our Video Training Library today!
Subscribe to Larry's FREE weekly newsletter and
save 10%
on your first purchase.