
![]() Its the holidays and time for something fun.
Its the holidays and time for something fun.
In this article, I’ll show how to create a fairly simple text and texture effect using Motion, some existing Library effects and two strategically-placed blend modes.
NOTE: On a similar theme, here’s an article showing how to create a holiday text effect in Final Cut Pro X.

This is where we are going. Now, let’s take a look at the steps to get there.
CREATE SOME SPARKS
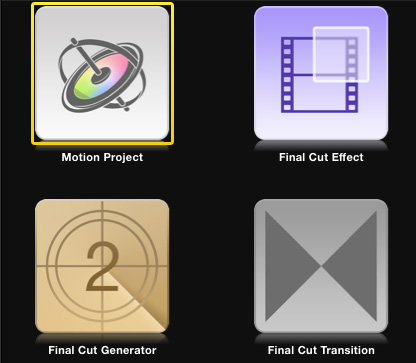
First, in the Project Browser, create either a new Motion project, if you want a stand-alone video, or a new Final Cut Generator, if you want to use this effect inside Final Cut Pro.
NOTE: These choices only affect where you can save a file, it does not effect image quality or the process of creating this effect.
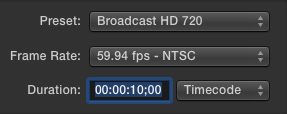
Next, in the top right corner of the Project Browser, select the video preset, frame rate and duration you want to use. Because all my training is 720p, I’ll use that format.
NOTE: These choices determine pixel aspect ratio and how the image is saved. All video created in Motion is progressive and at the highest-possible quality.
When you are happy with your choices, click OK.
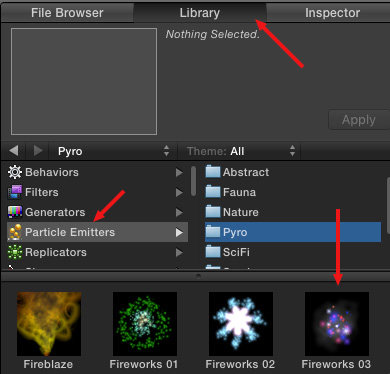
Choose Library > Particle Emitters > Pyro and scroll until you find Fireworks 03.
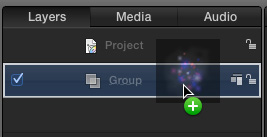
Drag the Fireworks 03 icon on top of the default Group in the Layers panel. Make sure all four edges of the Group turn white.
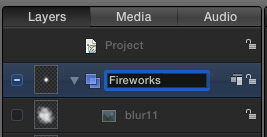
Double-click the name “Group” and rename it to “Fireworks”. (This isn’t really necessary, but I like knowing what’s stored in each folder and renaming groups helps me stay organized.)
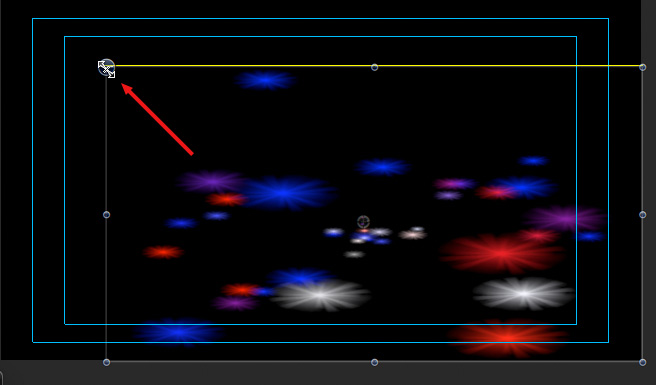
Move the playhead a couple seconds into the project – the exact amount isn’t critical. Then, select the Fireworks group in the Layers panel, to put a box around the emitter in the Viewer, and drag the box so that it more than fills the frame.
NOTE: Dragging a selected area this way distorts the image, but slightly distorted fireworks still look interesting; albeit weird. You’ll probably need to adjust the size of this box, again, at the end, to get the Fireworks to fill the frame properly behind the finished effect
ADD TEXT
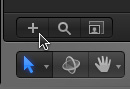
Click the Plus icon at the bottom left of the Layers panel to create a new group.
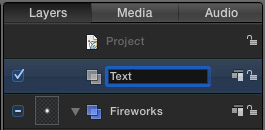
Notice that it is put above the Fireworks group. Again, double-click the name and rename it to Text.
NOTE: When working in 2D space, the stacking order of groups and elements determines foreground and background relationships. Similar to Photoshop, layers above are in the foreground. This stacking order is true of groups and the elements inside a group.
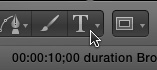
With the Text group selected, click the Text tool to select it.

Then, somewhere in the frame, type “2016” and press the Enter/Return key to select the text (the text object is selected when there is a box around it).
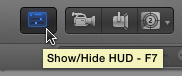
Click this button, or choose Window > Show HUD, or type F7, to display the HUD (Heads-Up Display). Drag the size slider all the way to the right to enlarge the text: 288 points.
Hmmm… Still not big enough.
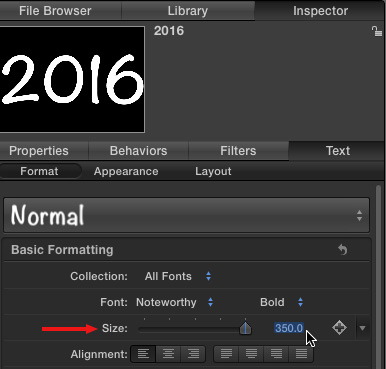
Click Inspector > Text > Format text buttons, then double-click 288 for Size to select it, then change the size to 350. Much better, and bigger, text.
You can, if you want, change the alignment and font. I’m using Noteworthy, 350 point, bold for this example. You can use any font that catches your fancy.
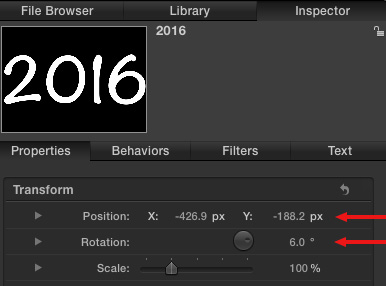
In the Inspector, click the Properties tab and rotate the text to give it a more jaunty angle, then drag the text in the Viewer until you have it positioned the way you want. In my case:
* X Position: -426.9
* Y Position: -188.2
* Rotation: 6°
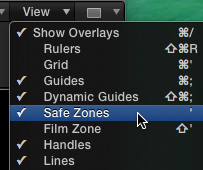
NOTE: If the lines of the Safe Zones are bothering you, turn them off using the View menu in the top right corner of the Viewer and uncheck Safe Zones (or type the apostrophe).
ADD TEXTURE TO TEXT
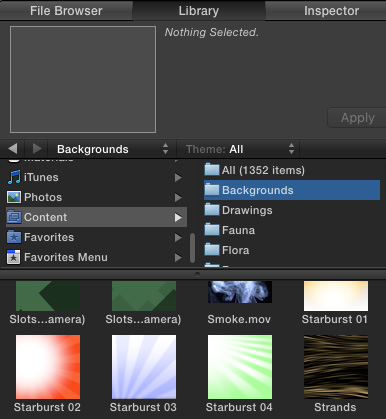
The Library holds a wide variety of different textures we can add to the text. For example, go to Library > Content > Backgrounds and scroll down till you find Starburst 02.
Drag it into the Text group; be sure all four edges of the group turn white. This creates a folder within the Text folder, called “Starburst 02.”
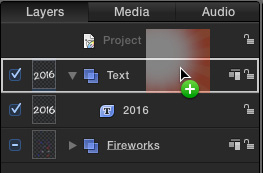
Since this texture now covers the text, drag the text so it is above the Starburst group. You can tell where you are dragging something by the blue line that appears showing where the dragged object is going to land.
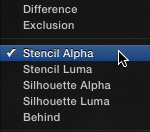
Put the texture inside the text by selecting the text “2016” in the Layers panel, then, in the HUD, change the Blend Mode to Stencil Alpha.
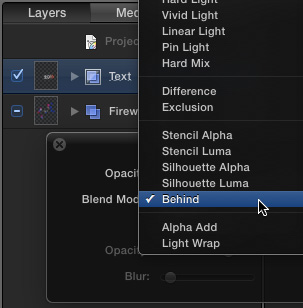
To make the Fireworks visible, select the Text group in the Layers panel, then, in the HUD, change the blend mode to Behind. This allows layers underneath the text layer to become visible.
NOTE: Stencil Alpha is applied to the text clip and allows whatever is behind it in the same group to appear in the text. Behind, when applied to a group, allows us to see effects in other layers placed behind the contents of the Text folder.
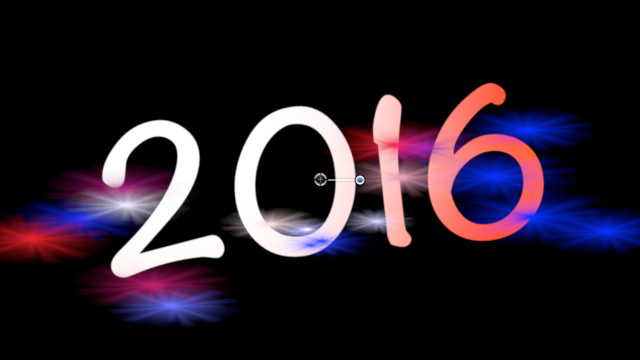
Here’s what our effect looks like so far.
ADD COLOR TO THE TEXT

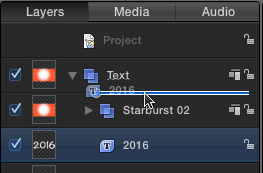
To make the texture inside our text more interesting, we are going to tweak the Starburst settings. Twirl down the Starburst group and select the Circle.
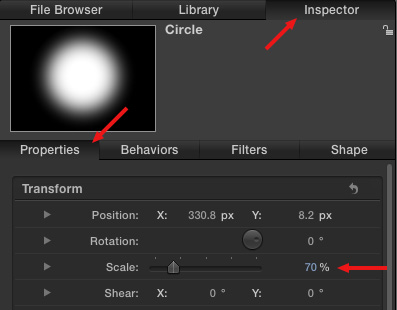
In Inspector > Properties, change the Scale to 70%, then drag the white circle so that the “6” is highlighted. You can see how I changed my settings here.
Next, in the Layers panel, select the Two Color Ray element.
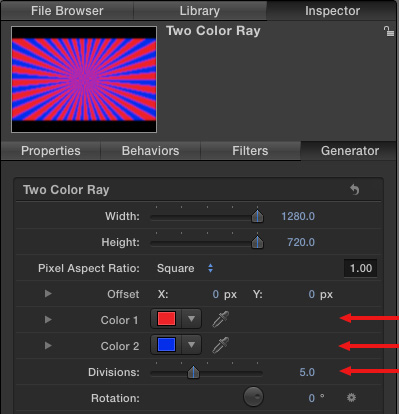
Click Inspector > Generator and change Color 1 and Color 2 to something more festive. Since my fireworks are red, white and blue, I decided to make these two colors red and blue. You can choose any colors you want.
NOTE: You can adjust the size of the starburst further by sliding the Divisions setting; in my example, I set Divisions to 5.
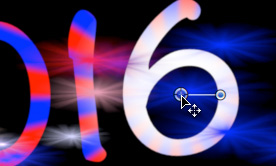
Finally, we need to reposition the center of the Starburst. To do this, make sure the Two Color Ray is still selected, then go to the Viewer and drag the white circle so it is in the middle of the number “6”.
NOTE: If the Fireworks don’t adequately fill the frame, select the Fireworks group and drag the edges until things work right. If the Fireworks don’t last long enough, you may need to apply a Retiming > Set Speed behavior.
SUMMARY

Here’s the final result. (The Fireworks and Starburst are already animated. You can apply any text animation to the numbers that you think appropriate.)
Cool.

2,000 Video Training Titles
Edit smarter with Larry Jordan. Available in our store.
Access over 2,000 on-demand video editing courses. Become a member of our Video Training Library today!
Subscribe to Larry's FREE weekly newsletter and
save 10%
on your first purchase.
One Response to Motion 5: Celebrate the New Year
Everything works great, Larry, except as you mentioned, the Fireworks03 ends way too soon. I tried applying Retiming>Set Speed but could not get anything to happen.