
 John sent me a question:
I need to convert old VHS and personal DVDs to digital files that I can edit in Final Cut or Premiere. What hardware do you advise so I can get the best quality. I have a 2013 Mac Pro and plenty of storage.
Legacy media is still part of our daily life. But converting analog video to digital is getting increasingly difficult as the gear we need to play it slowly dies. Still, there is great technology out there that allows us to convert and capture older media, so I thought it would be worthwhile to revisit this topic.
There are lots of inexpensive ways to digitize home movies. But, I wanted to concentrate on getting the BEST images – which can’t be done cheaply.
It is easy to get confused with all the choices out there, but, if preserving and maximizing audio and image quality is your goal – and I think it should be – here’s what affects image and audio quality when doing these sorts of transfers, listed in priority:
Everything else is a wash; well… assuming the VHS deck doesn’t eat your tapes.
Quality starts at the beginning of the chain, not salvaged at the end. As well, you need to look at each step and make sure you are maintaining quality.
AUDIO OUTPUT
![]()
VHS decks were designed as consumer gear. They tend not to have high-end connectors. Still, XLR connectors provide higher-quality (i.e. no hum or buzz) than RCA connectors.
XLR connectors use shielding to prevent hum and noise from entering the audio signal. RCA connectors are more popular, but tend to be noisy – especially when the length of the cable is more than a few inches. XLRs connect directly into the digitizing device, which I’ll cover shortly. (RCA connectors need a special cable with RCA on one end and XLR on the other.)
DVD decks may have XLR connections, but AES/EBU connections will also work. Either of these deliver the highest quality audio, with no hum or buzz added to it.
VIDEO OUTPUT
![]()
There are four popular video connections:
Ideally, use gear that provides component connections, because this means that each color channel – red, green, blue – has it’s own dedicated “pipe.” S-Video pretty good, too, but avoid, if at all possible, composite video.
HDMI signals can easily be converted into media files using inexpensive converter boxes. However, most VHS decks were released before HDMI was invented. So, while you’ll often find HDMI on DVD decks, you won’t find them on VHS.
Component or S-Video signals require a bit more gear but yield great images; well, as great as VHS can reproduce. Remember, you are working with source images that are 720 x 480 pixels – so there isn’t a lot of there there.
TIMEBASE CORRECTORS (TBC)
This is the essential component. VHS signals are inherently unstable. The decks were designed, remember, for casual consumer consumption.
A timebase corrector stabilizes the signal, gets rid of the jitter at the bottom of the frame, cleans up color fringing, decreases the blur around moving objects and, in general, turns a really poor image into something worth watching.
I used a deck with a built-in TBC when I transferred most of my VHS library to digital a few years ago and the difference when using a TBC was amazing!
Some VHS decks include a built-in TBC. Since no one is making VHS decks anymore, that I know of, they can be rented from many video rental houses or purchased on eBay. I don’t have a recommendation for a deck.
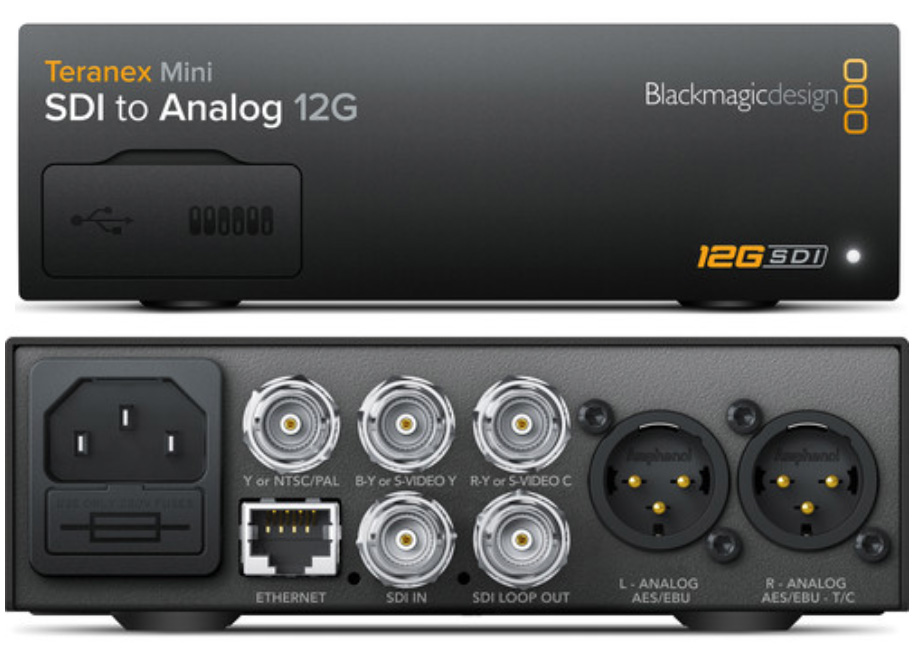 Blackmagic Design Teranex Mini – link.
But, in the event you can’t find a VHS deck with a TBC, consider using a Blackmagic Design Teranex Mini Analog to SDI converter. This converts component video to SDI, cleans up the signal, and, if necessary, up-converts it to 720p or 1080p.
NOTE: For the best images, always convert SD video, which is interlaced, to progressive.
If you are recording an HDMI source signal, use the Teranex Mini HDMI to SDI (link). In both cases, the XLR cables from your VHS/DVD deck connect directly into the Teranex. The Teranex can also handle AES/EBU audio.
NOTE: SDI combines the audio and the video elements into a single, high-quality, digital video stream.
DIGITIZATION
There are a number of low-cost digitizers on the market. The problem is that they all convert video into H.264. H.264 is a codec with even less color than SD video. So, after working to get great image quality out of the VHS or DVD deck, you throw it away by converting into H.264.
If all you want is to preserve home movies, H.264 is fine. If you want to do more with the video – especially if you want to edit it – H.264 is insufficient. A much better format to use is ProRes 422. This preserves all the image and color data from the source, while providing an easy-to-edit media file that can be edited in any NLE for both Mac and Windows.
NOTE: Storing one hour of NTSC or PAL SD video using ProRes 422 requires 18 GB. SD video plays at 5.25 MB/second, so high-speed storage is not essential.
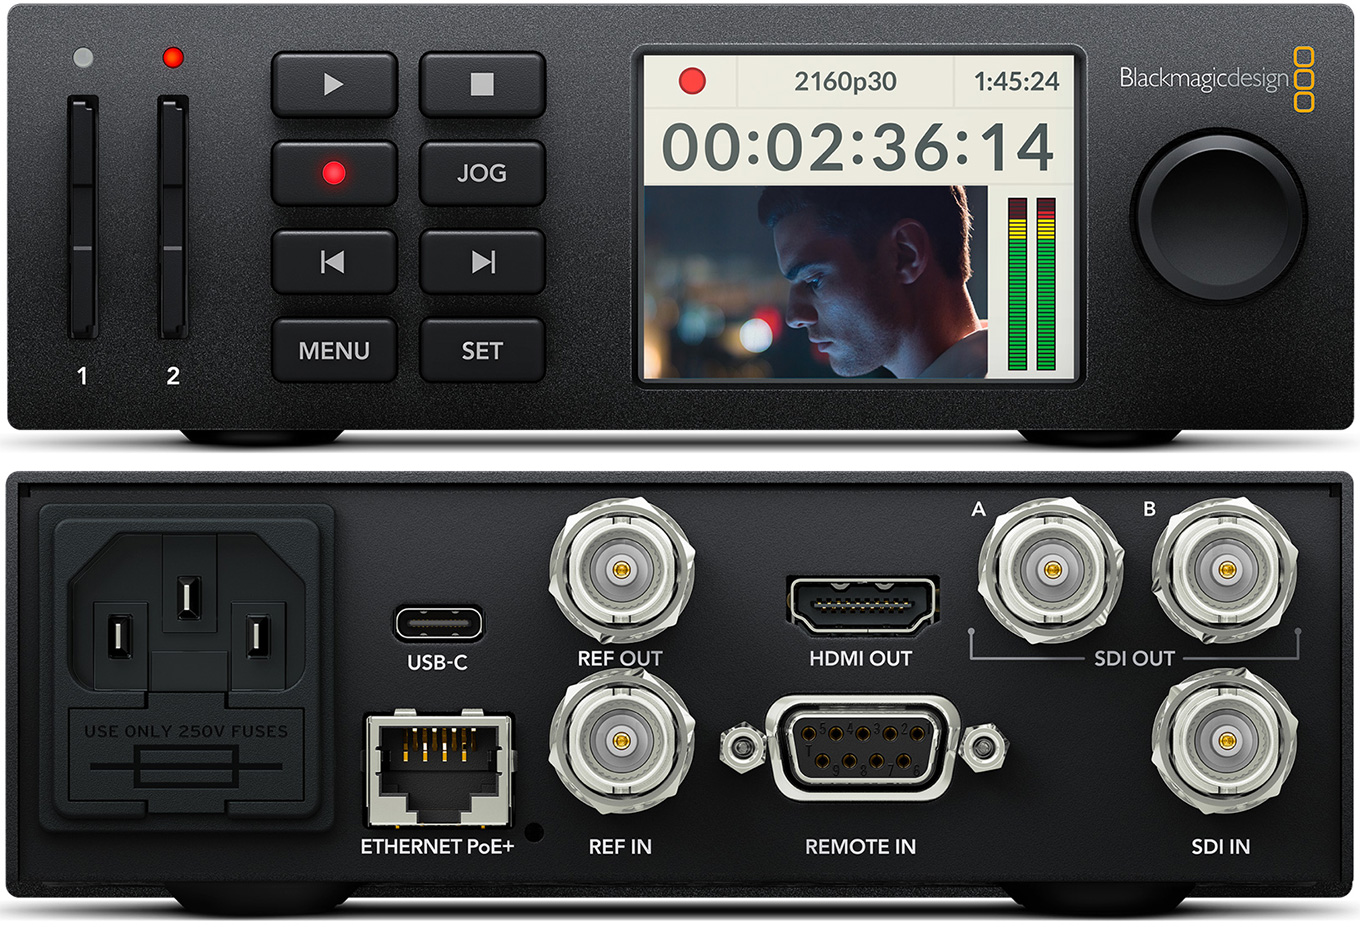 Blackmagic Design Hyperdeck Studio Mini – link
If you are using the Teranex Mini, take the SDI out and connect it to a Blackmagic Design Hyperdeck Studio Mini. This will record a ProRes 422 signal which can be transferred when recording is complete via USB-C to your computer.
NOTE: I used four HyperDecks in my video studio a few years ago and liked them a lot.
Once the ProRes file is recorded on your Hyperdeck, its a standard digital media file, like the kind you work with everyday.
SUMMARY
The hardest part of this process will be finding a VHS deck with component outputs. After that, the Teranex Mini costs $495 and the Hyperdeck Studio Mini costs $695.
Yes, you can do this cheaper and for many cheaper is fine. But, if you want the best possible audio and video, this would be a conversion system I recommend.
As with all media projects, test your workflow and talk with the folks at Blackmagic to be sure that what you want to do can be done.
[ General disclosure: This isn’t a review. Blackmagic did not ask me to write it and I have not directly tested all this gear. No money changed hands. John asked me an interesting question and I spent a fun couple of hours researching the answers. ]

2,000 Video Training Titles
Edit smarter with Larry Jordan. Available in our store.
Access over 2,000 on-demand video editing courses. Become a member of our Video Training Library today!
Subscribe to Larry's FREE weekly newsletter and
save 10%
on your first purchase.
40 Responses to How to Get the Best Images Digitizing SD Video
← Older Comments-
 Anthony Rettig says:
December 31, 2021 at 10:27 am
-
 Anthony Rettig says:
January 8, 2022 at 5:08 pm
-
 Larry says:
January 9, 2022 at 9:35 am
-
 Anthony Rettig says:
February 5, 2022 at 3:04 pm
-
 Larry says:
February 5, 2022 at 3:20 pm
-
 Alex says:
February 11, 2022 at 3:53 pm
-
 Eric Nelson says:
May 15, 2022 at 5:06 pm
-
 Larry Jordan says:
May 15, 2022 at 6:14 pm
-
 Adam McG says:
March 3, 2023 at 1:30 pm
-
 Larry says:
March 3, 2023 at 1:34 pm
-
 David P. says:
September 24, 2024 at 11:10 am
-
 Larry says:
September 24, 2024 at 11:27 am
-
 Todd Farion says:
October 24, 2024 at 11:57 pm
-
 Larry says:
October 25, 2024 at 4:18 am
← Older CommentsI am going to try this setup! I will let you guys know my results!
So far, not so good. When I try and play the tape back on my Sony CCD-TR67 Handycam while it is connected to the Teranex via a RCA to SDI cable, the Teranex keeps switching between NTSC and PAL like it can’t decide what is is receiving. Note, this does not happen with the live feed when the camcorder is in record mode. The live feed of the viewfinder the camera sends out the composite port displays on the Teranex just fine.
I have reached out to Black Magic Design support to see if there is an option to tell the Teranex that the feed it is receiving is NTSC.
So far the Teranex is not able to beat the ClearClick I bought on Amazon to compare this setup to!
Anyone have a 8mm tape player they want to let me try or buy?
Anthony:
Very interesting comments. I would not have expected the Teranex to have a problem with timecode.
Please let us know what the Blackmagic Techs suggest.
Thanks,
Larry
I ended up buying a Sony EV-S3000 to play back the Video8 tapes on eBay to correct the issue. It has a built in TBC. That was after Black Magic Design support said, “Unfortunately, passing signals generated from an analog tape is a bit more complicated and will sometimes require an additional device (Time Base Corrector) in order to put the signal into SMPTE spec. The TBC is for correcting the analog tapes which can stretch over time or with misaligned heads of the tape player or camcorder. Unfortunately, you cannot set the Teranex Mini input to NTSC, as it was designed to auto-detect the signal. In this case the signal coming from the tape is probably not within spec and is causing the Teranex Mini not to correctly identify the signal.”
I have had very good results using a combination of Sony EV-S3000 + Teranex Mini + Hyperdeck Studio Mini + Rolls MB15b. I am now ordering a Teranex Express + Mini Converter Analog to SDI to see if that combination yields an even better result than the Teranex Mini.
Either way, my current rig with the Teranex Mini blows the ClearClick 2.0 “clear” out of the water in terms of quality.
Anthony:
This is a really good to know. Thanks for sharing this update.
Larry
Hey Anthony,
Could you please let us know how your whole setup is/will work with the addition of Mini Converter Analog to SDI?
My source has Component Out (RGB). Was thinking of the following setup which I would like to share in case anyone could advice.
Component RCA from the out of source device and on the other end bnc adaptors going to Mini Converter Analog to SDI. Taking then the SDI to the UltraStudio Recorder 3G and then capture on PC with Media Express.
Then I’m having doubts if UltraStudio Recorder 3G will be a good choise.
The biggest problem I’ve found in converting old video to digital is the capture apps abort on a dropped frame (FCP, Premiere, OnLocation, iMovie, etc). And of course, old videos have a lot of dropped frames.
For me, the solution was to use my PD-170 to do the analog to DV conversion, followed by dvgrab on an old HP laptop (with DV input) running ubuntu linux. Dvgrab warns about dropped frames, but carries on recording, which is exactly what I wanted.
Eric:
Good tip, thanks.
Larry
I just picked up a used Ultrastudio HD Mini, using composite with BNC adapter in, then Thunderbolt to Mac for capture to pro res. There is a software option to ignore dropped frames on import and it’s a sanity saver for older, badly worn tapes. Still new to this box but so far impressed. Biggest letdown is it doesn’t support s-video input like other BM boxes – just component/composite.
Adam:
Thanks for sharing your experience with this.
Larry
Great article. Thank you for such a clear presentation, Larry.
I have 3/4″ SP and Betacam SP tapes to digitize, in addition to VHS. Consequently, I will be using a transfer facility with those tape decks. They want me to specify my requirements, incl. any de-interlacing and/or up-converts, and the media file format. My intention is archival preservation.
Questions:
1. Some online forum comments recommend capturing at 720×480 resolution (for NTSC) and still interlaced (aka 480i). This becomes my digital master file for preservation. They say that up-converting during capture will not capture additional information, and that up-converting (if desired, e.g., to 960×720 or 1440×1080) and de-interlacing (to 59.94p) are better handled post capture using special software (Topaz Labs’ software is often mentioned).
Do you think there is any benefit to de-interlacing or up-converting during capture, rather than leaving it until post?
2. Do you think that ProRes 422 HQ is adequate for archival purposes, or would that require uncompressed 10-bit 4:2:2? What about newer “lossless” codecs I’ve read about, like FFV1 and HuffYUV, or are those niche products with limited compatibility?
David:
Good questions.
1. I recommend deinterlacing during initial capture. If pro gear is used, you will both deinterlace and run the signal through a time-base corrector (the TBC is a very important step.) This will make your captured images look really, really good. I would NOT! up-scale. Up-rezing technology improves weekly – Topaz is very good at it.
2. Given how these SD systems captured color either ProRes 422 or ProRes 422 HQ is fine. Both have a wider color space than SD video of any time. No need for uncompressed video.
Larry
Hi Larry,
Wonderful article. My setup is a little different. Instead of a TeranexIm using a Harris X75 as my anologue to digital
Converter. Ive been capturing with IVSEDITS capture in DPS format. The work flow is clunky and my final results are unsatisfactory. If I add a Hyperdeck mini to the equation and capture in prores 422, whats the best method of deinterlacing?
Todd:
If you have the budget, use the Blackmagic Design Teradek Mini to deinterlace during transfer and capture. Otherwise, capture the footage with interlacing, then use software to deinterlace. Deinterlacing gets better every year with software upgrades. Currently, I like Topaz Video’s AI-assisted deinterlacing.
https://larryjordan.com/articles/review-topaz-video-ai-a-deinterlace-and-up-scale-wonder/
My general goal is to capture the footage as close to natively as possible, then improve it once converted to a digital format.
Larry