
 You’ve seen them everywhere on the web – an animated video GIF. These aren’t hard to create, once you know how.
There are websites and stand-alone apps that create GIFs; a simple Google search will reveal over a dozen. But we can also create these with the tools we already have, which gives us far more control over the final GIF than simpler tools allow.
There are really only two steps:
NOTE: GIFs are video-only.
Image sequences can be created by:
NOTE: You can also create them in Premiere. But since AME is the output engine for Premiere, the actual process is the same.
Then, you’ll use Photoshop to create the animated GIF itself.
CREATE AN IMAGE SEQUENCE
Images courtesy: Amy Campion, Antics Performance (www.anticsperformance.com)
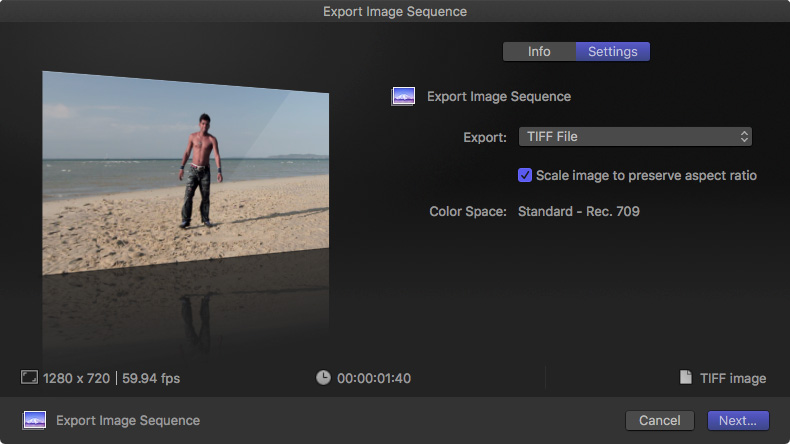
In Compressor:
This will create a folder, named after your clip, containing one TIFF image for each frame of video.
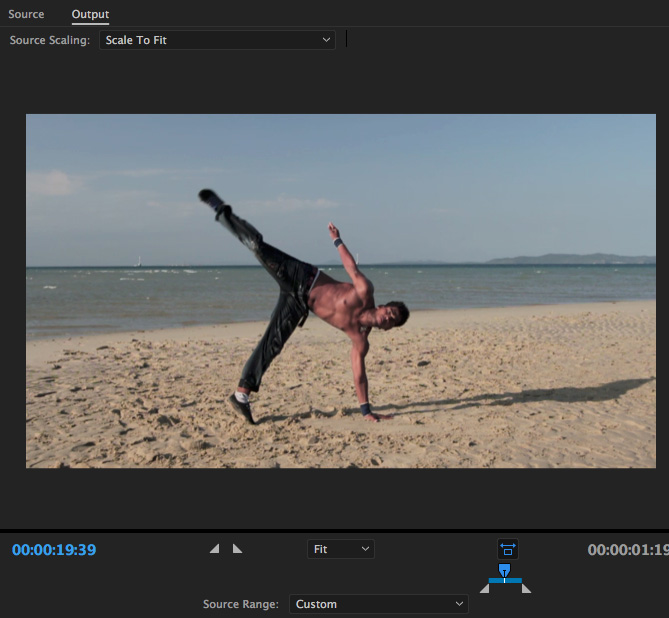
In Adobe Media Encoder (AME):
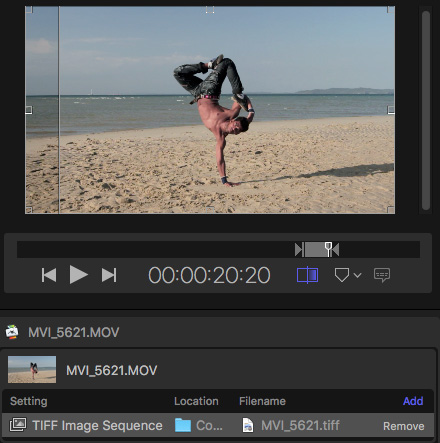
In Final Cut Pro X:
Like Compressor, FCP X will create a folder automatically to store your images. In general, for best quality, export either TIFF or PNG images.
CREATE THE ANIMATED GIF
Once the image sequence is created, there are a number of websites and GIF tools we can use. In this example, though, I’ll create the GIF using Photoshop.
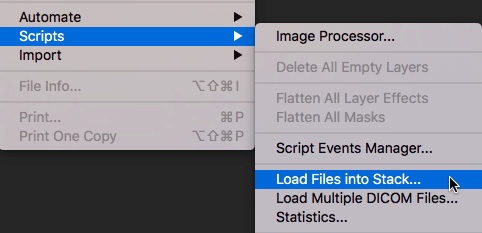
Choose File > Scripts > Load Files into Stack.
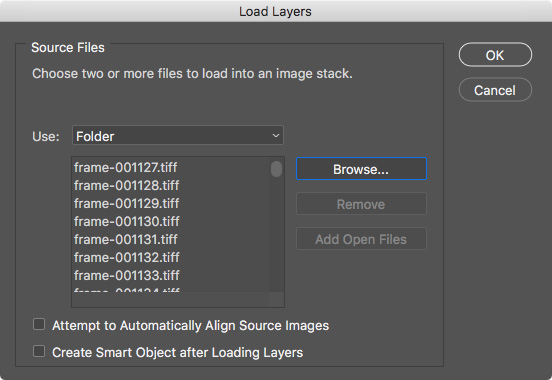
In the next screen, set Use to Folder, Browse to the folder containing the image sequence, select the folder, then click OK.
IMPORTANT NOTE: When using the Folder option, images are loaded in reverse order. We will fix this in a minute.
Click OK. This loads each image as its own layer in a Photoshop document. Depending upon the number of images in the sequence, this can take up to a minute to complete. Wait until importing is done before going to the next step.
NOTE: You’ll know importing is complete when all the frames are displayed in the Layers panel, the screen stops flashing and the interface returns to normal.
When importing is complete, choose Window > Timeline to display the Photoshop timeline.
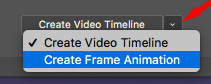
Then, from the pop-up menu in the middle of the empty Timeline, choose Create Frame Animation.
From the menu bar at the top, choose Select > All Layers. This selects all the images you just imported.
In the center of the Timeline, click the words Create Frame Animation. This tells Photoshop what type of animation we want to create.
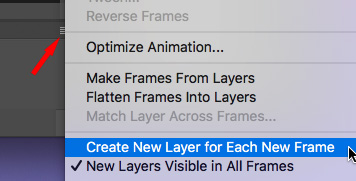
From the pop-up menu in the top right corner of the Timeline, click Create New Layer for Each New Frame.
From the same pop-up menu, choose Make Frames from Layers. This, too will take a several seconds to complete.
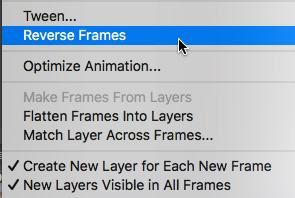
Finally, when the Timeline is built, go back to the same popup menu and choose Reverse Frames. This will now play the frames in the correct order.

Click the Play button (right-pointing arrow) at the bottom left of the timeline to preview the sequence.

At the bottom of the Timeline you can change the duration of each frame, modify the images, and determine how often the animation will loop. Looping Once is the default, but you can select it to loop a custom number of times or continually.
Once you are happy with how this looks, choose File > Export > Save for Web (Legacy).
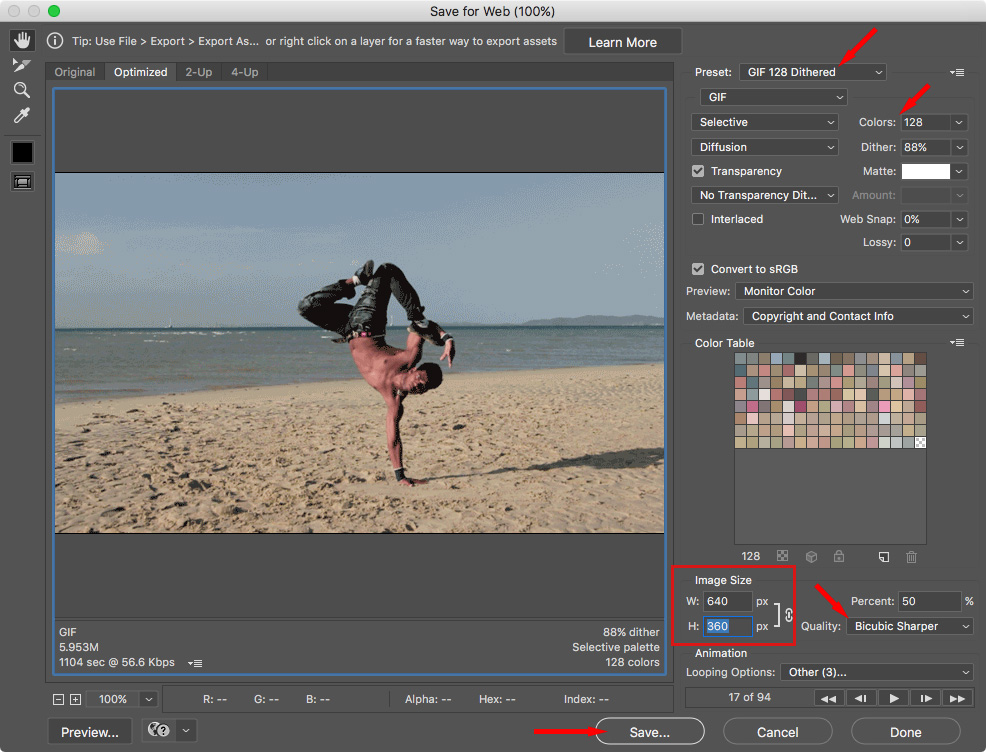
(Click to display larger image.)
For best image quality – but the largest file size – choose GIF 128 Dithered from the pop-up menu at the top.
NOTE: The smaller the GIF Color number, the smaller the file but the fewer colors it will contain. Smaller images and lower dither numbers will also reduce file size.
Play with the other presets if you like, but I tend to prefer the defaults.
At the bottom, set the image size to match the final image size you want to post to the web. I also prefer setting Quality to Bicubic Sharper when I’m reducing the size of the image.
Click Save to create the animated GIF.
NOTE: This can’t be played by double-clicking in the Finder, but can be played by opening it in any web browser.
SUMMARY
The benefit to using Photoshop, though it requires more steps than other tools, is that you can retouch each individual frame, as well as add text, titles, or other effects your animation may require. For me, the extra control is worth the extra steps.

2,000 Video Training Titles
Edit smarter with Larry Jordan. Available in our store.
Access over 2,000 on-demand video editing courses. Become a member of our Video Training Library today!
Subscribe to Larry's FREE weekly newsletter and
save 10%
on your first purchase.
7 Responses to How To Create an Animated Video GIF
Thanks very much for this
Thank you! This is the second time in 6 months that Google has directed me to one of your how-to articles and, both times, they’ve been exactly the help I’ve needed. 😀
Carleton:
Thanks for writing! Happy to help.
Larry
Thanks, Larry. Your help is great for us on the web.
Arghh. Trying to save for web. “Could not complete this operation. An unknown error has occurred.”
Patrick:
That is so frustrating. Where did the failure occur? If you have the TIFF images, you can also use web-based tools to create the GIF. (however, I don’t use these, so I don’t have a specific recommendation.)
Larry
Great stuff, many thanks.