 (This article was suggested by Jon Gay. I’ve covered this subject in my video training, but haven’t written an article about it.)
Final Cut Pro X makes working with multichannel audio easy – but, the process isn’t always intuitive.
Multichannel audio is a single audio clip containing multiple channels (or tracks) where each actor is recorded on their own channel. Dual-channel mono is the most common form of multi-channel audio, however, depending upon the audio gear you are using on set, you can stuff 4, 8, even 24 audio channels into a single audio file.
Whether you are working with 2 or 24 channels, the process is the same.
NOTE: Because I don’t have an audio clip with more than two separate channels of dialog, I’m using a surround music clip as my example. While the waveforms will look different, the process of working with multichannel audio is the same.
DISPLAY THE AUDIO CHANNELS
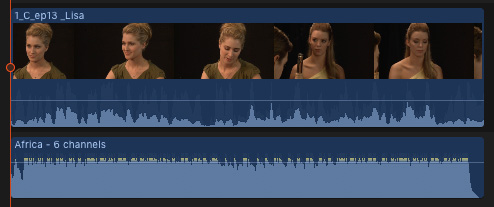
For this example, let’s pretend I recorded room audio on the video clip using the camera mic. Then, using separate gear, I recorded each actor separately on their own channel, to create a multichannel audio clip. I then synced the two clips together using a clapper slate.
NOTE: This technique works exactly the same if the multichannel audio was recorded and attached to the video clip.
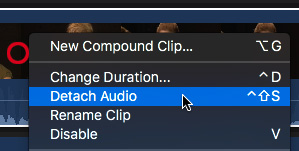
At this point, we no longer need the audio attached to the video clip, so I right-click the video clip, detach the audio and delete it.
NOTE: In real-life, I would keep the audio attached to the video “just in case,” but pull the audio levels all the way down so the clip becomes silent.
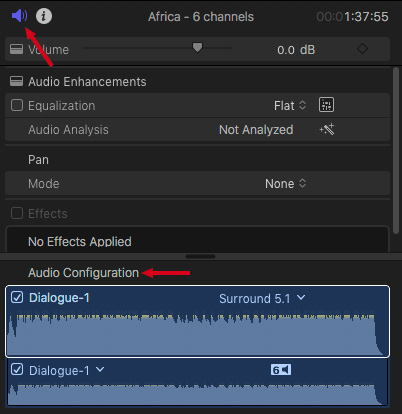
Select the audio clip in the Timeline, go to the Audio Inspector and look at the Audio Configuration at the bottom. In this example, it is set to Surround; this is the default setting when Final Cut sees a six-channel audio clip.
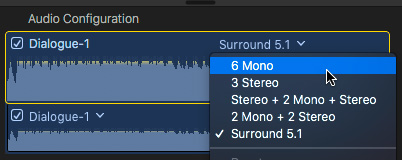
Because we want to see and adjust each track separately, click the downward-pointing arrow next to Surround and select 6 Mono. (This number will change depending upon the total number of tracks in the audio clip.)
NOTE: Choosing Mono is important. This means that each channel will be separate, play equally out both the left and right speakers, and remain fully adjustable. If two of the tracks contain playback music, those two tracks should be set to Stereo.
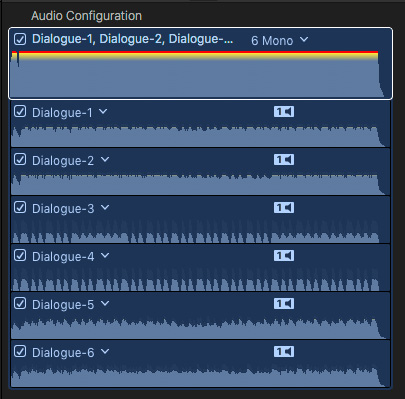
As soon as you do, each channel is displayed separately in the Inspector.
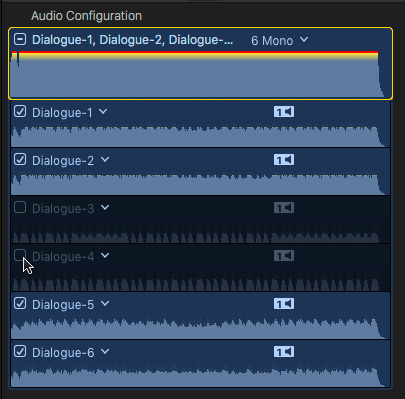
If there are channels you don’t need, uncheck the checkbox on the left side. This mutes the channel without deleting it.
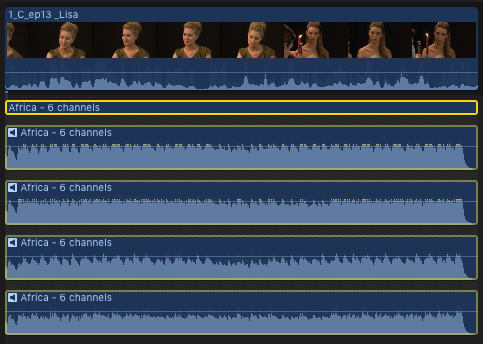
To view each channel separately in the timeline, choose Clip > Expand Audio Components (Shortcut: Control + Option + S).
Only those clips who’s checkboxes are checked in the Inspector will be visible in the Timeline. (You can activate or deactivate any audio channel at any time using the Audio Inspector.)
SET AUDIO LEVELS
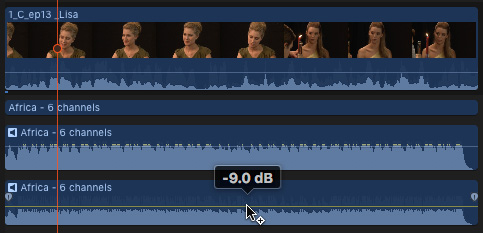
To adjust the audio levels for each channel, drag the light blue horizontal audio line up or down. This is exactly the same as adjusting the level of a single mono or stereo audio clip.
Just as with single-channel audio, we can:
TRIM MULTICHANNEL AUDIO
It is important to note that these channels are still synced to the video clip. We can’t move them horizontally, as that would break sync. But, we CAN trim them.
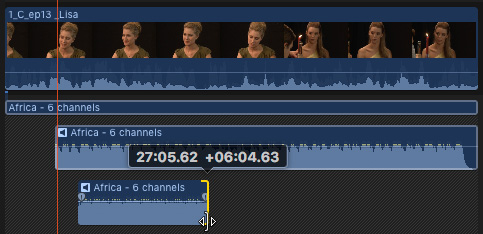
The easiest way to trim a clip is to grab an edge and drag it. Each channel can be trimmed differently.
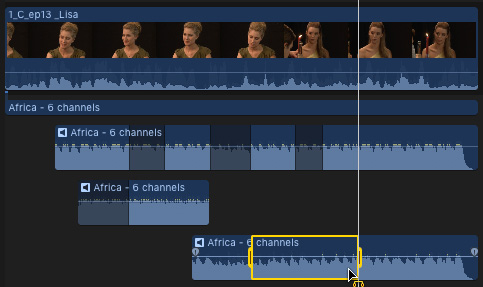
However, a better way to trim is to use the Range tool (Shortcut: R). This allows you to select a range within an audio clip and adjust the audio level by dragging the horizontal blue audio line up or down, or press the big Delete key to remove the audio entirely.
NOTE: If you are not sure if you will need the again or not, don’t delete it. Instead drag the audio line down. This sets keyframes which you can then adjust to bring the audio back.
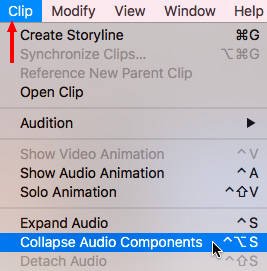
When you are done editing a multichannel audio clip, select the clip and choose Clip > Collapse Audio Components (Shortcut: Control + Option + S). The coalesces all the different channels back into a single clip. This doesn’t change any of your settings, but does keep the timeline cleaner.
SUMMARY
Recording and editing multichannel audio gives us the maximum amount of flexibility in the edit to make sure the audience hears what we want them to hear. And Final Cut makes the process of managing, editing, trimming and adjusting multichannel audio easy.
2 Responses to Final Cut Pro X: Edit Multichannel Audio
I need to slide two tracks that were recorded to camera. Track one is board feed and track two is shotgun. This is such a basic professional audio thing to do but is a full on hassle with this software! I’m so frustrated at how good FC7 use to be for the user experience. I am constantly disappointed by this software… ugh
Bryant:
Easy to do. Right-click the clip with the audio you want to slide, choose Detach Audio.
The audio is now separate from the video, i.e. sync is broken. Use the comma and period keys to move the audio one frame left or right until you are in sync.
To guard against the clips getting moved accidentally after you have them in sync, select both the audio and video elements and choose File > New > Compound clip.
Larry