 OK, let me say upfront that this should not be so hard. But it is.
Final Cut Pro X provides a simple scrolling credits effect in the Titles browser. However, if your credits are more complex, or exist in a word processing document, life gets much harder.
Here’s what you need to know. This article was suggested by a reader; now I know why.
THE BASICS
Perhaps you’ve seen the Scrolling credits option in Final Cut. (Titles > Credits > Scrolling).
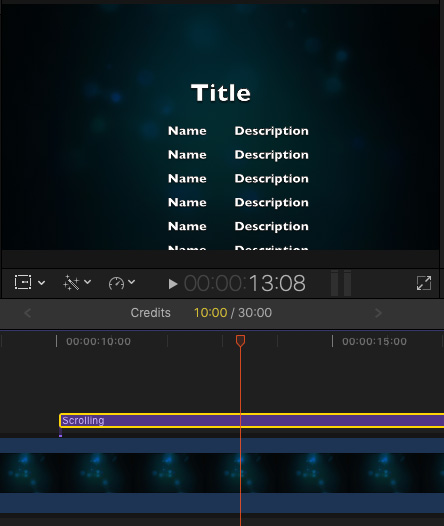
When you edit it to the timeline as a connected clip, then hover over it, a mostly-ugly formatted scrolling credits list appears.
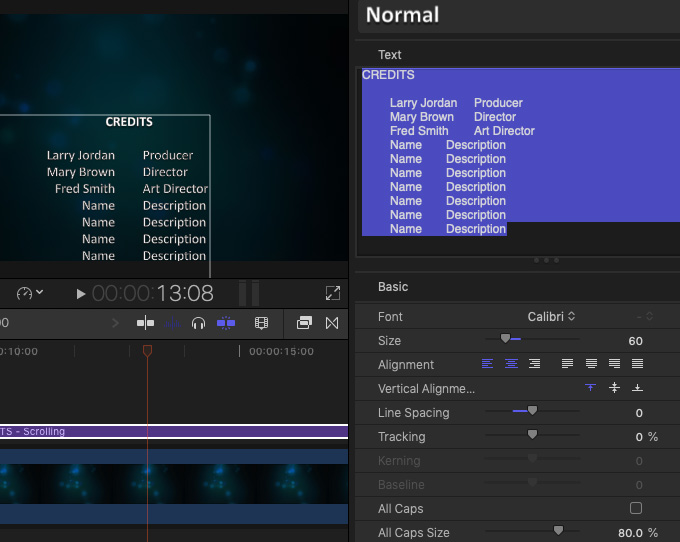
We can open the Inspector, click the Text tab and add our own titles. Notice that as long as we don’t delete the tab between the first and second columns, the left column will align right, while the right column will align left.
We can then format the text using the Format options lower in the Text Inspector.
The speed of the scroll is determined by the duration of the text clip. Longer clips scroll more slowly.
All this is straight-forward. Where things go off the rails is if we want to change the distance between the two columns or add columns or just about any other modifications.
At which point, FCP X gives up.
PLAN B – MOTION
We have more formatting options if we use Motion. The problem is that, even though Motion has a ruler and tab stops, they don’t behave the way you expect.
Still, if you want to make your credits more interesting, here’s what you need to know.
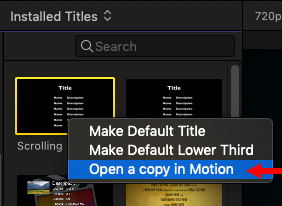
Right-click, or Control-click the Scrolling title in the Titles Browser and choose Open a copy in Motion.
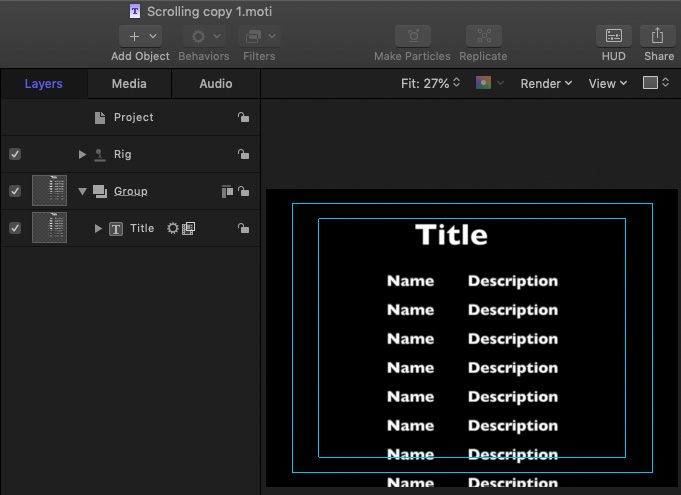
After a few seconds, Motion starts and a copy of the animated title appears.
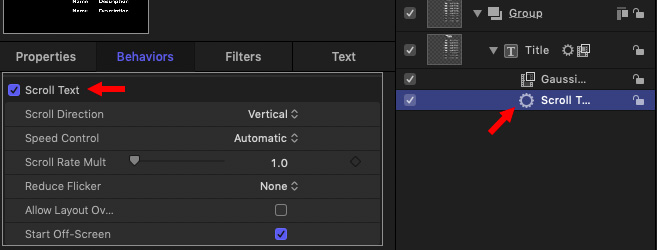
As you can see, this title is simply a large text block with a Scroll Text behavior applied to it.
NOTE: You could, to give yourself more control, delete this behavior and replace it with keyframes or a Motion Path. But this behavior is not the problem here, formatting the text is.
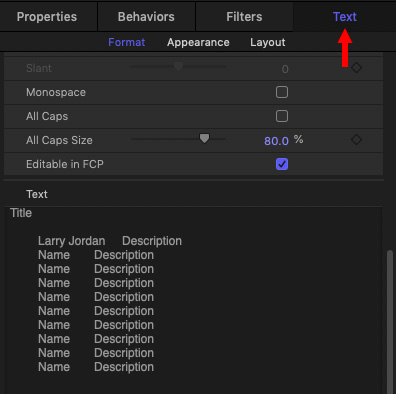
As long as you change the text in the Viewer, or Inspector > Text > Format, the alignment remains. But, what happens if, as is usually the case, you have a long Word or Pages document with all your credits. Sigh… Chaos.
Unless you know the secret handshake. Watch.
CREATE THE CREDITS
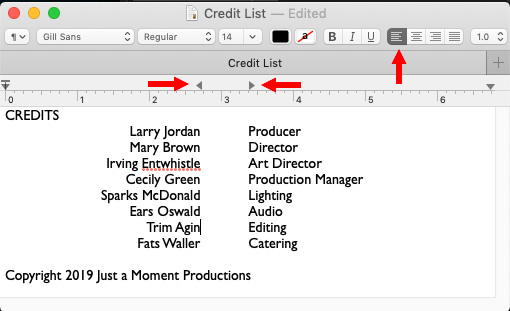
Here in Text Edit, I’ve created a credits list. Here are the KEY points:
Select all the text (Cmd+A) in the word processor.
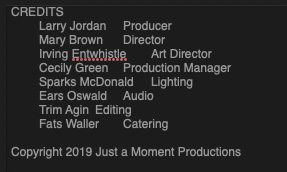
Select the Title layer in the Layers panel in Motion, then paste the text into the Text field in the Inspector. (I’ve found this works more reliably than pasting text into the Viewer.)
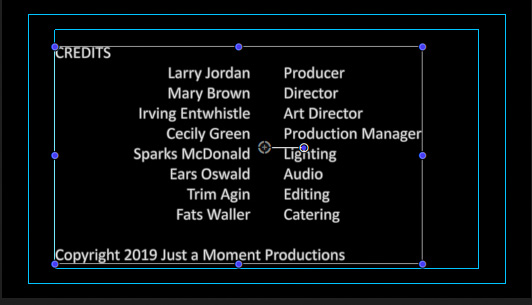
Note when you do, the text and columns align properly in the Viewer.
BIG, BIG NOTE: Motion does NOT automatically save anything, unlike FCP X. BE SURE to type Cmd+S frequently to preserve your work.
MAKE TEXT ADJUSTMENTS
With all text selected in the Inspector, format the text as you like. First, format all the text as a group, then make individual adjustments
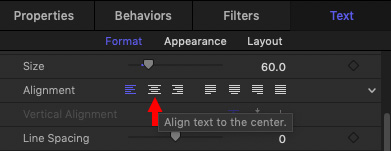
To format individual lines of text, I found it works better to select them in the Viewer, then make changes. For example, to center a line of text, put your cursor in the line you want to center and click the Center Alignment option in the Inspector.
NOTE: In order for the tab alignment to work, the tabbed text must be left-aligned.
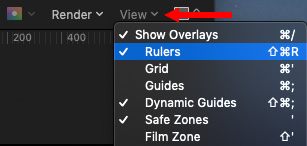
There’s a text ruler in Motion. To display it, choose Ruler from the View menu in the top right corner of the Viewer.
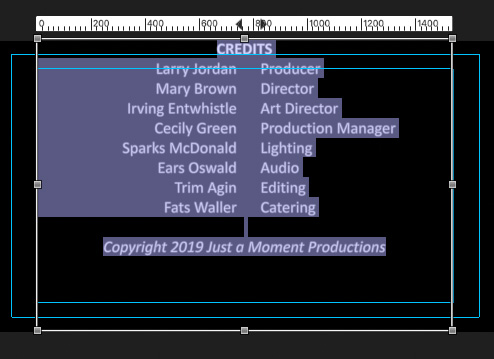
Select the Title layer in the Layers panel, then double-click the text in the Viewer. The ruler displays at the top.
Make sure all your text is selected, then drag the tab stops at the top to get the width of text that you want. As long as there are no other tabs in the document and all centered text does not use a tab, the only thing that changes is the tabbed text.
To deselect the text, click anywhere in the Layers panel except on the Title layer.
ANIMATION
As long as all your changes have been inside the existing Title layer, you won’t need to change any of the animation, is should just work. Again, just remember that the speed of the scrolling is based upon the duration of the clip in Final Cut.
NOTE: This animation does not pause. If you need the credits to pause at the end, you’ll need to use keyframes.
Save your project, you’re done in Motion.
BRING IT BACK
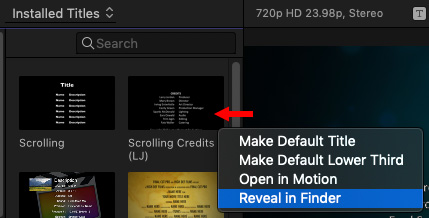
When you switch back to Final Cut, you’ll see the Motion project was added to the Titles Browser.
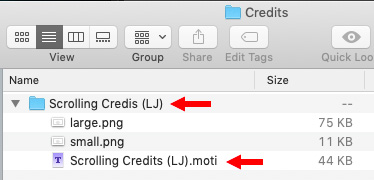
NOTE: Your version may just simply have “copy” appended to the file name. To change the name, right-click the clip and select Reveal in Finder. Then, change both the name of the Motion file and the folder that contains the file. The two names need to match.
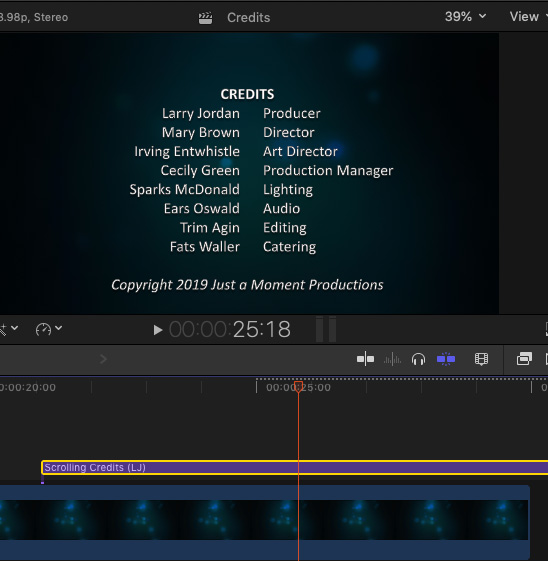
Apply the new credits to your project and you are done.
Whew.
10 Responses to Final Cut Pro X: Create Scrolling Credits
Why not scrolling text other than credits? What about messages that scroll by?n
Neil:
These can easily be created in either FCP X or, more easily, in Motion. However, FCP X does not have pre-built templates for them.
Larry
Thanks for that! Can I add a logo to the scrolling text for it to scroll with the rest?
Isabelle:
Not as part of the text clip, but, yes, as a separate element. Then, adjust timing using the Transform settings.
Larry
Thanks Larry! Loving your work as always.
Jack:
Thanks for the kind words!
Larry
Larry,
I have seen some films where the credits are scrolling to the right and there is video running on the left side of the screen. Can this be done in FCP?
Anne:
Easily. Use Position to move the credits to the right.
Then add the video clips on higher layers.
Larry
For the scrolling of text, is there an “industry standard” of how fast the text/paragraph should be shown ?
I am constantly adjusting the scroll speed and it may differ between the differant story bits throughout my project.
Dale:
Nope. No standards whatsoever.
Larry