Final Cut Pro: Put Video Inside Video Using Nested Compound Clips
[ I first wrote about this technique for The Inside Tips.com (link), but, though I wrote it as a tip, it kept getting more complex. So I’m adding it here with more images and explanations. It isn’t a tip anymore, but it IS an interesting technique. ]
OK, this is tricky, but worth trying. Here’s how to create a logo or shape in Photoshop, fill it with moving video in Final Cut, then place it over a background.
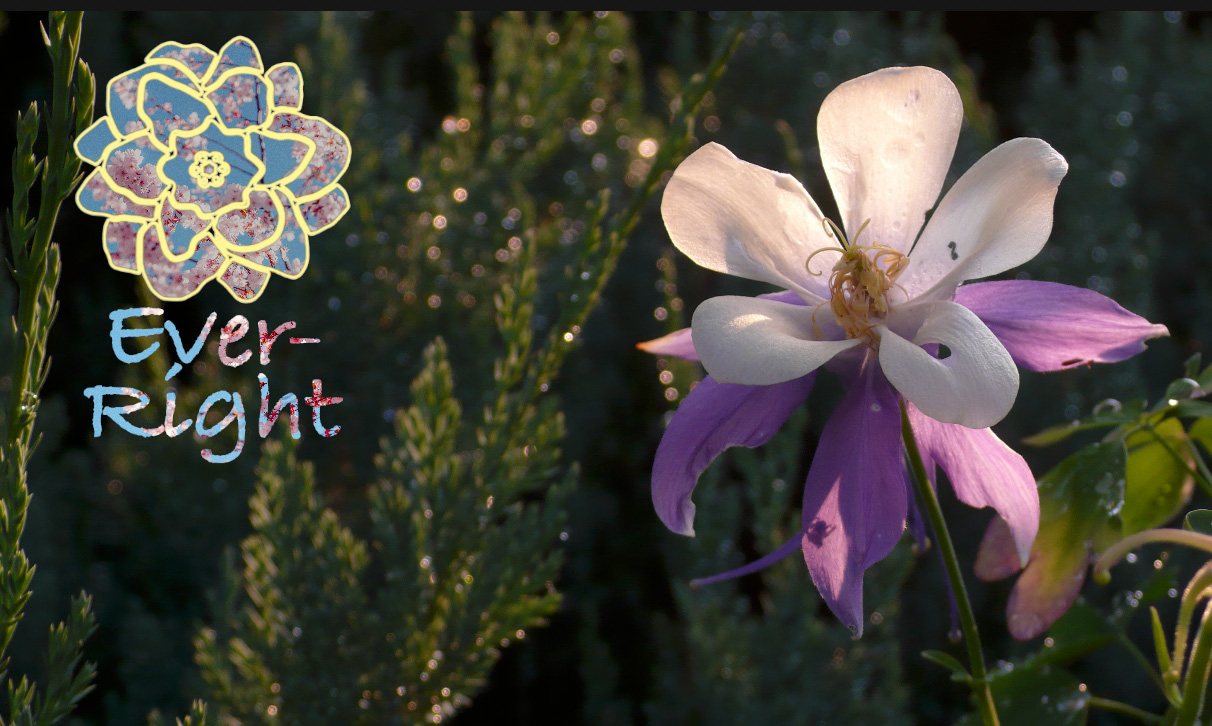
Here’s where we are heading – video inside a still or video keyed over video.
IN PHOTOSHOP

- Select the custom shape tool, then, from the Shapes menubar at the top, pick a shape you like. (Or you can create your own shape.) This screen shot shows a flower image combined with text (Font: Bradley Hand).
NOTE: Be sure the part of the shape you want filled with video is set to black. You could use other colors, but that only makes the key more complex. Lines that you want to retain should be any color except black.
- To make the colors work with the background image, I changed the Stroke color and thickness for the shape.
- Make the background layer transparent.
- Save the image as a PNG or PSD; both will work.
IN FINAL CUT PRO

- Put the video you want to insert into the shape into the Primary storyline.
- Import and stack the Photoshop logo above the video.

Cherry blossom image courtesy of Oleg Magni at Pexels.com.
- Select the logo and apply Video Inspector > Blend Mode > Stencil Alpha. The shape and text fill with the video. BUT, we lost all the lines in the middle of the shape. We need to put them back.
- Select both logo and video and choose File > New > Compound clip. Give this any name you like.
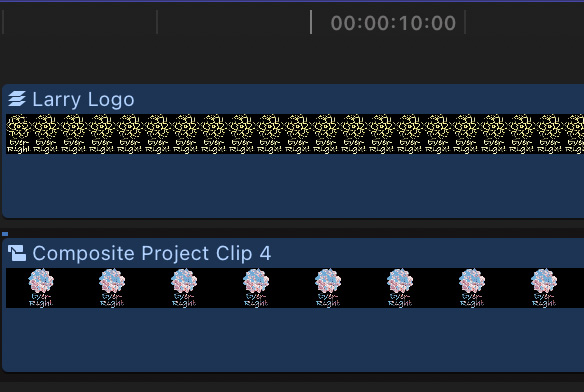
- Place the logo, again, on top of the newly-created compound clip in the timeline.
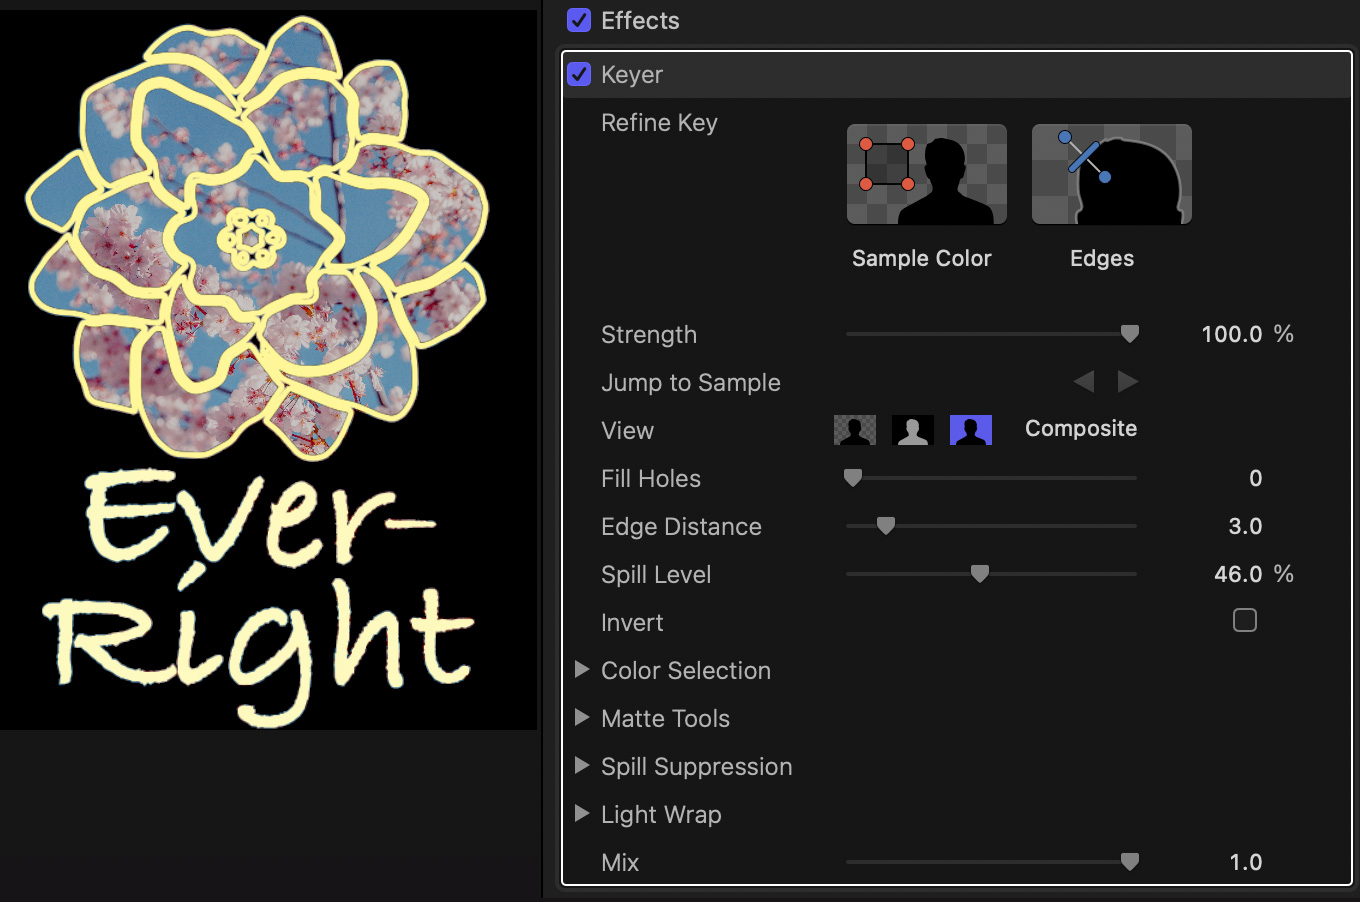
- Select the top logo and apply Effects > Keying > Keyer. It should automatically knock out the black background, leaving the yellow lines on top of the image from the compound clip.
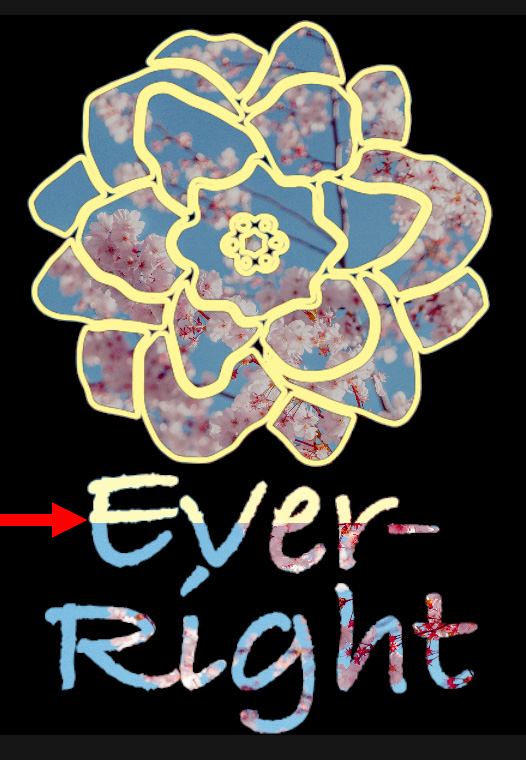
- Select the top logo and use Video Inspector > Crop to Trim the bottom of the logo so that the flower-filled image appears. In this screen-shot, you can see the trim half-way through the word “Ever-“.
- Select both the new shape and the compound clip and choose File > New > Compound clip. (Yup, a nested compound clip!) Give this any name you like.

- Stack that nested compound clip on top of the video you want to appear in the background.
- Finally, scale and position the logo as needed using the settings in Video Inspector > Transform. And, because this is a single nested compound clip, you can also apply a Drop Shadow effect to make the logo stand out from the background.
NOTE: Flower image taken by me on a nature walk many years ago.
Done.
EXTRA CREDIT
This trick works with logos, text, custom shapes – the possibilities are endless.
Bookmark the
permalink.
2,000 Video Training Titles
- Apple Final Cut Pro
- Adobe Premiere Pro
- DaVinci Resolve
Edit smarter with Larry Jordan. Available in our store.
Access over 2,000 on-demand video editing courses. Become a member of our Video Training Library today!
JOIN NOW
Subscribe to Larry's FREE weekly newsletter and
save 10%
on your first purchase.


8 Responses to Final Cut Pro: Put Video Inside Video Using Nested Compound Clips
Larry! Your knowledge is amazing. You are definitely the number one person
for Final Cut Pro and other areas.
I could not imagine the wold without Larry Jordan and many people and businesses would not be where they are because of you and your team.
Thank You for all you and your team are doing for us.
Best Wishes and Good Health
Dirk Baumann
Dirk:
You are very kind!
Thank you for you words – they are very much appreciated.
Larry
Your are a digital Rembrandt, Larry.
Bob:
Smile… Thank you!
Larry
Honest kindness is never redundant sooooo,,,,
ditto to what the others have said here.
Thanks Larry for all your tips, tricks, techniques and good mojo!!
James:
Thank you for your most kind words.
I enjoy writing about the stuff. It is very gratifying to know you like it.
Larry
Larry, I’m struggling with the transparency of Compound Clips. I had a title sequence with a full screen blue custom generator (connected to the main storyline, not directly in the main storyline) which has a dissolve transition to bring it on screen. Then the titles stacked on top of that.
Once I took the background and all the titles and made them a compound clip, the fade is over black, and after complete, the main storyline image underneath suddenly pops back on.
I had the same issue with a clip that had a draw mask to reveal a logo underneath. Once in a compound clip, the mask just reveals black, and not the contents of the main storyline below it.
Any ideas? Is this a simple limitation of compound clips?
Shaun:
I’m sorry for the delay in reading this. My guess – pending doing an experiment – is that you need to set the compound clip to render using Apple ProRes 4444. So, create an empty compound clip to configure the settings, then add your clips, then see what happens.
Larry