
![]() With Final Cut Pro X, trimming in the Primary Storyline is easy. The Magnetic Timeline means that anytime we move an edit point, everything to the right (downstream) moves with it. But that is not how connected clips behave. In this article, I want to show you some trimming techniques for connected clips that I use in virtually every edit I do.
With Final Cut Pro X, trimming in the Primary Storyline is easy. The Magnetic Timeline means that anytime we move an edit point, everything to the right (downstream) moves with it. But that is not how connected clips behave. In this article, I want to show you some trimming techniques for connected clips that I use in virtually every edit I do.
DEFINITIONS
Edit Point. The vertical point where two clip edges touch; with the Out of the out-going clip touching the In of the in-coming clip. An edit point is also the edge of a clip (either at the beginning or the end), whether there is another clip touching that clip or not.
Trimming. Adjusting where two clips touch by adjusting the In, the Out, or both. Trimming is always done in the Timeline. Setting and adjusting the In or Out of a clip in the Browser is called “marking” a clip.
Trim. To move the edge of a clip either or later in the Timeline without any downstream clips moving.
Ripple. To move one edge of a clip earlier or later in the Timeline, which causes all clips to the right of that clip to move by the same amount.
Roll. To move the point where two clips touch such that the edit point moves, but no other clip moves.
Trimming is an essential editing technique to match action between shots or set a particular emotional “feel” for the edit point.
TRIMMING
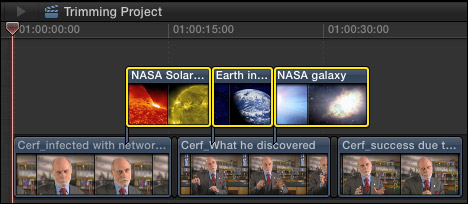
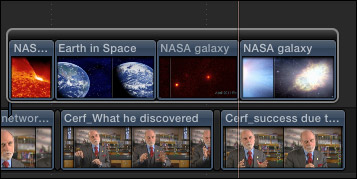
Here is a short sequence composed of three sound bites, separated by a small gap to make the pacing of the sound bites sound “normal,” with three B-roll clips covering the gaps and illustrating what the speaker is talking about. (Footage courtesy of Dr. Vint Cerf and Alcatel/Lucent.)
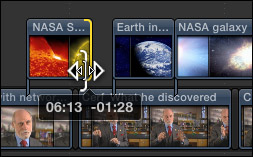
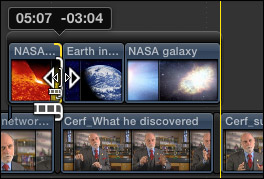
If I grab the edge of a connected clip, I can make it shorter…

…or longer, but all dragging does is either leave a gap or overlap two clips. What I’m doing in both these examples is a trim. But, I don’t want a gap and I do want the other clips to move as I move the first clip. Plus, I can’t do a roll trim between two connected clips at all. The Trim tool doesn’t work that way.
Then, if I try to insert a clip between two connected clips (keyboard shortcut: W), the clip is always inserted into the Primary Storyline.
In all these cases, this is not what I want. On the other hand, it is all that connected clips allow me to do.
TIME FOR SOMETHING DIFFERENT
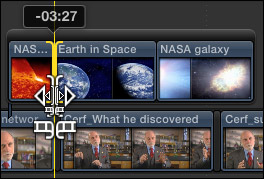
In order to trim connected clips the way we trim Primary Storyline clips we need to convert them into a Connected Storyline. To do this, select the clips you want to convert and do one of the following:
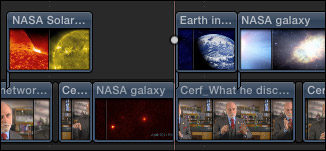
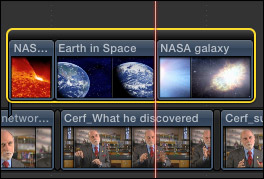
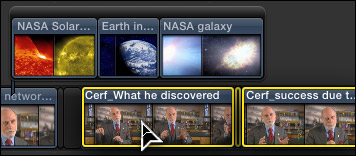
This converts the unrelated connected clips into a single storyline. See the gray bar over the top of the selected clips? This indicates the clips are contained in a storyline.
NOTE: There is no limit to the number of connected storylines that you can create in a project. However, all clips in the same storyline need to be on the same layer, you can’t stack clips inside the same connected storyline.
TRIMMING A CONNECTED STORYLINE
Now, when we grab the edge of a clip and drag left, all the clips in the same connected storyline to the right of the clip being trimmed move as the edge of the clip moves. Either shorter…
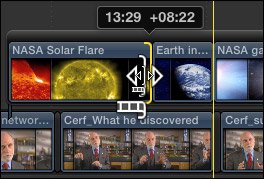
… or longer.
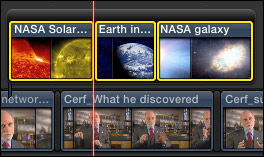
Even better, when I select the edit point with the Trim tool (keyboard shortcut: T), I can roll trim where two clips touch which changes the timing of the edit without moving the position of any clips.
DOING AN INSERT EDIT
To insert a clip into a connected storyline:
Poof! Instant inserted clip into the selected storyline.
NOTE: If no connected storyline is selected, the clip will be inserted into the Primary Storyline.
DECONSTRUCTING A STORYLINE
To convert a connected storyline back to individual clips, select the storyline by clicking the gray bar above the clips, and choose Clip > Break Apart Clip Items (keyboard shortcut: Shift+Cmd+G).
All the clips in the selected storyline are now individual connected clips.
SECRET TIMELINE TRIMMING TIP
A trimming tip that took me a while to discover involves the Position tool. When you trim clips using the Position tool, clips move without changing their edit points. (Think of the Position tool as an override to the Magnetic Timeline.) The Position tool allows me to quickly leave gaps between clips, which I almost always do when editing talking head interviews so that the pacing sounds right.
To create a gap, select the Position tool, then select all the clips you want to move. (If you only select one clip, it will override the clips around it.) Then, do one of the following:
COOL TIP FOR EXTRA CREDIT
To change the duration of a gap, select the gap then type Control+D, followed by the number of frames, or seconds and frames, you want the new duration to be.
I find that a six frame gap generally equals the duration of a period at the end of sentence spoken in normal conversation. This allows me to cut breaths and tighten sentences, yet still have the flow of a speaker’s voice sound normal.
ADDITIONAL RESOURCES
Here’s an article I wrote recently that shows how to merge or cut connected storylines.
For more in-depth video training on Final Cut Pro X, visit my store.

2,000 Video Training Titles
Edit smarter with Larry Jordan. Available in our store.
Access over 2,000 on-demand video editing courses. Become a member of our Video Training Library today!
Subscribe to Larry's FREE weekly newsletter and
save 10%
on your first purchase.
2 Responses to FCP X: Trim Connected Clips
“I find that a six frame gap generally equals the duration of a period at the end of sentence spoken in normal conversation. This allows me to cut breaths and tighten sentences, yet still have the flow of a speaker’s voice sound normal.”
Thank you for paying attention to the normal flow of speaking. I tire of videos where the speaker is somehow incapable of speaking more than 1 or 2 sentences per shot, and then having them glued “too close” together, resulting in an annoying choppiness!
Thanks!
Alan:
Thanks for the kind words. NOTHING bothers me more than audio edits that are too tight. Human speech is rhythmic for a reason.
Also, since we are into higher frame rates these days, the “six-frame” duration is pretty loose. I prefer to now say about 1/3 of a second.
Larry