
![]() One of my favorite effects is a Traveling Matte. This is where you key a shape into a background video and fill it with different video.
One of my favorite effects is a Traveling Matte. This is where you key a shape into a background video and fill it with different video.
In Final Cut 7, it takes four layers to achieve this affect. In Motion, it takes, essentially, one mouse click. So, this week, I set myself the goal of creating this effect in Final Cut Pro X. It wasn’t as simple as I expected, but we can get there – and there are a lot of interesting effects to learn along the way.
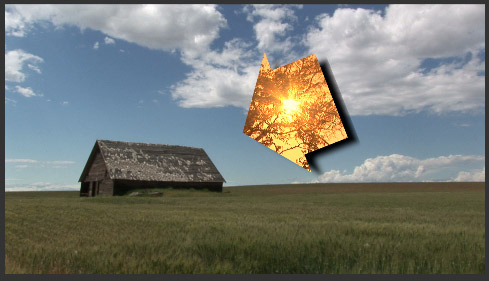
This is where we are headed. Here are the steps.
THE BASIC EFFECT
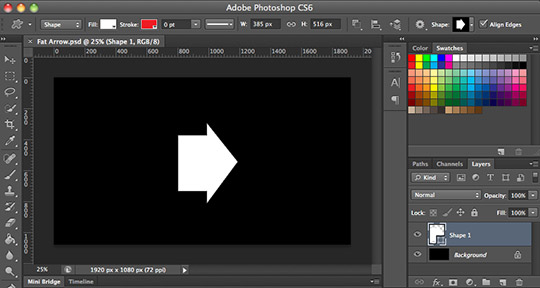
First, create a shape in Photoshop and save it as a layered Photoshop file (PSD). Make sure the shape you want to use is on a layer other than the background. (I used an arrow for this example, but you can create anything; and the color of the shape is not important.)
I saved this as a PSD file and imported it into Final Cut Pro X.
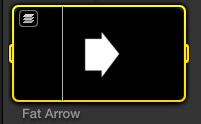
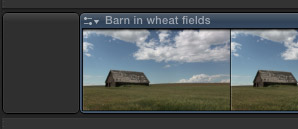
When you import a layered Photoshop file into FCP X, a small stacked icon appears in the top left corner. Double-click the file and it opens into a special version of the Timeline where you can see all the layers at one time.
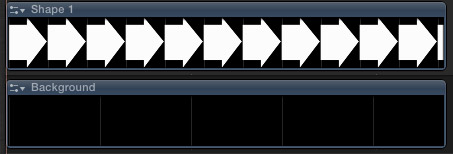
Select just the layer containing the shape and copy it to the clipboard.
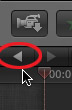
To exit this special Timeline, click the small left-pointing “Go Back” arrow in the top left corner of the Timeline.
In the Timeline, where you want to create this effect, add the clip you want to use as the background into the Primary Storyline.
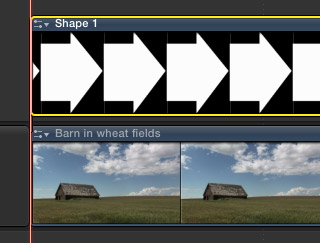
Put the playhead where you want the shape clip to start and paste it. It will appear as a connected clip.
Because the clip inherits the transparency information from its Photoshop roots, the white arrow immediately keys itself into the background.
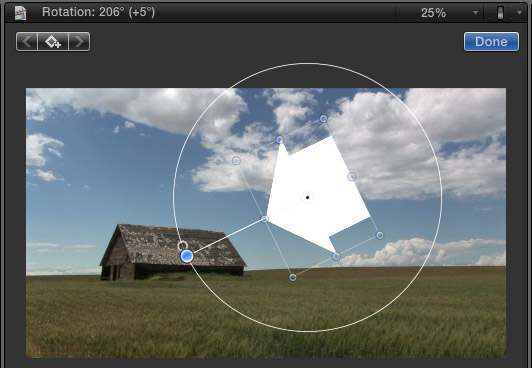
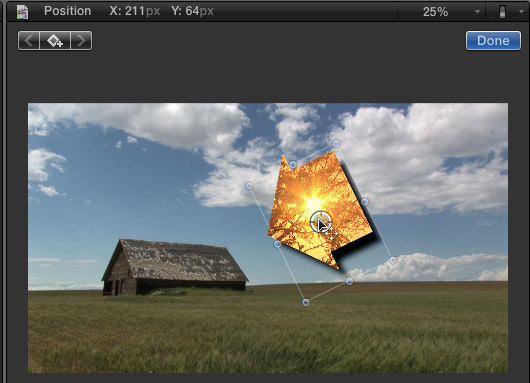
Turn on the Transform icon in the lower left corner of the Viewer, rotate and position the arrow so it is pointing at the barn. (Press the Shift key when rotating to constrain rotation to 45-degree increments.)
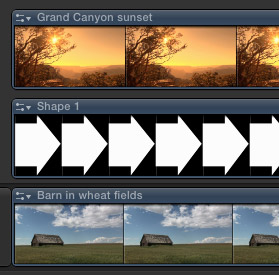
Above the shape clip, add the video of the clip you want to insert into the shape. In this case, I’m using a very orange clip of the Grand Canyon at sunset. (It made for a nice color contrast.)
Here’s where the magic starts.
Select the top clip (Grand Canyon) and change the Blend mode (at the bottom of the Inspector) to Behind. Don’t worry, nothing appears to happen.
Select the shape clip (Arrow) and set the Blend mode to Silhouette Alpha.
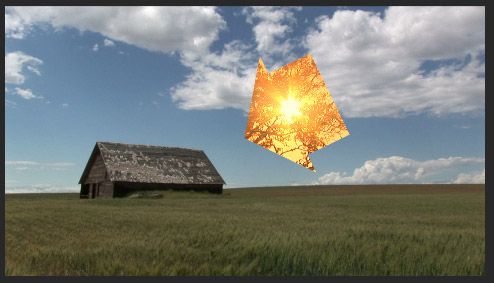
Poof! Instant effect. Play the Timeline and you’ll see video moving behind and inside the shape.
Very cool… except. This would look a lot nicer with a drop shadow — except we can’t add drop shadows to anything other than text in Final Cut Pro X.
So….. we need to get devious.
GETTING DEVIOUS
Select the Shape clip in the Timeline and copy it. Paste it so that now you have a duplicate of the shape.
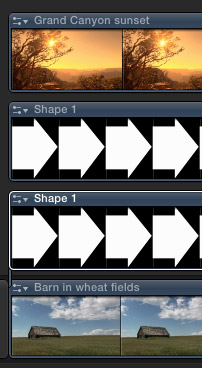
Drag the duplicate below the original shape. (This duplication process saves us the trouble of matching all the transform settings we applied earlier. Lazy is good.)
We need to turn the lower shape into a drop shadow, which is a trick, because the shape is white.
First, select the top two clips (the Grand Canyon and top Shape) and type V. This makes the selected clips invisible. (Not to worry, type V again and they reappear. For now, though, make them invisible.)
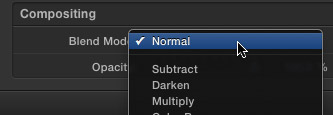
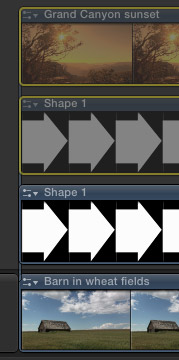
Select the lower Shape, go to the Inspector and set the Blend mode to Normal.
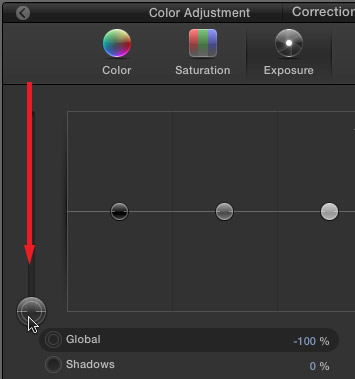
Next, go to Window > Show Color Board (or type Command+6) and click the Exposure icon to select it. Then, drag the Global exposure puck all the way to the bottom. This turns the white clip black.
With the bottom Shape clip still selected go to Effects > Blur and apply a Gaussian blur. Crank up the Amount setting in the Inspector to really soften the edges of the lower shape clip.
Select the top two clips and type V to make them visible again.
Select the lower shape and turn on the Transform settings. Drag the clip in the Viewer to create a drop shadow. Click Done when it is in a position you like.
Ta-DAH!
EXTRA CREDIT
You can soften the shadow more by adjusting the opacity of the lower shape. Actually, tweak both the blur and opacity until you are happy.
Cool.

2,000 Video Training Titles
Edit smarter with Larry Jordan. Available in our store.
Access over 2,000 on-demand video editing courses. Become a member of our Video Training Library today!
Subscribe to Larry's FREE weekly newsletter and
save 10%
on your first purchase.
10 Responses to FCP X: Travel Matte
Cool. I’d like to make this a compound or connected storyline so we can add a move…
thanks
Joe:
I would too, but as soon as we convert the top three layers to a compound clip, the effect breaks. I’m still playing to see if I can find a way to make a compound clip work.
Larry
I’ve copied the ‘shape’ layer as described but it will not then allow me to paste this into the clip board – any ideas as to what I’m doing wrong
Nick:
You may have missed a step.
Double-click the PSD file in the Event Browser to open it into the Timeline as its own project.
Select the layer containing the shape – remember, it needs to be on a layer other than the background.
Then, copy that layer to the clipboard.
larry
Try this method.
Put Matte on Layer 3 and apply ‘Stencil Luma’
Put ‘Fill’ on Layer two, Composite mode Normal.
Create Compound Clip from theses two clips and drop over ‘Background’ clip
Add Drop Shadow effect from Effects browser
ciao Larry , thanks for tour tutorial, it was great. How do I insert a transition like cross dissolve in the title with travel matte effect? To let you know, look at the title of this video. thank you very much
https://vimeo.com/74795926
Alberto:
you should just be able to add a dissolve at the beginning of the text clip. If that doesn’t work, put the text clip in a compound clip and add the dissolve to that.
larry
if I understand correctly, the three clips join in a single clip with the right key. thanks I’ll try tonight. What kind of color effect used in my vimeo video?
I filmed with gopro at 720p 100fps. I set the video to 1080p 60frame property. Do you think they are right to do slow motion?
grazie ciao
Hi Larry,
When I import PSD’s, they do not appear as layered and I do not get the “layers” icon in the top left of the clip. They’re just flat. I’ve tried multiple PSD’s, all with layers, RGB, 8 bit etc. I’m running FCP X 10.1.3. Any conceivable reason for this? I’m at my wits end. Thanks in advance
Gregg:
First, make sure your PSD files are saved as 8-bit, RGB.
Second, trash FCP X preference files. (Restart while pressing Option + Cmd.)
If those don’t work, there’s something wrong with the application – try calling Apple Support.
Larry