
![]() The “Ken Burns effect” was made popular by documentary filmmaker Ken Burns who brought stills to life using pans and zooms. Final Cut Pro X took this effect and built it into the software. (At the end of this article, you’ll see an update covering a new feature Apple added in the 10.1 release.)
The “Ken Burns effect” was made popular by documentary filmmaker Ken Burns who brought stills to life using pans and zooms. Final Cut Pro X took this effect and built it into the software. (At the end of this article, you’ll see an update covering a new feature Apple added in the 10.1 release.)
There are actually two ways to create this effect:
The advantage to the automated tools are that they are fast and easy. However, this always uses the entire duration of the clip. The advantage to keyframes is that you can animate a complete clip, or just a portion of the clip. However, keyframes are somewhat harder to use.
This article illustrates both techniques.
CREATE MOTION USING THE “KEN BURNS” EFFECT
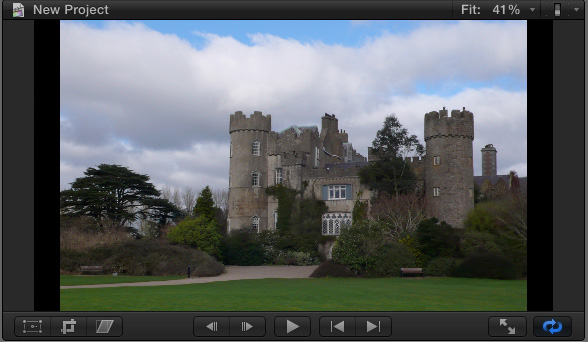
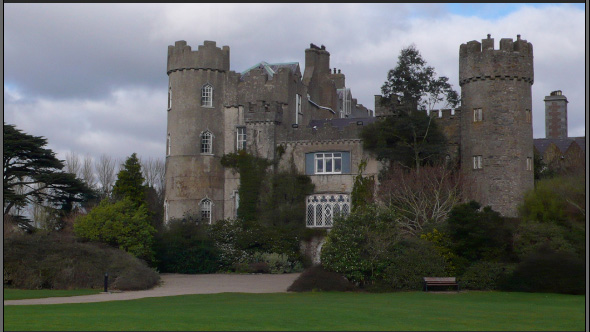
To apply the Ken Burns effect to a still image or video clip, select the clip in the Timeline. (This is a photo I took of Malahide Castle just outside Dublin, Ireland, when I visited recently on a seminar tour.)

Click the Crop icon in the lower left corner of the Viewer….
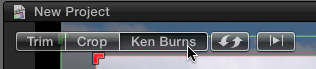
Then, click the Ken Burns effect in the bar at the top.
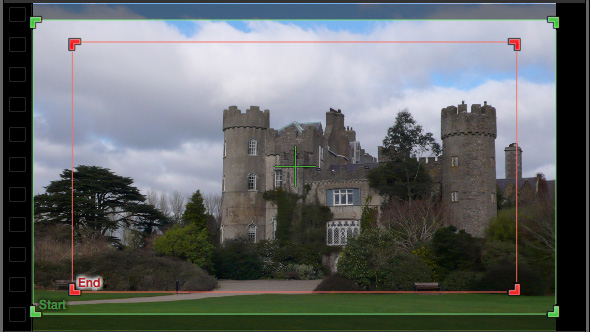
Two rectangles are displayed. The green rectangle shows the image displayed at the start of the clip. The red rectangle shows the image displayed at the end of the clip.
NOTE: The Ken Burns effect always runs the entire duration of a clip. If you want it to only run for a portion of the clip, cut the clip with the razor blade.
Click inside the green rectangle, but NOT the red rectangle, which selects the green rectangle – this sets the starting position. Drag the corners of the green rectangle to size the starting image. In this case, I’m selecting a wide shot in the lower right portion of the frame.
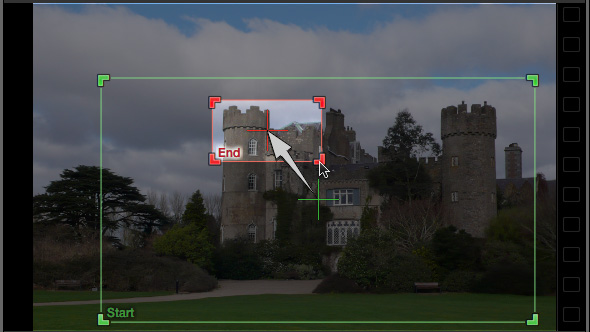
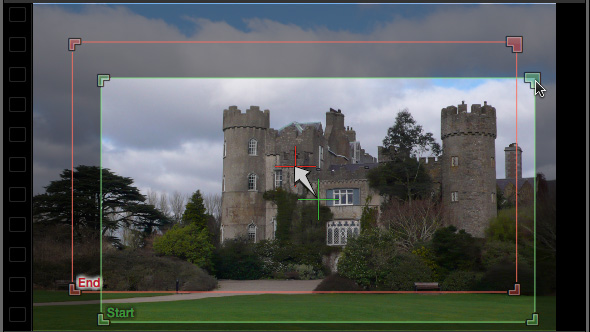
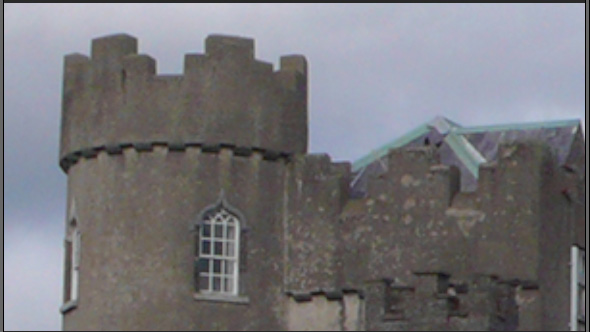
Then, click inside the red rectangle to select it and size and drag it until you get the ending image you want. In this case, I’m zooming into the top window of the turret, to highlight where the fair princess is being held captive by … well, I guess you know that story.
The white arrow shows the direction of the movement.
NOTE: Avoid zooming an image too large in the frame. Since video always deals with bitmapped images, zooming too far simply creates fat pixels — which look ugly. Here’s an article on sizing still images for video.
Press the up arrow key to move to the beginning of the clip and press Play.
The clip smoothly zooms from the starting to the ending position. (In fact, for the smoothest moves, you’ll need to wait for the clip to render. However, even before rendering is complete, you can get a good idea of what the move will look like by pressing Play.)
That’s it. Fast and easy. And done.
UPDATE
There’s a new option that Apple added with the 10.1 update to Final Cut Pro X: we now have the ability to change the acceleration and deceleration at the beginning and end of the Ken Burns effect.
The default setting used to be that the effect would start and end slowly, but speed up in the middle. Now, when we right-click (Control-click) inside the Viewer on the selected clip, four options appear:
Ease In and Out accelerates at the beginning and decelerates at the end of the effect.
Ease In decelerates at the end of the effect.
Ease Out accelerates at the beginning of the effect.
Linear maintains the same speed throughout the effect.
CREATE MOTION USING KEYFRAMES
The only problem with this approach is that is always uses the entire duration of the clip and, if you want it to change speed or pause in the middle of a move, you can’t. For that level of complexity, you need to use keyframes.
DEFINITION: A keyframe creates a change during playback. Virtually every parameter in FCP X can be keyframed. And you always use keyframes in pairs – a starting and ending keyframe.
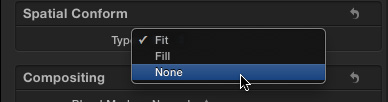
When manually sizing and positioning images, select the clip, go to the Inspector (Command+4), and set Spatial Conform to None. This displays the image at its full resolution, without scaling. (Here’s an article describing Spatial Conform.)
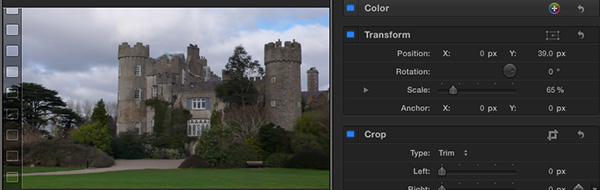
Position your playhead in the clip where you want the move to start and make sure the clip is still selected. Then, adjust the Transform settings in the Inspector until you have the starting position for the image. (In this example, I want the move to start one second in, scaled the image to 65%, and moved the image up 39 pixels.)
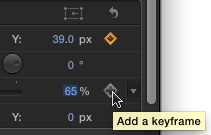
Because we need to adjust scale and position during this move, we will need to set a starting and ending keyframe. Keyframes are set for each parameter you want to change – in our case, that means Scale (size) and Position.
Click the gray diamond with a plus sign to set a key frame for both Position and Scale (two keyframes total).
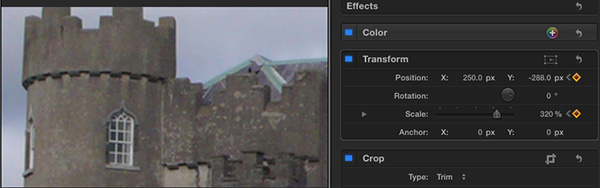
Next, move the playhead where you want the move to stop. Adjust both Scale and Position until you get the final position set. Because you already created keyframes for these settings, Final Cut automatically records ending keyframes.
In other words, you only need to create the starting keyframes. After that, FCP creates all other keyframes for those parameters automatically.
Play your clip and watch as the move starts in the middle of the clip and ends before the end.
Now, things get interesting.
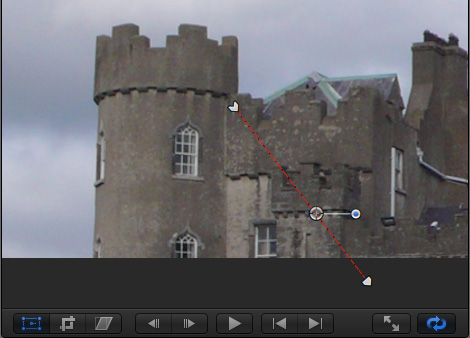
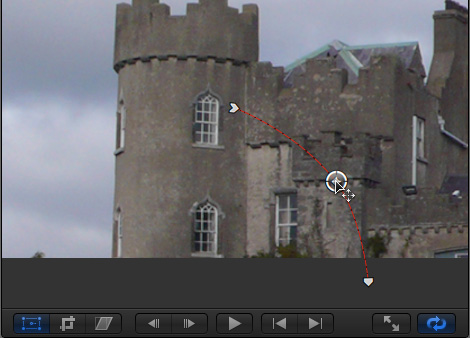
Click the Transform icon in the lower left corner of the Viewer which displays a red Motion Path, showing the movement of your image.
Grab the white ring (which represents the center of your image) and drag it. Notice that the motion path turns into a curve!
Click the new position keyframe you just created and two Beziér curves are displayed.
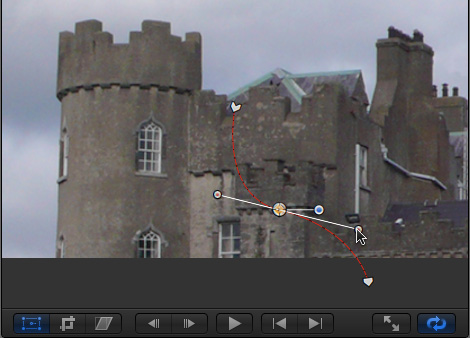
Grab one of the handles and drag it to change the angle of the curve. Make the handle longer to smooth the curve, make the handle shorter to sharpen the curve.
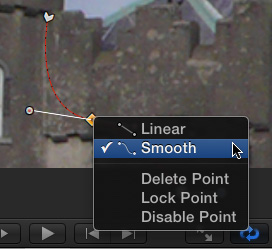
Right-click any keyframe to switch between linear (straight-line) and smooth (curves). You can also use this pop-up menu to delete, lock, or disable keyframes.
SUMMARY
The Ken Burns effect is fast, and makes image alignment simple. However, you have much more flexibility and control by using keyframes.
Now, you have a choice.
NOTE: I’ve created an entire series of video training cover Final Cut Pro X. Take a look here to see what’s available.

2,000 Video Training Titles
Edit smarter with Larry Jordan. Available in our store.
Access over 2,000 on-demand video editing courses. Become a member of our Video Training Library today!
Subscribe to Larry's FREE weekly newsletter and
save 10%
on your first purchase.
25 Responses to FCP X: "Ken Burns" Effect [u]
← Older Comments-
 Rico says:
September 12, 2013 at 9:38 am
-
 Larry Jordan says:
September 12, 2013 at 9:57 am
-
 Rico says:
September 12, 2013 at 10:14 am
-
 David Dixon says:
September 12, 2013 at 12:06 pm
-
 Rico says:
September 12, 2013 at 12:09 pm
-
 Joel Kitts says:
September 18, 2013 at 5:41 am
← Older CommentsHi Larry,
Is there a way to type in the specs for a Ken Burns effect, rather than relying on the click-move function? I ask because I would like to match a slow move in with a slow move out in the same clip and it would be easier and less painstaking to just type in the numbers rather than try to match them using the mouse. See what I mean?
In specific terms, I’m attempting this for the end frame to match with the next start frame:
Top: 26px
Bottom: 89px
Left: 24px
Right: 181px
Scale: 112%
Thanks!
Rico:
To the best of my knowledge, no.
Sorry,
Larry
Thanks, Larry. I thought that might be the case. Too bad for me!
Rico – read further up this thread to the message from July 15, 2013 from Ronald de Lange. I think it’s the 11th message from the top, and is a reply to a message from March.
Based on my understanding of your question, that message tells you exactly how to do what you want, very simply and without having to type in anything at all.
It allows you to retain the easing, which IMHO makes it look far better than using keyframes.
Ah, clever! I missed that one. Seems like it’ll work. Many thanks.
This is a great tutorial, thank you for the posting. I have created multiple images using the Ken Burns Effect but I was under the impression that in order for it to be considered the same effect the image needs a cut out portion placed infront of the background in 3D space.
I use Adobe Photoshop to create the images and I use Adobe Aftereffects to do all the 3d work and camera movements.
Take a look at the case study I created to show my process for a Ken Burns Effect Image at http://joelkitts.com/aftereffects-project/
Thank you again for this great post and walk through.