
![]() Timecode, which is a label that uniquely identifies each frame in a video clip, is essential to editing. (Even if you don’t pay attention to it, Final Cut Pro X needs to know what the timecode is for every clip.)
Timecode, which is a label that uniquely identifies each frame in a video clip, is essential to editing. (Even if you don’t pay attention to it, Final Cut Pro X needs to know what the timecode is for every clip.)
FCP X makes it easy to see the timecode for your project – just look in the Toolbar in the middle of the screen.
THE PROBLEM

The Toolbar displays the timecode of the project, if the skimmer (or playhead) is in the Timeline; or the timecode of the source clip, if the skimmer (or playhead) is in the Event Browser.
However, while it is easy to see the timecode of the Timeline, there’s no way to display the source clip’s timecode once it is edited into the Timeline. But, there is an interesting workaround that you may find useful. I discovered it while researching a recent PowerUP Webinar covering Final Cut Pro X training.
We now have the ability to export a clip from the Event Browser with burned-in timecode, which can be sent to other members of the production team – such as producers or directors – so they can review and comment on the clips. This technique can also be used for compound clips.
DEFINITION: “Burned-in Timecode” means to permanently display the timecode of a clip as part of the video of a clip. While this is never used as part of the final edit, it is a very common procedure to use when reviewing clips and sequences.
Here’s a summary of the workflow:
Here’s how this works.
MODIFY A COMPRESSOR COMPRESSION SETTING
The key to this technique is adding a single compression filter to a new or existing setting in Compressor. So, either create your own compression setting, or start with an existing preset.
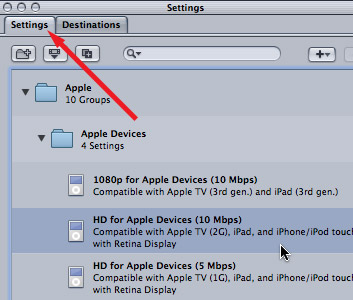
In this case, to keep things simple, we’ll start with an existing preset: Apple > Apple Devices > HD for Apple Devices (10 Mbps).
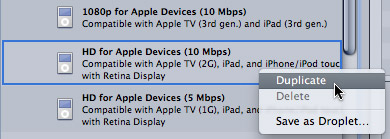
Then, because we want to change the setting, right-click it and select Duplicate. (Apple-originated settings can’t be changed.)
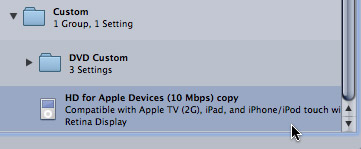
Scroll down to the Custom section of the Settings tab, locate the copy of the setting, and select it.
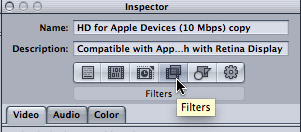
Click the Filters icon in the Inspector. This displays all the filters we can apply to the video, audio, or color space of a clip during compression.
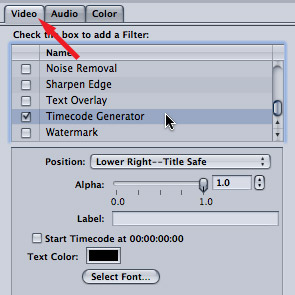
Scroll down until you find the Timecode Generator filter and turn it on by checking the checkbox.
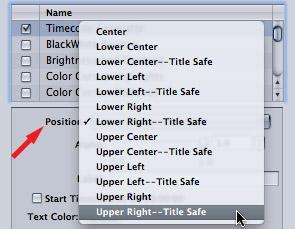
Click the Position menu and select where you want the Timecode to appear – I tend to like the Upper Right – Title Safe option.
NOTE: An advantage of using an Apple Devices setting is that passes through the image size, frame rate, and scanning without making any changes.
Click the Save button in the lower right corner of the Inspector to save your changes so far.
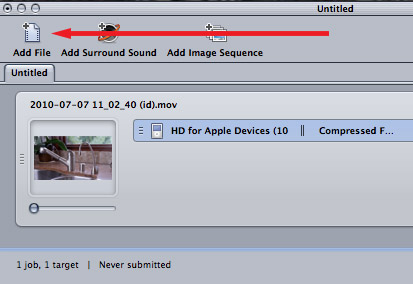
To help size and position the text, drag a clip into the Task bar of Compressor (or click the Add File icon in the top left corner) so that your image appears in the Preview window. (This part is optional, and the exact clip you use is not important.)
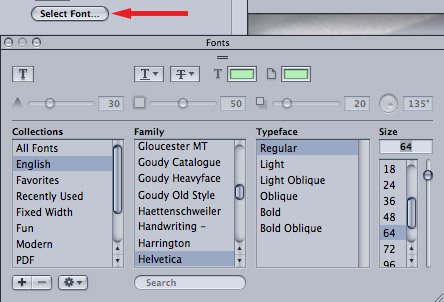
Back in the Timecode Generator filter settings, click the Select Font button and size the timecode so it can be easily read.
If necessary, change its color by clicking the Text Color chip.
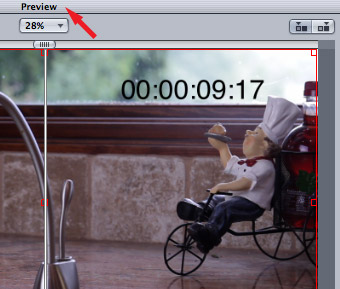
Verify that the timecode looks the way you want by checking the results in the Preview window.
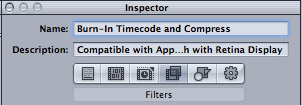
To make this setting easier for me to remember, I changed the name of the setting at the top of the Inspector to: “Burn-In Timecode and Compress”
When the timecode is sized and positioned the way you want, save the setting.
NOTE: Saving the setting is important. Settings only appear in Final Cut once they have been saved.
DOUBLE-CHECK
If you don’t see the Timecode displayed in the Preview window make sure that:
ADD THIS SETTING TO THE SHARE MENU
Once the compression setting is created, we need to tell Final Cut Pro X to use it.
NOTE: This technique can be used for any Compressor setting.
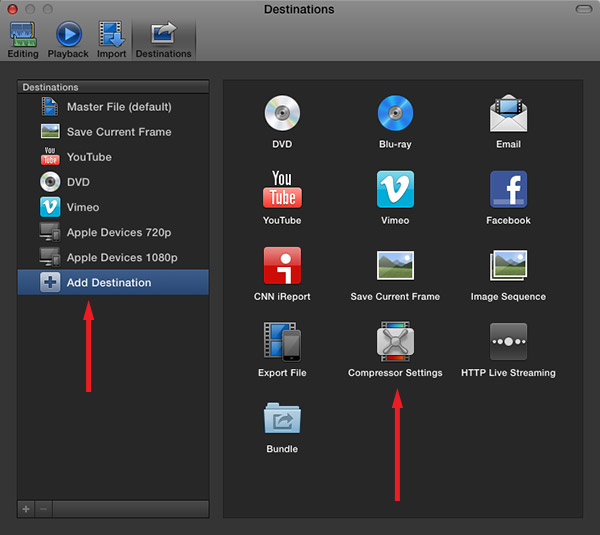
Go to Final Cut Pro > Preferences > Destinations (this tab is new with the 10.0.6 update.) Click the Add Destination button at the lower left.
This displays all the different compression options that FCP X has available.
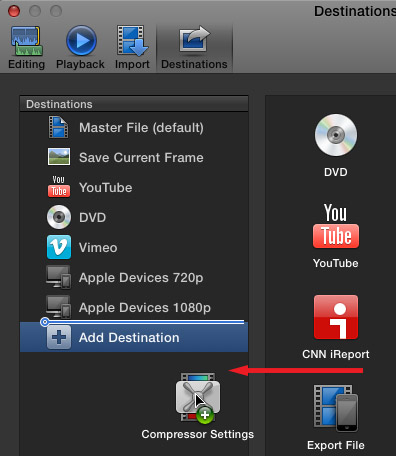
Drag the Compressor Settings icon from the right into the list of compression options on the left.
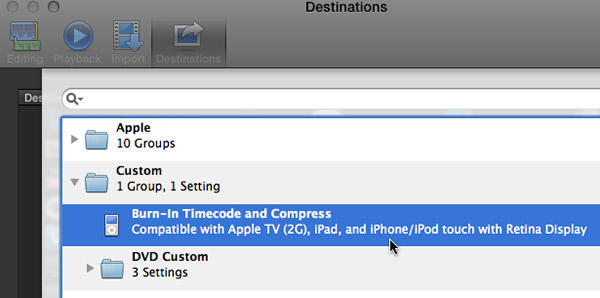
A dialog opens allowing you to select the compression setting you want to apply. In the Custom category, select the Burn-in Timecode and Compress setting we just created in Compressor.
This destination is now added to the list on the left.
NOTE: You can change the order of how these are displayed by dragging settings up or down in the left-hand panel, which I’ve done here.
Click the close button in the top left corner of Preferences to close the Preferences window.
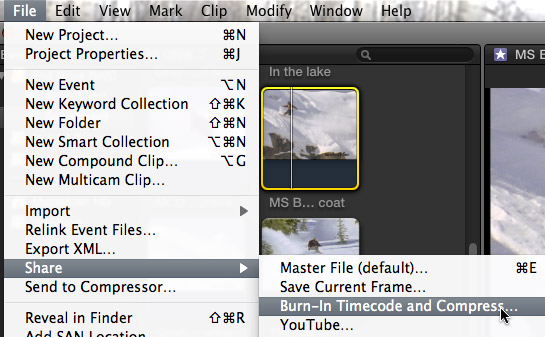
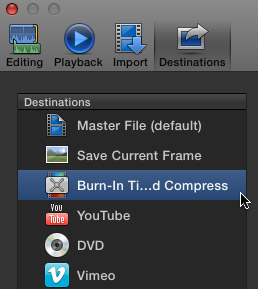
Now, whenever you want to export a clip with burned-in Timecode, select the clip in the Event Browser and choose File > Share > Burn-in Timecode and Compress.
SEVERAL NOTES
SUMMARY
Once this setting is created you have several options to burn timecode into a clip:
The cool thing is that, however you decide to do it, adding source timecode as part of your clip is easy.

2,000 Video Training Titles
Edit smarter with Larry Jordan. Available in our store.
Access over 2,000 on-demand video editing courses. Become a member of our Video Training Library today!
Subscribe to Larry's FREE weekly newsletter and
save 10%
on your first purchase.
9 Responses to FCP X: Export Source Timecode
Is that a generator or a reader filter? Don’t you want a reader to actually read the timecode from the clip when recorded? I didn’t see that in the filter section. I’ve been trying to accomplish this for a whole and still have not found a solution. My answer was to put all the clips in a project and export. This allows the client to use the timer in QT to make selects. When he returns a list I go to the project and blade and shut off (v) the unwanted material leaving only the selects. A quick selection and copy and I place the selects into a new project. It puts gaps inbetween the selects but they are easily removed. I found this to be much fast that searching clips for timecode as in FCP 7. Please let me know if the process grabs the shot timecode and not the running time. Love your training!
Mike:
Interesting idea – but this won’t display the timecode of the clip, just the project. Nice tip, though.
Larry
“…there’s no way to display the source clip’s timecode once it is edited into the Timeline.” This is fortunately not true. Simply change the selection tool to ‘trim’ and skim over any timeline clip to see its source code.
You can also go in the program timeline to a very specific spot, and right click on “reveal in timeline” the original source clip will be highlighted and also notice that the marker will be near the frame – timecode wise – that you were on in the timeline. This is how I have been finding source TC on my current project to drop in ISO shots in sync, but you still have to rough in the sync. It sure would be nice to just have source TC selectable in the dashboard of FCPX so you could get frame accurate match frame etc. without a lot of fooling around.
It’s very annoying that Compressor won’t give you the option of adding a solid background behind the timecode. If you have video with lots of white areas, white text will get lost. It’s such a simple feature that should be added. Adobe Media Encoder lets you do it. There’s a workaround involving adding a custom watermark where you create the box yourself, but that adds a whole lot of encoding time.
Good stuff! Thanks!
Is there a way Compressor can maintain the clips original timecode when outputting a new file with the timecode reader burn? In other words, when I export a clip with a timecode window it shows the original TC numbers accurately, but when the actual timecode of the new clip starts with 00:00:00:00.
Being able to do this would be handy for transcriptions in InQscribe.
Brad
Brad:
Yes. When burning in Timecode be sure NOT to check “Start Timecode at 00:00:00:00” this means that the timecode of the lcl will match the burned in timecode.
Larry
This tip is great! One follow up: I’m trying to export a lot of tips from the Event Library in order to have them transcribed. Is there any way to export multiple clips from the Event Library at once?
Noam:
Nope.
Larry