
![]() The Primary Storyline is a special place in Final Cut Pro X. It’s the first place clips go when we edit them to the Timeline and it is the clips in it that all other clips are connected to.
The Primary Storyline is a special place in Final Cut Pro X. It’s the first place clips go when we edit them to the Timeline and it is the clips in it that all other clips are connected to.
Most of the time, this works fine. But, problems arise when we want to delete clips in the Primary Storyline without deleting the clips that are attached to them.
In this case, we have four options:
Which option works best for you depends upon what you are trying to do. In most cases, we want to make the Primary Storyline clip disappear, without affecting the timing of any other clips.
START WITH THE AUDIO
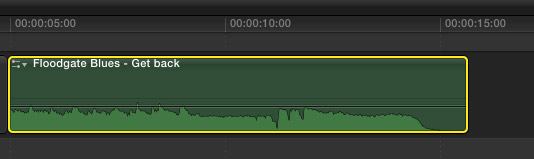
If you are creating a music video, your audio track is almost always pre-recorded. So, start your edit by putting the audio track into the Primary Storyline.
This means that all your video clips, and any natural sound associated with them, become connected clips which can be easily moved and removed without affecting the main audio in the Primary Storyline.
This is the recommended procedure for creating music videos. However, this also means you need to decide which audio clip you want to use before starting your edit.
NOTE: Another requirement is that you need to manually set the project settings when editing your audio. However, an easy workaround for this is to edit a video clip in the format you want to use for your project into the Primary Storyline. This automatically sets project settings. Then, edit the audio clip you want to use as the main audio track for your project immediately after this initial video clip so that it, too, goes in the Primary Storyline. Now that the project settings are correct, delete the video clip. The audio will remain in the Primary Storyline and all your video settings will be correct.
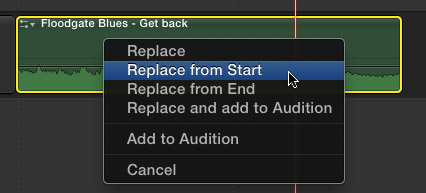
REPLACE A CLIP
By default, the Primary Storyline does not allow any gaps between clips. However, this is easy to override by using the Position tool, which allows you to drag any clip anywhere and leave a gap behind it. This works, except, that any connected clips also move when the Primary Storyline clip moves.
There are two ways to replace one clip with another:
This second option is the best choice when you want to keep the timing of all connected clips the same, but remove all references to the original Primary Storyline clip.
MAKE A CLIP INVISIBLE
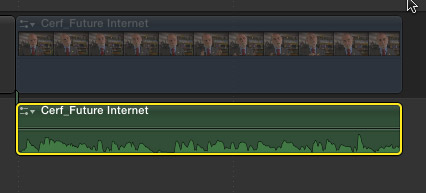
You can keep a clip in the Primary Storyline, but make it invisible by selecting the clip and typing V.
Or, if you want to make the video invisible, but keep the audio (or vice-versa) select the clip and choose Clip > Detach Audio. This separates the audio from the video. At which point, select the side of the clip you want to make invisible/inaudible and type V.
The only problem with this approach is that the audio becomes a connected clip, while the video remains in the Primary Storyline.
NOTE: What I wish we could do, but can’t, is to select just the video or just the audio of a Primary Storyline clip and make it invisible/inaudible. We can kinda do this by turning the audio volume off, or setting video opacity to 0, but its an awkward workaround.
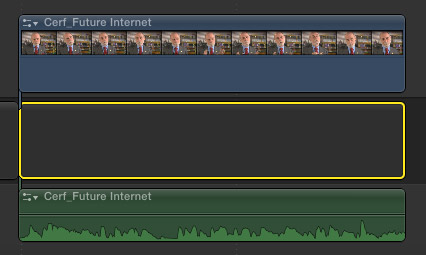
EDIT A CONNECTED CLIP INTO THE TIMELINE
The option I tend to use the most, aside from replacing a clip with a gap, is to select the connected clip you want to keep and choosing Edit > Overwrite to Primary Storyline.
This takes the selected clip and does an overwrite edit into the Primary Storyline. The existing Primary Storyline clip is replaced, and all connected clips are reconnected into the new clip. This is an ideal way to separate the audio from the video, then edit the audio back into the Primary Storyline to replace the video that we no longer want.
NOTE: The inverse of this function (Edit > Lift From Storyline) takes the selected clip, replaces it with a gap and moves it into a connected clip. This, also, is another way to delete a Primary Storyline clip without screwing up all the timing of connected clips.
SUMMARY
Its worth playing with all these options to see which ones work the best for your Project. And, if I’ve forgotten any techniques that you like to use, let me know in the comments below.

2,000 Video Training Titles
Edit smarter with Larry Jordan. Available in our store.
Access over 2,000 on-demand video editing courses. Become a member of our Video Training Library today!
Subscribe to Larry's FREE weekly newsletter and
save 10%
on your first purchase.
17 Responses to FCP X: Delete Clips in Primary Storyline
This is one of the many reasons why I’m not using FCP X … needing a variety of workarounds to prevent the tool from doing things you don’t want it to do. So I’ve migrated from FCP 7 to Adobe Premiere Pro 6 and haven’t looked back.
Putting the music track into the main story line comes with one big disadvantage: none of the keyboard editing commands work any more for editing our footage, since they work best with the primary story line.
This clearly is one of the areas that weren’t thought through completely by Apple, or were they?
I second Markus and Dan!
For Markus: As you say using audio in a primary storyline is not a good idea because you lose all the “power” it has using a clip that won’t change during the sequence. My workaround is to create a 1 frame gap as the first frame in the primary storyline and connect the music to that gap, so all the keyboards commands work as usual, and so do the transitions between clips.
For Dan: While using FCPx I realize that I’m doing more clicking than I used to do in Avid or FCP7, also I found that many operations have to be done in a particular point of your edit session, if not you are screwed or have to look for many of those multi step workarounds to fix it.
I put a clip into my primary storyline, then decided not to use it so deleted it. I imagine I’ll be doing this a lot as I’m pretty indecisive. Now I want that clip again…am I going to have to reimport it from my camera? I can’t see it in my library anymore. What can I do so that the things I edit on my primary storyline doesn’t affect my library?
Newbie:
All clips that you import are stored in the Event Browser, which is in the upper left corner of the FCP X window. Deleting clips from the Timeline does not delete them from the Event Browser.
So, you’ll find your clip there.
larry
It does completely delete them. Im having the same problem with xml files.
I am working with a project that required stock footage. The footage has now been purchased and ready to insert into the timeline but whenever I do a replace, replace from start, I lose the color correction and retiming work I’ve put in. How can you replace without losing the ways you’ve altered the clip?
WB:
FCP X does not have a “Replace Content” function. The workaround is to add a dummy clip somewhere, copy the clip with the effects you like, use Edit > Paste Attributes to copy the effects to the dummy clip (This is just a safety, in case we need the clipboard for something else.)
Do a replace edit to replace the old clip with the new clip. Then, select the new clip in the Timeline and use Edit > Paste Attributes to add the old effects to the new clip. (In the event you needed the clipboard for something else, copy them from the dummy clip, then delete the dummy clip.)
Larry
Interesting. The technique definitely get’s me where I need to go, so thank you for the advice. I actually like the “Paste Attributes” aspect and that will come in handy. All in all, seems like an extra step but maybe FCP will improve it over time. Thanks so very much for responding, it’s actually an honor to hear from you directly.
Hi Larry, Helpful information, thanks. I have what I think may be a common problem for those that don’t know better. I want to import from my video camera several long stretches of continuous video, find the stuff that I most likely want to use(after I import), and then delete the chunks that I don’t want to use (so I can free up disk space from big pieces of unusable video that I have segregated from the useable stuff). I can’t find a way in FCP X to save the range of the clip that I want, while successfully deleting the rest of the associated footage that I don’t want to work with.
Any suggestions as to how I can selectively and permanently edit/delete this unwanted footage that is filling up my disk space?
Thanks.
TH:
You can’t, at least not with FCP X.
Instead, cue the camera to the portion you want to ingest, then just ingest that portion. As an alternative, if you own QuickTime 7, you can open the video in QT7 and trim off the media you don’t need there.
Larry
Thanks for the quick answer for a rookie question, Larry. Looking forward to learning more about FCP X.
I am using FCPx. When I make a small cut in the main story line it is linked to all of the other story lines on the page. So if i move the new small cut all of the b roll and audio lines move with it. If I delete the small cut, it deletes everything on all the other lines.
It is very frustrating. I want to unlink these lines.
Help.
Travis:
When you make your cut, look to see if any connecting clips have vertical lines connecting to the part you want to remove. If so, move the line to a clip that you are NOT deleting by clicking inside the connected clip while holding both Option and Command down. That resets the connection to the point at which you clicked.
You can then remove the cut without moving any other clips.
Larry
Hi all!
I’m in desperate need of some Final Cut Pro X help.
I’ve tried the relevant above information, but nothing has helped me solve my issue, below:
I’m working on a documentary, and I shot both the video and audio that I need for the film with the same camera. Now I’m trying to edit the imagery and audio separately, so that everything flows — talking heads, b-roll, action, etc.
I’m looking for a way to completely detach the video from the recorded audio, so that I can edit them SEPARATELY before relinking them at the end. I need things like the flexibility of taking the audio from video clip A and attaching it to video clip B, and the option of taking audio from video clip B and making it stretch over both video clips C and C. I recognize now that I should have likely recorded video and audio separately, but I didn’t — and now I’m desperately looking for a way to freely edit video and audio separate of each other.
N.B. – I’ve already done the initial “detach” video and audio, but that doesn’t allow me to delete a video and keep its audio (which i need to do several times), and the option of making a video go “invisible” doesn’t seem to work either, as placing another video’s image on top of the story reline to replace the imagery means dragging all the audio from the second video… which brings us back to square one of the problem.
would be very, very grateful for any and all help!
Deeb:
First, once you disconnect the audio from the video, you can’t relink it unless you combine the two clips into a compound clip. For this reason, I tend to recommend against this practice.
However, it is easy to do as you want.
Select the clip you want to separate then choose: Clip > Break Apart Clip Items. This separates the audio and video into separate clips. If the video is in the Primary Storyline, it remains in it, and the audio becomes a connected clip.
Then, and this is the key step, select the clip you want to delete and press the forward delete button – that’s the delete key next to the End key on a full-size keyboard. (On a laptop, press Fn+Delete) This replaces the selected clip with a gap.
You can now drag the remaining audio, or video, clip wherever you want ti to go in the timeline.
Larry
This is clearly something I’d like Apple to address. I love FCPX, but come often into that situation.