
IMPORTANT NOTE: Apple changed the behavior of compound clips with the 10.0.6 update. Here’s an article that describes the changes.
Final Cut Pro 7 calls it a “nest.” Final Cut Pro X calls it a “compound clip.” Whatever you call it, there are some real benefits in knowing how to use it.
A compound clip is simply a collection of clips gathered together and treated as though they were a single clip. There are several advantages to doing so:
There are two places you can create compound clips: in the Timeline or in the Event Browser. Let’s take a look at both.
IN THE TIMELINE
The principal benefits to creating a compound clip in the Timeline are to organize a complex edit or apply a common effect to a group of clips.
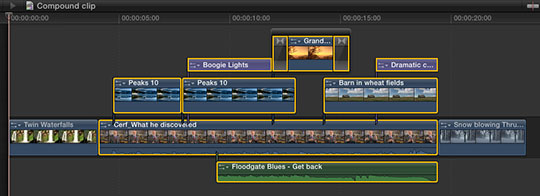
For instance, here, I want to consolidate all the selected clips into a single compound clip to simplify my edit. (OK, so this edit isn’t really that complex, my point here is to illustrate how this is done.)
To create a compound clip in the Timeline, select the clips you want to group together. One of the new features in FCP X is that you can create compound clips from clips that are not next to each other. In fact, they don’t even have to be on the same layer, nor contain the same types of clips!
NOTE: Compound clips can contain any combination of audio, video, titles, generators, still images or effects.

Choose File > New Compound Clip (or type Option+G) and all selected clips are coalesced into a single compound clip stored on a single layer.
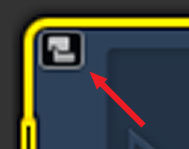
The “curved hands” logo – which Apple likens to a connected clip – is the symbol for a compound clip. This icon appears in the top left corner of all compound clips.
At this point, you have several options:
In other words, a compound clip acts just like a clip; except it contains a collection of clips.
ALL THIS — AND EDIT, TOO!
Yes, like all those Ronco commercials, you get all this — AND you can still edit the contents of a compound clip! (Sigh. Memo to self — cut back on late night TV.)
To open a compound clip for editing, including adding or removing clips or effects, simply double-click the compound clip in the Timeline.
Poof! Instant edit.
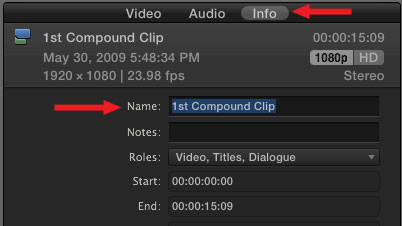
The default name of a compound clip is “Compound Clip.” Which is great if you only have one of them, however, it can become confusing as you add more.
To rename a compound clip, select it in the Timeline (or the Event Browser, but we haven’t talked about that yet). Then, go to the Info tab in the Inspector and change the name.
NOTE: You can’t rename a compound clip if you have opened it for editing in the Timeline. Compound clips need to be selected before being opened in order to be renamed.
THE TIMELINE HISTORY

As soon as you open a compound clip for editing, the Timeline History – top left corner of the Timeline – wakes up. This displays the path from the source project to the current compound clip.
For instance, in this example, I double-clicked from “Compound Project” into the “1st Compound Clip” which contained a second compound clip. When I double-clicked into this second clip, the path showed where I came from.
Click the left-pointing arrow to return back along the same path. Click the right-pointing arrow to go forward, deeper into the same compound clips. The Timeline History allows you to quickly navigate between projects and compound clips.
NOTE: These arrows also cycle you through recently opened projects.
IN THE EVENT BROWSER
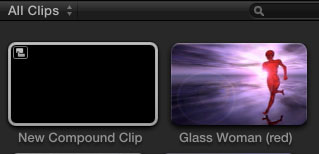
For me, while compound clips in the Timeline are useful, they show their real power when you first create them in the Event Browser
To create a compound clip in the Event Browser, make sure the Event Browser is selected, then choose File > New Compound Clip (or type Option+G).
This creates an empty compound clip. Double-click it to open it in the Timeline. Here’s the very cool part – compound clips that originate in the Event Browser act like individual projects! You can add clips, text, effects — everything you could put in a project, you can put into a compound clip!
What makes this REALLY helpful is that because the compound clip is stored in the Event Browser, you can use it in as many different projects as you want. For example, consider creating your opens, bumpers, or info-graphics as compound clips stored in the Event Browser.
Whenever you need them, you can instantly reuse them by editing the compound clip into the Timeline!
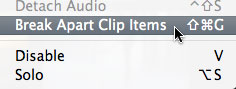
If you need to revert back to the original components of the compound clip – say to apply a different effect, change the text of a title, or add a new piece of video – simply select the compound clip and choose Clip > Break Apart Clip Items.
UPDATE – Jan. 9, 2012
I just did a quick check. If you create a compound clip in the Event Browser, then edit that compound clip into multiple projects – or multiple locations within a single project – if you change the compound clip in the Timeline it does not affect the master compound clip in the Event Browser, nor any other occurrence of that compound clip in any project.
This makes it easy to create a show open that you can modify each week for each show, without affecting previous projects.
UPDATE – Aug. 2013
This behavior changed with the 10.0.6 FCP X update. Now, if you modify a compound clip in the Timeline, it modifies all occurrences of that compound clip in the Project. The way to change one compound clip without changing all the others is to select the clip in the Timeline, and choose Clip > Reference New Parent Clip.
This duplicates the clip in the Event Browser. Rename and use the new duplicate clip. You can make as many changes to the duplicate clip as you want, without having those changes ripple back into the original clip.
SUMMARY
When I was first learning FCP X, I was concerned that it only allowed one project open at a time. However, the use of compound clips essentially allows us an unlimited number of “sub-projects,” all instantly available in the Event Browser – which can be shared inside the same project, or across multiple projects.
Very cool.
ADDITIONAL READING
Here are two other articles I’ve written on Compound Clips:

2,000 Video Training Titles
Edit smarter with Larry Jordan. Available in our store.
Access over 2,000 on-demand video editing courses. Become a member of our Video Training Library today!
Subscribe to Larry's FREE weekly newsletter and
save 10%
on your first purchase.

90 Responses to FCP X: Compound Clip Secrets
← Older Comments Newer Comments →-
 Larry Jordan says:
December 5, 2015 at 1:01 pm
-
 Alex says:
February 14, 2016 at 7:00 am
-
 Larry says:
February 14, 2016 at 10:25 am
-
 David Stevens says:
October 3, 2016 at 8:47 am
-
 Larry says:
October 3, 2016 at 9:01 am
-
 Rick says:
January 10, 2018 at 10:02 am
-
 Sergio says:
May 29, 2018 at 9:57 pm
-
 Larry says:
May 31, 2018 at 9:00 am
-
 Mickey Stroud says:
November 17, 2019 at 5:28 pm
-
 Larry jordan says:
November 17, 2019 at 8:08 pm
← Older Comments Newer Comments →Marinda:
I agree, audio levels inside a compound clip is not the same as the audio levels you hear when you play the compound clip. (Hmm… I should write an article about that.)
As far as I can tell, compound clips treat your audio as mono, while a project treats audio as stereo. Mono clips are always louder than stereo clips, which accounts for the 3 dB difference you are seeing and hearing.
Larry
Hello Larry,
Thanks for your article. When I create a compound clip, all of my audio fades disappear (especially the ones that stretch beyond the image as a fade in and fade out). Is there a way to create a compound clip respecting these audio fades?
Thanks!
Alex:
Add gaps, or other media, to cover the entire duration of your audio. Compound clip durations are determined by the video content.
Larry
I have a compound clip that is 1920×1080. However, the nested video clip is actually 4k. What went wrong!?
David:
Compound clips are like projects – they can have their own frame size settings. What happened is that the compound clip settings were set to 1920 x 1080, so that when you added the 4K clip, it was down-scaled. To fix this, all you need to do is change the compound clip frame size settings up to 4K.
The easiest way to do this is to create a new compound clip and click the Advanced Settings tab, then create the frame size you need.
Larry
Hi Larry:
Brilliant blog post. Fixed the problem with which I was struggling. I have been struggling and persevering with FCPX. I would like to say that your information has been instrumental in getting the most out of this program. All the best, Cheers Rick | Smart Drive Test
Greetings. There is a project in ProRess LT. When creating a compound clip from the timeline it will not inherit the project settings, it becomes ProRess. Have you noticed this? Is it possible to make that the Compound Clip can inherit the project settings? Thank you. FCSP 10.4.2
Sergio:
Compound Clips are designed to have separate settings from a project – this allows us to create effects – like panning across text – that we could not create any other way.
To have a compound clip inherit your project settings, select a clip that is in the Timeline first, then create the compound clip.
Larry
I have a really naive question. After creating a compound clip then breaking it apart to make some minor modifications, how do you return it to a compound clip?
Mickey:
Not naive at all.
You create a compound clip the same as when you created it in the first place.
Select your clips and choose: File > New > Compound Clip.
Larry