
![]() In Final Cut Pro X, Auditions allow us to quickly compare two or more takes to see which one works best for our project. Apple tends to showcase Auditions using video clips, but what you may not know is that Auditions are really useful when working with narration and voice-overs.
In Final Cut Pro X, Auditions allow us to quickly compare two or more takes to see which one works best for our project. Apple tends to showcase Auditions using video clips, but what you may not know is that Auditions are really useful when working with narration and voice-overs.
NOTE: A “voice-over” is an audio-only clip where an actor or narrator explains something we see on the screen. Because it is audio-only, we don’t need to worry about synching it with video, though, generally, the images of the video need to relate to what the narrator is saying.
CREATING AN AUDITION
An Audition is a special type of clip that can be created in either the Event Browser or the Timeline. I generally tend to use the Event Browser because it seems more straight-forward to me.

Here, for example, using the Command key I selected four regions in three different audio clips. (Yes, Auditions can contain multiple regions from the same clip!)
NOTE: Most professional voice-over artists send their work as a single file containing multiple takes of the same content. To select multiple regions from within the same clip, set an In and Out to set the first region, then Command-drag to select others.
To create an Audition, choose Clip > Audition > Create (or type Command+Y). While there is no practical limit to how many clips can be in an Audition, personally, I tend to limit my options just to make the decision process easier.
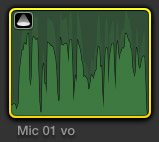
The Audition clip is indicated by the small icon in the top left corner. The name of the Audition is based upon the name of LAST clip you selected.
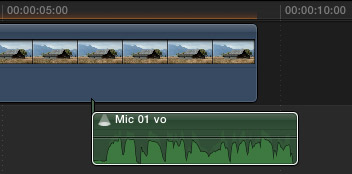
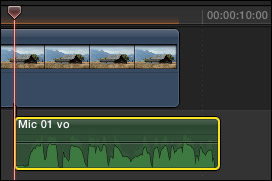
Edit the Audition to the timeline as you would any other clip.
NOTE: I recommend using Auditions as connected clips, rather than putting them into the Primary Storyline. While they work in either location, I find connected clips to be more flexible.
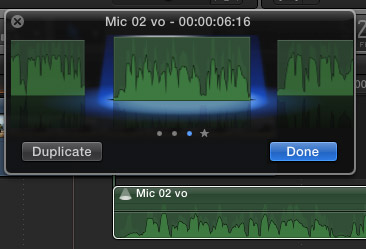
To view the selections in the Audition, select the clip in the Timeline and do one of the following:
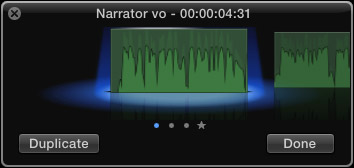
To move between the different takes, click the image to the left or right of the center image in the Preview window.
NOTE: There are also keyboard shortcuts to move between shots: Control+[left arrow] and Control+[right arrow]. However, you will need to modify the shortcuts used by the operating system to use these. Use System Preferences > Keyboard.
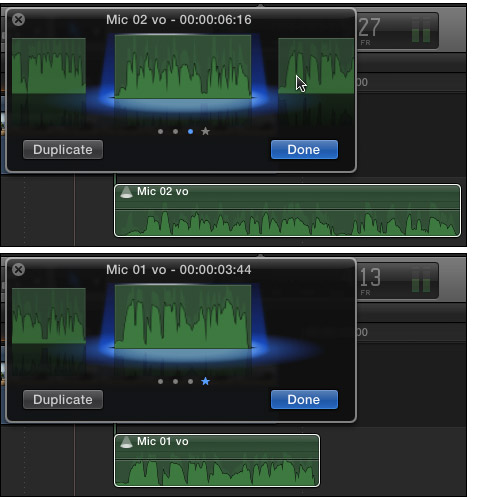
Notice that as you move from one take to another the duration of the take changes; however the starting position of all Audition clips remains the same. This is one of the reasons I like using Auditions as connected clips, because connected clips tend not to interfere with other clips downstream.
After you select the take that you like the best, you need to “Finalize” the Audition. Choose Clip > Audition > Finalize Audition (or type (Shift+Option+Y). This releases all the clips you aren’t using and retains just the Audition clip you selected.
When you Finalize a clip, the Audition icon disappears.
EXTRA CREDIT
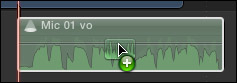
To add a clip to an Audition that is already in the Timeline, drag the clip from the Event Browser and drop it on the Audition clip. (When the Timeline clip turns white, it is safe to drop the Event Browser clip.)
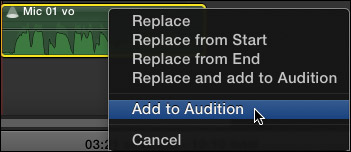
Then, from the pop-up menu, select Add to Audition.
NOTE: You don’t need to remove clips from an Audition because when you Finalize an Audition all the clips that you didn’t select are automatically disconnected from it.
SECOND NOTE: You can also use this drag-and-drop technique to create an Audition clip from a Timeline clip.
SUMMARY
If you’ve ever struggled to select the best reading from multiple takes by dragging multiple clips to the Timeline, you can appreciate the speed and simplicity that Auditions provide, especially because Audition make is very easy to select multiple ranges from the same clip.
If you’ve been avoiding Auditions because they seem too complex, try using them for voice-overs. They can make a complex and time-consuming task much easier.

2,000 Video Training Titles
Edit smarter with Larry Jordan. Available in our store.
Access over 2,000 on-demand video editing courses. Become a member of our Video Training Library today!
Subscribe to Larry's FREE weekly newsletter and
save 10%
on your first purchase.
6 Responses to FCP X: Use Auditions for Voice-overs
Hi Larry,
Thanks for the excellent tip. One comment however, your note about dragging and dropping to create an Audition clip from a timeline clip. That is something I have requested to Apple several times, but as of 10.0.9 it doesn’t appear to work. If you have been able to get it to work can you share the specific steps?
Thanks,
– T.
T.
This has worked for many versions. Drag a clip from the Event Browser on top of a timeline clip. Wait until the Timeline clip turns white, then release the mouse. Select Add to Audition from the popup menu that appears.
If this doesn’t work, try trashing your FCP X preferences. (Auditions are only in FCP X.)
Larry
Larry,
Perhaps I just misread your Second Note:
“SECOND NOTE: You can also use this drag-and-drop technique to create an Audition clip from a Timeline clip.”
I understood that to mean that with an existing clip on the timeline you can drag it onto another clip in the timeline and create an audition.
Ah, good point.
Nope.
Larry
Hopefully Apple adds the capability somehow to grab add to an audition directly from a timeline clip. It would make auditions much more useful. I often end up just stacking clips and disabling and enabling as needed.
However, this audio multiple take technique is excellent, and I’ll put it to good use right away.
Thanks for all you do Larry.
– T.
Thanks for the excellent tip. One comment however, your note about dragging and dropping to create an Audition clip from a timeline clip. thanks