
![]() Last week, I got a request from a reader asking how to create a spotlight effect in Final Cut Pro X. I realized I hadn’t written about this, so I added it to my list for this week. Then, as I was putting this article together, I realized there are several ways to create a spotlight effect:
Last week, I got a request from a reader asking how to create a spotlight effect in Final Cut Pro X. I realized I hadn’t written about this, so I added it to my list for this week. Then, as I was putting this article together, I realized there are several ways to create a spotlight effect:
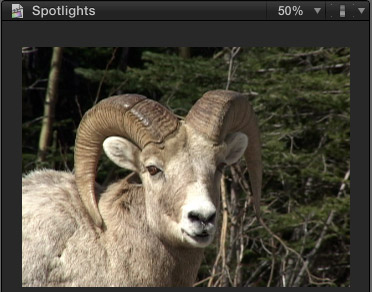
So, let’s use this clip as an example and take a look at how to create all three.
NOTE: None of these effects will automatically track a moving object within the frame; a process called “motion tracking.” To motion track, you would either need to create keyframes manually using the position parameters within the effect, create position keyframes using the Transform settings, move the clip to Motion 5 which does offer motion tracking, or use a 3rd-party plug-in like Mocha to motion track the shape. Illustrating motion tracking is a subject for a future article.
VIGNETTE EFFECT
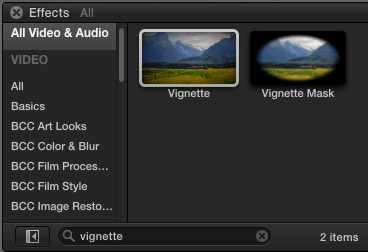
Open the Effects Browser (type Command+5) and search for the Vignette effect.
NOTE: Two effects are displayed. Vignette works with a single layer clip and is the easiest way to create a soft spotlight effect.
Drag the Vignette effect onto the clip in the Timeline.
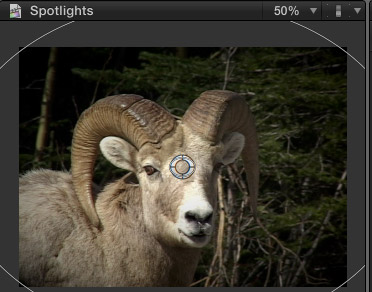
The default Vignette settings are displayed in the Viewer.

To make this look more like a spotlight:
Here’s what the effect looks like with these settings applied. This effect only takes one layer and is easy to apply. However, the limitation to this effect is that it only supports a horizontal oval shape.
NOTE: You can apply keyframes to the Center parameter to move the position of the vignette as the highlighted object moves inside the frame.
CIRCLE MASK
This effect requires duplicating the same clip on two layers, however it offers the option to use shapes other than circles. The upper layer has the highlight, the lower layer has the darkened background.
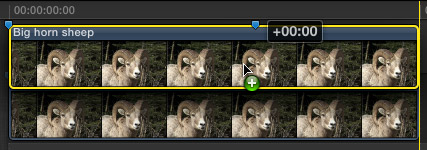
To copy a clip, press the Option key and drag the selected clip up one layer.
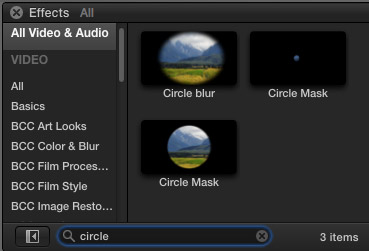
Open the Effects Browser and search for “Circle.” Three options appear. We are interested in the bigger Circle Mask because it has more adjustable settings than the smaller Circle Mask, so drag it on top of the clip in the upper layer.
NOTE: You can also find these effects in the “Keying” category.
SECOND NOTE: Once you drag the effect to the clip you want, remember to delete the text in the search box at the bottom of the Effects Browser; otherwise all other effects will be hidden.
By default, nothing changes in the image.
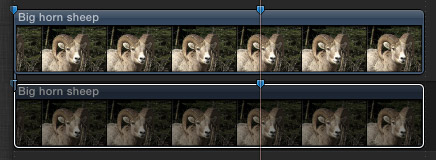
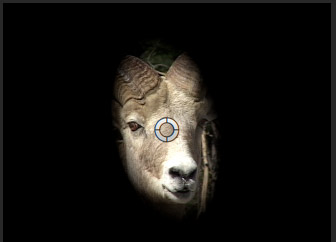
To see the mask, you need to make the bottom layer invisible. Select the bottom clip and type V. This toggles a clip between visible and invisible.

Now, you can see the mask which is applied to the top layer.
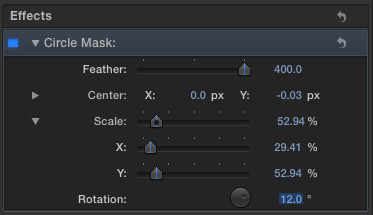
Select the clip in the top layer and make the following changes:
Here’s what the image looks like with these settings.
Now you have a choice. You could add a Blur to the background to create a blur spotlight. Or, you could darken the background to create a light spotlight.
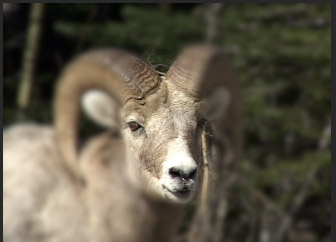
Here’s what a Blur spotlight looks like with a Gaussian Blur added to the bottom clip with an Amount setting of 30.
NOTE: Remember to make the bottom clip visible by selecting it and typing V.
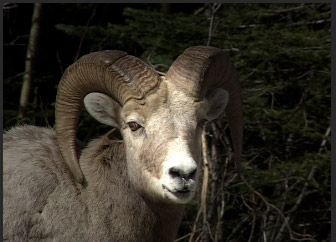
Here’s what the spotlight looks like by lowering the white levels on the background clip. (I’ll explain how to do this in the next section.)
The benefit to using the Circle Mask is that you have more control over the shape and feathering than with the Vignette. The disadvantage is that it takes two layers. In the next technique, you’ll learn how to create a highly flexible spotlight effect using only one layer and a shape mask.
SHAPE MASK
This technique takes advantage of the flexibility built into shape masks in the color correction tools in the Inspector. Start by selecting the clip.

Then, in the Inspector, click the Shape mask button to the right of Correction 1 in the Color section at the top of the Inspector.

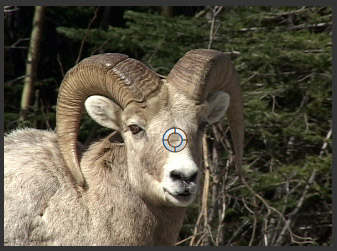
This applies the default shape mask: a circle.
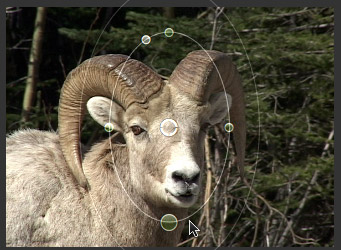
Drag the green dots attached to the inner circle until you’ve created the shape you want.

Drag the white dot on the top left to make this more of a square, though you can’t make truly sharp corners.

Drag the dot to the right of the center dot to rotate the shape.
Drag the outer circle (oval) to adjust the amount of feathering. Less feathering means sharper edges between highlight and background.
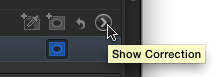
When the shape is the right size and position, click the right-pointing arrow to the right of the shape mask icon.
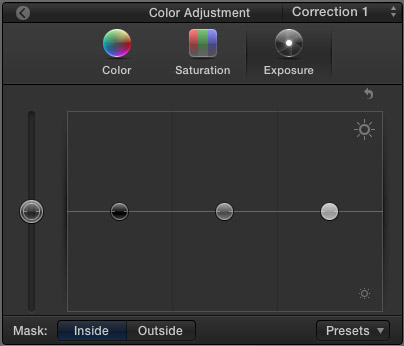
This switches the Inspector to the Color Board (or type Command+6). Click the Exposure button at the top, because we want to adjust how bright the background is.

Click the Mask: Outside button at the bottom because we want our adjustments to occur outside the center area of the mask.
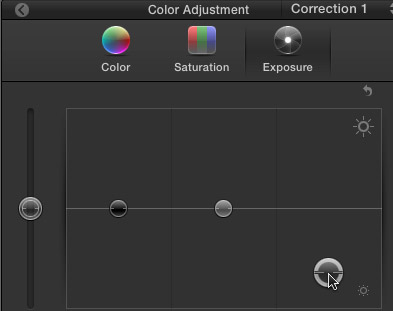
Drag the Highlights puck down to decrease the brightness outside the center selection circle until you have the spotlight effect you want. Decreasing white levels yields the most accurate colors in the background. You can create more unusual looks by dragging down the mids, shadows, or global pucks.
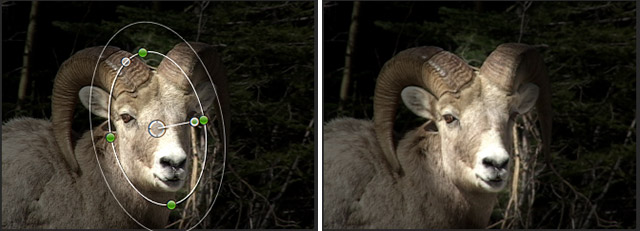
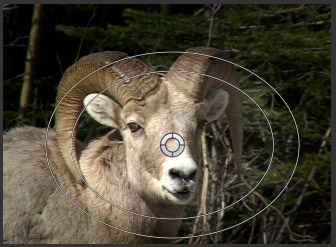
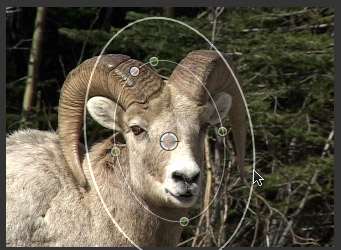
For example, here’s the effect that these settings created. The image on the left shows the selection and feathering circles. The image on the right shows the final effect without displaying the circles.
NOTE: For a detailed article on working with color and shape masks, read this article.
SUMMARY
Which of these three effects you choose to use is entirely up to you and your style of working. Vignette is the easiest. A two-layer mask can be used with a variety of different shapes, while the Shape mask provides the most flexibility within a single layer clip.
Visit our website to see Final Cut Pro Training & more!

2,000 Video Training Titles
Edit smarter with Larry Jordan. Available in our store.
Access over 2,000 on-demand video editing courses. Become a member of our Video Training Library today!
Subscribe to Larry's FREE weekly newsletter and
save 10%
on your first purchase.
4 Responses to FCP X: Spotlight Effect
This was perfect, thank you! I used your “Shape Mask” directions.
Hi I’m having trouble trying to figure out how this person edit this certain video. If you could please take a look at how there is a picture as the background then a video on top but its not a square. Take a look for your self.
https://www.youtube.com/watch?v=QLWcGf34gPM
As you can see it defuses beautifully into the video I was think a shape mask? But I tried and did not get the same outcome. Another thing I was wondering how there was a two videos in one heart but the its like she messed around with the opacity. Thanks so much for taking time to read!
The X and Y keys have disappeared in the Effects/Spot window. I used them several times and now they are not there. I cannot find any information on this issue anywhere and hope you can help me. Thank you
Robert:
The Center (X,Y) settings are in my version of FCP X (v.10.2.3), at the bottom of the Effects > Spot settings in the Inspector.
If they are not there for you, you should consider trashing FCP X preference files and see if that helps:
http://larryjordan.com/improving-fcp-x-performance/
Larry