
![]() Arnie Blum sent me an email which got me starting thinking about this. In it, he asked what was the best way to flag sections of clips that you want to use from the portions of clips that you don’t want to use.
Arnie Blum sent me an email which got me starting thinking about this. In it, he asked what was the best way to flag sections of clips that you want to use from the portions of clips that you don’t want to use.
Actually, the more I thought, the more ways I could think to solve this. So, in this article, I will illustrate some alternatives so you can pick the method that works the best for you.
These alternatives fall into three areas:
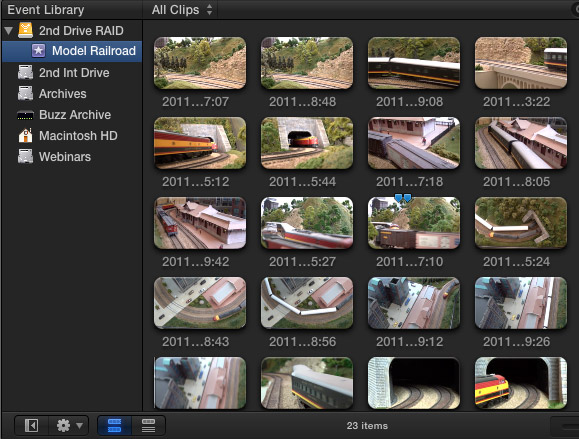
For this exercise, I’ll work with a variety of clips for an upcoming model railroad project. I’m also using FCP X version 10.0.7.
NOTE: Thanks to Fran and Miles Hale of Model Railroad Builders (www.franandmileshale.com) for permission to use their clips.
THOUGHTS ON THE ALTERNATIVES
If you are selecting clips based on visuals, the first two techniques may be the most helpful, because these techniques assume that you want to group similar portions of clips together. For example, to group all the night shots, remove all the shaky shots, or display all the exterior shots that don’t include people.
If you are selecting clips based on sound bites, the last technique may be the most helpful, because it allows you to uniquely identify each clip and quickly find it again.
OPTION 1: FAVORITES
An easy way to flag the portions of clips that you like is to use Favorites.
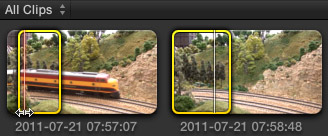
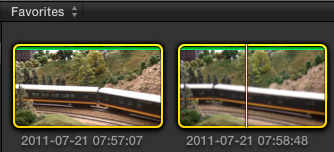
In this Event, for instance, I’ve selected two clip ranges that I want to use in a future edit. These are two different takes of the same action.
NOTE: You can select any number of ranges to mark as a Favorite. You can even select multiple ranges in one clip. Here’s an article that explains this in more detail.
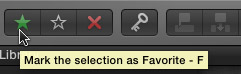
To mark these selected ranges as Favorites, click the green star in the Toolbar, or type F.
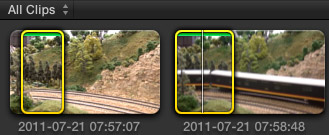
This places a green bar at the top of each selected range, indicating it is a Favorite section.
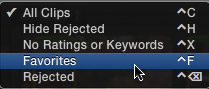
To view all Favorites, go to the top of the Event Browser, click the All Clips menu, and select Favorites, or type Control+F.
Instantly, only those ranges marked as Favorites are displayed. (Note that the green bars now extend across the entire thumbnail.)
To display all clips again, change the top popup back to All Clips (or type Control+C).
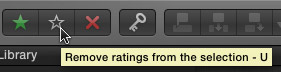
To delete a Favorite range, select the range, or ranges, you want to remove and click the white star, or type U.
While Favorites are a fast and easy way to indicate selected clip, they have two limitations:
Favorites are an ideal solution for simple projects. However, for more complex projects, we need to step up to Keywords.
NOTE: To learn more, search for Rating in the Final Cut Pro Help files.
THE OPPOSITE OF FAVORITES
Rejecting a clip, or a range within a clip, is the opposite of a Favorite. Maybe you don’t have Favorites, instead, you have a bunch of clips that you don’t like.
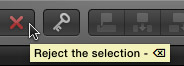
In this case, select the clip, range, or group of ranges that you don’t want to use and click the red X button; or press the Delete key.
Now, a red bar appears at the top of all rejected clips or ranges.
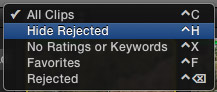
To hide all Rejected clips or ranges, go to the All Clips menu and choose Hide Rejected. To see ONLY the Rejected clips, go to the All Clips menu and choose Rejected.
NOTE: Rejecting a clip does NOT delete it, it simply allows you not to display in the Event Browser.
OPTION 2: KEYWORDS AND FOLDERS
There are two types of keywords:
Automatic keywords are added during import, indicating, for example, problems with audio, color, or image stabilization.
Manual keywords are added by you to help organize clips. You can apply one or more keywords to a range within a clip, a whole clip, or groups of clips.
We can add keywords using the Keyword editor or keyboard shortcuts. In either case, the process is similar to adding Favorites.
Start by selecting the clip, group of clips, or clip ranges you want to categorize.
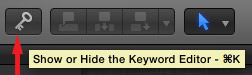
Then, click the Key icon in the Toolbar, or type Command+K.
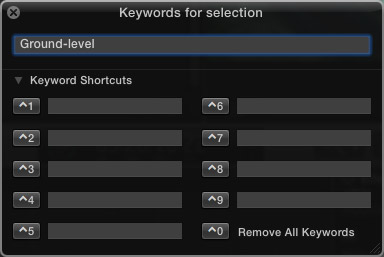
The Keyword editor appears. In this example, I want to create four keyword categories:
So, in the Keyword Editor, I entered “Ground-level”.
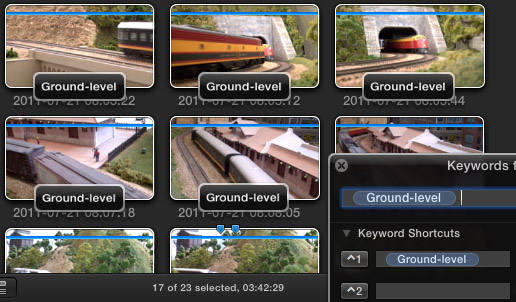
When you press Return, the keyword animates into each selected clip or range.
Repeat this process and add as many keywords to as many ranges as you want. Although the Keyword Editor only displays the nine most recent keywords, there is no limit to the number of keywords you can create.
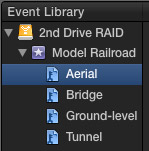
Notice that each time you add a keyword, a new category shows up under the Event in the Event Library.
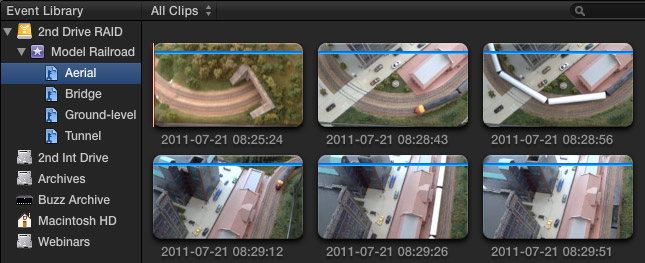
To view any of the clips for a particular keyword, click the keyword name under the Event in the Event Library. Here, for example, I selected “Aerial,” to display only those clips or ranges that have that keyword applied.
What I like about keywords is that applying them is fast, can include both clips and ranges, and that there is no limit to how many I use, or even if different keywords overlap.
ADDING FOLDERS
However, if you get really carried away, you can create a TON of keywords, which makes the Event Library really unwieldy.
To solve this, we can add folders into which we place keywords. (We can also create Smart Collections, but that’s worth an article unto itself. For now, we will just work with simple folders.)
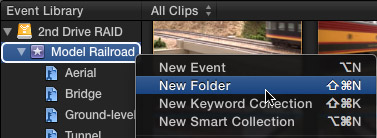
To create a folder, select an Event in the Event Library, then either:
Whichever you choose, a new folder appears under the Event, using a different icon than keywords.
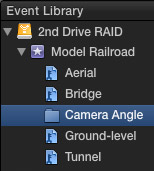
Here, I gave it a name: “Camera Angle.”

Drag the icon for a keyword (not the keyword name) into the folder to group keywords by folder.
Show or hide folders by clicking the right-pointing arrow next to the folder name. (Apple calls this a Disclosure triangle. I call this a “twirl-down arrow.”)
FINDING STUFF
Apple provides a variety of ways to find clips by keywords; in fact, far more options than I have time to cover in this article. (To see a complete list, search for Keyword in the Help files.)
However, to show you some of the power that keywords offer, let’s say we want to find all shots that are both an Aerial AND include the tunnel.
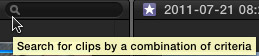
Click the small magnifying glass in the top right corner of the Event Browser. This area is called the Search Text box.
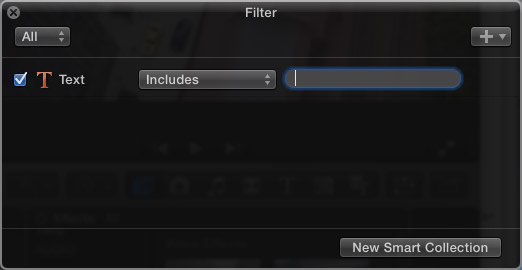
This opens the Filter window — this is what we can use to find stuff.
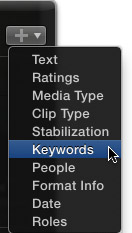
Click the Plus icon in the top right corner and select Keywords.
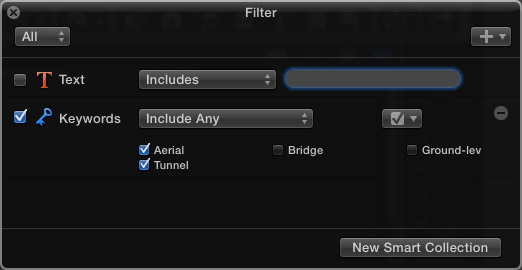
Uncheck Text, because we don’t want to search any text – like clip names.
Then, check all the keywords that you want to search for. In this case, I’m searching for clips that contain EITHER Aerial OR Tunnel. (That’s what Include Any means — display any clip with any of the checked keywords.) Include Any always displays the most clips.
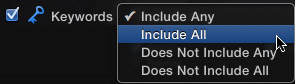
If you want to search for clips that contain BOTH Aerial AND Tunnel, change the popup menu to Include All. Include All always displays the fewest clips.
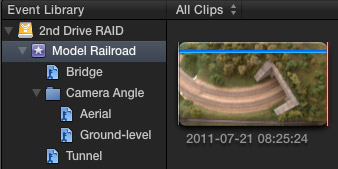
As you see here, only one clip is both an Aerial shot and includes the Tunnel.
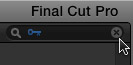
To clear the search, so you can see all your clips, click the small “X in a circle” at the right side of the Text Search window.
OPTION 3: CREATING A PROJECT AS A SELECTS REEL
This third option works best when each clip you want to track is different; for example, in locating sound bites that you want to use for the project.
Here’s the basic idea:
To get started, create a new Project. While you can call it anything, I’m going to call mine “Selects Reel.”
NOTE: If it helps, you can use folders in the Project Library to group related projects.
The process of viewing, marking, and editing clips is the same as when we are editing, and I’ll skip the details here.
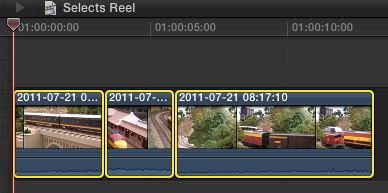
Here, for instance, I have three clips edited into my Selects Reel. (I highlighted the clips simply so that you can easily see all three.)
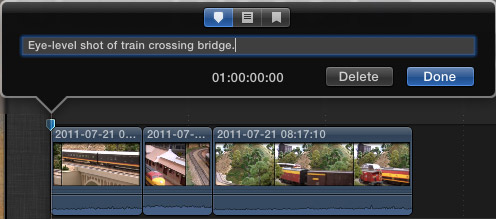
Using the Up/Down arrow keys, position the playhead at the start of each clip and type M. This creates a marker. Type M again to open the edit marker dialog box.
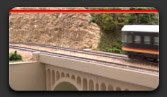
Add a text description of the clip. In this case, I am describing a visual: “Eye-level shot of train crossing bridge.” In the case of a talking head, you could enter a summary of what they are talking about.
Click Done to close the dialog box.
Because markers are stored with the clip, you can shuffle clips around as much as you want and the markers will travel with them. This can help in figuring out the best organization for your clips.
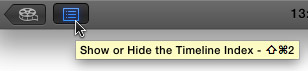
Click the second icon from the left at the bottom of the Timeline to open the Timeline Index.
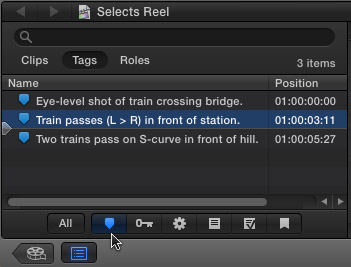
Click the Marker icon at the bottom (colored blue in this screen shot), then click the Tags button at the top.
The Index now displays the text of each marker in the project. Click the marker text to jump to that marker.
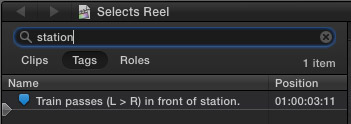
When you have a lot of markers, use the Search box at the top to enter a word or phrase. Only those markers that contain that phrase are displayed.
Click a marker text to jump the playhead to a specific clip, select the clip, then copy it from the Selects Reel into your Project, using Edit > Copy and Edit > Paste.
NOTE: While FCP X only allows one Project open at a time, you can quickly switch between Projects using the Project Library.
SUMMARY
FCP X provides a variety of ways to track and find exactly the clips you are looking for; from the very simple to the more complex.
Whichever method you choose, you’ll find even more options by reading the Help files.

2,000 Video Training Titles
Edit smarter with Larry Jordan. Available in our store.
Access over 2,000 on-demand video editing courses. Become a member of our Video Training Library today!
Subscribe to Larry's FREE weekly newsletter and
save 10%
on your first purchase.
10 Responses to FCP X: Selecting the Best Clips
Larry,
Thanks for answering my question!! Wow I didn’t expect that.
The article is the best explanation of the process I’ve been able to find anywhere. So thank you for taking the time to detail the options. I’ll not hesitate to go to FCPX next time for my videos. I find the editorial process fast and actually a little easier than 7, and now that I have a good handle on how to organize my selects (I do a lot of interview based projects) I’ll be able to move along quickly. I’m sure I’ll find the right one for me as the project unfolds.
Thanks again from your newest fan… Arnie….. I’l forgive the Arthur part 🙂
Arnie:
Thanks for your kind words and providing the impetus for the article. And, if you look at the top, I’ve already corrected your name.
Larry
Hi Larry,
Thanks for this. A lot I have worked out myself and I often create a selects reel as I do a lot of interview heavy stuff with several interviewees. What I HADN’T worked out which will be very useful is naming clips with markers and then using the timeline index to find them. So, for instance, if I have a section of my edit containing different talking heads referring to one subject I can label all those clips with that subject and find them all easily.
Looking forward to when Apple integrates Siri for keyword searching audio…
Thanks for the great article as always. There are so many great tools in this program many have yet to take the time to discover.
So I’ve been working a job and I have been using Favorites to “subclip” my Footage and I have come across a weird/troubling thing FCPX does. And I tried this on 2 machines and got same action from FCPX:
1. I have a clip with several sound bites I want to mark as “favorite”, I’ll call this “Clip 001” and I’ll designate 3 favorites
2. change my clip view to favorites and I see 3 instances of “clip 001” each is the favorite area I selected. Great!
3. If if go to the 2nd or third Favorite and skim it and pick an in point FCPX jumps my selection back to the first favorite!! What the?
4. now if iselect the favorite I was working with the inpoint has been placed but if I try to do anything with any Favorite instance of Clip 001 FCPX jumps me up to to favorite 1.
What the heck is going on? any thoughts
thanks this was helpful!
Excellent article as usual.
Re selecting a favorite …
Following your instructions, I find that I don’t get a green line when selecting a Favorite, instead, it removes from view the part of the clip which is not selected.
Cheers
Jean-Claude:
To display the green line, select View > Show Marked Ranges.
Then, change the pop-up menu in the top left corner of the Browser to either All Clips, or Hide Rejected.
Larry
Larry,
I have one long clip that is an interview. I selected answers to questions and made each range a Favorite. I found that the main note field is the same for all ranges but a reveal arrow displays the range with a Favorite by it and another note field. This note field is independent so each range can have it’s own note. So far so good. But, there does not seem to be any way to keep the revealed clip open so I can see the note and no way to open all of them at once. This bugs me. Do you know of any way to keep the list such that I can always see my notes? Do you know what I am talking about? I am not sure if I made myself clear.
Thanks. This was brilliant. Shifted from Adobe PP to FCP X, and not looking back.