
![]() One of the big benefits in shooting high-res media such as 4K is the ability it gives us to reframe shots later during editing. In this article, I show how to do this using Final Cut Pro X.
One of the big benefits in shooting high-res media such as 4K is the ability it gives us to reframe shots later during editing. In this article, I show how to do this using Final Cut Pro X.
NOTE: In a separate article, I illustrate the same process using Premiere Pro CC (2014).
BACKGROUND
Recently, I went on a safari into the wilds of Africa to shoot video of big game. (Well, um, that story sounds a whole lot more interesting than “I purchased this single stock footage clip.”)
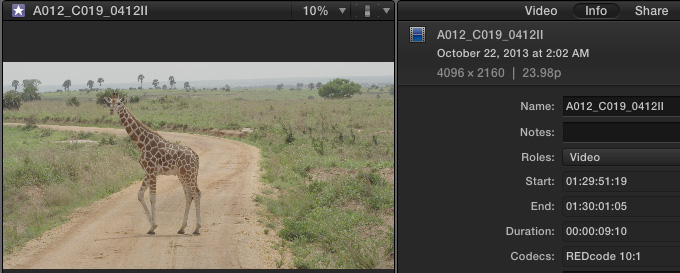
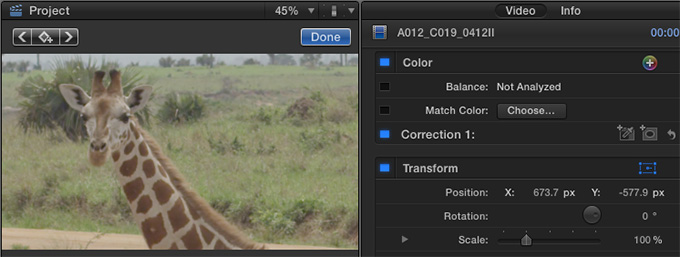
As you can see from the Inspector, this is a 4K R3D file. The shot consists of a giraffe walking into the center of the road, then turning to look at the camera. This is a single wide shot, which works fine.
But it would work even better if I could cut to close-ups showing its feet and face. Except, how?
That’s the cool part. Because the frame size of my sequence is smaller than the frame size of the source media, Final Cut gives us some nice reframing options that won’t damage the image quality.
EDITING

To start, I created a sequence at the size I want to use for final output, but in all cases, smaller than the size of the source image. (To make the differences in scaling really obvious for this article, I created an SD 16:9 project.)
Because I customized the Project settings before editing a clip into it, when I edit the giraffe clip into the timeline, Final Cut remembers and honors the changed project settings, without needing me to reconfirm them.
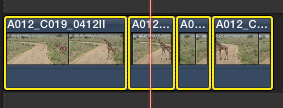
Using the Blade tool, I next edited this clip into the different shots I wanted:
For those clips that we want to leave as wide shots, we don’t need to do anything. Because, by default, Final Cut always scales clips to fit into the size of the Project. This means that we only need to change shots 2 and 4.
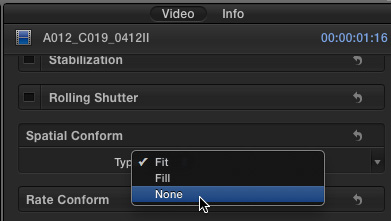
Put your playhead into and select shot 2. Open the Inspector and change Spatial Conform from Fit to None. This automatically sets the shot to 100% camera native size.
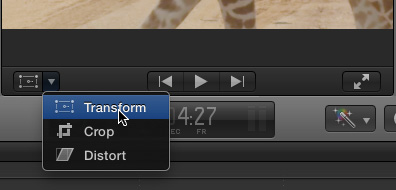
Using the on-screen Transform controls in the Viewer, position the shot as you wish.
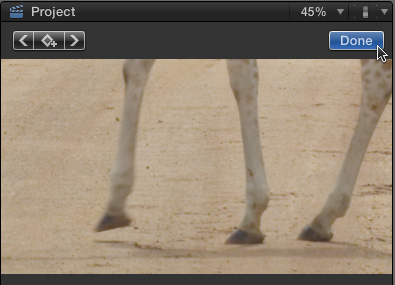
Remember to click Done when the shot is positioned as you wish.

If you need to change the size of the shot (Scale), open the Inspector and adjust Transform > Scale as necessary.
IMPORTANT NOTE: To avoid damaging image quality, do not scale an image larger than 100%. Doing so makes the image look soft and “blocky.”
Make a similar adjustment for the fourth clip to “zoom into” its face. Remember to click the blue Done button when you are finished positioning the clip.
NOTE: The secret to this technique is changing Spatial Conform to None. This displays the image at its native size and adjusts Scale to suit. This makes this reframing process very easy.
Ta-DAH! Done.
SUMMARY
The benefits to this technique are that you can easily edit a master shot into a variety of related close-ups quickly and easily.
The limitations of this technique is that you can’t change the camera position, nor can you adjust the depth of field or lighting as would normally occur when changing angles.
Still, this can be a really useful technique when you need something that you didn’t shoot.

2,000 Video Training Titles
Edit smarter with Larry Jordan. Available in our store.
Access over 2,000 on-demand video editing courses. Become a member of our Video Training Library today!
Subscribe to Larry's FREE weekly newsletter and
save 10%
on your first purchase.
8 Responses to FCP X: Reframe Shots
Thanks Larry, i saw where you showed how to trim clips and then use spatial conform to pull them back out to fill the screen vs the black bars on the side. I can not seem to find that any longer and i really struggle with this trim in FCPX can you point me to it again. Thanks for what you do and the great vocal presentation you have.
Tom, set Spatial Conform to FILL
Is it always better to create the sequence at final output size? I have never done that, and really never thought of it, but, hmmm, it makes so much sense…
Hi Larry,
What about leaving the spatial conform in “fit” mode and zooming in on a 4k video? I can’t seem to find an answer as to if this is the same as changing the spatial conform to “none” to resize the image.
Travis:
“Fit” is the best option if you are using the Ken Burns effect. “None” is the best option if you are animating using keyframes.
Larry
What if you are not planning a Ken Burns or keyframe animation on the 4K clip within an HD project and rather want to simply zoom in on the 4K clip to “create” a close up? Should you select “none” in the spatial conform menu and adjust the scale of the 4K clip? Or should you select “fit” in the spatial conform menu and use the scale parameter to zoom into a close up? Thanks!
Philip:
You should select “None” for Spatial Conform, then adjust the size using Scale in the Transform section of the Inspector.
Larry
And remember to scale down (lower than 100%) to retain image integrity. Scaling higher than 100% will be stretching/resampling pixels.