
![]() The Timeline Index only exists in Final Cut Pro X and, if you haven’t explored it, you are missing a very helpful tool. In fact, using this window can reduce errors and help you edit faster.
The Timeline Index only exists in Final Cut Pro X and, if you haven’t explored it, you are missing a very helpful tool. In fact, using this window can reduce errors and help you edit faster.
For those that haven’t looked at it recently, let me give you a tour.

Here’s the project we’ll be exploring during this tour. it consists of a variety of video, audio and title clips, along with a flock of transitions, connected storylines, markers and Roles.
THE BASICS
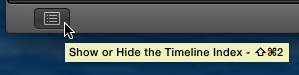
To display the Timeline Index, click this icon in the lower left corner of the FCP X interface (shortcut: Shift+Cmd+2).
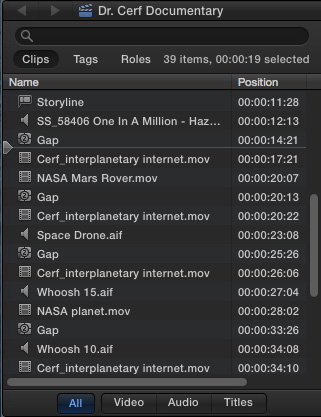
By default, the Index opens to display all the clips in your project, sorted by the order they appear in the Timeline. While useful, this far too often provides too much information.
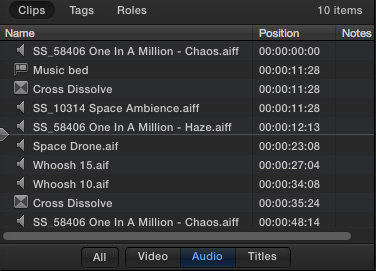
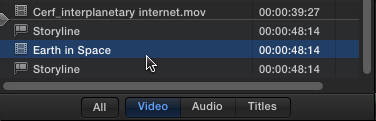
So, click one of the three text tabs at the bottom – Video – Audio – Titles – to see just the video, audio, or title clips in your project. Here, for instance, is a list of all the audio clips.
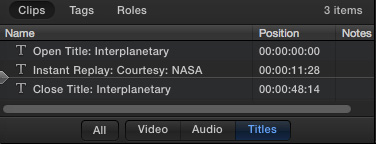
NOTE: A really useful function is to click Titles, which displays all the titles in your project. This makes it very easy to quickly review the spelling of all your text without having to play through the entire project. Drag a column header left or right to change the width of a column.
Click anywhere in the list to move the playhead to that location.
NOTE: You can also drag that “thick-pointy-arrow” on the left anywhere in the list to move the Playhead. That arrow also moves whenever you move the Playhead.
Even better, you can instantly jump the playhead to and highlight any clip by double-clicking its icon. The Position column lists the timecode for the start of the item.
NOTE: To rename a clip or marker, double-click on the name.
ADVANCED TRICKS
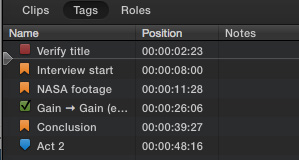
Click the Tags button at the top. By default, this lists all the markers and keywords associated with this project. Tags are color coded:

Click a tag name at the bottom to display all that tags in that category.
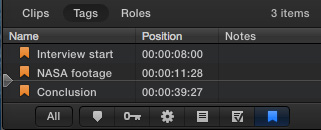
For instance, clicking the far-right tag displays all Chapter markers.
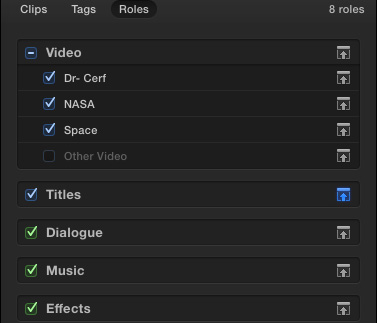
Roles are a very powerful feature that allow you to organize your clips by categories and subcategories. Here, for instance, I’m using the five default Roles – Video, Titles, Dialog, Music and Effects – with three custom subcategories – Dr. Cerf, NASA, and Space. (The grayed-back “Other Video” is a Role with no clips assigned. It will disappear the next time you quit FCP X.)
NOTE: Here’s an article describing Roles in more detail.
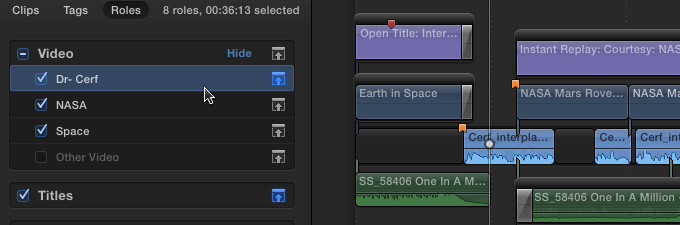
Click the name of a Role to:
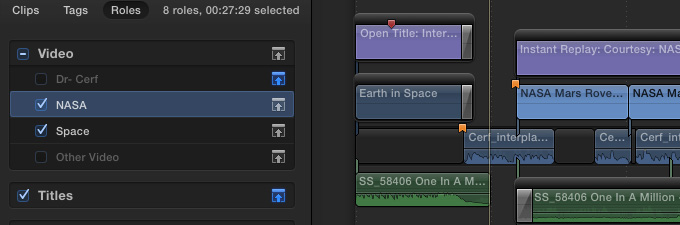
Uncheck a Role to disable all the associated clips in the Timeline, meaning they are no longer visible or audible.
Click the up-arrow to the right of the Role name to supposedly minimize clips with that Role in the Timeline. However, while it removes the thumbnail display from a clip, it does not change the clip height, so I find this feature less than useful.
NOTE: A VERY fast way to delete a clip or group of clips is to select them in the Index, then press the Delete key.
SEARCHING
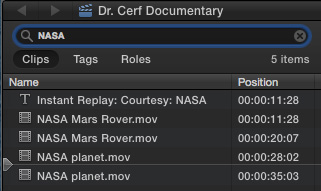
Another very powerful – and fast – feature is the search box at the top of the Index. Type a search term, for example “NASA,” and instantly all the clips with “NASA” in their file name or Notes field are instantly displayed.
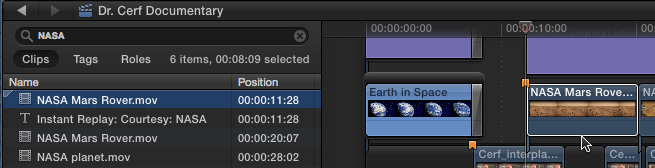
Double-click the icon for a clip and the Index highlights it in the Timeline.
SUMMARY
The Timeline Index is a very powerful, and often-overlooked, feature in Final Cut Pro X. I use it in every project to check spelling of titles and chapter markers.
And the ability it provides to quickly navigate even the largest projects means that I keep it open for every major project I edit.

2,000 Video Training Titles
Edit smarter with Larry Jordan. Available in our store.
Access over 2,000 on-demand video editing courses. Become a member of our Video Training Library today!
Subscribe to Larry's FREE weekly newsletter and
save 10%
on your first purchase.